How to Make a Resin Sign: A Complete Guide with Pro Tips and Safety
Knowing how to make a resin sign starts with choosing the right materials and preparing your base carefully to ensure smooth application and lasting durability. Mixing equal parts resin and hardener thoroughly prevents bubbles and creates a clear, firm finish within 24 to 48 hours. Using even heat from a torch or lighter about 6 inches away helps pop surface bubbles right after pouring.
Key Takeaways
- Select quality plywood like 20 x 36 birch for a stable, smooth resin sign base.
- Apply stain or paint on your wood before resin to improve color and protect the surface.
- Mix resin and hardener separately for 2 minutes each to avoid incomplete curing.
- Use vinyl letters or decals under the resin to add crisp, professional-looking designs.
- Allow resin to cure fully for at least 72 hours to ensure maximum hardness.
- Sand edges lightly after curing to remove rough spots, then polish for a glossy finish.
What Materials and Tools Do You Need for Resin Signs?
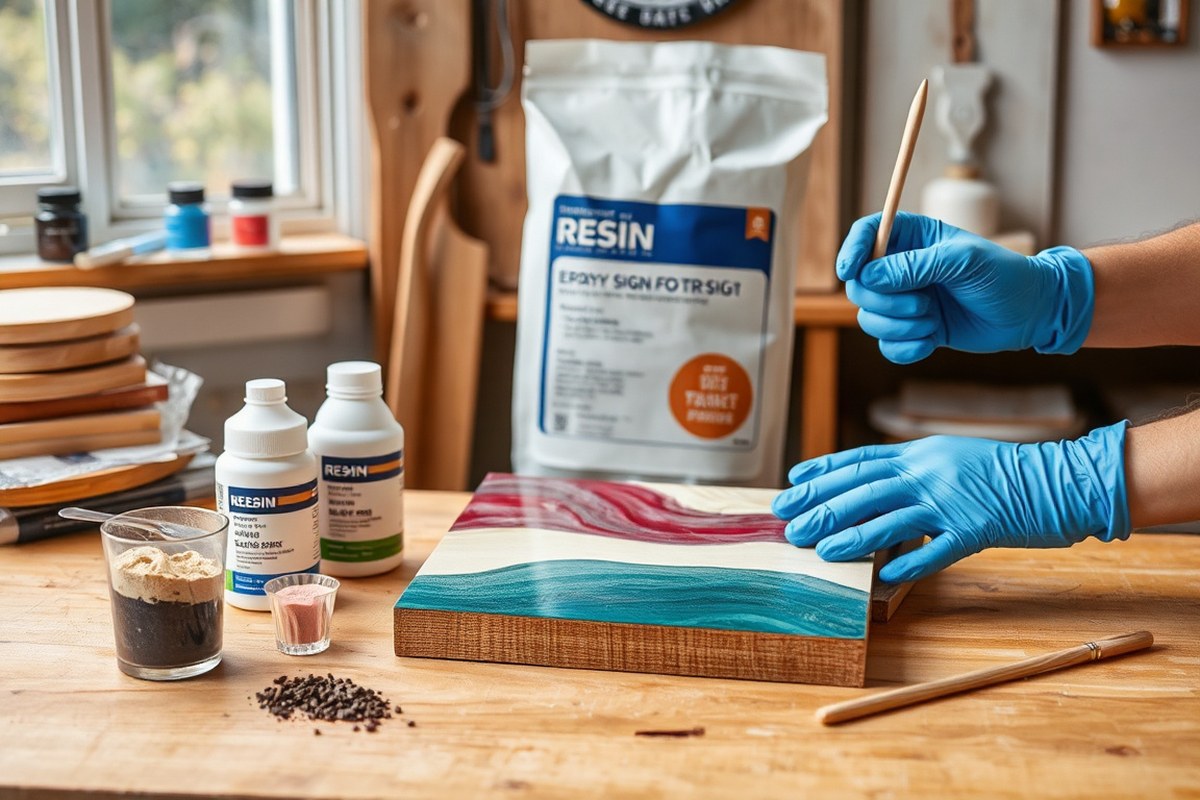
Creating resin signs requires selecting the right materials and tools to ensure a smooth process and a quality finish. Epoxy resin is the most popular choice for resin signs because it cures clear, hardens with a smooth, glossy surface, and is easy to tint with pigments. Generally, epoxy resin kits cost between $20 and $40 for a 16 to 32 ounce kit, which covers small to medium-sized signs. Polyester resin is less common for signs due to its strong odor and yellowing over time, while polyurethane resin is less preferred for beginners because it cures quickly and can be tricky to handle.
The base you choose depends on the sign style. Wood is a great base for signs that display resin as a protective or decorative top layer. It should be sanded smooth and sealed to avoid resin soaking in. Acrylic sheets or panels make excellent rigid, clear bases for colorful resin layers or embedded designs. Silicone molds are ideal when making a full resin sign, such as a nameplate or decorative plaque, because they flex for easy removal. Each base type affects adhesion and curing; for example, porous wood needs sealing, and acrylic requires cleaning to prevent bubbles.
| Resin Type | Best Base Materials | Key Features | Approximate Cost |
|---|---|---|---|
| Epoxy | Wood, Acrylic, Silicone Mold | Clear finish, easy tinting, durable | $20-$40 per 16-32 oz kit |
| Polyester | Silicone Mold | Strong odor, potential yellowing | $15-$30 per kit |
| Polyurethane | Wood, Acrylic | Fast curing, requires experience | $25-$35 per kit |
To add colors and effects, pigments, mica powders, or glitter are common additives. Use pigments designed for resin to avoid curing problems. Metallic flakes and dried flowers can add texture and character under a clear resin layer. For brightness or glow effects, special glow-in-the-dark powders or LED lights embedded beneath the resin layer can be used carefully to prevent damage to the resin’s surface.
Handling resin safely requires the right personal protective equipment and work environment. Always wear disposable nitrile gloves to prevent skin contact, chemical-resistant goggles to protect your eyes, and a respirator mask rated for organic vapors if working in a space without ventilation. Set up your workspace with disposable paper or plastic covers to catch drips and make cleanup easier. Having wooden stir sticks, disposable mixing cups, and a heat gun or torch to remove bubbles completes your toolkit.
- Epoxy resin kit (16-32 oz) suitable for signs
- Base: sanded wood panel, acrylic sheet, or silicone mold
- Resin pigments, mica powders, glitter, or metallic flakes
- Disposable nitrile gloves, eye goggles, respirator mask
- Mixing cups and wooden stir sticks
- Disposable work surface covers
- Heat gun or small butane torch for bubble removal
Following these material and tool recommendations will help you create a durable and visually appealing resin sign. Using the right resin type for your base and design ensures proper curing and adhesion. Safety gear protects you from resin’s chemical exposure. Preparing your workspace and tools properly makes the entire process more manageable and helps prevent common resin-related problems like bubbles, uneven surfaces, or incomplete curing.
How to Prepare Your Sign Base for Successful Resin Application

To ensure your resin sign has a smooth, durable finish, properly preparing the base is critical. Different materials like wood, acrylic, and silicone molds require specific cleaning, sealing, and edge-preparation steps to help resin adhere well and avoid defects like bubbles or runs.
Preparing Wooden Bases
Wood must be dry, smooth, and sealed before resin application to prevent bubbles caused by air trapped in the grain and to keep resin from soaking in unevenly. Start by sanding with medium grit (around 120) to remove roughness, then finish with fine grit (220) for a smooth surface.
After sanding, clean the wood thoroughly with a lint-free cloth dampened with isopropyl alcohol or warm soapy water to remove dust and oils. Seal the wood using a clear acrylic primer or a wood sealer like sanding sealer. Choose a sealer that is non-water based and fully dried before resin application, which typically takes a few hours.
Secure painter’s tape carefully around the edges on the back and sides to create a dam and avoid resin dripping off. You can also build a stronger edge dam by sticking duct tape first, then wrapping it with tin foil pressed firmly around the edges of the sign. This temporary barrier helps hold the resin in place during pouring and curing.
- Sand the wood starting with 120 grit, then 220 grit for a smooth finish.
- Clean surface with isopropyl alcohol or mild soap and water; allow to dry completely.
- Apply a clear acrylic primer or wood sealer; let it cure fully (2, 4 hours or as per product instructions).
- Seal edges and back with painter’s tape, then reinforce with duct tape and tin foil for a dam.
- Place the base on risers and check it is level before resin pouring.
Failing to seal or sanding too coarsely can cause air bubbles that ruin the resin’s smooth surface.
Preparing Acrylic and Plexiglass
Acrylic bases come pre-smooth but still need cleaning and edge protection before resin coating. Wash the surface with warm water and a mild soap, then wipe with a lint-free cloth and isopropyl alcohol to remove grease, fingerprints, and dust that can interfere with adhesion.
Because acrylic is non-porous, sealing is usually not necessary. However, taping the edges to prevent resin from leaking off the sides is important. Use painter’s tape on the back and build a tape dam around the edges if you expect to use thicker resin pours.
Place acrylic on a level surface, ideally supported on risers to catch any drips underneath. Resin on acrylic cures with a glossy, glass-like finish when the base is properly cleaned and free from scratches.
Setting Up Silicone Molds
Silicone molds are flexible containers designed for casting resin and require a very different approach. Since silicone doesn’t bond with resin, you don’t need to tape edges or seal the base. However, you must ensure the mold is clean and free of dust or residual oils from previous use.
Before pouring resin, wash the mold with warm soapy water, rinse well, and dry completely or let air dry. Use a mold release spray if recommended by your resin or mold manufacturer to extend the mold’s lifespan and achieve a smoother finish on your cast sign.
Place the mold on a flat, level surface that won’t move during curing. Since silicone molds can flex, handle carefully to avoid warping the resin shape as it sets.
How to Mix, Tint, and Pour Epoxy Resin Without Bubbles
Mixing epoxy resin with the correct ratios, adding pigments carefully, and managing bubbles properly ensure a smooth, clear resin sign without sticky spots or imperfections. Precise measuring, gradual pigment addition, and using heat for bubbles help achieve a professional finish. Pouring techniques also affect surface quality and clarity.
Correctly Measuring Resin and Hardener
Accurate measurement of resin and hardener follows the manufacturer’s ratio, usually 1:1 by volume or weight. Incorrect measuring or incomplete mixing often causes sticky or soft resin. Using a graduated silicone measuring cup and stirring well for at least two minutes prevents curing problems.
Keep resin and hardener at room temperature (70°F to 75°F) before mixing. Cold resin thickens and traps bubbles. Once you start, mix slowly to avoid whipping air in, but thoroughly to activate the chemical reaction for curing.
- Prepare a clean, plastic-covered workspace.
- Measure equal parts resin and hardener by volume, for example 2 ounces each.
- Pour both into a disposable mixing cup.
- Stir slowly for two full minutes, scraping the sides and bottom.
- Check mixture for even clarity with no streaks.
- Use immediately to avoid premature curing.
- Keep stirring gently if bubbles start to form before pouring.
Adding Pigments and Effects
Add pigments gradually into the mixed resin to control opacity and color depth. Using too much pigment can cause uncured spots or stickiness. Mica powders, alcohol inks, and liquid pigments are common, each giving different visual effects and mixability.
| Pigment Type | Effect | Use Tips |
|---|---|---|
| Mica Powder | Opaque, pearlescent shimmer | Add 1/4 teaspoon per 4 oz resin, mix thoroughly to avoid clumps |
| Alcohol Ink | Transparent, vibrant colors | Add dropwise, do not exceed 5 drops per 4 oz resin for clarity |
| Liquid Pigment | Solid color coverage | Use sparingly (1/2 teaspoon per 4 oz resin) to avoid curing issues |
For special effects like marbling, divide resin into small cups, tint each, then pour in thin ribbons to swirl. Always test a small sample to see how pigments affect curing and appearance.
Techniques to Minimize and Remove Bubbles
Bubbles form from trapped air during mixing or pouring. They often rise to the surface but sometimes stay trapped, ruining clarity. Managing temperature and pouring close to the project reduces their formation.
- Use slow, gentle stirring to avoid creating air pockets.
- Pour resin from a low height and close to the work surface.
- Warm resin slightly to lower its viscosity; this helps bubbles escape.
- Apply a butane torch or heat gun held about 6 inches above the surface quickly to pop bubbles.
- For deeper pours, a pressure pot or vacuum chamber can remove bubbles but are usually not required for flat signs.
Bubble removal steps:
- Pour resin carefully and evenly onto your prepared sign base.
- Hold a heat source (torch or heat gun) about 6 inches from the resin surface.
- Pass the flame quickly and evenly to burst bubbles without overheating.
- Repeat this process after pouring additional layers if used.
- Maintain a dust-free environment to prevent debris adherence in still resin.
How Long Does Resin Curing Take and What Affects It?
Typical curing for epoxy resin signs requires about 24 to 72 hours to fully harden at room temperature. You’ll notice the resin goes through stages: initially it’s liquid, then it becomes tacky in several hours, turning solid but still soft around 12 to 24 hours, and finally reaching full hardness after 2 to 3 days. Lower temperatures or high humidity can slow this process considerably, while warmth can speed it up.
Resin cures through a chemical reaction sensitive to environment. Ideally, keep your workspace between 70°F and 75°F (21°C to 24°C) with humidity below 50% for a predictable cure time. Higher humidity can cause a cloudy or white finish known as amine blush, which affects clarity and adhesion. Using a dehumidifier or working in a dry room helps maintain these conditions. Avoid drafts or direct airflow during curing, as they can create uneven surfaces or bubbles.
| Time Since Pour | Resin Stage | Handling Advice |
|---|---|---|
| 0-4 hours | Liquid to tacky | Do not touch; resin is still very soft |
| 4-12 hours | Tacky to gel | Can lightly cover to avoid dust; no pressure |
| 12-24 hours | Soft solid | Safe to handle gently; no sanding or heavy contact |
| 24-72 hours | Fully cured | Safe to sand, polish, and finish |
You can gently accelerate curing by increasing room temperature up to about 80°F (27°C). Avoid temperatures above 85°F to prevent over-curing, yellowing, or a brittle finish. Applying gentle heat, such as with a heat gun set on low and held at a distance, helps but do so cautiously to avoid hot spots. Some craftsmen slow curing by placing the project in cooler areas or air-conditioning, which is useful when you need more working time for layering or positioning designs.
Wait to sand until you’re sure the resin is fully cured, typically after 48 to 72 hours, depending on thickness. Sanding too soon causes smearing or stickiness. Begin smoothing with coarse grit, like 80 or 120, before moving up to 320 grit for a polished look. Keep dust controlled by sanding lightly and using a mask. Finish any additional coats within 24 hours of the previous one to help layers bond properly without peeling or bubbles.
Sign-specific details matter too. If you pour resin over vinyl lettering or wood bases, make sure your designs are firmly set and dry before pouring. After curing, you can add hardware such as hanging hooks or adhesive bumpers without the risk of damage. Fully cured resin can also withstand light outdoor exposure, but check your resin’s label for UV resistance and outdoor suitability to ensure long-lasting results.
What Are Effective Methods to Add Designs and Lettering Under Resin?
Incorporating designs and lettering under resin adds depth and personality to your resin signs. Using vinyl letters, stencils, dried flowers, glitter, and paint requires careful preparation to avoid bubbles and achieve crisp, clear visuals. Proper sealing and positioning help maintain the design’s integrity as resin cures over it.
Using Vinyl and Stencil Lettering
Vinyl letters and stencils work well under epoxy resin because they create clean, sharp edges for your lettering. Before applying resin, make sure your vinyl letters or stencil are firmly adhered to a smooth, sealed surface like properly sanded and clear-coated wood. This prevents resin seepage underneath and helps the letters stay in place. White or colored vinyl contrasts nicely with clear resin, making text easy to read.
Position and secure the vinyl carefully. Double-sided tape or spray adhesive can help keep stencils in place. To protect lettering and keep edges crisp, apply a clear coat (varnish or Mod Podge) over the vinyl before pouring resin. This layer acts as a sealant to reduce bubbles forming from porous surfaces under resin.
- Clean and seal your sign base with a clear coat.
- Apply vinyl letters or stencil with firm pressure.
- Apply a thin, even clear coat over letters to seal edges.
- Let the clear coat dry fully (usually overnight).
- Carefully pour or spread your mixed resin over the sign.
- Use a heat gun briefly to pop surface bubbles gently.
Check that vinyl edges are fully sealed before resin pour to avoid resin bleed under the letters, which blurs the design.
Embedding Natural Elements Like Flowers
Dried flowers add a delicate, natural touch to resin signs but require careful handling to prevent bubbles and discoloration. Use fully dried flowers that have no moisture left, as trapped moisture causes bubbling and cloudiness in resin. Seal flowers with a thin layer of clear spray or brush-on resin sealer to stabilize and protect them from resin’s chemicals.
Arrange flowers on a leveled, sealed base. Secure them gently with a tiny dab of craft glue or sticky tack so they don’t shift during resin pouring. Pour resin slowly over the flowers in thin layers, allowing each layer to cure partially to control bubbles and ensure full coverage. Avoid mixing glitter or pigments directly with flowers to keep clarity.
- Select and press flowers until completely dry.
- Seal flowers with clear spray or resin sealer.
- Arrange flowers on a sealed, flat sign base.
- Fix flowers in place lightly with craft glue or tack.
- Pour resin slowly in thin layers over the flowers.
- Let each resin layer partly cure before next pour.
Thick layers of resin over flowers can trap bubbles easily; thin, multiple coats minimize this risk.
Applying Glitter, Paint, and Metallic Flakes
Glitter, paint, and metallic flakes add sparkle and color variation when embedded under resin. Use fine glitter and metallic flakes to avoid rough textures that resist resin flow. Mod Podge works well as an adhesive base to hold glitter or flakes in place before sealing with a clear coat. Acrylic paints and alcohol inks are compatible with resin but should be fully dry and sealed to prevent bleeding or mixing in the resin.
Apply paint or glitter designs on the sealed base, then cover with a thin clear coat like Mod Podge to lock the materials in place. Let everything dry completely before pouring resin. For glitter, sprinkle evenly and cover with multiple thin clear coats, sealing well around edges and in crevices. Avoid stirring glitter into resin directly to reduce bubble formation and clumping.
- Paint or apply glitter/metallic flakes onto a sealed base.
- Seal design with clear Mod Podge or varnish and dry fully.
- Prepare resin and pour gently over the design.
- Use a heat gun on low to remove surface bubbles.
- Allow resin to cure undisturbed for 24 to 48 hours.
| Material | Seal Before Resin? | Best Adhesive | Common Issues |
|---|---|---|---|
| Vinyl Letters & Stencils | Yes, clear coat (Mod Podge) | Adhesive vinyl or spray adhesive | Bubbling under edges, resin bleeding |
| Dried Flowers | Yes, clear spray or resin sealer | Craft glue or sticky tack | Moisture bubbles, discoloration |
| Glitter & Metallic Flakes | Yes, Mod Podge or varnish | Mod Podge | Clumping, surface roughness |
| Acrylic Paint & Alcohol Inks | Yes, clear coat | Acrylic medium or Mod Podge | Color bleeding, bubbling |
How to Finish, Sand, and Polish a Resin Sign to Perfection
Sanding your cured resin sign smooths out any imperfections and prepares it for a bright, glossy finish. Starting with the right grit of sandpaper and progressing through sanding stages is key to getting a professional-looking surface. Begin sanding only after the resin is fully cured, which usually takes around 24 to 72 hours depending on the product and conditions. Wet sanding with fine grit papers reduces the risk of scratching and dust.
Use sanding grits in a sequence from coarse to fine. A typical progression moves from 220 grit to 400 grit for initial smoothing, then up to 600 or 800 grit, finishing with 1000 grit or higher for polishing readiness. This stepwise method removes surface roughness without damaging the resin layer. You’ll notice the surface losing its shine during sanding, that’s normal and will be restored by polishing.
Polishing transforms the dull, sanded resin into a clear, glassy finish. Use a polishing compound designed for plastics or resins, often called a plastic polish or automotive polishing compound. Apply it with a soft cloth or a buffing pad in small, circular motions. This will fill in microscopic scratches and bring out the resin’s natural gloss. Polishing can be done by hand or with a low-speed rotary tool for faster results.
After polishing, sealing the surface with a thin clear coat can protect the finish and add extra shine. A clear epoxy resin topcoat or a UV-resistant spray varnish works well. Apply just enough resin for an even layer without bubbles or pooling. If youʼve sanded and polished correctly, the additional seal won’t be necessary for durability, but it helps maintain luster over time.
- Check resin curing: Ensure the resin sign has fully cured, typically 24, 72 hours, before sanding.
- Sand with 220 grit: Use 220-grit wet or dry sandpaper to remove large imperfections and level the surface.
- Progress to 400 grit: Sand with 400 grit to smooth scratches from the previous step.
- Finish with 600 to 1000 grit: Wet sand using 600, 800, then up to 1000 grit to create a fine smooth base for polishing.
- Polish the resin: Apply a plastic or automotive polish with a soft cloth or buffing pad using circular motions to restore gloss.
- Optional topcoat: Add a thin clear epoxy resin topcoat or UV-resistant varnish spray if extra shine and protection are needed.
- Let the topcoat cure: Allow the seal coat to dry fully, usually 24 hours, before handling or displaying.
Typically, wet sanding costs only a few dollars for sandpaper sheets, and polishing compound ranges from $10 to $20 for a bottle, making this a low-cost way to greatly improve your sign’s appearance. Avoid skipping sanding since uneven or cloudy spots can detract from your design. Not polishing after sanding leaves a matte, scratched look, while over-sanding with coarse grit at the end can damage the resin surface. Adding a topcoat is optional but recommended for signs exposed to sunlight or outdoor conditions to prevent yellowing and maintain long-term gloss.
Common Mistakes with Resin Signs and How to Fix Them
Bubbles in resin signs usually form from air trapped during mixing or from moisture in unsealed wood. To fix bubbles after curing, gently warm the surface with a heat gun or hair dryer on low. This softens the resin enough to pop the bubbles without damaging your sign. For deep bubbles, apply a thin layer of fresh resin on top to fill and smooth the surface. Prevent bubbles by mixing slowly and sealing porous surfaces with a primer or thin resin coat before the final pour.
Yellowing happens when epoxy resin is exposed to UV light and certain chemicals over time. Using a resin specifically formulated with UV inhibitors helps delay this effect. Keeping your sign out of direct sunlight and applying a UV-resistant clear coat can also protect the finish. Avoid resins without UV protection for outdoor or brightly lit environments, as yellowing can make colors look dull and affect the sign’s visual impact.
Resin that doesn’t cure completely usually results from wrong resin-to-hardener ratios, low temperatures, or high humidity. Follow the exact manufacturer’s mixing instructions using a scale or measuring cups to ensure accuracy. Keep your work area between 70° and 75°F for optimal curing, and avoid pouring resin when humidity is above 60 percent. If your resin sign stays sticky after the recommended cure time, place it in a warm, dry spot for an extra 24 to 48 hours. For soft, uncured areas, lightly sand the surface, then apply a new resin layer to complete the cure.
Chips, cracks, and surface defects can ruin the smooth finish of your resin sign. You can repair small chips and cracks by sanding the area with fine-grit sandpaper (220 to 400 grit), then cleaning off any dust before applying a thin, fresh layer of resin. For larger defects, remove loose resin pieces and carefully build up the area one layer at a time, allowing each coat to fully cure. Avoid heavy sanding on cured resin surfaces to prevent further damage.
- Bubbles: warm surface to pop bubbles or add a thin resin topcoat
- Yellowing: choose UV-resistant resin and avoid sun exposure
- Incomplete cure: verify mix ratio, control temperature (70°, 75°F), and limit humidity
- Sticky resin: extend curing time in warm, dry conditions
- Chips/cracks: sand lightly, clean, and apply fresh resin layers
- Uneven surfaces: sand and apply thin resin coats to level
- Unsealed wood: seal before resin to prevent bubbles and absorption
Uneven surfaces often come from poor wood sealing or inconsistent resin thickness. Sand any rough spots before sealing the base and pour resin in thin, even layers. Each layer should fully cure before adding the next to avoid trapping air or creating ridges. When sanding cured resin, use wet sanding to reduce dust and achieve a smooth finish that improve your sign’s shine.
What Safety Tips and Best Practices Should Resin Users Follow?
Working with epoxy resin requires taking safety seriously to protect your skin, eyes, and lungs. The main protective gear you need includes nitrile gloves, safety goggles or glasses, and a respirator mask with an organic vapor cartridge if you’re in a poorly ventilated space. Nitrile gloves should be thick enough to resist the resin’s chemicals and changed frequently, especially if you notice any stickiness or tears. Goggles keep irritating resin fumes and accidental splashes from harming your eyes.
Having proper ventilation is essential because epoxy resin releases vapors that can cause respiratory irritation or allergic reactions. Your best option is to work near a window or outdoors where fresh air can circulate freely. Use a fan to push air away from you and exhaust vapors outside if possible. Avoid working in small enclosed spaces without airflow for extended periods, especially when mixing and pouring resin, as vapors are strongest during this time.
When resin contacts your skin, wash the area right away with warm soapy water. Avoid solvents, which can worsen irritation. Should resin enter your eyes, rinse them with clean water for 15 minutes and seek medical attention immediately. Having eyewash solution nearby is a good precaution. Don’t touch your face, especially your eyes or mouth, while handling uncured resin.
For cleanup, use disposable paper towels or rags soaked with isopropyl alcohol to remove resin spills while still wet. Once cured, resin is difficult to remove and requires sanding or scraping. Store resin waste, including mixing sticks and empty containers, in a sealed bag to prevent continued chemical release. Check with your local waste management about hazardous waste disposal rules since regulations vary by area.
Maintain a safety checklist every time you work with resin: put on gloves and goggles, confirm ventilation, gather cleanup materials, and keep water nearby for emergencies. Avoid eating or drinking in your workspace. Keep children and pets well away until the resin fully cures, which can take 24 to 72 hours depending on temperature and brand. For home crafters on a budget, nitrile gloves cost around $10 to $15 for 100, while a basic respirator mask suitable for paints and epoxy runs about $20 to $40. Spending on protective gear can prevent costly health issues and interruptions to your crafting.
Always ventilate your workspace thoroughly and never reuse disposable gloves after resin contact to avoid skin irritation and chemical absorption.
Step-by-Step Action Plan for Making Your Resin Sign
Follow these steps carefully to create a stunning resin sign with a smooth finish and clear design.
- Before you start: Gather all your materials and tools including epoxy resin, pigments, sign base, gloves, and mixing supplies. Confirm everything is clean and ready for use.
- Day 1: Prepare your wooden or acrylic sign base by sanding it smooth and cleaning off dust. Check the surface is dry and free of debris for optimal resin adhesion.
- Day 2: Mix your resin and hardener according to the manufacturer’s instructions. Add pigment carefully, stir slowly to avoid bubbles, and pour into a measuring cup to inspect for any air pockets.
- Day 2, after mixing: Pour the tinted resin evenly over the prepared base. Use a heat gun or torch briefly to pop surface bubbles. Look for a smooth, glossy coat without cloudiness.
- Day 3 to 5: Allow the resin to cure at room temperature, ideally 70, 75°F with low humidity. Touch lightly to check it’s firm but tacky; full cure may take up to 72 hours.
- Day 6: Add lettering or designs underneath the resin if not done before curing. Use waterproof inks or decals designed for resin art to avoid smudging.
- Day 7: Sand any rough edges with fine-grit sandpaper and polish the surface using a microfiber cloth and resin polish or automotive compound for a clear shine.
- After finishing: Store your sign in a dust-free space and handle carefully to prevent scratches. Check for any imperfections and apply a thin resin layer to fix small flaws if needed.
Frequently Asked Questions
Can You Make a Resin Sign Without a Wooden Base?
Yes, a silicone mold works well to create a fully resin-based sign like a desk nameplate, avoiding the need for wood entirely.
How Do You Add LED Lights to a Resin Sign?
Use a transparency method to pour deep pour resin, allowing LED lights to glow through the clear resin effectively.
What Thickness Should a Resin Sign Be for Durability?
Aim for about 1/8 inch thick to ensure the sign is firm and durable but still lightweight and manageable.
Can You Reuse Silicone Molds for Resin Signs?
Yes, silicone molds can be reused many times if cleaned and cared for properly, making them cost-effective for multiple projects.
What Type of Resin Is Best for a Glossy Finish?
EnviroTex Lite High Gloss Finish Resin is popular for a smooth, shiny surface on resin signs.
How Do You Prevent Bubbles in Epoxy Resin for Signs?
Mix resin slowly and use the “double cup” method to avoid unmixed resin causing tacky and bubbly spots.
Final Thoughts
Making a resin sign requires patience and attention to detail throughout every step, from preparation to finishing. By carefully following the process, you can produce a durable, glossy sign with striking designs embedded beneath the resin. Start with a small practice project today to gain confidence before moving onto larger or more intricate signs.