How to Make a Glass Sign: 8 Easy Ways with Expert Tips & Tools
How to make a glass sign starts with choosing a clear, clean glass surface and deciding on your design and technique. Use vinyl decals or glass paint for easy application, or try glass etching for a permanent effect. Begin by thoroughly cleaning the glass to ensure materials stick properly and your design looks professional.
Key Takeaways
- Clean glass with 70% (or higher) isopropyl alcohol and a lint-free cloth before applying any design.
- Print your design at 100% scale, using guides to size it accurately on the glass.
- Apply vinyl decals at temperatures between 65-75°F for best adhesive results.
- Use at least 15 PSI pressure when pressing vinyl to adhere strongly to the glass.
- After applying vinyl, full adhesive strength develops over 72 hours for long-lasting signs.
- For bent glass neon signs, carefully heat and shape tubing using a propane torch or tube heater.
1. Proven Methods to Make a Glass Sign at Home
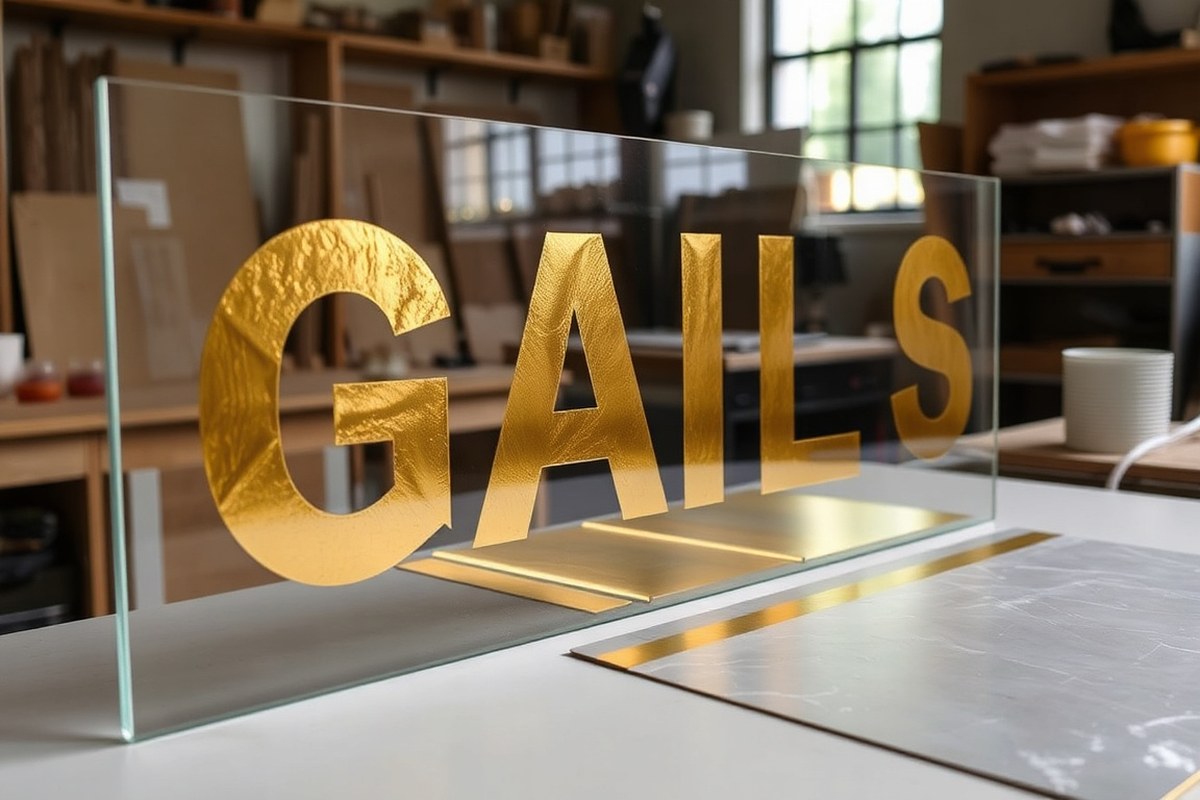
Making a glass sign at home can be done using several proven methods, each suited to different skill levels and desired results. The most common options include painted signs, vinyl lettering, gold leaf gilding, and glass neon signs. You should pick a method based on your experience, tools, and the look you want to achieve.
| Method | Skill Level | Basic Steps | Time & Cost | Results & Common Issues |
|---|---|---|---|---|
| Painted Signs | Beginner to Intermediate | Clean glass, sketch design, apply glass paints with brush or stencil, dry and cure | 1-3 hours, $10-$30 for paint and brushes | Customizable and easy; paint can chip if not sealed or handled gently |
| Vinyl Lettering | Beginner | Design on computer, cut vinyl letters, weed excess vinyl, apply transfer tape, stick to clean glass | 30-60 minutes, $15-$50 for vinyl sheets or rolls | Precise and clean look; vinyl may peel if applied in wrong temperature (<65°F or >75°F) or on dirty glass |
| Gold Leaf Gilding | Intermediate to Advanced | Apply gelatine size on glass, place delicate gold leaf over wet size with soft squirrel-hair brush, smooth out, remove excess carefully | Several hours, $20-$60 for gold leaf sheets | Elegant and classic appearance; requires patience and steady hands, gold leaf tears easily |
| Glass Neon Signs | Advanced | Gather materials, heat and bend glass tubes with flame, apply electrodes, fill tubes with neon gas, seal and test | Many hours to days, costs vary widely ($100s+), plus special equipment needed | Authentic neon glow; high risk of breakage and gas leaks if done incorrectly |
Painted glass signs offer great flexibility for beginners wanting to customize frames or windows. You start by cleaning the surface thoroughly, then sketch your design lightly with a marker or stencil. Use specialized glass paint or enamel applied with a fine brush, which usually dries in about an hour but may require curing overnight. Avoid using regular house paint, as it won’t adhere well or last outdoors. Expect to spend under $30 on paints and brushes.
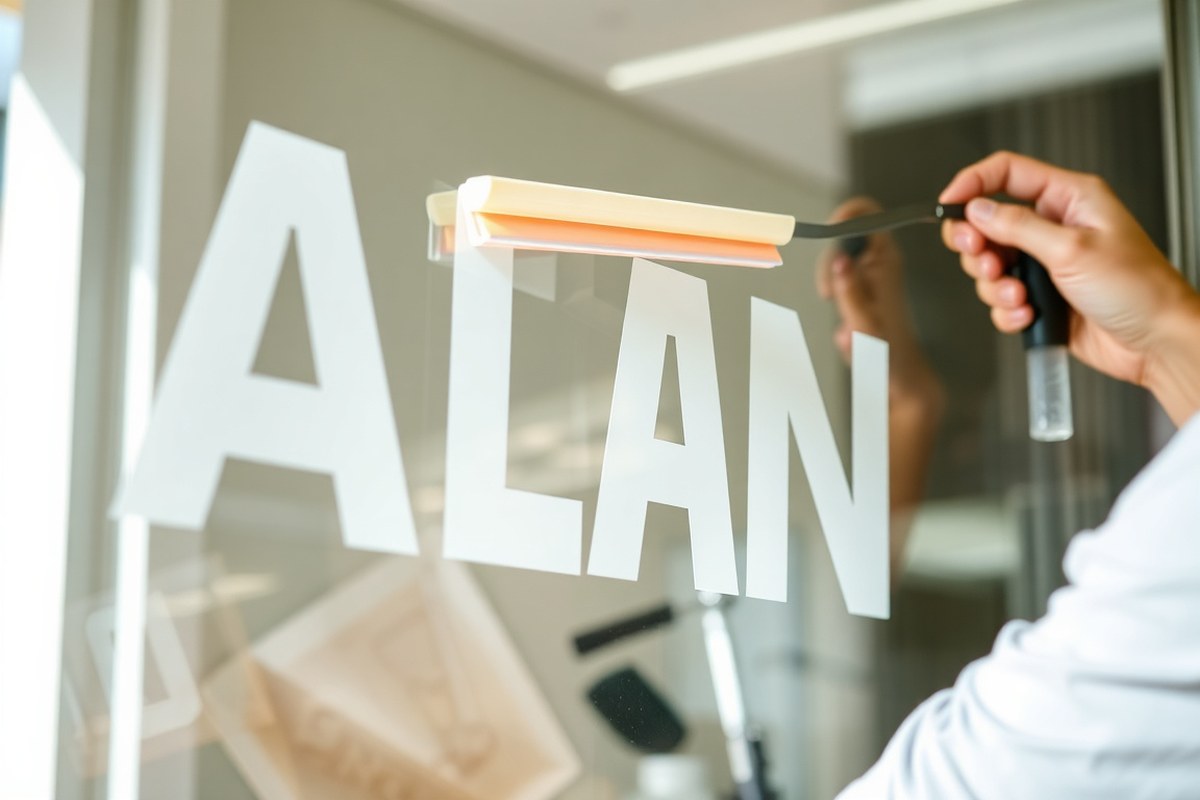
Vinyl lettering is ideal for those who want a crisp, flawless design without freehand painting. You design your sign on a computer, then use a vinyl cutter or order pre-cut vinyl letters online. After removing the excess vinyl, transfer tape helps apply the letters to clean glass easily. Proper application temperature (between 65-75°F) is critical to ensure the adhesive sticks well. This process takes less than an hour and is cost-effective for small signs.
Gold leaf gilding provides a vintage, luxurious look found on classic signs in pubs or restaurants. The trick is applying a gelatine-based adhesive (called “size”) and then carefully laying thin gold sheets onto it while still tacky. Because gold leaf is extremely thin and fragile, you’ll need a soft squirrel-hair brush to pick it up and smooth it without tearing. Once it ‘jumps’ onto the glass, gently remove the excess to reveal your design. This method demands patience and steady hands, and is best for intermediate crafters who want a high-end finish. It takes several hours from prep to cleanup, and gold leaf sheets cost around $20 to $60 depending on quality.
Making real glass neon signs is a complex process suited to professionals or very experienced DIYers with access to special equipment. You heat and shape glass tubes carefully, a skill learned through repetition as you feel how different temperatures and tube sizes react. After bending, the tubes are filled with neon gas and sealed to glow authentically. This method requires several days and is expensive, but it creates a distinctive, glowing sign that vinyl or paint cannot replicate. Many hobbyists prefer to buy custom LED neon signs if the traditional look is not essential.
Choosing the right method depends on your skill, budget, time, and the sign’s purpose. Paint and vinyl are the easiest for beginners and produce reliable results quickly. Gold leaf and neon are more involved but offer unique finishes if you want to challenge yourself or make a statement piece.
2. Essential Materials and Tools for Glass Sign Making
To make a glass sign, you need specific materials and tools depending on the technique you choose: painting, vinyl application, gold leafing, or neon tubing. Each method requires different core supplies that affect the quality and durability of your finished sign.
For painted glass signs, essential materials include glass or acrylic panels, high-quality paint pens or enamel paints designed for glass, and brushes or sponges for application. Proper cleaning supplies are critical: use 70% or higher isopropyl alcohol, distilled water, and lint-free cloths to remove oils, residues, and dust before painting. This step ensures paint adheres well without peeling. Painting on glass takes patience; allow at least 24 hours for curing and avoid touching the surface to prevent smudges.
Vinyl glass signs require adhesive vinyl sheets and a cutting machine or craft knife to create your design. A squeegee or plastic scraper helps apply the vinyl smoothly to avoid bubbles. Clean the glass thoroughly beforehand using the same cleaning supplies mentioned for painting. Vinyl tends to last longer than paint outdoors but may peel over time if applied on uneven or dirty surfaces.
Gold leaf signs need adhesive sizing glue, loose or sheet gold leaf, and soft brushes for application and burnishing. Apply the sizing glue carefully on clean, dry glass, then position the gold leaf once the glue is tacky, about 15 to 30 minutes after application. Protective sealants can help prevent gold leaf from flaking off but are optional depending on the sign location.
For neon glass signs, you require specialized glass tubing, a glass tube heater or propane torch for bending, neon gas for filling, and electrical components like transformers and power supplies. Each piece of tubing must be heated evenly using a tube heater or torch and bent with manual tools or a bending machine to follow your design. Filling the tubes with neon gas and properly sealing the ends is a delicate process; leaks can cause the sign to fail. This method is more advanced and usually demands safety precautions, including gloves and eye protection.
- Isopropyl alcohol (70% or higher) and distilled water for cleaning
- Paint pens or enamel paints for glass painting
- Adhesive vinyl sheets and a cutting tool for vinyl signs
- Adhesive sizing glue and gold leaf sheets for gold leaf application
- Glass tubing, tube heater or propane torch, neon gas, transformers for neon signs
- Lint-free cloths and soft brushes for application and cleaning
- Squeegee or plastic scraper for vinyl smoothing
Always clean your glass thoroughly before any application to improve adhesion and prevent peeling or flaking.
Some tools are must-haves to make your glass sign process easier and safer. For example, lint-free cloths avoid scratching or leaving debris, while a tube heater provides more even heating for bending glass tubes than a propane torch alone. Squeegees help apply vinyl without wrinkles. Optional but useful items include easels to hold glass steady during painting and protective gloves when handling neon tubing or chemicals. Prices range widely: vinyl sheets average $15 to $30 per roll, quality paint pens can cost $10 to $20 each, while neon tubing and electrical supplies can exceed $100 depending on complexity. Investing in the right materials upfront reduces frustration and improves results.
3. How to Prepare Glass for Perfect Sign Application
Preparing your glass thoroughly is key to achieving smooth, durable adhesion and flawless paint application for your glass sign. This involves detailed cleaning, careful surface inspection, and ensuring the ideal temperature. Proper cleaning removes invisible contaminants that block vinyl or paint from sticking well, which helps your design last longer without peeling or smudging.
Initial Surface Assessment
Start by examining your glass under bright light to spot dust, oils, or residue. Glass often appears clean but can hold invisible film from fingerprints, environmental dust, or manufacturing residues that harm adhesion. Scratches or chips may affect your design’s look and should be noted before painting or applying vinyl. The surface needs to be smooth and defect-free where your graphics will go.
Checking the temperature is also part of this step. Ideally, prep and application should take place in an environment where the glass and air temperature range between 60°F and 80°F (15°C to 27°C). Temperatures outside this range can cause cleaning solutions to evaporate too quickly or adhesives to fail after installation.
Removing Contaminants
Glass requires more than just wiping with water or a window cleaner. To prevent peeling or bubbles, remove all oils, dust, and residue with a cleaning process that goes beyond surface shine. Using abrasive powders like Bon Ami or whiting combined with a soft cloth can physically remove stubborn grime without scratching.
This scrubbing helps break down any invisible films that common glass cleaners can miss. After mechanical cleaning, wipe with a lint-free paper towel or cloth to pick up contamination from the surface before moving to chemical cleaning.
Applying Cleaning Solutions
Use a 50:50 mix of isopropyl alcohol (IPA) and water to clean the surface before applying anything. This mixture effectively dissolves oils and evaporates quickly without leaving streaks, according to 3M’s surface preparation recommendations. Spray or apply the solution liberally and wipe the glass with a lint-free cloth until it appears spotless. Follow these steps carefully to ensure your glass is perfectly clean:
- Spray or moisten a clean, lint-free cloth with a mix of 50% isopropyl alcohol and 50% water.
- Wipe the entire glass surface thoroughly, covering all areas where paint or vinyl will go.
- Use a second dry, lint-free cloth to buff off any streaks or moisture.
- Check the surface under a bright light to confirm no smudges, dust, or residue remain.
- Repeat the IPA wipe until the residue is completely gone.
Avoid using detergent-based cleaners or aerosol glass sprays before this step since residues from those can interfere with adhesion.
Final Drying and Inspection
Ensure the glass is completely dry before starting paint or vinyl application. Residual moisture can cause poor adhesion and bubbling under your sign elements. Use a clean, dry lint-free cloth or allow the glass to air dry for 10-15 minutes in a dust-free area with ambient temperature in the 60-80°F range.
Before moving on, inspect the surface once more under good lighting. Run your hand lightly over the glass to detect any remaining dust or rough spots. Gently remove any you find using a soft, dry cloth or compressed air.
4. Designing and Sizing Your Glass Sign Correctly
Designing your glass sign with the right size and layout ensures your message is clear and visually appealing. Careful font and color choices impact readability, while accurate scaling and file preparation help your design fit perfectly on the glass surface. Using printable templates broken into standard paper sizes simplifies transfer and application.
Selecting Fonts and Colors
Choose fonts that are bold, simple, and easy to read from a distance. Avoid intricate or cursive fonts that are difficult to cut or paint on glass. Sans-serif fonts often work well for modern, clean designs, while slab serif fonts can add a classic touch without sacrificing clarity.
For colors, contrast is key. Use light-colored fonts against darker glass or backgrounds, and dark fonts on clear or light-colored glass. Chalk markers and paint pens come in various colors; white is popular for clear glass, but you can select colors that suit your branding or space ambiance. Keep in mind that some colors may appear slightly different once applied to glass, especially on frosted or textured surfaces.
Breaking Up Designs for Printing
Your glass or acrylic surface likely exceeds standard printer paper sizes. To print your design accurately, divide it into 8.5″ by 11″ sections. This method breaks your full sign design into manageable pieces that fit onto typical printer sheets, allowing for precise assembly and transfer.
This process starts after you finalize your design’s dimensions, matching it to your glass size. Use design software to crop or slice the image into these sheet-sized pieces, ensuring each segment aligns without gaps or overlaps. Printing each piece at 100% scale maintains the true size for accurate transfer.
Setting Accurate Guides and Scale
Matching your design’s size to the glass prevents distortion or poor fit. Measure the exact width and height of your glass piece before adjusting your digital design. Use a graphics program to set the canvas size to these dimensions and scale your artwork accordingly.
Double-check scaling before printing by including a ruler or calibration square in your design. Print a test page and measure the physical output to verify 100% scaling. Accurate guides will help you line up your printed sheets perfectly when taping them together on the glass for tracing or painting. Here’s a clear sequence to prepare your design files for printing:
- Measure the glass surface precisely to determine the width and height in inches.
- Open your graphic design software and set your canvas size to match the glass dimensions exactly.
- Import or create your design, adjusting fonts and colors as needed for readability and contrast.
- Break the design into separate files or sections sized 8.5″ by 11″ to fit standard printer paper.
- Include alignment marks or a ruler on each section to ease matching during assembly.
- Print each section at 100% scale, avoiding any page scaling or fit-to-page settings.
- Lay out the printed pages on the glass, tape them together following your guides, and ensure the full design measures correctly against your glass.
- Proceed with tracing or transferring the design using gelatine size or chalk markers as preferred.
5. Applying Vinyl and Paint to Glass: Step-by-Step Techniques
Applying vinyl decals and paint to glass requires careful positioning, pressure control, and temperature awareness to achieve clean, bubble-free results and sharp reverse-painted designs. Both vinyl application and reverse painting benefit from precise alignment and moderate pressure to avoid damage and maximize adhesion.
Positioning and Alignment
Start by cleaning the glass thoroughly to remove any dust or oils that could interfere with adhesion. Use a ruler or measuring tape to mark placement lightly with a pencil or masking tape. For vinyl decals, peeling off the backing slowly while holding the decal in place prevents shifting.
Reverse painting involves applying the design on the back of the glass, so the image appears clear from the front. Transfer your design or stencil onto the glass backside carefully by tracing or using a pattern to guide your painting.
Applying Vinyl or Paint Evenly
Use a squeegee or a plastic card to apply vinyl decals evenly. Apply firm but gentle pressure starting from the center moving outwards to push out any air bubbles gently. Avoid pressing too hard, since glass can break under excessive force.
For reverse painting, start with a strong backing paint or ink to protect parts of the glass where you want no paint to go. Use paint pens or small brushes to trace and fill in your design, applying paint in thin, even layers to avoid runs or blots.
- Clean the glass thoroughly with alcohol or glass cleaner and dry completely.
- Measure and mark where your vinyl or design will go.
- Peel the vinyl backing partially and align it on the glass carefully.
- Use a squeegee with moderate pressure (about 15 psi) starting at the center to smooth the vinyl outwards.
- After vinyl is applied, slowly remove the transfer tape at a 45-degree angle.
- For reverse painting, apply a backing paint to protected areas if needed.
- Trace and paint the design on the glass backside with thin coats, letting each layer dry for 30 minutes.
- Allow the paint to cure fully before installing or handling, usually at least 24 hours.
Applying too much pressure can crack the glass; keep pressure firm but gentle, and use several passes for stubborn bubbles instead of one strong push.
Managing Temperature and Pressure
Room temperature between 65°F and 75°F (18°C to 24°C) offers the best environment for both vinyl application and paint curing. Extreme cold or heat can affect vinyl adhesion and paint drying times. Avoid applying decals or paint in direct sunlight or overly humid conditions.
Use consistent pressure around 10 to 20 psi when smoothing vinyl with a squeegee. Apply paint pens with light, controlled strokes to avoid uneven buildup. If paint bubbles or vinyl wrinkles appear, carefully lift and reapply with less pressure after adjusting the surface.
6. Shaping and Installing Glass Neon Signs Safely
Bending neon glass tubes requires carefully controlled heating to soften the glass without causing cracks. Use a propane or butane torch to evenly heat the section you want to bend until it glows faintly orange, usually between 1,200 and 1,400 degrees Fahrenheit. Move the flame continuously to avoid overheating any spot. Once pliable, gently bend the tube to your desired shape, ensuring smooth curves to maintain consistent gas flow and aesthetics.
Filling the tubes with neon or other gases like argon is essential for the sign’s glow color and brightness. Before filling, connect the tube to a gas tank and first evacuate all air to prevent contamination. After filling, seal the tube ends using a torch or a suitable sealant to prevent leaks. Testing for leaks is a critical step that confirms the integrity and safety of the sign.
Handling heated glass and gas cylinders demands strict safety measures. Always wear heat-resistant gloves, safety goggles, and long sleeves to protect from burns and glass shards. Work in a well-ventilated area, away from flammable materials. Inspect all equipment before use, and make sure to follow local regulations on gas handling.
- Wear protective gear including gloves, goggles, and a face shield before starting.
- Clean the glass tubing thoroughly to remove dust and debris that could weaken it when heated.
- Heat the glass tubing evenly with a torch, moving the flame along the area to bend until it glows faint orange (1,200, 1,400 °F).
- Bend the softened glass slowly, shaping smooth curves without forcing sharp angles.
- Connect the finished tube to a gas tank, evacuate all air from inside using a vacuum pump, then fill the tube completely with your chosen neon or argon gas.
- Seal both ends of the tube by heating and melting the glass or applying a professional sealant to prevent gas leakage.
- Test the tube for leaks by applying a soapy water solution along the seals and watching for bubbles or using a leak detector device.
- After confirming no leaks, allow the tube to cool fully before connecting the electrical components.
7. Common Mistakes and How to Fix Glass Sign Errors
Common mistakes during glass sign making include improper cleaning, poor adhesion of vinyl or paint, and uneven finishing. These errors can affect the look and durability of your sign, but most issues can be fixed without starting over.
A frequent problem is residue or dust left on the glass before application. This prevents vinyl or paint from sticking well and causes bubbles or peeling. To fix this, clean the glass with isopropyl alcohol and a lint-free cloth, then let it dry completely. Avoid oily cleaners, which leave behind residues that interfere with adhesion.
Another common issue is bubbling or wrinkling of vinyl or paint. For vinyl, gently lift the bubbled area and reapply, smoothing with a plastic squeegee to remove trapped air. Paint bubbles usually appear if the surface was dusty or moist. Sand the affected area lightly with fine-grit sandpaper (around 400 grit), clean again, then repaint after the surface dries.
- Dust or grease on glass causing poor adhesion
- Bubbles and wrinkles in vinyl during application
- Paint peeling or flaking due to moisture or inadequate drying time
- Uneven or streaky paint from using wrong brushes or spray pressure
- Scratches or chips on glass after finishing
- Incompatibility between paint type and glass surface
Deciding whether to repair or redo depends on the severity of the damage. Small bubbles, dust specks, or light paint streaks can be fixed with spot sanding, careful cleaning, and touch-ups. Larger peeling areas or deep scratches usually require removing the vinyl or paint layer completely and starting fresh. Removing vinyl involves heating the patch with a hairdryer and peeling it slowly. For paint, use paint remover safe for glass and follow with thorough cleaning.
Good results mean clean, smooth surfaces without bubbles, peeling, or scratches. Pay attention to drying times: vinyl should set for at least 24 hours before handling, and paint needs curing times up to 48 hours depending on product instructions. Following manufacturer guidelines on temperature and humidity also reduces errors, ideally between 65°F to 75°F and low humidity.
Repair attempts require patience and careful work. Rushing fixes or applying too many paint layers can worsen the appearance. If your sign has major defects or you plan to use it for a formal event like a wedding, consider redoing it to ensure a polished look that lasts.
8. When to Call a Professional for Glass Sign Projects
Tasks that require professional skills usually involve large or heavy glass panels, complex neon tubing, intricate custom etching, or installations in public or commercial spaces. Professionals have training and tools to cut, polish, and safely mount glass without cracking or injury. For example, cutting a glass sign larger than 2 feet wide or installing electrical neon elements calls for expert handling because glass can easily shatter and neon tubes require precise bending and wiring under strict safety standards. When fragile materials or electrical components are involved, DIY attempts risk costly mistakes or safety hazards.
Hiring a pro brings benefits like cleaner cuts, precise application of graphics or paint, and secure mounting that withstands weather and wear. Professionals also carry insurance that protects your investment if something goes wrong. You get a higher-quality finish and typically faster results than DIY, which may involve trial-and-error. Costs vary by project scope: a simple vinyl installation can cost under $200, while complex neon signs with custom fabrication can exceed $1,000. Compared to DIY, professional work reduces risks of damage or needing redo jobs, thus offering better long-term value despite upfront costs.
Deciding when to hire a pro depends on project complexity, your skill level, and available time. Small, straightforward signs using basic vinyl or paint can be done at home, especially if the glass is under 12 x 12 inches and the design is minimalist. Larger, electrical, or load-bearing glass signs call for pros skilled in fabrication and installation. Consider professional help if you notice any damage on the glass or if exact measurements and perfect alignment are critical, like mounting signs on doors or outdoors where weatherproofing matters.
To find qualified glass sign makers or installers, start by seeking local businesses specializing in commercial signage or glass fabrication. Check portfolios to confirm experience with similar projects, such as neon lighting or etched glass signs. Ask about licensing, insurance, and warranties on their work. Customer reviews and referrals can indicate reliability. A good question to ask is how they handle site preparation and damage control during installation. Demand a written estimate that explains costs for materials, labour, and clean-up to avoid surprises.
Compare DIY versus professional work by weighing your budget, skills, and timeline. DIY is rewarding for small personal projects with non-structural glass or basic vinyl designs but can stretch over several days due to learning curves and rework. Professionals ensure precision and durability, which is critical for branding or safety compliance, though at a higher price point. Knowing when to switch from DIY to hiring a pro can save money and frustration, especially for sign owners needing polished results for business or public display.
Always inspect the glass for chips or cracks before installation, and don’t proceed if damage could compromise safety or appearance; call a professional to assess or replace the glass first.
Step-by-Step Action Plan for Your First Glass Sign
Follow this plan to create your glass sign with confidence, moving smoothly from design to installation. Each step includes a clear check to ensure success before you advance.
- Before you start: Gather all materials and tools listed for your chosen method, including glass, vinyl or paint, cleaning supplies, and protective gear. Confirm everything is ready by doing a test cleaning on a small glass area.
- Day 1: Design and size your sign using digital tools or sketching. Measure your glass and print a template to check fit and appearance directly on the glass surface.
- Day 2: Prepare your glass by thoroughly cleaning and degreasing it with isopropyl alcohol. Verify preparation by wiping with a lint-free cloth until the glass is spotless and feels smooth.
- Day 3: Apply vinyl or paint according to your design. For vinyl, carefully align and smooth out bubbles; for paint, use stencils and allow each coat to dry. Check success by inspecting for no gaps or paint runs.
- Day 4: If using neon elements, shape and install them safely with insulated gloves and follow electrical codes precisely. Test the neon’s illumination before securing it fully.
- Day 5: Review your glass sign for mistakes like misaligned vinyl or uneven paint. Correct errors using recommended fixes such as repositioning vinyl or repainting small areas once dry.
- Day 6: Mount your sign securely to the desired location using appropriate hardware. Confirm stability by gently testing for movement without forcing the glass.
Frequently Asked Questions
What Is the Best Way to Clean Glass Before Applying a Sign?
Proper cleaning removes oils and residue that block adhesion. Use rubbing alcohol and a lint-free cloth for best results to ensure your sign sticks well and lasts longer.
Can I Reuse Vinyl Letters on a Different Glass Sign?
Vinyl letters are usually designed for one-time use. Reapplying them can reduce their stickiness and cause damage when removed, so fresh vinyl is recommended for each new sign.
How Do I Choose the Right Paint for Glass Signs?
Use paint made specifically for glass surfaces, like enamel or acrylic paints. This helps the paint adhere better and resist chipping or fading over time.
When Should I Avoid Making a Glass Neon Sign Myself?
Avoid DIY neon signs if you lack experience with electrical components. These signs require careful handling and installation to ensure safety and proper function.
What’s a Simple Way to Size and Position a Design on Glass Accurately?
Place lined paper under the glass as a guide for lettering and layout. This helps keep your design straight and evenly spaced during application.
Can I Make a Glass Sign Without Special Software?
Yes, simple designs can be drawn by hand or printed on paper and traced onto the glass. However, design software helps create precise images and sizing.
The Bottom Line
Making a glass sign yourself combines creativity with practical skills, from careful design through safe installation. Start by designing your sign clearly and gathering all necessary tools for the best results. Once you have your materials ready, focus on perfecting the glass surface before applying your design to avoid common pitfalls. Taking these steps will help you create a professional-looking glass sign that fits your space perfectly.