What Is a Wood Burning Tool? A Complete Guide for Beginners
A wood burning tool is an electric device used to burn designs, patterns, or textures onto wood surfaces. It works by heating a metal tip that you press against wood to create marks through controlled burning. This process, known as pyrography, allows you to create detailed art by adjusting the temperature and tip shape for different effects.
Key Takeaways
- Choose a wood burning tool with adjustable temperature between 200°F and 1,050°F for versatile control over burn depth and shading.
- Solid-point tools offer precise temperature regulation, ideal for detailed and gradual shading techniques.
- Wire-nib burners heat faster but typically have fixed temperatures, making them better for bold lines rather than fine work.
- A tool set with multiple tips, including hot knife options, expands your ability to cut, carve, and burn intricate designs.
- Select wood with a fine, smooth grain like basswood or birch for clearer burn marks and less resistance to the hot tip.
- A digital display on some tools helps maintain consistent heat, important for even and professional-looking designs.
What Is a Wood Burning Tool and How It Works
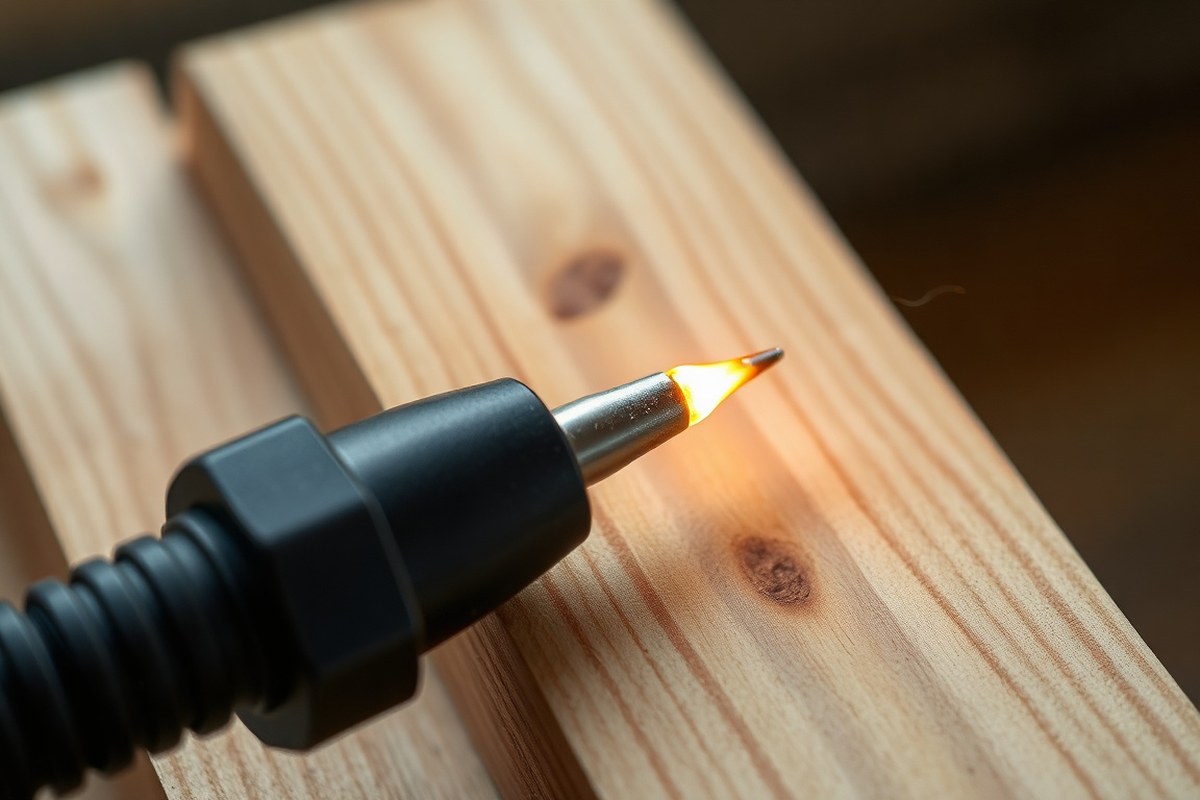
A wood burning tool, often called a pyrography pen, is a handheld device designed to create detailed and permanent designs by scorching wood surfaces. It consists of a heating element inside a pen-like body, which heats tip attachments made of metal to temperatures that burn the wood on contact. Applying the heated tip to the wood surface causes controlled scorching, forming lines, shading, and textures that make up a wood burned image or pattern.
The primary heating mechanism in these tools uses electricity to warm a metal tip. When plugged in, the tool’s internal heating element reaches temperatures typically ranging from about 400°F to over 1,100°F (204°C to 593°C). Variable temperature control on many models allows you to adjust the heat depending on the desired burn darkness and wood type. A lower temperature produces lighter shades or subtle lines, while higher temperatures create darker, deeper marks. Heating times to reach working temperature usually take under a minute, enabling quick adjustments as you work.
This tool generally includes several parts: the pen handle, the metal tip or nib, a temperature control dial or switch, and a power cord or transformer. The handle is designed for comfortable grip during detailed work. Tips come in different shapes and sizes, such as fine points for detailed lines or wider tips for shading, to help you achieve various artistic effects. When the tool is powered on, electricity flows through a coil or resistive wire inside the tip, generating the necessary heat. Some models use a transformer for safe and stable voltage supply, ensuring consistent temperature throughout a session.
Creating designs with a wood burning tool involves gently pressing or gliding the heated tip over a prepared wooden surface. The heat burns the wood fibers, darkening them without removing material as carving would. To avoid uneven burning or scorching too deeply, it’s important to control the tip’s temperature, the speed of movement, and the pressure applied. Using softer woods like basswood or birch can make it easier to burn clear designs at lower temperatures. Heavier or more resinous woods may require higher heat settings and more careful technique to prevent flare-ups or unwanted dark patches.
The cost of a basic wood burning tool designed for beginners often ranges from $20 to $50 and includes several interchangeable tips and adjustable temperature. More professional kits, which may have dual pens and advanced temperature controls, can cost upwards of $100. Successful results depend on steady hand control, appropriate tip selection, and correct heat settings, allowing you to produce smooth lines, gradual shading, and clean, permanent designs. Incorrect usage, such as too much heat or uneven pressure, can result in blotchy burns, charred spots, or damage to the wood surface.
Types of Wood Burning Tools: Solid-Point vs Wire-Nib Burners

Wood burning tools come mainly in two types: solid-point burners and wire-nib burners. Solid-point burners use a solid metal tip heated by the tool to burn designs onto wood, while wire-nib burners feature electrically heated wire tips that allow finer control. Choosing between them depends on your project needs, skill level, and budget.
Solid-Point Burner Features
Solid-point burners have a solid metal tip attached to a pen-like handle. They often come with interchangeable tips for various line thicknesses and textures. These tools may have fixed temperature or adjustable settings, but their heating is usually slower to respond than wire nib tools.
They are well-suited for outlining, decorative patterns, and working on mixed materials like leather or coasters. Their typical wattage ranges around 15 to 30 watts, providing temperatures near 950 to 1050 degrees Fahrenheit. Their cost tends to be lower, making them popular for beginners or those on a budget.
While solid-point burners offer a broad tip selection and come in affordable starter kits, they lack the precise temperature control that more advanced wood burning requires. Their slower heat-up and cooldown times can limit work speed and fine shading capabilities. Kits like the TRUArt Stage 1 offer two power modes for some adjustability but may not provide the fine heat control needed for detailed gradients.
Wire-Nib Burner Features
Wire-nib burners heat an electrically powered thin wire tip enclosed in a pen, often connected to a control station that allows precise temperature adjustment. They heat and cool faster, making it easier to work with various shading techniques and produce fine lines.
This type usually includes multiple wire tips specialized for lines and shading. Power ranges typically around 25 to 30 watts, reaching temperatures up to 1050 degrees Fahrenheit. These burners are more expensive than solid-point tools but provide versatility that suits professionals and serious hobbyists.
The adjustable temperature control on wire-nib tools lets you change heat levels while working, essential for handling different wood types and achieving consistent results. For example, Walnut Hollow’s wire-tip models allow detailed shading without a bulky setup, and combo kits offer both solid-point and wire nib pens for diverse effects.
| Feature | Solid-Point Burner | Wire-Nib Burner |
|---|---|---|
| Heating Element | Solid metal tip | Electrically heated wire nib |
| Temperature Adjustment | Fixed or limited adjustable | Commonly adjustable through control unit |
| Heating/Cooling Speed | Slower heat-up and cooldown | Faster response to temperature changes |
| Detail Capacity | Good for outlines, patterns | Better for fine lines and shading |
| Typical Wattage | 15 to 30 W | 25 to 30 W |
| Typical Price | Lower cost, often under $50 | Often higher, $60 and above |
| Best For | Beginners, casual crafters, mixed crafts | Advanced shading, detail work, professionals |
Reviewing these differences helps you match your project goals with the tool that fits your skill level and budget.
Choosing the Right Burner Type
Beginners or hobbyists starting out may find solid-point burners more accessible due to their affordability and range of tips bundled in starter kits. These tools make it easy to try basic designs on woods like balsa, birch, or pine. Kits like Chandler Tool offer many tips and stencils, making creative exploration simple without a big upfront cost.
For projects requiring fine detail, smooth shading, and faster heat adjustments, wire-nib burners provide better control. They are ideal for artists working on intricate designs or varying wood types where temperature tuning is important. Professionals often prefer wire-nib tools to achieve repeatable tonal progression and precision.
Faster heat response in wire-nib burners reduces waiting time between strokes, increasing workflow speed and comfort. However, their higher cost and often bulkier stations may not suit casual users. Combining both types in a kit offers flexibility but increases investment.
Tip: Avoid wood burning tools without variable temperature control if your projects include shading or delicate details, since fixed heat limits artistic possibilities.
Key Features to Consider When Choosing a Wood Burning Tool
Choosing the right wood burning tool depends on key features like temperature control, interchangeable tips, power, and comfort. Beginners should focus on tools with variable temperature settings and a good selection of tips to handle different project types. Ergonomics and wattage also matter for longer sessions and working with various woods.
Adjustable Temperature Control Benefits
Variable temperature control is essential because it lets you work with different wood types and achieve finer detail. Softwoods like pine burn faster and need lower heat, usually around 600 to 750°F, while hardwoods like oak or walnut require higher temperatures up to 1,000°F. A tool without temperature control limits your ability to switch between delicate shading and deep lines.
Many beginner-level kits offer adjustable heat ranges between 600 and 1,000 degrees Fahrenheit. This flexibility avoids scorching your work or underburning hard wood. For example, the Creative Versa Tool features 11 tips and variable temperature control, making it a budget-friendly choice that grows with your skills.
Types of Tips and Their Uses
Having multiple interchangeable tips expands your creative options. Common tips include:
- Writing Tip: Fine-point for detailed lines and lettering.
- Shading Tip: Flat or comb-shaped for gradual tones and textures.
- Calligraphy Tip: Angled edges for stylized script.
- Stamp Tip: Shapes for imprinting patterns like stars or leaves.
- Hot Knife or Cutter Tip: For slicing thin wood or carving.
- Soldering Tip: Metals and non-wood materials, common in hybrid tools.
Beginner kits often include 9 to 11 tips that cover most basic effects. Using the right tip for the task improves precision and saves time. For example, shading requires a wider, flatter tip that covers larger areas smoothly without pressing too hard.
Ergonomic and Power Considerations
Comfort is important since wood burning often involves detailed, steady hand movements over minutes or hours. Look for tools with soft-touch, temperature-insulated grips that reduce hand fatigue and provide tactile feedback. The TruArt Stage 1, known for ergonomic design, also offers a stable non-slip power base that keeps the tool steady when resting.
Power ratings vary from 16W for basic pen-style burners to 60W or 100W for professional dual-pen stations. Higher wattage means faster heating and better performance on dense hardwoods or gourds. Beginners typically do well with 15-30W units but may upgrade if they work with tougher materials or larger projects. Here’s a quick decision checklist:
- Choose variable temperature control for all but the simplest projects.
- Pick a tool with at least 9 interchangeable tips to cover line work, shading, and stamping.
- For beginners, a 15-30W pen with ergonomic grip is sufficient.
- Upgrade to 60W+ tools for faster heating and dense wood work.
- Consider dual-pen stations if tackling professional or mixed-media projects.
- Check for a non-slip base and insulated grip to improve handling and safety.
Choosing and Preparing Wood for Wood Burning Projects
Choosing the right wood and preparing it properly are key to achieving clear and detailed results in wood burning projects. Softer woods with fine grains offer the best surface for lines and shading. Proper sanding and cleaning improve how the tool interacts with the wood, preventing blotchy burns or excessive charring. Moisture and grain patterns also influence how the heat affects the wood’s surface and visibility of your design.
Best Woods for Pyrography
Basswood is widely regarded as the top choice for beginners and detailed pyrography. Its pale color and fine, uniform grain allow your burned lines to stand out clearly. The soft surface requires gentle handling to avoid dents but generally takes the heat evenly for shading and fine lines.
Birch offers a slightly firmer alternative with a light, even grain, supporting medium to large pieces. It gives a smooth surface that holds detail well. Maple’s harder, dense surface provides excellent durability and a fine grain for intricate designs. However, it takes more time to burn effectively because of its density.
Pine is very soft and easy to burn but comes with prominent grains and knots that may create uneven burning. It can work well for rustic or quick projects where natural wood patterns are part of the design. Cherry has warm tones and a fine texture but may reduce contrast in light shading because of its darker background. Cedar’s aromatic quality and unique grain make it suited for decorative or outdoor pieces, though its softness demands careful burning.
- Basswood: pale, soft, fine grain, great for beginners and detailed work
- Birch: light, firm, smooth, good for medium-large projects
- Maple: hard, dense, fine grain, ideal for intricate, durable pieces
- Pine: soft, prominent grain, knots, suitable for rustic designs
- Cherry: warm color, fine texture, decorative but lower contrast
- Cedar: soft, aromatic, unique grain, outdoor projects, special effects
Sanding and Prepping Steps
Start with a smooth wood surface to ensure clean lines and consistent shading. Use fine-grit sandpaper between 180 and 220 grit, sanding along the grain direction until the surface feels even and free of major imperfections. Avoid coarse sanding as rougher textures can scatter the pyrography tool’s heat unevenly.
After sanding, clean the surface with a dry cloth or a slightly damp cloth. This removes dust and residue that could interfere with burning or create uneven marks. Allow the wood to dry fully if moisture is present. Avoid sanding sealer or finishes before burning because they block the wood’s natural absorptive qualities and affect the burning intensity.
For best control, secure your wood piece on a stable surface or with clamps so it doesn’t shift as you work. A stable surface helps you maintain steady lines and intricate shading with your wood burning tool.
Wood Grain and Moisture Tips
Wood grain direction significantly affects how heat spreads. Burn along the grain for smoother, more controlled lines, especially with fine detail. Burning across strong grain patterns or knots can cause uneven dark lines or blotches as these areas absorb heat differently.
Moisture content under 10% is ideal for burning. Higher moisture prevents the wood from scorching properly and can cause pitting or inconsistent shading. You can measure moisture with a simple moisture meter. Dry your wood if needed by storing it in a warm, ventilated place for several days or weeks, depending on thickness. Wood with very pronounced grain or resin pockets, like some pines, may require lighter passes with the tool or test burns on scraps before starting your main project to avoid burnt artifacts and rough textures.
Basic Wood Burning Techniques with Your Tool
Creating smooth lines, shading, and texture with a wood burning tool allows you to add detail and depth to your pyrography projects. Line work forms the foundation and is done with fine point tips that run at controlled temperatures, usually between 200°F and 950°F. Shading involves adjusting heat and pressure to build gradients, while textures like stippling add visual interest by varying burn density.
Line work requires steady hand movements and consistent heat. Use the fine point tip on a clean, smooth piece of basswood or other untreated hardwood for the best results. Keep the tip at a consistent temperature and glide it gently along guide lines to avoid jagged edges. Shading comes from moving the shading tip more slowly over an area, varying the tip’s contact and temperature to create lighter or darker tones. You can also use stippling, a technique where you tap the surface repeatedly to form small dots, simulating texture and shading.
Precision comes from controlling both heat and pressure. Higher temperatures or longer contact times make darker burns, so start with lower heat settings and test on scrap wood first. Applying too much pressure risks gouging the wood or uneven burns, while too little leads to faint marks. Adjust speed, temperature, and pressure based on the wood’s grain and your design needs to get smooth fades and crisp lines. Follow these key steps to start mastering basic wood burning techniques:
- Choose a fine point tip for lines and a shading tip for smooth gradients.
- Set your tool to a medium temperature, around 600°F, then test on scrap wood.
- Trace outlines with slow, steady movements to form consistent, clean lines.
- Slowly move the shading tip in small circles or back-and-forth strokes to build gradients.
- Use a light tapping motion with the tip to create stippling texture for shadows or detail.
- Control pressure so the tip barely presses into the wood to avoid gouges.
- Allow the wood to cool between passes to judge shading depth properly.
- Practice these steps on scrap wood until you can get smooth lines and even shading.
Always start with lower heat and lighter pressure to avoid burns that are too dark or uneven, then gradually increase as needed.
Common Mistakes to Avoid with Wood Burning Tools
Applying too much pressure or setting the temperature too high are frequent errors that can damage your wood or tool. Pressing hard pushes the heated tip deeper than intended, leaving gouges or uneven burn marks. Excess heat can char the wood, creating black scorch marks beyond your design area. To avoid this, hold the tool gently and allow the heat to do the work. Start with a lower temperature setting and increase gradually while testing on scrap wood.
Another common mistake is pausing with a hot tip in one spot. This often causes dark blobs at the start of lines and uneven shading. Instead, begin each stroke with the tip moving steadily. Practice on a test piece to find the right speed that creates smooth lines without burning too deeply.
Beginners sometimes underestimate the need to let the tool fully heat up before use. Insufficient heat results in dragging marks that barely show up, causing frustration and wasted time. To fix this, plug in your wood burning tool and wait several minutes for the tip to reach the desired temperature. Clean the tip regularly following the manufacturer’s instructions to maintain good heat transfer.
- Avoid pressing too hard; use light, steady pressure
- Start each stroke with a moving tip to prevent blotches
- Test heat settings on scrap wood before beginning
- Allow the tool to heat fully before use, around 1 to 3 minutes
- Keep the tip clean to ensure consistent burning
- Sand your wood surface smoothly to reduce line skipping or patchiness
- Wear heat-resistant gloves and work in a well-ventilated area for safety
Shading that appears striped often results from using a nib that is too narrow or moving the tool inconsistently. Try using a wider nib and maintaining a steady hand speed. Rough or dense wood grain can also cause uneven burning. Sand your wood to a smooth finish and select wood types known for consistent grain patterns. Softwoods like basswood respond well to lower temperature settings and reduce the risk of unwanted scorch marks.
Remember that a wood burning tool is not an open flame but still reaches temperatures up to 1,000°F (538°C). Avoid touching the hot tip and always place the tool on a heat-resistant stand when not in use. Use a 30W model for beginners; higher wattage models around 60W provide more power but require greater heat control to prevent overburning. Following safe handling practices and proper techniques will save you time and prevent costly mistakes as you build your skills.
Wood Burning Tool Safety Guidelines Everyone Must Follow
Wood burning tools reach temperatures up to 900°F (482°C) or more, which makes handling and use potentially hazardous. Protection starts with wearing heat-resistant gloves to avoid burns. A mask is also necessary to prevent inhaling fumes released from heated wood, especially when working with treated or oily woods. Always work in a well-ventilated area to reduce fume concentration.
The electric nature of many wood burning tools adds another layer of risk. Inspect cords and plugs for damage before each use to avoid electrical shock or fire. Use the tool with dry hands and avoid working in damp environments. Keep the cord clear of hot tips and away from sharp edges to prevent wear and potential short circuits.
- Wear heat-resistant gloves and a respirator mask during use
- Work in a room with open windows or a strong exhaust fan
- Keep children under close supervision or away entirely during use
- Check electrical cords, plugs, and connections before powering on
- Place the hot tool on a heatproof stand or surface when not in use
- Unplug the tool immediately after finishing and before changing tips
- Store the tool in a cool, dry place once fully cooled
Handling the tool only by its insulated grip and being cautious with the heated tip prevents accidental contact with skin or flammable materials. Avoid touching the metal parts immediately after use; let them cool for at least 10 to 15 minutes, depending on the tool’s wattage and workspace conditions. Using heatproof mats or stands protects your workspace from scorch marks and fire hazards.
Users should also be aware of the potential for harmful fumes, particularly from softwoods or woods with finishes and chemicals. Using untreated hardwoods and ensuring good airflow reduce these risks significantly. Always read your tool’s manual for any model-specific warnings and follow local electrical safety codes. When supervising children, confirm they understand precautions clearly and never leave them unattended with a hot or plugged-in wood burning tool.
Maintaining and Caring for Your Wood Burning Tool
Maintaining a wood burning tool is essential for keeping it working smoothly and extending its life. The tips build up residue after each use, which can affect heat transfer and result in uneven burning. You should clean the tips regularly and check the tool for any signs of wear or damage. Proper storage also helps protect your tool and accessories from dust, moisture, and accidental damage.
Cleaning the tips helps remove charred wood and carbon buildup. A good option is a leather strop combined with a fine abrasive like aluminum oxide to polish brass tips gently without scratching. Clean the tips at least after every 1 to 2 hours of use or whenever you notice uneven performance. Let the tip cool down before cleaning to avoid burns. Here’s a step-by-step process to clean your wood burning pen tips safely and effectively:
- Unplug the tool and let it cool completely before handling the tips.
- Remove the tip by unscrewing it from the heating element carefully.
- Strop the tip on a leather strop embedded with aluminum oxide. Pull the tip backward across the strop with gentle pressure to polish away residue.
- Use fine sandpaper (around 400 grit) only if the tip is heavily oxidized, but avoid over-sanding, which alters the tip shape and performance.
- Wipe the tip with a clean, dry cloth to remove loose particles.
- Reattach the tip securely to the tool after cleaning.
- Plug in and test on scrap wood before continuing your project to confirm even heat distribution.
Regular inspection can alert you to issues like bent or cracked tips, loose connections, or inconsistent heating. Replace tips that no longer hold shape or burn unevenly despite cleaning. If the tool doesn’t heat up at all or overheats quickly, internal wiring or the heating element may need professional repair or replacement.
Store your wood burning pen in a dry, dust-free environment to prevent corrosion and damage. Use a case or wrap it in a soft cloth to protect the tips and cord. Avoid wrapping the cord tightly around the tool, which stresses wires and shortens lifespan.
Never clean the tips while they are hot to prevent burns and tip damage; always let them cool completely before handling.
Step-by-Step Action Plan to Start Wood Burning Today
Follow these steps to begin your wood burning project confidently and safely.
- Before You Begin: Choose a simple, light-colored hardwood like basswood or birch for your first project. Confirm the wood is dry and smooth by running your hand over it.
- Day 1: Set up your wood burning tool with a basic solid-point tip. Turn it on and wait until the tip heats evenly, testing on scrap wood for consistent marks.
- Day 2: Practice basic strokes, straight lines, curves, and dots, on scrap wood. Look for clear, controlled burns without scorching or skipping.
- Day 3: Transfer a simple design onto your project wood using pencil outlines. Trace the lines lightly so they won’t show afterward.
- Day 4: Begin wood burning your design slowly, keeping the tool steady and using light pressure. Check that your lines are even and the wood isn’t overheating.
- After Your First Project: Clean the tip of your tool as recommended, and store it properly. Review any areas that need improvement for your next piece.
Frequently Asked Questions
What Materials Can I Use with a Wood Burning Tool Besides Wood?
You can burn on leather, gourds, and certain paper types, adding variety to your projects. Make sure the material is natural and safe to burn for best results.
Can I Use a Wood Burning Tool Outdoors?
Yes, but wind can affect the tool’s heat and your control, so protect your workspace. Use a stable surface and avoid windy conditions for consistent results.
Does the Tip Size Affect the Detail of My Wood Burning?
Yes, smaller tips create finer details while larger tips cover broader areas faster. Changing tips helps adapt your tool to different design needs and wood surfaces.
Can I Use a Soldering Iron for Wood Burning?
Yes, a soldering iron with appropriate tips can work but typically offers less temperature control than dedicated tools. Beginners may find dedicated wood burning tools easier to use.
How Long Does It Take for a Wood Burning Tool to Heat Up?
Most tools heat up within 1 to 3 minutes depending on the model and temperature settings. Always let your tool reach full heat before starting for even burning.
What Safety Gear Should I Wear While Wood Burning?
Wear heat-resistant gloves and work in a well-ventilated area to avoid inhaling fumes and prevent burns. Eye protection is also recommended for debris or accidental contact.
Final Thoughts
A wood burning tool lets you add detailed, personalized designs to wood with heat and precision. Taking careful steps to set up your tool, choose the right wood, and practice basic techniques will help you build skill without frustration. Start with a simple shape today, so you can see how steady hands and patience make your project come to life. Keep safety in mind, and your wood burning hobby can offer years of creative enjoyment.