Glass Sign Ideas: 8 Expert Tips for Stunning Custom Glass Creations
Glass sign ideas offer a stylish and functional way to communicate your message. Custom glass signs combine durability with elegance, making them ideal for business branding, event décor, or home accents. Start by choosing the right type of glass and design to match your space and purpose.
Key Takeaways
- Select glass type based on use: frosted for privacy, stained glass for weddings, or etched glass for logos and branding.
- Acrylic offers lightweight alternatives, but real glass provides a premium, modern finish and higher durability.
- Glass thickness usually ranges from 1/4 inch to 1/2 inch for signs sized 2 to 8 feet wide.
- Rushing a custom glass project can reduce lead time to about 4-5 weeks with a 20% fee added.
- Advanced designs like 3D carving and hand-painting add depth and uniqueness to your sign.
- Consider how and where the sign will mount; installation options range from stands to wall mounts with minimal hardware.
1. Popular Types of Glass Signs and Their Uses
Glass signs come in several popular types, each suited to different styles and uses. The most common are etched, frosted, stained, and painted glass signs. Etched and frosted signs offer a semi-opaque, elegant appearance ideal for corporate or office settings. Stained glass signs provide colorful, decorative effects often used for special events like weddings. Painted glass signs deliver vibrant imagery and logos, working well for both indoor and outdoor branding. Understanding their differences helps you choose the best option for your business or event needs.
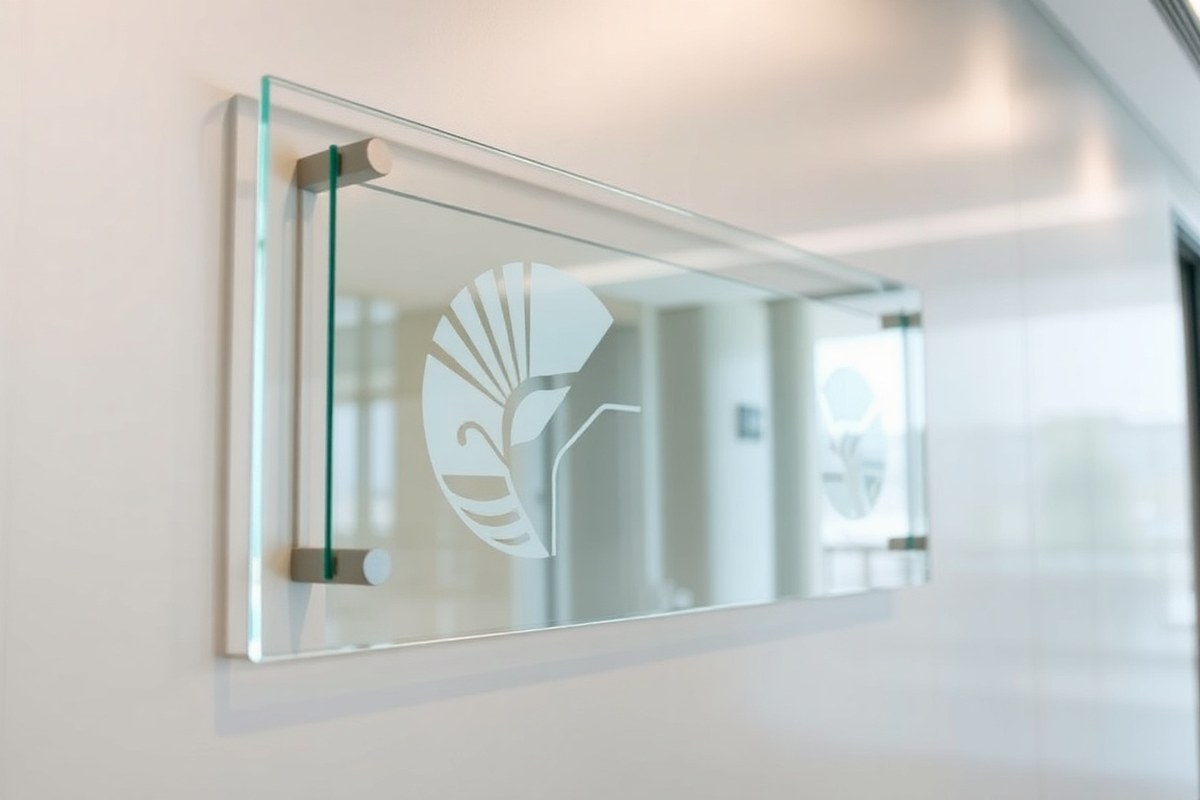
Etched glass signs involve sandblasting the surface to create a permanent, semi-opaque design. They are highly durable and won’t peel or fade over time, making them a long-lasting choice that reflects a professional aesthetic. Frosted glass signs, often produced from annealed glass, use similar sandblasting techniques but vary in design complexity, from simple frost effects to intricate 2D or 3D carvings. They reduce glare while maintaining brightness, which makes them ideal for lobbies, offices, and shared spaces requiring subtle branding. Both types can be custom-sized and mounted with high-quality standoff posts in finishes like brushed nickel or chrome to complement the environment.
Stained glass signs mimic traditional stained glass artwork with colorful, sometimes leaded patterns. These signs are more artistic and less subtle, great for decorative use at weddings, receptions, or boutique interiors where a striking visual impression is the goal. Painted glass signs manipulate the surface with custom colours matched precisely to your brand, offering vivid graphics and logos. These can be combined with etched or frosted backgrounds for contrast and added depth, but they require careful application and upkeep to maintain their look.
| Type | Technique | Durability | Common Uses | Pros | Cons |
|---|---|---|---|---|---|
| Etched | Sandblasting on clear or low-iron glass | Permanent, won’t peel or fade | Corporate logos, office signage | Elegant, professional, permanent | Less colorful, limited decorative effects |
| Frosted | Sandblasted with design options including 2D/3D carving | Durable and permanent | Office spaces, shared interiors | Reduces glare, preserves brightness, versatile | Design detail limited by frost effect |
| Stained | Decorative colored glass mimicking traditional stained glass | Less durable, mainly indoor use | Wedding welcome signs, decorative events | Highly decorative, colorful, eye-catching | Fragile, not ideal for heavy traffic or outdoor use |
| Painted | Hand-painting or custom colour matching on glass | Can fade or chip without proper sealing | Brand logos, custom graphic signs | Vibrant colours, customizable | Requires maintenance, less permanent than etched/frosted |
Choosing between these types depends on your setting and message. Businesses benefit from etched and frosted signs due to their durability and understated sophistication. Event planners and interior designers might prefer stained glass signs for their artistic flair. Painted signs balance both, offering bold visuals but require more care. Installation quality and choosing the right glass thickness also affect the performance and appearance, so seek professional advice to ensure your chosen glass sign complements your space effectively.
2. Materials, Thickness, and Safety of Glass Signs
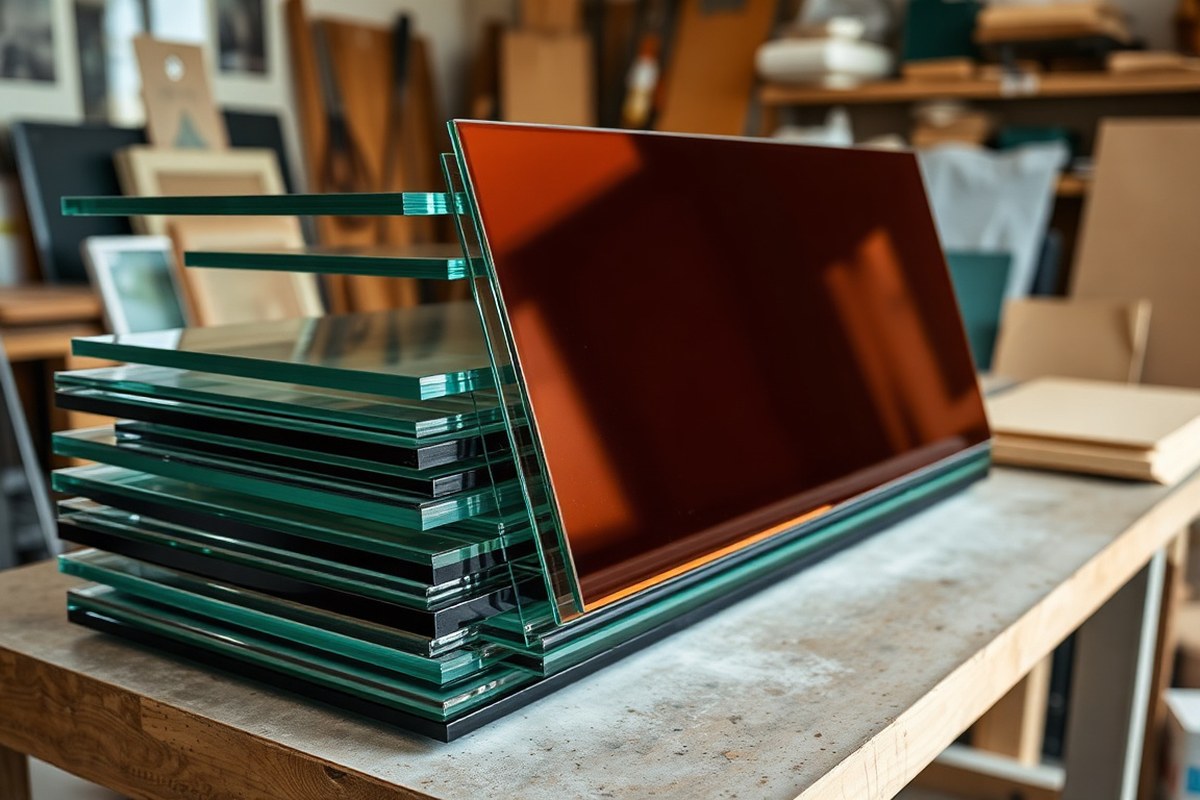
Glass signage commonly uses tempered, annealed, and laminated glass, each serving specific durability and safety needs. Tempered glass is the most popular choice for durable signs because of its strength and shatter resistance. This type of glass is heated to around 1200 degrees Fahrenheit and then rapidly cooled, making it four to five times stronger than regular annealed glass. In case it breaks, tempered glass crumbles into small, blunt pieces, reducing injury risk.
Annealed glass is slowly cooled during production, making it less likely to break during cutting or installation. However, it is not as strong or safe as tempered glass since it breaks into sharp shards. This type is better for indoor signs that don’t face impact risks or harsh weather. Laminated glass consists of two or more glass layers bonded with an interlayer, holding shards together if broken, offering excellent safety and durability, ideal for locations requiring extra protection or outdoor use.
Typical glass thicknesses for signs range from 1/4 inch to 3/8 inch. Thicker glass provides more durability but also adds weight and cost. For indoors, 1/4 inch tempered glass is generally sufficient. Outdoor signs benefit from 3/8 inch laminated glass for increased strength and safety. Both safety and aesthetic needs influence the choice, as polished edges and thickness affect appearance.
- Tempered glass: Highly durable, shatter-resistant, suitable for commercial and indoor use.
- Annealed glass: Easier to cut and install, less strong, appropriate for protected indoor signs.
- Laminated glass: Combines safety and strength, ideal for outdoor or high-risk areas.
- Typical thicknesses: 1/4 inch for most indoor use, 3/8 inch recommended for outdoor.
- Low-iron glass option: Ultra-clear, improve visual clarity for premium signs.
- Polished or hand-chiseled edges add sophistication but may affect cost.
The choice between tempered and laminated glass depends on location and mounting. Tempered glass suits areas where breakage risk is low but impact resistance is needed. Laminated glass is better near doorways, public spaces, or outdoors where safety and sturdiness are critical. Annealed glass works well when cutting precision is more important than durability, especially for interior décor signs mounted securely away from traffic.
Always confirm that your glass supplier uses safety glass certified to ASTM standards to ensure legal compliance and maximum protection.
Choosing the right glass for your sign affects how well it withstands weather, accidental bumps, and installation stress. Safety glass like tempered and laminated types not only protect people but also help your sign keep its professional look for years. You can expect tempered signs to resist breakage from impacts and maintain clear visibility, while laminated glass offers additional resistance to penetration and better performance in outdoor conditions.
3. Design Options That Make Glass Signs Unique
Customizing glass signs offers a wide range of options, from back-painting and engraving to hand-painting and decals. These techniques let you integrate colors, logos, and special effects to create a sign that fits your style and purpose perfectly. Using these options strategically can make your glass sign stand out while showcasing your brand or wedding theme elegantly.
Planning Your Glass Sign Design
Start by defining the sign’s purpose and the environment where it will be displayed. Consider size, shape, and orientation to ensure it fits naturally in your space and is easy to read. Sketch a rough layout to organize text, logos, and decorative elements clearly. Planning helps avoid costly revisions and ensures your sign looks balanced and professional.
Effective planning includes selecting fonts that match your brand or event style while maintaining legibility, especially from a distance. Choose simple fonts like sans-serif for modern businesses or elegant serif fonts for wedding signage. Avoid overly decorative fonts that can reduce readability. To finalize design planning, follow these steps:
- Identify the sign’s primary message and any secondary details.
- Measure the location to determine ideal sign dimensions.
- Choose fonts that suit your brand identity and are easy to read.
- Select artwork or logos that complement your message without overcrowding.
- Create a layout sketch, placing elements logically with clear spacing.
- Decide on which finishing techniques (engraving, painting, decals) to use for each element.
- Consult with your glass sign provider to ensure your design is feasible.
Choosing Color and Finish Effects
Back-painting glass is a popular way to add vibrant colors that improve visibility and style. Choosing colors that align with your brand or wedding theme creates a cohesive look. For example, use metallic gold or silver paint fills for a luxurious vibe, or bright custom colors for a modern, eye-catching sign.
Finish options include frosted glass achieved by sandblasting or acid etching, which softens the appearance and can be improve with airbrush hand painting on carved areas. This technique adds texture and dimension for a high-end look, perfect for offices or elegant event signs.
Special effects like gold leaf inlay or direct-to-glass digital printing offer more customization. Gold leaf adds a shimmering, upscale touch but can be more costly and require expert application. Direct-to-glass printing supports complex color gradients and photographic detail, ideal for detailed logos or floral designs.
Incorporating Logos and Decorative Elements
Integrating logos into glass signs is typically done through engraving or etching, providing a clear, permanent mark that looks professional. Paint-fill options can highlight logos in black, metallic silver, or custom colors for better contrast. These methods help your branding stand out while maintaining durability.
Decals are an easy way to apply detailed artwork or temporary graphics. They are suited for wedding signs or short-term use because they can be removed or updated without damaging the glass. Applying decals requires clean glass, steady hands, and patience to avoid bubbles and misalignment.
Adding inlayed materials like mother of pearl, colored crystals, or mosaic tiles creates unique texture and richness. These decorative elements should be planned carefully as they add weight and cost but deliver distinct styles that improve receptions, lobbies, or high-end business spaces.
4. How Long Custom Glass Signs Take and Key Cost Factors
Custom glass signs generally require a lead time of 6 to 8 weeks for most design and production processes. This longer turnaround is due to the meticulous craftsmanship involved, including cutting, etching, and assembling materials like glass and hardware which typically are ordered immediately after your order is placed. Pre-made stained glass options may be available for quicker delivery, often ready to ship much sooner if your timeline is tight.
Several factors affect the cost of a custom glass sign. The material choice is primary; thicker glass and double-pane constructions raise prices. Size also matters, with dimensions ranging typically from 2 feet to 8 feet wide, larger signs use more material and handling time. Design complexity adds cost through additional labor or special treatments like custom chiseled edges or direct-to-glass printing. Hardware, mounting accessories, and any custom logos similarly increase expenses.
Rush orders are possible but often require direct communication with the manufacturer due to the complexity. Additional fees apply, generally increasing the base price by 20% to 50%. Such fees reflect the need to prioritize your job and expedite shipping of materials, sacrificing standard scheduling for speed. Call to discuss rush needs as they may still not guarantee delivery earlier than 3 to 4 weeks in many cases. The table below compares typical lead times against pricing factors to help you estimate your order:
| Sign Type | Typical Lead Time | Key Cost Factors | Rush Order Availability & Cost |
|---|---|---|---|
| Pre-made Stained Glass Signs | Ready to ship (days) | Standard size, fixed design | Usually not necessary |
| Custom Etched Glass Signs | 6 to 8 weeks | Size, etching detail, glass thickness, logo inclusion | Possible; +20% to +50% cost |
| Double-Pane Custom Signs | 6 to 8 weeks | Material complexity, insulation features, size | Requires consultation; extra fees apply |
| Frosted Glass with Chiseled Edge | 6 to 8 weeks | Custom edge work, frosting technique, size | Possible; call to arrange |
To ensure timely delivery and optimal pricing, decide your size and design details before ordering. Provide all artwork or logo elements in final formats early. Accepting standard lead times avoids rush fees, saving you money if your schedule allows. For critical deadlines, contact your supplier promptly to discuss available expedited options and confirm extra charges upfront.
5. Best Installation Methods and Mounting Options
Glass signs require careful mounting to ensure stability and safety, using the right hardware suited for the sign’s weight and location. Common installation options include decorative stand-offs, wall anchors, and LED channels, each creating different visual effects and practical outcomes. Knowing whether you can handle the installation yourself or need a professional depends on the complexity, sign size, mounting surface, and presence of electrical components.
Types of Mounting Hardware for Glass Signs
Stand-offs are a popular choice for glass signs, offering a sleek, floating appearance by holding the sign a few inches off the mounting surface. These are metal or plastic cylinders that screw into the wall with anchors, suitable for medium to heavy glass panels. Wallboard anchors can secure lighter glass signs directly onto drywall, but they require the right size to avoid damage. For signs with LED edge lighting, mounting channels equipped with LED strips both hold the glass and showcase the illumination.
Choosing the right hardware depends on the thickness and weight of your glass sign. For example, glass thickness from 1/4-inch to 3/8-inch generally pairs well with standard stand-offs sized around 1.5 to 2 inches in length, which ensures stability without overpowering the design. LED channel mounts add complexity but are manageable for those with moderate DIY skills.
Installation Preparation Checklist
Preparing before installation reduces mistakes and potential breakage. Securing the proper tools and hardware is critical, alongside planning the exact mounting location. Following these steps ensures a professional-looking and secure mount.
- Measure the mounting surface to confirm space and determine exact placement height for optimum visibility.
- Confirm the weight and thickness of your glass sign to select compatible stand-offs or anchors.
- Gather tools like a drill with appropriate bits, a level, a tape measure, and wall anchors or toggle bolts suited to your wall type.
- Mark mounting points on the wall using a pencil, double-checking horizontal and vertical alignment with a level.
- Drill pilot holes carefully to avoid cracking tiles or drywall, especially with heavier signs.
- Insert anchors or toggles securely into wall holes to provide solid support for screws.
- Attach stand-offs or mounting hardware to the wall, then secure the glass sign onto the hardware following manufacturer instructions.
- Verify that the sign is stable and level once mounted, adjusting as needed to ensure safety and appearance.
Pre-drilling holes that are too large or uneven can lead to a weak mount and damage to the glass or wall. Use a drill bit size recommended for your anchors.
When to Hire a Professional Installer
Professional installation is advised if you are mounting large, heavy glass signs, especially thicker than 1/2 inch, or integrating electrical components such as LED lighting. Hiring an installer reduces risk of injury or damage and ensures compliance with safety standards. Also, signs mounted on exterior walls exposed to weather require more durable hardware and waterproofing techniques that professionals can better handle.
DIY installation suits smaller to medium-size glass signs, with no wiring and mounting on stable interior walls like drywall with studs. If your project involves custom mounts or unusual surfaces, professional assistance can save time and avoid costly mistakes. Installation services generally range from $150 to $500 depending on sign size, hardware complexity, and location.
6. DIY Glass Wedding Sign Ideas and Techniques
Creating your own wedding glass sign is a creative and rewarding project that adds a personal touch to your special day. Whether you choose painting, stenciling, or applying decals, you can craft elegant and memorable decorations with the right materials and techniques. The key lies in careful preparation, layering, and sealing to ensure a professional look and lasting beauty.
Choosing the Right Glass and Tools
Select a clear, flat piece of glass that fits your desired sign size, usually 12 by 18 inches or larger, depending on visibility needs. Tempered glass is safer but costs more; regular glass works well if handled carefully. You’ll also need acrylic paint made for glass, paintbrushes of different sizes, painter’s tape, a squeegee or felt applicator for decals, and vinyl decals or stencils tailored to your wedding design.
Cleaning materials are essential to avoid bubbles or paint peeling: use isopropyl alcohol or glass cleaner to remove oils and dirt. For stencils, consider reusable adhesive vinyl that sticks lightly to glass without leaving residue. Acrylic paint is preferred because it dries quickly and withstands heat and moisture better than other paints.
Painting and Decal Application Steps
Follow these steps to ensure smooth and sharp results in your painted or decal glass sign. Patience and precision at each stage prevent common issues like smudging or uneven edges.
- Clean the glass surface thoroughly with isopropyl alcohol and allow it to dry completely.
- Secure your stencil or decal on the glass using painter’s tape or light adhesive to prevent shifting.
- Apply acrylic paint carefully over the stencil using a sponge brush or stippling brush if painting, using thin layers to avoid dripping.
- Allow the first paint layer to dry completely, this usually takes 20 to 30 minutes depending on paint type and room temperature.
- Add a second thin paint layer if needed for opacity and uniform color.
- For decals, smooth them onto the glass with a squeegee or felt applicator, starting from the center and working outwards to prevent bubbles.
- Gently remove the stencil or decal backing after the paint or adhesive has dried, typically in 1 to 2 hours.
Taking extra time to layer paint thinly avoids cracking or peeling later. Avoid touching wet paint or applying thick coats, which can cause uneven drying or smudges.
Sealing and Finishing Your DIY Sign
Sealing protects your design from scratches, moisture, and fading. Use a clear acrylic sealer spray or brush-on sealer suitable for glass and acrylic paint. Spray sealers allow even coatings but work in a well-ventilated space following the product instructions carefully.
Apply two to three light coats of sealer, allowing 15 to 30 minutes drying time between coats. Avoid heavy coats that can drip or cloud the glass. After sealing, cure the sign by letting it rest 24 hours in a dust-free environment for full durability.
Final touches like attaching small suction cups or easel backings can turn your glass into a standing welcome sign. Cleaning your finished sign with a soft cloth and mild glass cleaner keeps it looking crisp without damaging the artwork.
7. Advanced Glass Technologies and Lighting Options
Electrochromic glass allows you to control the transparency or shading of your glass sign electronically. It works by applying a low-voltage electrical charge that changes the glass from transparent to opaque or tinted, making it ideal for privacy or dynamic visual effects in high-end retail or office settings. Installation involves wiring the glass panel to a control system, which can vary in cost but typically starts around $50 per square foot, depending on size and supplier. This technology is best suited for interior signs where you want to switch visibility on demand without replacing the glass.
Direct-to-glass printing lets you print full-color images or logos directly onto the glass surface with UV-resistant inks. This method produces vibrant, long-lasting designs often used in custom signage for weddings or boutique shops. Applying it requires a flat, clean glass pane, and printing machines typically handle thicknesses up to 1/2 inch. Costs range from $25 to $75 per square foot based on complexity. For best results, pair this technique with a protective clear coat to prevent scratches and fading.
Back-painted glass is created by applying opaque paint or lacquer to the rear surface of clear glass. This technique adds a bold, colorful background that makes etched or printed graphics pop, often used in decorative interior signage. To produce a smooth finish, use spray painting in a dust-free environment and cure the paint fully, which usually takes a few hours. Back-painted glass is durable and moisture-resistant, suitable for indoor environments like restaurants or offices where aesthetics matter alongside functionality.
Integrating LED lighting with glass signs improve visibility and creates eye-catching displays, especially in low-light conditions. Edge-lit LED panels are popular because they highlight etched logos and patterns without overwhelming the design. Installing LED rails along the edges of a glass panel requires precise alignment to ensure even light distribution; poor installation can cause hotspots or uneven brightness. Interior signs benefit from cooler LED colors (around 4000K to 5000K) for clarity, while exterior signs should use brighter, weather-resistant LEDs and diffusers to withstand sunlight and moisture.
- Electrochromic glass suits locations needing adjustable privacy or shading.
- Direct-to-glass printing supports detailed, colorful branding on smooth glass surfaces.
- Back-painted glass provides a durable, vibrant backdrop for etched or printed elements.
- Edge-lit integrated LEDs improve etched designs with soft, uniform illumination.
- Interior lighting often uses neutral or cool LEDs for readability and style.
- Exterior LED setups require waterproof components and brighter outputs.
- Proper sealing and wiring prevent electrical issues in integrated LED glass signs.
Choosing between lighting options depends on the setting of your glass sign and the effect you want. For interior use, softer white LEDs emphasize design details without glare, while outdoor signs demand durable LEDs with weatherproof casings and higher brightness, which can cost an additional 20 to 50 percent more than indoor fixtures. Combining these technologies allows you to create sophisticated, functional signage that stands out under various lighting conditions.
8. Maintaining, Cleaning, and Preserving Glass Signs
Proper care extends the life and maintains the clarity of your glass sign, which directly impacts its effectiveness and aesthetic appeal. Begin by identifying the type of finish on your glass sign, whether it’s etched, frosted, painted, or coated, to tailor the cleaning approach and avoid damage.
Use a soft, lint-free microfiber cloth and a gentle glass cleaner or a mixture of mild dish soap and warm water. Spray the solution on the cloth, never directly on the glass, to prevent moisture from seeping behind the sign or into mounting hardware. Wipe in circular motions to remove dust and fingerprints without scratching.
Avoid harsh chemicals like ammonia, bleach, or abrasive powders, which can etch or dull delicate finishes. Also steer clear of rough sponges or scrub brushes that might cause micro-abrasions or remove printed or painted designs.
- Test cleaning products on a small, inconspicuous area first.
- For frosted or etched glass, use only mild soap and water to prevent surface damage.
- Dry the surface immediately with a clean microfiber cloth to avoid streaks.
- Use protective gloves when handling glass signs to avoid fingerprints.
- For outdoor signs, regularly inspect for dirt buildup and clean monthly to prevent wear from environmental exposure.
- Keep the cleaning solution under room temperature; avoid hot water to prevent stress cracks.
If you notice minor scratches, repair may be possible depending on the glass type. Use a non-abrasive, cerium oxide-based polish designed for glass; apply with a felt pad, then polish in small, circular motions. This process can remove or reduce light scratches but may require professional attention for deeper damage.
To preserve the sign’s appearance, position it away from direct sunlight when possible to minimize UV fading of any painted or printed elements. Use UV-protective coatings or films where applicable. Regularly check mounting fixtures for secure installation to prevent movement that could cause scratches or chipping.
Caution: Never use razor blades or sharp tools to remove stubborn marks as they will permanently scratch the glass surface.
Step-by-Step Action Plan for Creating Your Custom Glass Sign
Follow these steps to design, order, and install a glass sign that fits your style and business needs efficiently.
- Before you start: Determine the purpose and location for your glass sign to select the right type and size. Confirm the space dimensions and lighting conditions to ensure visibility.
- Day 1: Choose your glass type and thickness based on durability and safety needs, such as tempered glass for outdoor signs. Check local codes if applicable.
- Week 1: Decide on design options including fonts, colors, and additional effects like frosted or etched areas. Request digital proofs to verify the look before production.
- Week 2: Order your sign from a reputable supplier, including mounting hardware and installation instructions. Confirm lead time and shipping details.
- Upon delivery: Inspect the sign and all parts for damage or defects immediately. Contact the supplier if issues arise.
- Within 2 days after delivery: Prepare the installation site by cleaning surfaces and locating studs or anchors. Use the recommended mounting method for your wall type.
- Installation day: Mount the sign securely following the manufacturer’s guidelines. Test stability and visibility under different lighting.
- After 1 week: Clean the sign using a soft, non-abrasive cloth and mild glass cleaner. Check for any needed adjustments or touch-ups.
Frequently Asked Questions
What Makes a Custom Etched Glass Sign Unique to My Business?
Custom etched glass signs are tailored to your space, logo, and brand, offering a sleek, contemporary look that turns your sign into a piece of modern art. This personalisation helps your business stand out with a distinctive visual identity.
Can I Add Color to a Frosted Glass Sign for My Wedding or Business?
Yes, color can be added through hand-painting or stained glass techniques to make a frosted glass sign stand out. These options allow you to match your sign with the event theme or business branding creatively.
Are Standoff Posts Suitable for Installing Glass Signs on All Wall Types?
Standoff posts come in various lengths and finishes to suit different wall types and decor. Choosing the right post ensures your glass sign is both secure and visually complementary to its surroundings.
What Design Techniques Make Glass Wedding Signs More Creative?
Using stencils, paint pens, or chalkboard-style painting offers creative ways to decorate glass wedding signs. These methods allow you to personalise messages and match the style of your event easily.
How Long Does It Usually Take to Get a Custom Glass Sign Made?
Custom glass signs typically require several weeks for design, production, and finishing depending on the complexity. Planning ahead ensures the sign is ready before your event or installation date.
Can I Install a Glass Sign with LED Lighting Myself?
Yes, but follow detailed installation instructions carefully to ensure safety and proper function. Wiring and mounting LED-lit glass panels require attention to electrical codes and hardware compatibility.
Wrapping Up
Glass signs combine beauty and function, offering a refined display that suits many business and event settings. Starting with a clear plan ensures your custom sign meets your expectations in style and durability. Begin by sketching your design ideas or consulting a professional designer to move forward confidently.