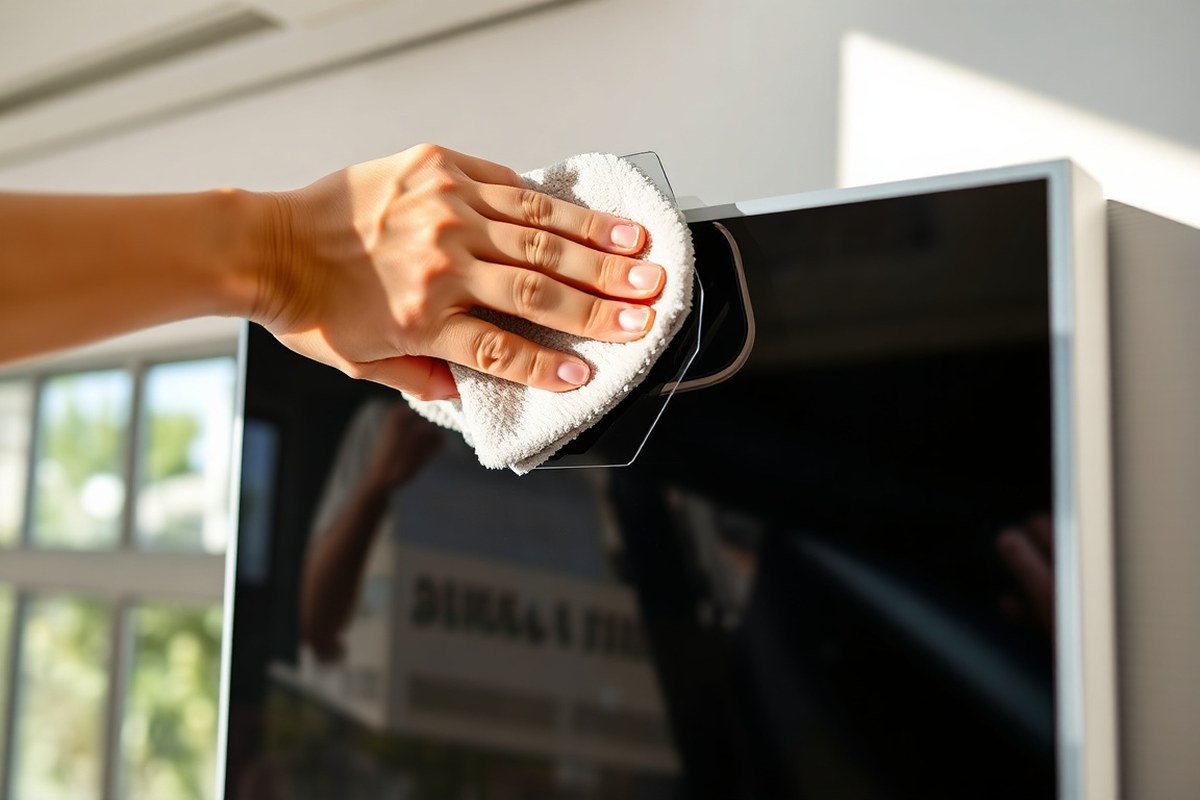
How to Clean a Lightbox Sign Safely with 8 Essential Steps
Knowing how to clean a lightbox sign safely means turning off and unplugging the sign before you start. Use gentle, minimal moisture and a soft cloth or brush to prevent damage. For tougher grime, a diluted 70% isopropyl alcohol solution works well without harming acrylic surfaces.
Key Takeaways
- Always disconnect power before cleaning your lightbox sign to avoid electrical hazards and damage.
- Use separate microfiber cloths, one dry to dust off, one slightly damp for light cleaning.
- Apply a diluted mild soap solution sparingly for stubborn surface grime, avoiding oversaturation.
- Use a very soft brush to clean narrow gaps without scratching acrylic or damaging tubing.
- For greasy spots, use a 70% isopropyl alcohol and 30% water mix to safely cut through residue.
- Wipe the sign dry with a clean cloth after cleaning to remove moisture and prevent streaks.
1. How to Safely Clean a Lightbox Sign Step-by-Step

Start cleaning your lightbox sign by ensuring it is completely powered down to avoid electrical hazards. Switch off the sign, unplug it from the outlet, and wait a few minutes for the power supply to cool. Removing loose dust gently with a soft, clean microfiber cloth or a very soft brush helps prevent scratches and damage to the acrylic or LED components.
Cleaning while the sign remains mounted is acceptable when it is stable and safe to reach. However, if the sign feels unstable or the back requires attention, remove or securely support it before proceeding. Using minimal moisture and mild cleaning agents is essential to protect the sign’s surface and internal electronics.
- Power down and unplug the sign. Turn off the switch and disconnect the plug from the electrical outlet. Wait 5 to 10 minutes for any electrical components to cool down and eliminate the risk of shock during cleaning.
- Remove loose dust with a dry microfiber cloth or soft brush. Use gentle, sweeping motions to dislodge dust from the surface and narrow gaps. A soft brush helps access detailed parts without scratching acrylic or disturbing LED tubing.
- Dampen a microfiber cloth with clean water or a very diluted mild neutral soap solution. Wring out excess moisture so the cloth is barely damp to avoid water seeping into electrical parts. Soap should be used sparingly only if grime persists after dusting.
- Wipe the sign surface gently with the damp cloth. Clean in smooth strokes to lift fingerprints, smudges, and dirt without pressing hard. Avoid spraying liquids directly on the sign to prevent damage.
- Rinse the cloth with clean water and wipe the sign again. This removes any soap residue and ensures no chemical traces remain that could harm the acrylic or LEDs.
- Use a dry microfiber cloth to thoroughly dry the sign. Remove all moisture from the surface to prevent streaks and reduce the risk of electrical faults when plugging the sign back in.
- Inspect the sign for any remaining spots or signs of damage. Ensure it is fully dry and stable before reconnecting the power and switching it on.
Handling the sign carefully during cleaning helps maintain its clarity and extends its lifespan. Avoid harsh chemicals, high moisture, and rough scrubbing to prevent permanent damage. Cleaning the sign with light pressure and proper drying safeguards both its appearance and electrical safety.
2. Tools and Cleaning Materials You’ll Need

Gathering the right tools and cleaning materials makes the job of maintaining your lightbox sign easier and safer. Using soft microfiber cloths, mild solutions, and gentle brushes will protect the acrylic, LED lights, and delicate parts from damage, while avoiding harsh chemicals keeps your sign clear and functional.
Microfiber Cloths vs Other Cloths
Microfiber cloths offer the best balance of softness and effectiveness for cleaning lightbox signs. They trap dirt and dust without scratching acrylic or glass surfaces.
Use a clean, dry microfiber cloth to dust the neon tubes and acrylic panel before wet cleaning. For smudges or fingerprints, lightly dampen the cloth with clean water or a mild cleaning solution. Avoid rough fabrics like cotton rags or paper towels that can leave scratches or lint.
Safe Cleaning Solutions and DIY Recipes
A mild soap solution with distilled water is usually enough and safe for lightbox signs. Mixing a few drops of gentle dish soap in a quart of distilled water creates a cleaning solution that removes smudges without harsh chemicals.
Distilled water alone can also clean neon tubes effectively without mineral deposits. Harsh chemicals such as ammonia, alcohol, or solvents risk clouding acrylic, discoloring silicone, and weakening adhesives. Stick to gentle soap or plain distilled water for most cleaning jobs.
Brush Types and Uses
A soft toothbrush or any non-abrasive brush helps clean textured or intricate parts of your sign casing. These tools get into crevices and cutouts where a cloth can’t reach.
Use the brush gently to avoid scratching or damaging finishes. Bristles should be flexible and soft to protect delicate parts. Brush small sections individually to avoid missing spots on complex designs.
Products to Avoid on Acrylic and LEDs
Acrylic panels scratch easily, so avoid abrasive pads, harsh chemicals, or rough cloths. Never use ammonia-based cleaners, strong solvents, or abrasive powders, which can cloud and damage acrylic surfaces.
LED and printed surfaces also suffer from harsh chemicals that degrade adhesives or discolor finishes. Protect your investment by sticking strictly to gentle solutions and soft tools to preserve clarity and prolong sign life. Use this checklist to prepare cleaning supplies that protect your lightbox sign while making the job efficient:
| Tool or Material | Purpose | Example |
|---|---|---|
| Microfiber Cloth | Dusting, wiping without scratching, drying | Soft, lint-free cloth |
| Soft Toothbrush | Cleaning intricate, textured parts | Non-abrasive bristles |
| Distilled Water | Dilution, mineral-free rinsing | Mild detergent mixture or plain |
| Mild Dish Soap | Gentle cleaning agent for dirt and grease | Drop or two per quart of distilled water |
| Lint-Free Paper Towels | Final drying and polishing | Careful polishing for streak-free shine |
Following this setup helps ensure your cleaning process keeps lightbox signs clear, undamaged, and attractive.
Always unplug your sign and let it cool before cleaning to avoid electrical hazards or damage to sensitive components.
3. How Often Should You Clean Your Lightbox Sign?
Routine dusting of your lightbox sign should be done about once every two weeks to keep dust and dirt from dulling its brightness. This basic cleaning takes less than five minutes and helps maintain the sign’s sharp appearance over time. You can dust the sign while it remains mounted, but it must be unplugged and completely cool to avoid any risk of electric shock or damage.
Deeper cleaning sessions are necessary less frequently, roughly once every three to six months, depending on your sign’s environment and level of exposure to grime. Signs located indoors in clean environments usually fall on the longer end of this range. In contrast, lightbox signs in kitchens, garages, or other dusty or greasy spaces require more frequent deep cleanings, about every two to three months, due to the buildup of grease, smoke residues, or heavy dust.
Each cleaning session is also a good opportunity to perform quick maintenance checks. Look for any cracks or discoloration in the acrylic casing and inspect LED or neon tubes for dimming or flickering. Check the power cord and plug for any wear and make sure all mounting hardware remains secure. These checks help you spot issues that may affect the sign’s performance and longevity.
Using distilled water for cleaning avoids mineral deposits on the tubes and casing, which can leave streaks or dull the sign’s appearance. Warm water mixed with a few drops of dish soap works well for removing surface dirt during both routine and deep cleanings. Always clean gently using a soft cloth or sponge with minimal moisture to avoid damage.
| Cleaning Action | Frequency | Notes |
|---|---|---|
| Routine dusting | Every 2 weeks | Takes less than 5 minutes; sign unplugged and cool |
| Deep cleaning (warm water & mild soap) | Every 3, 6 months (clean environment) | Removes accumulated dirt and grime; check for damage |
| Deep cleaning (grease-prone areas) | Every 2, 3 months (kitchens, garages) | More frequent due to grease and heavy dust buildup |
| Maintenance checks | With every cleaning | Inspect cords, mounting, tubes, and casing for issues |
Following this schedule keeps your lightbox sign vibrant and functional while preventing over-cleaning, which can wear down components prematurely. Signs in less demanding environments can stretch the time between deep cleans, saving you effort and reducing the risk of damage from excessive handling. Signs in harsher environments need the extra attention to maintain brightness and avoid buildup that can interfere with illumination.
4. Cleaning Specific Lightbox Components Effectively
Each part of your lightbox sign needs special care to avoid damage. Acrylic panels require gentle cleaning to stay clear without scratching. LED tubes must be wiped carefully when cool to maintain brightness. Silicone tubing benefits from a soft, dry touch to avoid stretching or tears. Meanwhile, cables and mounting hardware need dusting without letting moisture reach electrical connectors.
Cleaning the Acrylic Face Panel
The acrylic face is the main display surface and scratches easily. Use only soft microfiber cloths to avoid marks. Avoid harsh chemicals; mild soap and water or dedicated acrylic cleaners work best. Cleaning keeps the panel clear for maximum light transmission, maintaining vibrant sign visibility.
Take care to remove dust and fingerprints gently. Excessive pressure or rough wipes create micro-abrasions that scatter light and dull the finish. Avoid ammonia, alcohol, and abrasive cleaners as they can cause clouding or cracking.
- Mix a few drops of mild dish soap with warm water (under 110°F).
- Dampen a soft microfiber cloth with the solution and wring it well.
- Gently wipe the acrylic surface in circular motions, applying light pressure.
- Rinse the cloth with clean water, then wipe again to remove soap residue.
- Dry the panel gently with a dry microfiber cloth to prevent streaks.
- Inspect the panel under good light and repeat if necessary.
Wiping LED Tubes Safely
LED tubes can get dusty but are fragile if handled improperly. Before cleaning, always unplug the sign and let the tubes cool for at least 10 minutes. Use soft tools to dust, avoiding moisture near electrical parts.
A soft bristle nylon brush or a dry sock over your hand works well to remove surface dust and dirt. Cleaning helps maintain brightness and prevents buildup that reduces light output.
- Turn off and unplug the sign, waiting 10, 15 minutes for the tubes to cool.
- Use a soft bristle brush or dry cotton sock to gently brush the tubes from one end to the other.
- Spot-clean with a lightly dampened microfiber cloth if needed, avoiding liquid accumulation.
- Allow the tubes to air dry completely before plugging the sign back in.
Treating Silicone Tubing and Flexible Parts
Silicone tubing diffuses light and adds durability but can attract dust and oils. Avoid pulling or stretching it, as silicone is flexible but tears can occur. Clean silicone gently with a dry or barely damp microfiber cloth to keep it clean without weakening the material.
Do not use solvents or alcohol-based cleaners which may degrade silicone. Regular light cleaning preserves the tubing’s translucent quality and maintains even light diffusion.
Removing Dust from Cables and Connectors
Electrical cables, power supplies, and connectors should stay dry to avoid shorts or corrosion. Do not open or attempt to repair these components yourself. Dust removal needs to be done with care, using dry cloths or compressed air without inserting moisture.
Keeping cables tidy also prevents stress on connections and reduces wear. Store power supplies and mounting hardware in a labeled bag or box when removed for cleaning to stay organized and avoid loss.
- Unplug the power supply and disconnect cables carefully by supporting the acrylic panel, not forcing cables.
- Use a dry microfiber cloth to wipe dust from cables and connectors gently.
- Optionally, blow dust from connectors with compressed air without touching the internal pins.
- Check for signs of wear or damage and replace any frayed cables promptly.
- Keep power supply, dimmer, and remote controls together in a labeled container.
5. Dealing with Stubborn Grime and Grease Safely
Use a diluted isopropyl alcohol solution combined with mild soap to break down grease and fingerprints on your lightbox sign without harming the acrylic or LED components. Apply these solutions gently with soft microfiber cloths, avoiding heavy scrubbing that could cause scratches or damage to the sign’s surface. Proper drying techniques help prevent streaks and drying marks, maintaining a clear, professional appearance.
Preparing Mild Cleaning Solutions
For tackling grease and oily residues safely, prepare two main types of cleaning solutions. First, mix 70% isopropyl alcohol with 30% water to create an effective alcohol solution that cuts through stubborn dirt without harming acrylic panels. Second, combine warm water with a very small amount of mild dish soap to form a gentle soapy solution for lighter grime or fingerprints.
Use distilled water for the final rinse if available, as this helps avoid residue or streaks left by minerals in tap water. Always prepare small batches to ensure freshness and effectiveness.
Application Techniques for Grease Removal
Use a clean microfiber cloth dampened (not soaked) with the prepared solutions to gently wipe the affected areas. For grease:
- Dip a microfiber cloth in the isopropyl alcohol solution and wring out excess liquid so the cloth is just damp.
- Apply the cloth to the greasy spots using light, circular motions to break down oil and fingers prints.
- For stubborn smudges, fold the cloth and wrap it around one finger to reach tight curves without stretching the material.
- Use a soft toothbrush dipped in the soapy water for corners or crevices, scrubbing gently without pressure.
- Rinse the area with a cloth dampened with distilled water to remove any soap or alcohol residue.
Limit the use of alcohol solution to greasy or oily areas since excessive use can degrade protective coatings over time.
Avoiding Damage and Scratches
Heavy scrubbing with abrasive tools or rough cloths can cause micro scratches and reduce the clarity of your lightbox sign. Use only soft microfiber cloths and non-abrasive brushes for cleaning tasks. Avoid sponges or brushes with stiff bristles that may abrade the acrylic surface.
Keep cleaning motions gentle and consistent. Pulling or scrubbing upward on curved or delicate parts can bend or stress components, so always wipe along the surface’s natural contours. Avoid harsh chemical cleaners such as ammonia, acetone, or bleach that can damage the sign structure and fade colors.
Test any cleaning solution on a small, hidden section of the sign first to check for adverse reactions before full application.
Final Wipe and Drying
After cleaning stubborn grime, thoroughly remove all soap and alcohol residues to prevent streaks or smudges. Use a clean microfiber cloth dampened with distilled water for a final wipe. Then take a dry microfiber cloth to gently buff the surface until completely dry.
Allow the sign to air dry fully in a shaded, dust-free area before powering it on again to avoid moisture-related damage. Avoid drying under direct sunlight or with heat sources, which may warp acrylic or cause streaking.
6. Common Cleaning Mistakes and How to Fix Them
Avoid using ammonia-based cleaners on a lightbox sign, especially if it has acrylic parts, since ammonia can cause clouding and permanent damage. Instead, choose mild, non-ammonia cleaners or a solution of distilled water with a small amount of dish soap. Always apply the cleaner to a soft cloth rather than spraying directly onto the sign. Spraying liquids directly increases the risk of moisture seeping inside, which can damage internal components and cause electrical issues.
Using paper towels or abrasive cloths can scratch the acrylic or LED surfaces. Opt for microfiber cloths or other soft, lint-free towels for cleaning. These materials reduce the chance of leaving scratches or lint behind, leading to a cleaner finish without streaks or smudges. Notice streaking after cleaning? Lightly buff the surface with a dry microfiber cloth in a circular motion.
Streaks or smudges often result from residue left by harsh cleaners, too much moisture, or drying the sign in direct sunlight. After cleaning, rinse the sign with distilled water and wipe it down immediately with a dry microfiber cloth. Avoid cleaning in extreme heat or sunlight, as faster drying can cause water spots or streaks.
When water or cleaning solution leaks inside the sign, take quick action. Turn off and unplug the sign. Use a dry cloth to soak up moisture around seams and access points. Allow the sign to air dry completely before powering it back on, ideally for 24 to 48 hours in a dry, well-ventilated area. Check for any lingering moisture to avoid corrosion or electrical shorts. Unsure about what to do or spot damage? It’s safer to consult a professional technician.
- Don’t spray cleaners directly onto the sign; use a damp cloth instead
- Avoid ammonia-based or abrasive cleaners that cloud or scratch acrylic
- Use only soft microfiber cloths to prevent surface damage
- Rinse with distilled water to remove residual cleaner and reduce mineral spots
- Dry immediately with a microfiber cloth to prevent streaks
- Keep the sign protected from direct sunlight during and immediately after cleaning
- Water inside the sign means you should power off, dry the area, and let it air dry for 1-2 days before using again.
Cleaning a lightbox sign properly requires careful handling to avoid these common mistakes. Using distilled water reduces mineral buildup and corrosion risk, which is especially important for neon components. Avoiding moisture exposure to internal parts lowers the chance of electrical problems. Following these steps can keep your sign bright and functioning longer, minimizing costly repairs or replacements.
7. Maintenance Tips for Long-Term Lightbox Sign Care
Maintaining your lightbox sign involves more than just cleaning the surface. Regular checks on mounting hardware, cables, and power supplies prevent damage and electrical hazards. Start by examining all mounting points for looseness or corrosion. Tighten screws or brackets that have become unstable, ensuring the sign remains securely attached to the wall or frame before cleaning or handling it. Look closely for cracks in acrylic panels, which might compromise protection from weather and moisture.
Inspect cable routes carefully to avoid pinching or pulling. A pinched cable can break internal wires, leading to flickering lights or complete failure. Make sure cables are not trapped behind furniture or pressed tightly against mounting points. Keep cables organized and use cable clips or ties to prevent movement. Check the condition of connectors, dimmers, and power supplies. These components should stay dry and free from dust or corrosion. Never let water run onto connectors or power supplies during cleaning.
Moisture build-up inside or around the lightbox can cause electrical shorts and damage the sign’s components over time. After cleaning with any liquid, allow the entire sign and the surrounding area to dry completely before reconnecting power. This can take from 30 minutes to several hours, depending on temperature and humidity. Aim for a dry surface temperature above 60°F to minimize moisture risks.
Professional servicing is advisable at least once a year or if you notice persistent flickering, dimming, or unusual sounds from the sign. Professionals can perform a thorough electrical inspection, replace worn cables, and reseal acrylic panels to prevent moisture intrusion. Calling a professional sooner is recommended if you detect exposed wiring, burning smells, or inconsistent illumination.
- Check all mounting hardware for tightness and signs of rust or wear.
- Inspect acrylic panels for scratches, cracks, or warping.
- Ensure all cables run without bends or pinches; secure loose cables.
- Keep power connections dry and clean of dust or corrosion.
- Allow the sign to dry fully after any liquid contact before powering on.
- Schedule a professional electrical check every 12 months or sooner if issues arise.
Develop a maintenance habit by jotting down the date of each inspection and noting any issues or repairs. This helps track your sign’s condition over time and avoids unexpected downtime. A few minutes spent on regular hardware and electrical checks can extend the life of your lightbox sign and maintain its visual appeal without more costly repairs later.
8. When to Call a Professional for Your Lightbox Sign
Watching for trouble after cleaning your lightbox sign saves you from bigger issues down the line. Flickering lights, dim sections, or parts of your sign that don’t turn on at all often point to electrical problems beyond simple cleaning. These issues may come from damaged wiring, faulty LED modules, or moisture getting inside during cleaning. Attempting repairs without proper skills can create safety hazards or void warranties, so it’s best to call a professional.
Signs like cracked acrylic panels, loose mounting brackets, or damaged seals around the edges usually require expert attention. Professionals can replace or repair components safely while ensuring your sign remains weatherproof. Using harsh cleaners or abrasive tools can cause these damages, which worsen without correct fixes. Electrical faults also often need specialized tools and knowledge for safe diagnosis and repair.
Deciding when to call a professional depends on what you see after cleaning. Your sign flickers or lights up only in parts within 24 hours of cleaning, so avoid trying more DIY fixes. Turn off the power and contact a licensed sign technician. Similarly, any visible damage to wiring, connectors, or light fixtures means professional inspection. Noticing corrosion or water inside the lightbox calls for a pro to test and reseal it to stop shorts or rust.
Dealing with warranty concerns is important before hiring a repair professional. Check the warranty terms from your sign manufacturer or installer to understand what maintenance and repairs are covered. Some warranties become void if non-approved repairs or harsh cleaning chemicals are used. Calling the company that installed your sign or the authorized service provider for inspections can protect your coverage and avoid unnecessary expenses.
Finding qualified maintenance experts usually starts with your sign company’s recommendation or local electrical contractors experienced with LED signage. Verify that the technician holds licenses and insurance relevant to electrical and sign work. Their knowledge of materials like acrylic, LED fixtures, and outdoor sealing will lead to safer, longer-lasting repairs. Expect professional repair costs to range from $100 to $500 or more, depending on damage severity. This upfront investment prevents costly replacements and ensures your sign stays visibly effective and safe.
Never attempt to open or repair electrical parts inside a lightbox sign yourself; always disconnect power first and rely on licensed professionals to avoid shock or damage.
Step-by-Step Action Plan for Cleaning and Maintaining Your Lightbox Sign
Follow these steps to keep your lightbox sign clean and functioning well, preserving its appearance for longer.
- Before you start: Gather your cleaning tools and materials, including a soft microfiber cloth, mild detergent, and gentle cleaners safe for acrylic and LED components.
- Day 1: Turn off the sign and unplug it to ensure safety while cleaning; this also prevents damage to the lights and electrical parts.
- Day 1: Wipe the exterior surfaces gently with a damp microfiber cloth and mild detergent; a clean surface reflects light better, so check for streak-free results.
- Week 1: Inspect and spot-clean any stubborn grime using a gentle degreaser, testing a small area first to avoid damage; effective cleaning will remove buildup without scratching.
- Month 1: Review your lightbox sign’s condition, tighten any loose screws or fixtures, and check for moisture inside the box to prevent damage.
- Every 3 months: Schedule a thorough cleaning session and component check, focusing on LED brightness and sign alignment.
- Annually: Consider having a professional inspection if you notice persistent electrical or structural issues beyond your cleaning scope.
Frequently Asked Questions
Can I Use Water to Clean My Lightbox Sign?
Yes, use very little moisture with a damp cloth to avoid damage. Always disconnect the sign from power before cleaning to stay safe.
Should I Clean My Lightbox Sign While It’s Plugged In?
No, never clean a sign that is powered on or plugged in to prevent electrical hazards. Always switch off and unplug before cleaning.
Can I Use Soap or Detergents on My Lightbox Sign?
Mild soap mixed with water is safe for cleaning, but avoid harsh chemicals. Rinse the cloth well to remove soap residue before wiping.
How Do I Clean the Intricate Parts of My Lightbox Sign?
Use a soft toothbrush or non-abrasive brush to gently clean textured or detailed areas. This helps remove dirt in hard-to-reach spots without scratching.
Is It Okay to Use Paper Towels for Cleaning Lightbox Signs?
It’s better to use a microfiber cloth as paper towels can scratch acrylic or delicate surfaces, leaving marks on your sign.
How Long Does It Typically Take to Clean a Lightbox Sign?
Cleaning usually takes less than five minutes if done regularly, helping maintain the sign’s sharp appearance for years.
Final Thoughts
Keeping your lightbox sign clean and well-maintained directly supports its visibility and lifespan. Taking simple, regular steps helps prevent costly repairs and preserves your sign’s impact. Start today by safely turning off your sign, then gently cleaning its surfaces to see immediate improvement in appearance.

