What Is Permanent Vinyl: A Complete Guide for Lasting Craft Projects
What is permanent vinyl? It’s a type of adhesive film designed to stick firmly to surfaces and last for years indoors or outdoors.
The secret is its strong, weather-resistant adhesive that bonds tightly to materials like glass, plastic, and metal. Permanent vinyl usually sets fully within 24 to 48 hours, so patience pays off for a lasting hold.
This vinyl is great for crafts needing durable designs that don’t peel off easily. Be sure to clean your surface and apply it in a moderate temperature range, roughly 50°F to 85°F, to get the best results. Using transfer tape correctly also helps the adhesive stick strongly to your project.
Key Takeaways
- Permanent vinyl bonds tightly, making it ideal for projects that need to last outdoors or on frequently handled items.
- Clean surfaces thoroughly before application to ensure the vinyl sticks properly and lasts longer.
- Apply permanent vinyl in temperatures between 50°F and 85°F for optimal adhesion and durability.
- Let the transfer tape stay on the vinyl for 10 to 15 minutes after application to give the adhesive time to set properly.
- Permanent vinyl typically takes 24, 48 hours to fully adhere and reach peak durability.
- Choose permanent vinyl over removable vinyl for projects requiring up to 6 to 8 years of outdoor life.
What Is Permanent Vinyl and How Does It Work?
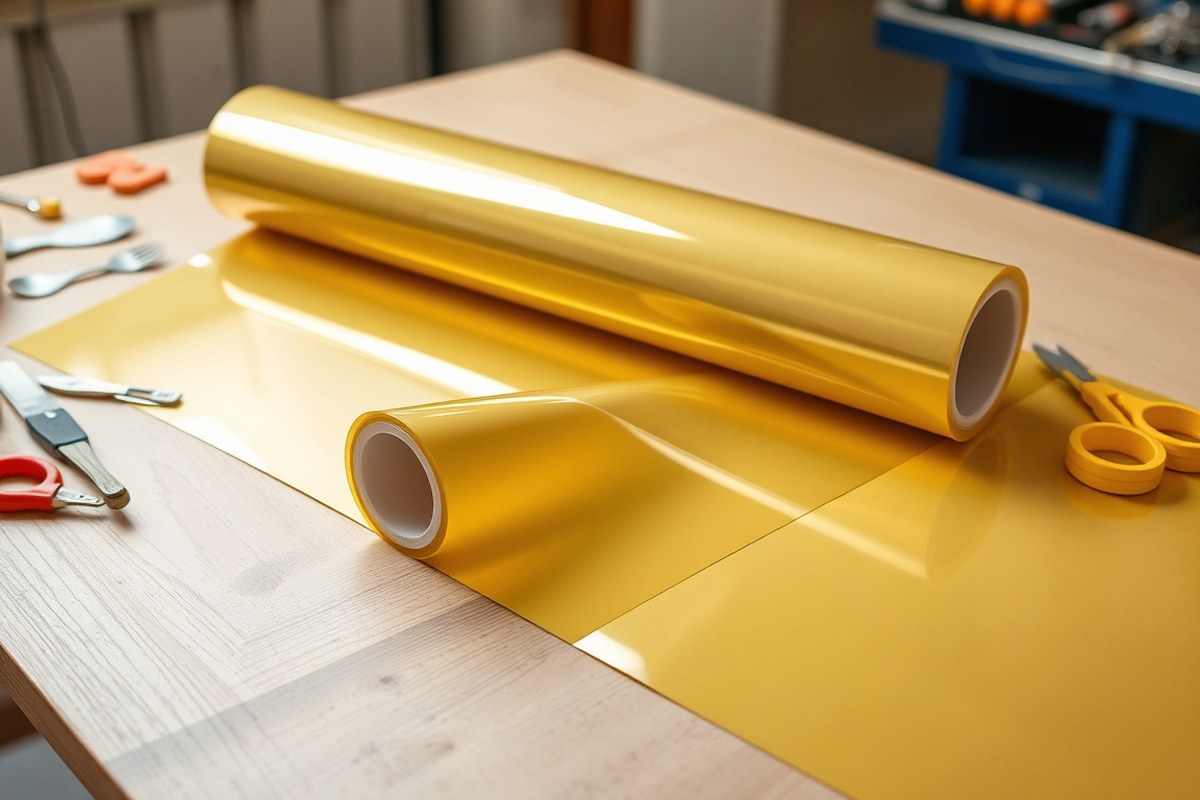
Permanent vinyl is a type of adhesive vinyl known for its strong, pressure-sensitive backing. It sticks firmly to smooth, clean, non-porous surfaces like glass, metal, plastic, and sealed wood without needing heat. This vinyl is designed to stay put for years, making it ideal for outdoor and frequently handled projects.
The vinyl’s composition features a thin, flexible plastic film combined with a high-tack adhesive layer. This adhesive is specially formulated to bond tightly to smooth surfaces, preventing lifting or bubbling over time. It works by creating a strong molecular bond when pressure is applied during application, which is why it’s called “permanent.”
After applying permanent vinyl, the adhesive continues to strengthen for 24 to 48 hours, fully adhering to the surface. Its durability comes from resistance to UV rays, water, and temperature changes, ensuring designs don’t peel or fade quickly outdoors. Surface cleanliness matters a lot, dirt or oils can block adhesive contact, causing poor bonding or bubbles.
Although permanent vinyl forms a firm bond, it can leave residue or damage surfaces if you try to remove it. Removing it usually requires heat or strong adhesive removers, which can risk the underlying paint or finish. Because of this, it’s best used where you expect the design to last multiple years, not for temporary decorations.
Different permanent vinyl products vary in outdoor lifespan, ranging from about 3 years to as long as 8 years under normal conditions. Premium brands offer UV-resistant and weatherproof vinyl that holds up well in rain and sun. Crafting with these types means your decals and labels will stay vibrant and stuck on windows, mugs, and even vehicle surfaces.
How Long Does Permanent Vinyl Last and What Affects Its Durability?

Permanent vinyl typically lasts 3 to 6 years outside, and up to 5 to 7 years indoors when applied and cared for properly. Its lifespan depends heavily on the material quality, surface preparation, and environmental exposure. Taking simple steps to clean and protect your vinyl projects helps keep them looking fresh longer.
Expected Lifespan Indoors and Outdoors
Outdoor permanent vinyl commonly lasts 3 to 6 years. Brands like Oracal 651 advertise up to 6 years, but color fading and weather can cut that time by about one-third in real use. Indoor vinyl generally holds up longer, 5 to 7 years on sealed wood or smooth surfaces is common with regular care.
Repeated cleaning and handling don’t typically damage permanent vinyl, but extreme sun or moisture can wear it down faster. Projects exposed to harsh weather need better preparation and sealing to reach the top of their lifespan range.
How Environmental Factors Affect Durability
Sunlight causes UV damage that fades vinyl colors and weakens adhesives over time. Vinyl exposed to direct, intense sunlight sees its life shortened by up to a third compared to shaded locations. Moisture and temperature swings also challenge the adhesive’s grip, risking peeling or bubbling.
Pollen, dirt, and pollutants can build up and degrade the surface if not cleaned, especially outdoors. Protecting your project from these conditions can keep vinyl tougher and brighter through the seasons.
Sealing and Surface Preparation Tips
Applying permanent vinyl to clean, dry, and sealed surfaces extends its hold and lifespan. Non-porous surfaces like glass or sealed wood work best because they prevent moisture from reaching the adhesive. You can wipe surfaces with rubbing alcohol to remove oils before applying.
A clear sealant over vinyl outdoor projects adds a layer of protection against UV rays and rain. Use a spray sealant designed for vinyl that won’t cloud or peel off. This extra step can push the vinyl’s outdoor life closer to 6 years.
How to Care for Your Vinyl Projects
Cleaning vinyl regularly with a soft cloth and mild soap prevents dirt buildup that can dull or damage the material. Avoid harsh chemicals, scrubbing pads, or abrasive cleaners which can scratch or wear down the vinyl surface.
Keeping vinyl dry and out of extreme weather when possible also preserves its adhesive strength and appearance. Cover items or bring them indoors during storms or winter months if practical.
Always clean surfaces thoroughly before vinyl application to avoid bubbles and peeling later.
Comparing Permanent Vinyl with Removable and Heat Transfer Vinyl
Permanent vinyl sticks stronger than removable vinyl because it uses a solvent-based adhesive. It holds up well on hard surfaces like glass, metal, and sealed wood over a long time. Removable vinyl has a lighter, acrylic-based adhesive that lets you peel it off without leaving residue.
Heat transfer vinyl (HTV) works differently. It needs heat from a press or iron to activate its adhesive.
It’s great for fabrics like shirts or tote bags because it bonds with the fabric fibers, making the design washable and durable. HTV must be mirrored before cutting since you’re pressing the design face-down.
| Feature | Permanent Vinyl | Removable Vinyl | Heat Transfer Vinyl (HTV) |
|---|---|---|---|
| Adhesive Type | Pressure-sensitive, solvent-based | Pressure-sensitive, acrylic-based | Heat-activated adhesive |
| Backing Material | Paper backing | Paper backing | Clear plastic carrier sheet |
| Finish | Glossy (mostly), some matte | Matte (mostly), some glossy | Varies |
| Application Method | Transfer tape, pressure | Transfer tape, pressure | Heat press or iron |
| Surface Compatibility | Hard, non-porous (glass, metal, wood) | Hard surfaces, temporary uses | Fabric only |
| Mirroring Required? | No | No | Yes, always |
You can’t convert removable vinyl into permanent by applying extra heat or adhesives. The adhesives are different types.
The best choice is to pick the right vinyl for your project from the start. Use removable vinyl for short-term projects or when you want to reposition the design later.
If you need a design on fabric that withstands washing, heat transfer vinyl is the way. It bonds deeper into the cloth and is machine washable.
Permanent vinyl shines on items like tumblers and signs where durability and water resistance matter. Removable vinyl works best on items like pantry jars and temporary labels that you might change often.
Which Surfaces Are Best for Permanent Vinyl Applications?
Permanent vinyl sticks best to smooth, clean, and nonporous surfaces like glass, metal, and sealed wood. Preparing surfaces carefully helps the adhesive bond well and prevents peeling. Avoid porous or textured surfaces unless they are sealed first.
Best Surface Types for Permanent Vinyl
Glass is perfect for permanent vinyl because it is smooth and nonporous. Clean it with glass cleaner or isopropyl alcohol before applying. Metal also works great when flat and free from rust or debris, wiped down with alcohol first.
Smooth plastics hold vinyl well, but avoid flexible or rubbery plastics. Painted wood works only if the paint is fully cured and the surface is clean. Unsealed or rough wood won’t hold vinyl unless sealed with a clear acrylic spray or paint.
Preparing Surfaces for Strong Adhesion
Cleaning is the key step before you apply vinyl. Use rubbing alcohol, glass cleaner, or mild detergent based on the surface type to remove oils, dust, and residues. Let the surface dry completely to ensure the adhesive sticks properly.
- Wipe glass with glass cleaner or isopropyl alcohol
- Remove rust and wipe metal with isopropyl alcohol
- Clean plastic with mild detergent or alcohol solution
- Confirm paint on wood is fully cured before applying
- Seal porous surfaces like raw wood with clear spray paint
- Dry surfaces thoroughly before vinyl application
Burnishing the vinyl firmly with a squeegee after applying ensures maximum adhesion. Start from the center and work outwards to avoid air bubbles.
Surfaces to Avoid or Treat Differently
Textured or porous surfaces usually cause vinyl to peel or stick unevenly. For materials like untreated wood, fabric, or heavily textured plastics, vinyl won’t hold well unless they are sealed and smoothed out first.
Stretchy fabrics call for heat transfer vinyl rather than permanent vinyl. Avoid permanent vinyl on soft or flexible plastics because the vinyl might crack or come off. Using permanent vinyl on delicate painted surfaces risks pulling paint off when removed.
Extra Tips for Durable Vinyl Applications
For items getting frequent handling or outdoor use, adding an epoxy coating or sealer over the vinyl helps protect it. Hand washing is best for vinyl on mugs or plastic containers to keep the design intact.
Permanent vinyl designed for outdoor use can last up to 8 years when applied properly. Using transfer tape helps place the vinyl on the surface without stretching or damaging it.
Step-by-Step Guide to Applying Permanent Vinyl Correctly
Applying permanent vinyl correctly means using the right tools and steps to get smooth, lasting adhesion. You need clean surfaces, the right materials, and careful pressure to avoid bubbles and lifting edges. Follow these clear steps to get professional results on your craft projects.
Gathering Materials and Tools
Start with essential supplies: permanent adhesive vinyl, transfer tape, and a squeegee or scraper tool. You’ll also need isopropyl alcohol and a clean cloth for surface prep. A cutting machine helps create precise designs, but you can also buy pre-cut vinyl shapes.
Using the right tools makes a big difference. Transfer tape designed for vinyl transfers sticks well but peels off smoothly. A hard plastic squeegee applies firm pressure evenly without scratching your project surface.
Preparing the Surface for Application
Clean the surface thoroughly with isopropyl alcohol and a lint-free cloth. This removes oils, dust, and residues that block vinyl adhesion. Make sure the surface is completely dry before you start.
Smooth, non-porous surfaces like glass, plastic, or sealed wood work best. Avoid textured or dirty surfaces as they cause peeling. Dust or moisture left on the surface can cause bubbles or edges to lift after vinyl application.
Applying Vinyl and Using Transfer Tape
Handle your weeded vinyl carefully by the backing. Cut a piece of transfer tape slightly larger than your design and place it over the vinyl. Use your squeegee to press the tape firmly, removing bubbles and ensuring full contact.
Next, flip the vinyl and tape over and slowly peel off the vinyl backing. Position the design on your project surface. Use the squeegee again to press the vinyl down firmly, directing pressure from center outward to push out air bubbles.
- Cut and weed your permanent vinyl design.
- Apply transfer tape over the vinyl and smooth out bubbles with a squeegee.
- Peel the vinyl backing away carefully at a sharp angle.
- Place the vinyl and transfer tape onto the clean, dry project surface.
- Press firmly with a squeegee, pushing from center to edges.
- Let the vinyl sit with transfer tape applied for 10, 15 minutes to bond.
Use firm, even pressure and peel transfer tape slowly at about a 180° angle to avoid lifting edges or bubbles.
Smoothing and Removing Transfer Tape
After waiting 10 to 15 minutes, remove the transfer tape slowly at a sharp angle, close to 180 degrees. A slow peel prevents the vinyl from lifting. Use your fingers or squeegee edge to burnish any parts that seem loose.
If you notice bubbles, gently lift the area and press down again with your squeegee. Small bubbles often flatten over time, but large ones need extra smoothing right away. Make sure edges are fully stuck down to avoid peeling later.
Curing Time and Post-Application Care
Give your vinyl at least 24 hours to fully cure before exposing it to washing or heavy use. This lets the adhesive strengthen and stick for the long term. Avoid scrubbing or soaking the surface too soon.
Permanent vinyl is dishwasher-safe on many surfaces but checking your vinyl brand’s instructions matters. Regular gentle cleaning with mild soap helps preserve the vinyl’s look without damaging it.
Common Mistakes with Permanent Vinyl and How to Fix Them
Bubbling happens when moisture or air gets trapped under the vinyl during application. To fix bubbles, gently lift the vinyl and smooth it down again with a scraper or credit card at a low angle. For small bubbles, use a pin to poke a tiny hole, then press the air out carefully.
Edges lifting after a few days usually means the surface wasn’t clean or dry enough before applying. Cleaning with rubbing alcohol and letting it fully dry prevents this. You can also press down the lifting edges using a heat gun or hair dryer set to low heat, then smooth it with a scraper to reactivate the adhesive.
When transfer tape won’t release vinyl, the tape might be too sticky or not sticky enough, or the wrong type was used. Using transfer tape from the same brand as your vinyl often works best. Peel the backing paper slowly at a low angle while pressing the design onto the transfer tape with a scraper tool to help with release.
- Clean surfaces with rubbing alcohol before applying vinyl.
- Use a scraper tool during application to avoid bubbles and wrinkles.
- Simplify peeling by pulling backing paper at a low angle.
- Try the same brand transfer tape to match vinyl stickiness.
- Apply gentle heat to stuck edges to reactivate adhesive.
- Poke tiny holes in small bubbles to release trapped air.
Keep your workspace dust-free, as dust or lint can cause vinyl to lift or bubble. Use a squeegee or firm card at a 45-degree angle to apply even pressure. When repositioning vinyl, do it quickly before the adhesive sets, or you risk lifting small pieces later.
Popular Permanent Vinyl Brands and Their Best Uses
Oracal 651 is a popular choice for outdoor projects since it lasts 4 to 6 years exposed to weather. It offers over 60 colors and a moderate level of ease when weeding designs. Cricut’s Premium Permanent Vinyl is better indoors, with a high gloss but more limited colors and harder weeding.
Siser EasyPSV stands out for detailed work because it weeds very easily and holds up up to five years outside. Avery and Ritrama offer other options with competitive durability, though usually at higher or local prices.
Price can vary slightly, but most brands charge about $1 for a 12-inch sheet of vinyl. Avery rolls cost more, around $28 for 24 inches.
Choosing a vinyl with strong adhesive and fade resistance matters most to keep decals looking good on cars, signs, or drinkware. You’ll find Cricut Smart Vinyl great on Mat-free cutters, while other brands may need a StandardGrip mat to get clean cuts.
| Feature | Oracal 651 | Siser EasyPSV | Cricut Smart Vinyl | Avery A6 | Ritrama |
|---|---|---|---|---|---|
| Durability | 4, 6 years (outdoor) | Up to 5 years | Indoor-only | High-performance | Multi-year |
| Color Variety | 60+ standard | 38+ + finishes | Limited | Standard | Standard |
| Ease of Weeding | Moderate | Excellent | Challenging | Moderate | Moderate |
| Price (12” Sheet) | ~$1.00 | ~$1.00 | ~$1.00 | Higher (~$28/24” roll) | Competitive |
| Best For | Outdoor projects | Detailed designs | Mat-free cutting | Local | Local |
For outdoor signs, car decals, or cups that get washed, Oracal 651 or Siser EasyPSV give the best hold and fade resistance. Cricut’s permanent vinyl suits mats without cutters well, but it is better for indoor use only.
Avery and Ritrama work well in certain local markets or high-performance settings but at higher prices. Label backs will often indicate vinyl type, making it easier to pick the right one.
Project Ideas and When to Choose Permanent Vinyl for Your Craft
Permanent vinyl works great for projects that need long-lasting, vibrant decals or designs. Use it on tumblers, car decals, outdoor signs, and home decor that faces frequent washing or weather changes. Its waterproof and UV-resistant qualities keep your design looking fresh over time.
This vinyl sticks best to smooth, non-porous surfaces like glass, metal, plastic, and painted wood. For drinkware, permanent vinyl holds up well but make sure the surface is dishwasher-safe. It’s a solid choice for outdoor items because it resists temperature changes and sun damage.
- Personalizing water bottles and tumblers
- Creating durable car decals and bumper stickers
- Making weatherproof outdoor signs and garden decor
- Customizing laptops, phone cases, and helmets
- Decorating painted wood or metal household items
- Adding long-lasting labels on storage bins or containers
- Applying to items that get frequent cleaning or use
Permanent vinyl isn’t the best fit for projects that need temporary designs or easy removal. Avoid it if you want to change your decoration often or use it on fabrics, since permanent vinyl doesn’t flex well and can peel. For clothing or fabric, heat transfer vinyl (HTV) is a better pick.
Choose permanent vinyl when you want your design to stay stuck for months or years, and the item will face water, sunlight, or rough handling. This vinyl typically costs around $4 to $7 per 12×12 inch sheet, so plan accordingly for larger projects. Applying on a clean, dry surface with steady pressure helps avoid bubbles and ensures a smooth finish.
Make sure to test permanent vinyl on a hidden area first to confirm it can be removed without damage if needed.
Step-by-Step Action Plan for Using Permanent Vinyl
Follow these steps to get the best results when crafting with permanent vinyl. Each phase helps you check your progress and avoid common issues.
- Before you start: Clean your surface with rubbing alcohol and a lint-free cloth. The vinyl will stick better if the area is free from dust, oils, and residue.
- Day 1: Cut your design with your vinyl cutter using recommended settings for permanent vinyl. Test a small piece to make sure the blade depth and pressure are correct.
- Day 1: Weed the excess vinyl carefully. The edges should be sharp and clean without bits of vinyl stuck where you don’t want them.
- Day 1: Apply transfer tape smoothly over your design, pressing down firmly with a scraper tool. Check that the entire design sticks to the transfer tape before lifting.
- Day 1: Place the design on the prepared surface and rub it down evenly with firm pressure. The vinyl should stick to the surface when you slowly peel back the transfer tape.
- After 24 hours: Let the vinyl cure by avoiding washing or heavy use. This lets the adhesive fully bond to the surface for better durability.
- After 1 week: Clean your vinyl lightly with water and mild soap to maintain its look. Avoid harsh chemicals that can degrade the adhesive.
Frequently Asked Questions
Is Premium Vinyl and Permanent Vinyl the Same Thing?
Premium vinyl usually means higher quality but isn’t always permanent. Permanent vinyl specifically refers to vinyl with a strong adhesive designed to last years on various surfaces.
Can You Print on Vinyl Paper with a Regular Printer?
Most regular printers can’t print on vinyl paper designed for adhesive use. You’ll need an inkjet or laser printer made for vinyl or printable adhesive sheets to get good results.
How Long Does Adhesive Vinyl Last?
Permanent vinyl can last 3 to 8 years depending on the brand and surface, while removable vinyl usually lasts up to 1 year indoors. Outdoors, permanent vinyl holds up better due to UV resistance.
Where Can I Buy Permanent Vinyl?
You can buy permanent vinyl at craft stores, specialty vinyl shops, and online retailers like VSU Print and Craft. They offer various colors and helpful tools for applying vinyl.
What Is Permanent Vinyl?
Permanent vinyl is a sticky, durable adhesive film that sticks strongly to smooth surfaces. It’s made to last years indoors and outdoors, ideal for long-term craft projects and decals.
Can Permanent Vinyl Be Used on Fabric?
Permanent vinyl is not meant for fabric; use heat transfer vinyl for clothes and materials instead.
Key Points to Remember
Permanent vinyl offers long-lasting, durable results for your crafts when you apply it right. Try a small project using this guide to see how well it sticks. Take your time and pay attention to surface prep to get the best finish that lasts.