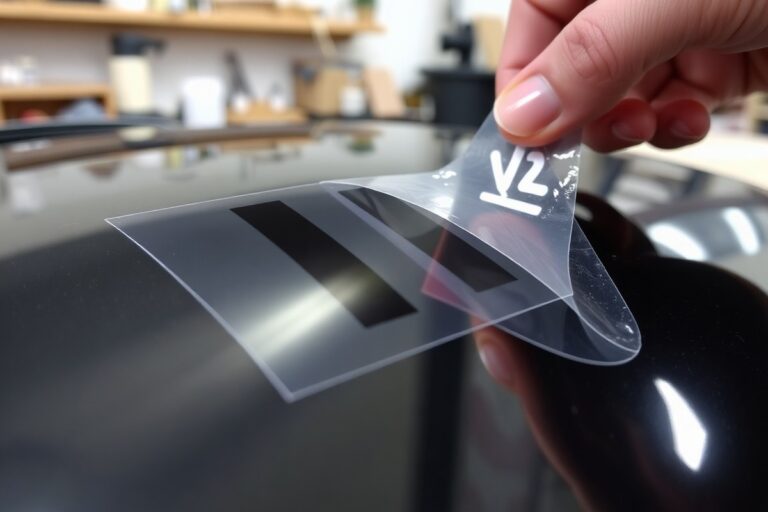
Can Cricut Cut Acrylic? Complete Guide for Perfect Thin Acrylic Cuts
Can Cricut cut acrylic? The answer depends on the acrylic’s thickness and the Cricut model. Cricut machines can cut thin acrylic sheets up to about 2 mm thick, but they cannot handle standard 1/8-inch or thicker acrylic commonly used in laser-cut projects. Starting with thin, clear acrylic sheets will increase your chances of clean cuts.
Key Takeaways
- The Cricut Maker can cut through acrylic up to 2 mm thick using the right blade.
- The Cricut Explore Air 2 is limited to very thin acrylic, ideally less than 0.25 mm thick.
- Thick acrylic sheets (1/8 inch or thicker) are too thick for all Cricut machines to cut cleanly.
- Use clear acrylic sheets no thicker than 2 mm for better cutting results.
- The Knife Blade on Cricut Maker models cannot safely or cleanly cut solid, rigid acrylic sheets.
- Many claims of cutting 3 mm acrylic on Cricut machines involve scoring and snapping, not full cutting.
Can Cricut Machines Actually Cut Acrylic Sheets?

Cricut machines cannot cut thick acrylic sheets typically used in laser-cut projects, such as those 1/8 inch (around 3 mm) or thicker. These thicker sheets are too dense and hard for Cricut blades to penetrate effectively. Attempting to cut thick acrylic risks damage to your machine and produces poor results. The damage and wear to your blades from forcing thick acrylic through your Cricut are not worth the questionable cuts you might get.
For thin acrylic, the situation is different. The Cricut Maker can cut acrylic materials up to about 2.4 mm (roughly 0.09 inches) thick. However, that is the upper limit, and many recommend staying below 0.5 mm for best results. The Cricut Explore Air 2 is less powerful and can only reliably cut extremely thin acrylic, generally no thicker than about 0.02 mm (20 microns), which is more akin to plastic film or acetate sheets rather than rigid acrylic. Acetate and thin acrylic alternatives can work nicely for projects like overlays, tags, or decorative elements where you want a clear, acrylic-like effect that your Cricut can handle.
In practical terms, if you want to cut acrylic sheets using your Cricut, it’s important to match your acrylic thickness to your machine’s ability. Use very thin acrylic or acetate sheets for the Explore Air 2, and up to about 2 mm thick acrylic for the Maker. Anything thicker will not cut cleanly and can damage your tool. For typical acrylic blanks sold for keychains and similar crafts, these often come in 1 to 2 mm thickness, making the Maker the only realistic Cricut choice to cut these materials, not the Explore Air 2.
There are also poor substitutes and alternatives to consider. Standard cast acrylic from hardware stores is almost always too thick for any Cricut and should be cut by tools designed for rigid materials, like laser cutters or CNC machines. Acrylic that looks thinner or flexible might still be too tough, so test a small piece first. If your material tears or the blade gets stuck, your acrylic is too thick or hard for your Cricut machine.
Choosing the right blade is another part of this decision. While the Maker’s rotary or knife blade can handle thin acrylic better than the Explore Air 2’s fine-point blade, no blade currently supported by Cricut machines will cut through thick rigid acrylic sheets. Trying extra passes or sharper blades does not change this fundamental limitation. The Cricut’s motor strength and blade pressure simply aren’t designed for that material density.
To decide if your acrylic is suitable, consider this: the Cricut Maker reliably cuts acrylic materials thinner than approximately 2 mm, with best results under 1 mm. The Explore Air 2 can only handle very thin film-like acrylic or acetate around 0.02 mm thick. For anything heavier, select a cutting method suited to dense acrylic or choose thinner acrylic-look materials that your Cricut can cut cleanly. This approach helps you avoid machine damage and ensures cleaner, more precise cuts for your acrylic crafting projects.
What Acrylic Thickness and Types Work Best with Cricut?
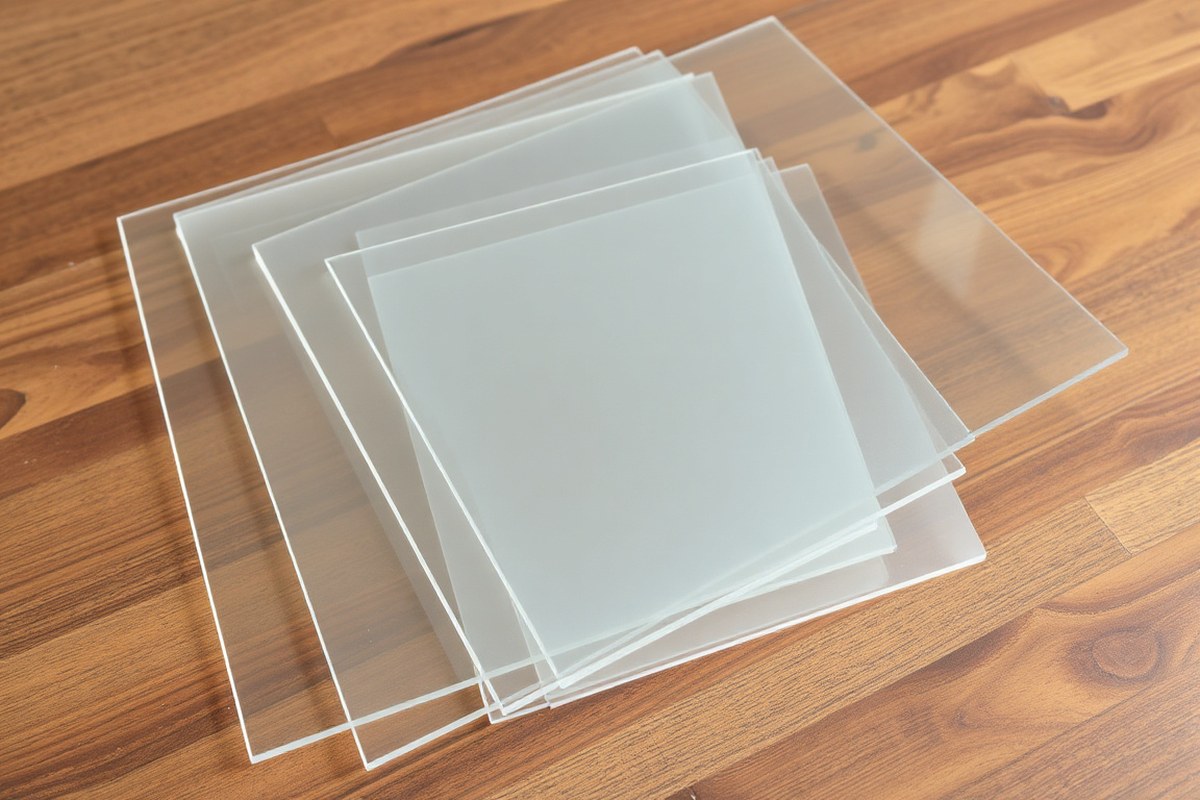
You can successfully cut only very thin acrylic sheets with a Cricut machine, typically less than 1 mm thick. Thin extruded or cast acrylic works best because they are easier to score and cut, unlike rigid acrylic sheets that are too thick and tough for Cricut blades. Specialty materials like acetate and acrylic films under 1 mm also perform well for detailed cuts such as keychains or cake toppers. Going above 1 mm thickness makes cutting difficult and risks blade damage or incomplete cuts.
Choosing the right acrylic type matters because extruded acrylic usually cuts cleaner than cast acrylic, which can chip more easily. Mirror acrylic sheets are popular for decorative projects but must be thin to work well. Thickness also impacts how well the material fits on the cutting mat and the blade’s ability to slice through it precisely. Designs that require intricate cuts benefit from thinner sheets to avoid cracking or poor edges.
| Acrylic Type | Thickness Range | Cricut Compatibility | Common Uses |
|---|---|---|---|
| Extruded Acrylic | 0.5, 1.6 mm (up to 1 mm recommended) | Good for cutting thin sheets and scoring | Keychains, signs, simple shapes |
| Cast Acrylic | 0.5, 1 mm | Works but more prone to chipping; thin sheets only | Decorative pieces, small crafts |
| Mirrored Acrylic | Up to 1 mm | Suitable if thin; mostly for engraving or light cutting | Home décor, jewelry accents |
| Acetate Sheets | Under 1 mm (e.g., 0.007 mm to 0.02 mm) | Excellent for cutting and layering | Cake toppers, overlays, transparent accents |
| Acrylic Film/Thin Sheets | Below 1 mm, around 0.5 mm typical | Best choice for precise cuts with Cricut | Craft projects like keychains and ornaments |
To get the best results, cut a piece of acrylic that fits neatly onto your Cricut cutting mat. Use the Design Space software to prepare your cut design and select suitable settings like “Basswood” with a 1.6 mm thickness as a starting point for thin acrylic sheets. Remember that multiple passes usually won’t help with thicker rigid acrylic; focus on cutting only very thin acrylic to protect your blade and mat. Thin acrylic is often available in 12×12 inch sizes, matching the Cricut cutting area well.
Tip: Always punch any holes you need in thin acrylic before cutting to avoid stress on your blade and maintain clean edges.
Which Cricut Models and Blades Are Best for Acrylic?
The Cricut Maker models with the Knife Blade are best suited for cutting acrylic, but even they face limits with thicker sheets. The Explore Air 2 and Air 3 can cut thinner acrylic with their standard blades, but they lack the Knife Blade’s strength. Other Cricut machines generally aren’t designed for acrylic cutting due to blade and pressure constraints.
Cricut Maker and Knife Blade Capabilities
The Cricut Maker, Maker 3, and Maker 4 come with or support the Knife Blade, which is built to cut thicker and tougher materials than standard blades. This blade can handle thin acrylic sheets around 1 mm thick, but cutting thicker or solid acrylic is not recommended because the blade can dull quickly or break.
Cutting acrylic with the Knife Blade requires multiple slow passes to achieve a clean cut. The higher cutting force of the Maker models helps, but you must be patient and adjust settings carefully. Using the Knife Blade on acrylic provides rougher edges compared to laser cutting but is a practical option for crafting when you avoid very thick sheets.
Cricut Explore Air 2 and Air 3 Blade Options
The Explore Air 2 and Explore 3 do not support the Knife Blade and lack the same cutting force as the Maker series. They use the standard fine-point blades and work best with acrylic sheets 0.25 inches (about 6.35 mm) thick or less. For these models, thin acrylic or acrylic-like craft materials are realistic to cut cleanly.
Blade selection for these machines is limited to standard and deep-point blades, which are not ideal for thicker acrylic but suffice for very thin sheets. Cutting thicker acrylic risks damaging the blade or machine.
Why Cricut Joy and Other Models Are Limited
Cricut Joy and older or less powerful machines do not have the necessary blade options or cutting force to handle acrylic. These devices are better suited for paper, vinyl, and light materials, and attempting acrylic cutting can result in poor cuts or equipment damage.
You should avoid using these models for acrylic projects to prevent dulling blades unnecessarily and wasting materials. If your projects require cutting acrylic regularly, investing in a Maker model with a Knife Blade is a safer choice. Below is a summary table demonstrating Cricut models, compatible blades, and recommended maximum acrylic thickness for cutting:
| Cricut Model | Compatible Blade(s) | Max Acrylic Thickness |
|---|---|---|
| Cricut Maker, Maker 3, Maker 4 | Knife Blade, Fine-Point Blade | Up to 1 mm (0.039″) with Knife Blade |
| Cricut Explore Air 2, Explore 3 | Fine-Point Blade, Deep-Point Blade | Up to 0.25″ (6.35 mm) thin acrylic sheets |
| Cricut Joy | Fine-Point Blade only | Not recommended for acrylic cutting |
Choosing the right blade depends mainly on your acrylic’s thickness. For thin sheets under 1 mm, the Knife Blade on a Maker model provides the best balance between cutting depth and blade durability. Thicker acrylic risks blade damage and poor results. The standard blades on Explore machines work only for the thinnest acrylic sheets, and multiple passes may be needed. Avoid non-Maker models for acrylic to prevent wasted time and tools.
How to Prepare Acrylic Sheets for Successful Cutting
Preparing acrylic sheets properly before cutting with a Cricut is essential for achieving clean, precise edges and preventing damage to the material and machine. You need to remove protective films, clean the surface, secure the sheet firmly on the right mat, and use tape to keep it stable throughout the cutting process.
Cleaning and Inspecting Acrylic Sheets
Begin by carefully removing the protective plastic film, which often covers both sides of the acrylic sheet. This layer prevents scratches during shipping and handling but must be fully removed to ensure accurate cutting and prevent debris from interfering with the blade.
Once the plastic is off, wipe the acrylic surface with a soft, lint-free cloth slightly dampened with water or a gentle cleaner made for plastics. This step removes dust, fingerprints, or oils that could cause slipping during cutting. Inspect the acrylic for any chips or cracks, especially at edges, because flawed areas can worsen under cutting pressure and cause uneven cuts or sheet breakage.
Applying Tape and Choosing the Right Mat
Use a purple StrongGrip mat when cutting acrylic sheets, as its adhesive is designed to hold heavy or firm materials without damaging them. This grip prevents the sheet from slipping mid-cut, which is critical to avoid jagged edges or wasted material.
After positioning the acrylic sheet on the mat, secure its edges with painter’s tape or masking tape. Avoid using tape that leaves sticky residue. Tape each corner and along the sides to minimize movement but keep the tape away from the area where the blade will cut to prevent tearing or blade damage.
Securing the Sheet and Setting Up the Machine
Once taped, press the acrylic firmly onto the mat’s surface to improve adhesion. Check that the sheet lies flat with no bends or bubbles, which can cause the blade to jump or skip, leading to uneven cuts.
Before starting the cut, set the Cricut machine with the correct blade and cutting pressure for the thickness of your acrylic. Inadequate pressure can leave incomplete cuts, while excessive force may break the sheet or dull the blade. Monitor the machine closely, pausing to adjust if the acrylic shows signs of cracking or shifting.
- Remove protective plastic film from both sides of the acrylic sheet.
- Clean the acrylic with a soft cloth and mild cleaner to remove dirt and oils.
- Inspect the sheet for chips or cracks; discard or trim damaged sections.
- Place the acrylic sheet onto a purple StrongGrip cutting mat, aligning it flat and smooth.
- Apply painter’s tape around all edges of the sheet, avoiding the cutting area.
- Press down firmly on the entire acrylic surface to secure it to the mat.
- Load the mat into the Cricut machine and set blade depth and pressure appropriate for the acrylic thickness.
- Start cutting while closely watching for slipping, shifting, or cracking; pause if adjustments are needed.
Optimal Cricut Settings for Cutting Thin Acrylic Sheets
To cut thin acrylic sheets with a Cricut machine, set the blade depth to a moderate level, apply high cut pressure, and use multiple passes for a clean cut. Custom material settings are necessary because Cricut Design Space does not include a preset for acrylic. Adjusting these settings carefully prevents cracking or incomplete cuts on acrylic sheets around 0.5mm thick.
Choosing the Right Blade Depth and Pressure
Cricut machines do not list acrylic in their preset materials, so you must customize settings. Use a blade depth of about 4 to 5 on machines with adjustable blades, such as the Knife Blade or Deep-Point Blade, to penetrate thin acrylic. Cutting pressure should be high, generally between 250 and 350, depending on your machine model. This extra pressure ensures the blade cuts through the material without leaving uncut sections.
For example, setting cut pressure to 290 with a Fine-Point Blade has worked well for similar acetate materials. Testing your specific acrylic type will help refine these numbers, as thicker or denser acrylic might need increased pressure or blade depth.
How Many Passes Are Recommended
Cutting thin acrylic sheets usually requires more than one pass. Plan on 2 to 3 passes to achieve a smooth, complete cut without stressing the material in a single pass. Excessive pressure during a single cut can crack or chip acrylic, so multiple gentle passes reduce this risk.
In Design Space, enable the multi-cut feature and set it for two or three passes, depending on test results. This balances thorough cutting and material safety.
Configuring Custom Materials in Design Space
Since there is no built-in acrylic material setting in Design Space, you’ll need to create a custom material profile. Access the “Material Settings” panel in Design Space and select “Add New Material.” Name it “Thin Acrylic” or similar for easy reuse.
Set the blade type to Knife Blade or Deep-Point Blade, the pressure to around 300, and multi-cut to 2 or 3 passes. Leave speed at the default unless the acrylic feels fragile or cracks during a test cut, then reduce speed slightly to improve precision.
Step-by-Step Setup for Cutting Thin Acrylic
Follow these steps to optimize your Cricut machine for acrylic cutting. Thorough testing after setup will confirm if adjustments are needed:
- Place the acrylic sheet securely on a strong grip cutting mat to prevent movement.
- Open Cricut Design Space and create or upload your design.
- Select the machine tab and choose “Add New Material” under material settings.
- Name the material “Thin Acrylic” and set the blade type to Knife Blade or Deep-Point Blade.
- Adjust the cut pressure to 290-350 depending on your acrylic thickness and machine.
- Enable multi-cut and set passes to 2 or 3 to ensure a clean cut.
- Set the blade depth manually if your machine allows; choose level 4 or 5.
- Perform a test cut on a small acrylic scrap to evaluate cut quality, adjusting pressure or passes as needed.
Always test cut on a scrap piece of acrylic before your main project to avoid wasting material or damaging your design.
Variables to Monitor During Test Cuts
During test cuts, watch for incomplete cuts where the blade doesn’t cut fully through the acrylic, or signs of cracking and chipping. If the acrylic breaks easily, reduce blade depth or pressure slightly. Incomplete cuts require increasing pressure or adding another pass.
Cleaning the blade and mat regularly also improves cut consistency. Acrylic dust and residue can blunt the blade or cause slipping, leading to poor results.
Common Mistakes and How to Avoid Acrylic Cutting Issues
Acrylic often cracks or chips because the material is brittle and does not handle sharp pressure or rapid blade movement well. Using too much pressure with your Cricut machine or the wrong type of blade can damage both the acrylic and your tool. The fine-point blade included with most Cricut models won’t cut through acrylic sheets but can score thinner sheets that you then snap apart manually. Applying excessive force or trying to cut thick acrylic will cause uneven edges, cracks, or chips. It also risks dulling or damaging the blade quickly.
Partial cuts or incomplete lines happen when the machine’s cut pressure is too light or when the blade is not sharp or suitable for acrylic. Unlike paper, acrylic requires precise pressure to score cleanly. If your design isn’t cutting through, repeatedly scanning the cut lines or increasing pressure slightly can help. However, overdoing pressure leads to the problems stated earlier, so adjustments should be gradual. Here are common mistakes crafters make when cutting acrylic, along with how to fix or avoid them:
- Using a fine-point blade to cut thick acrylic: Switch to scoring the acrylic with this blade and snap the sheet along the scoreline instead of fully cutting.
- Setting cut pressure too high: Reduce pressure gradually to avoid cracking and chipping.
- Ignoring blade wear: Replace blades regularly, especially after several cuts on acrylic or similar tough materials.
- Skipping test cuts: Always do a small test cut on a scrap acrylic piece to check settings before the full job.
- Rushing the process: Take time between cuts to assess material condition and blade sharpness.
- Not securing acrylic properly: Use strong transfer tape or a cutting mat to hold acrylic sheets flat to prevent shifting or cracking.
- Missing signs of poor cut quality: Look for uneven edges, rough lines, or incomplete cuts early and adjust settings before continuing.
Recognizing poor cut quality early saves material and time. Uneven or rough edges signal pressure is too high or the blade is dull. Partial cuts mean pressure is insufficient or the blade isn’t ideal. Checking cuts immediately after each pass helps you fine-tune settings to prevent wasted acrylic sheets. Since Cricut machines were not designed to fully cut thick acrylic, scoring with a fine-point or engraving blade is a safer approach. This minimizes cracking and allows more control over when and how to break the sheet.
Engraving Acrylic with Cricut: When to Choose Engraving over Cutting
The Cricut Maker, Maker 3, and Maker 4 offer engraving capabilities on acrylic using the Engraving Tip, which is part of their QuickSwap toolset. Engraving acrylic with these machines involves etching the surface rather than cutting through it. This option works well for creating detailed designs, text, or patterns without the risk of cracking or breaking the acrylic sheet, which can happen when cutting thicker or harder materials.
Engraving acrylic is generally easier and safer than cutting because it does not require physically slicing through the material. Instead, the tip presses or scrapes the surface to create an engraved effect. This minimizes the chances of damaging the acrylic, especially if you are working with pre-cut blanks or thinner sheets around 0.5mm to 2mm thick that might be fragile. If you plan to add vinyl decoration or use sublimation or Infusible Ink on acrylic blanks, engraving offers a great way to add texture and personalization without compromising the structural integrity of the piece.
To engrave acrylic with a Cricut, install the Engraving Tip into the QuickSwap housing and secure it tightly. Place your acrylic blank flat on a StrongGrip mat to prevent slipping during the process. In Cricut Design Space, select the design you want to engrave and set the material type to “Acrylic Engraving” or manually adjust pressure settings based on test cuts. The machine will move the engraving tip along the design paths to etch into the surface. Engraving speed and pressure may need adjustment depending on acrylic hardness and thickness to avoid incomplete engraving or excessive scratching.
Engraving tends to be more affordable and faster than cutting because it requires less blade wear and no multiple passes to slice through the material. The Engraving Tip typically costs around $20 to $30 and lasts for many projects if used properly. Good engraving results show clean, visible etched lines with no cracks or chips in the acrylic. Common issues include shallow engraving due to low pressure or too-fast speed, or marred acrylic if the material shifts during the process.
Comparing cutting versus engraving acrylic in a Cricut shows clear tradeoffs. Cutting lets you create custom shapes, but is limited to thin sheets (0.5mm to 2mm) and requires more cautious setup to avoid breaks. Engraving works even on blanks or thicker material, offering decorative options that do not compromise the sheet’s strength. It is advisable to choose engraving for detailed surface artwork, personalized text, or logos on existing acrylic items. Cutting suits projects needing separate acrylic parts or inlays but demands more careful material selection and blade management.
Alternatives to Acrylic for Cricut Projects
Materials like acetate sheets and plastic films offer a look similar to acrylic but are much easier to cut with a Cricut machine. Acetate is a clear, lightweight plastic sheet that cuts cleanly with fine lines using standard blades, making it a great alternative for projects needing transparent elements. Plastic films, like transparency film, also cut well and can serve as reusable stencils with crisper edges than vinyl stencils, ideal for paint projects or layering effects.
Vinyl decals add versatility by allowing you to decorate pre-cut or purchased acrylic shapes without cutting the acrylic itself. You can cut intricate designs from adhesive vinyl and apply them on colored acrylic blanks to create sharp contrasts and personalized decorations. This combination avoids the challenges of cutting thick acrylic while still achieving an acrylic-like aesthetic.
| Material | Appearance | Cricut Cutting Ease | Common Thickness | Project Ideas |
|---|---|---|---|---|
| Acetate Sheets | Clear, glossy, similar to acrylic | Easy to cut with fine details | 7 to 10 mil (0.18 to 0.25 mm) | Clear overlays, window decals, gift tags |
| Plastic Transparency Film | Clear, ultra-thin | Very easy, ideal for stencils | 3 to 5 mil (0.08 to 0.13 mm) | Reusable stencils, layering elements |
| Adhesive Vinyl | Opaque or transparent | Very easy to cut, no blade depth issues | Various, generally 2-3 mil (0.05 to 0.08 mm) | Decals on acrylic blanks, customized signs |
| Colored Acrylic Blanks (Pre-cut) | Various colors, rigid | Not typically cut, used as base | 1/8 in (3 mm) typical | Base for vinyl designs, keychains, ornaments |
For making projects that combine style and ease, you can cut shapes from acetate or transparency film and decorate them with vinyl decals. Use your Cricut to create stencils by cutting the plastic film into desired patterns. These stencils are reusable and provide clean edges for painting or inking, making them more practical than vinyl stencils. If you want that authentic acrylic look without the hassle of cutting thick sheets, layering vinyl decals onto pre-cut acrylic blanks offers a clean, polished appearance with minimal effort.
Tip: Always test cut a small piece of your chosen material before starting your full project to adjust blade settings and avoid wasting materials.
Vinyl works best when applied to smooth, non-porous acrylic surfaces. Clean your acrylic blanks thoroughly before application for better adhesion. Combining these materials lets you explore a wide range of projects from decorative signs to personalized gifts, all within the Cricut’s cutting capabilities and without the risks and difficulties of cutting thick acrylic.
Step-by-Step Action Plan for Cutting Acrylic with Your Cricut
Follow these steps to cut thin acrylic sheets accurately using your Cricut machine, while avoiding common problems.
- Before you start: Gather acrylic sheets no thicker than 1/16 inch and a deep blade or knife blade compatible with your Cricut model. Confirm your blade is sharp and clean to avoid jagged cuts.
- Day 1: Clean the acrylic surface thoroughly with a lint-free cloth and some isopropyl alcohol to remove dust and oils. This helps your design adhere better and prevents scratches during cutting.
- Day 2: Set up your design in Cricut Design Space and choose “Custom Material” settings. Start testing with a low pressure and increase gradually, cutting a small test shape to check the cut depth without overcutting.
- Day 3: Use Painter’s Tape or transfer tape to secure the acrylic sheet to your cutting mat firmly. This reduces shifting and keeps the cut precise. Verify adhesion by lightly pressing the material to the mat.
- Day 4: Run the cut job while closely monitoring blade wear and the acrylic’s response. Pause if edges chip or blade seems dull and replace the blade if needed.
- Day 5: Gently remove the acrylic from the mat without bending to prevent cracking. Inspect the edges and sand lightly with fine-grit sandpaper if any roughness remains.
- After your first project: Note your machine’s perfect settings for acrylic cutting to speed up future projects. Keep your blades dedicated to acrylic only as resin buildup can dull blades faster.
Frequently Asked Questions
Can the Cricut Maker Cut Thick Acrylic Sheets?
No, the Cricut Maker cannot cut thick acrylic sheets like those 1/8″ or thicker; it works best with thinner acrylics, up to about 2 mm. Attempting to cut thicker sheets can damage the machine and produce poor results.
Is Engraving Acrylic with a Cricut Safer Than Cutting?
Yes, engraving acrylic with a Cricut reduces the risk of damaging the machine and material, making it a safer choice than trying to cut thick or rigid acrylic sheets.
Can the Cricut Explore Air 2 Cut Any Acrylic?
The Cricut Explore Air 2 can cut very thin acrylic, around 0.02 mm thick, but thicker sheets commonly used in crafts are beyond its capability.
Is the Knife Blade Effective for Cutting Acrylic on a Cricut Maker?
The Knife Blade can cut thicker materials but still cannot cut solid acrylic cleanly or safely, limiting its use for acrylic crafting projects.
Can the Cricut Cut Through Acrylic Keychain Blanks?
No, solid acrylic keychain blanks usually exceed the cutting capacity of Cricut machines; users often score and snap them instead of clean cutting.
What Type of Vinyl Works Best for Acrylic Projects with Cricut?
Adhesive vinyl designed for acrylic surfaces works well and is easy to cut with any Cricut, allowing you to decorate acrylic pieces without cutting the acrylic itself.
Before You Go
Your Cricut can cut thin acrylic sheets effectively when you use the right blades, settings, and preparation. Focus on trial cuts and securing the material firmly to get clean edges without cracking. Start by cutting small test pieces to dial in the best pressure and blade depth for your machine. This careful approach lets you expand your acrylic crafting options safely and with better results.