What Is Raster Braille? A Complete Guide to ADA-Compliant Signage Benefits
What is Raster Braille? Raster Braille is a patented method of creating ADA-compliant tactile signs by drilling precise holes into a substrate and inserting raised spheres to form Braille dots. The process uses specialized tools that automate bead placement, ensuring consistent, durable, and highly readable Braille characters. This makes Raster Braille an efficient and reliable solution for clear tactile navigation aids.
Its effectiveness comes from the perfect coordination between routing tools and the Raster Braille pen, allowing flexible material choices and secure bead fastening that exceeds glue-only methods. Starting with a substrate suitable for routing is essential for best results.
Key Takeaways
- Use substrates that accommodate precise routing for durable Raster Braille sign production.
- Automated bead insertion tools improve efficiency and consistency in Braille placement.
- Maintaining at least 70% contrast ratio ensures the tactile text is visually distinguishable.
- Raster Braille spheres can be secured between layers for increased durability beyond adhesive bonding.
- Grade 2 Braille can be incorporated in Raster Braille signage for efficient tactile communication.
- Raster Braille allows a broad selection of materials, improving design flexibility and compliance options.
What Is Raster Braille and How Does It Work?
Raster Braille is a patented method of creating tactile Braille dots on signage used primarily for ADA compliance. Unlike other Braille production techniques such as photopolymer or simple engraving, the Raster Braille process involves drilling precise holes into the sign’s substrate and then inserting perfectly rounded spheres, or beads, into these holes. This method ensures uniform dot size and spacing, providing consistent tactile feedback for blind and visually impaired users.
The process starts with selecting the sign’s base material, which can vary widely, offering flexibility for different architectural and design needs. Next, a CNC router or engraving tool equipped with a Raster Braille Tool attachment drills the necessary holes according to exact Braille dimensions outlined in ADA regulations. These holes are typically about 1.5 millimeters in diameter and spaced to fit the Braille cell structure properly.
Once the holes are routed, the Raster Braille Tool automatically inserts hard plastic or metal beads into each hole, anchoring them securely to the substrate. This precise insertion guarantees that each Braille dot is perfectly rounded, uniform in height, and durable, maintaining tactile readability over time. The combined use of the router and automated bead insertion makes the process efficient, reducing manual labour and minimizing errors compared to hand-applied or photopolymer methods.
This method is particularly well-suited for environments such as hospitals, universities, government facilities, and corporate buildings, where permanent and durable tactile signage is essential. The tactile dots created by the Raster Braille system resist wear and environmental damage, helping signs retain ADA compliance for years without the need for frequent replacement. The high precision and consistency also mean that readability meets or exceeds federal guidelines, an important factor when signs must serve the public accurately and reliably.
Setting up the Raster Braille system involves an initial investment in specialized routing equipment and the Raster Braille Tool, but this pays off over time through faster production speeds and reduced material waste. For lower-volume or occasional signage needs, tools like the Raster Braille Pen allow for manual creation of compliant Braille dots, though bulk or commercial projects benefit most from automated machinery. Variations of the Raster method, such as applique combined with Raster Braille, offer additional production options, adapting to different design philosophies or time constraints.
Good Raster Braille signage results in dots that are tactilely distinct and durable, with exact sizing and placement to meet ADA standards. Common problems arise when routing depth or bead insertion is inconsistent, leading to dots that may be too shallow or loosely seated, which diminishes tactile clarity and compliance. Proper calibration of equipment and adherence to the patented method’s specifications help avoid these issues, ensuring your signage provides dependable navigation aids for the visually impaired community.
Materials Suitable for Raster Braille Signage
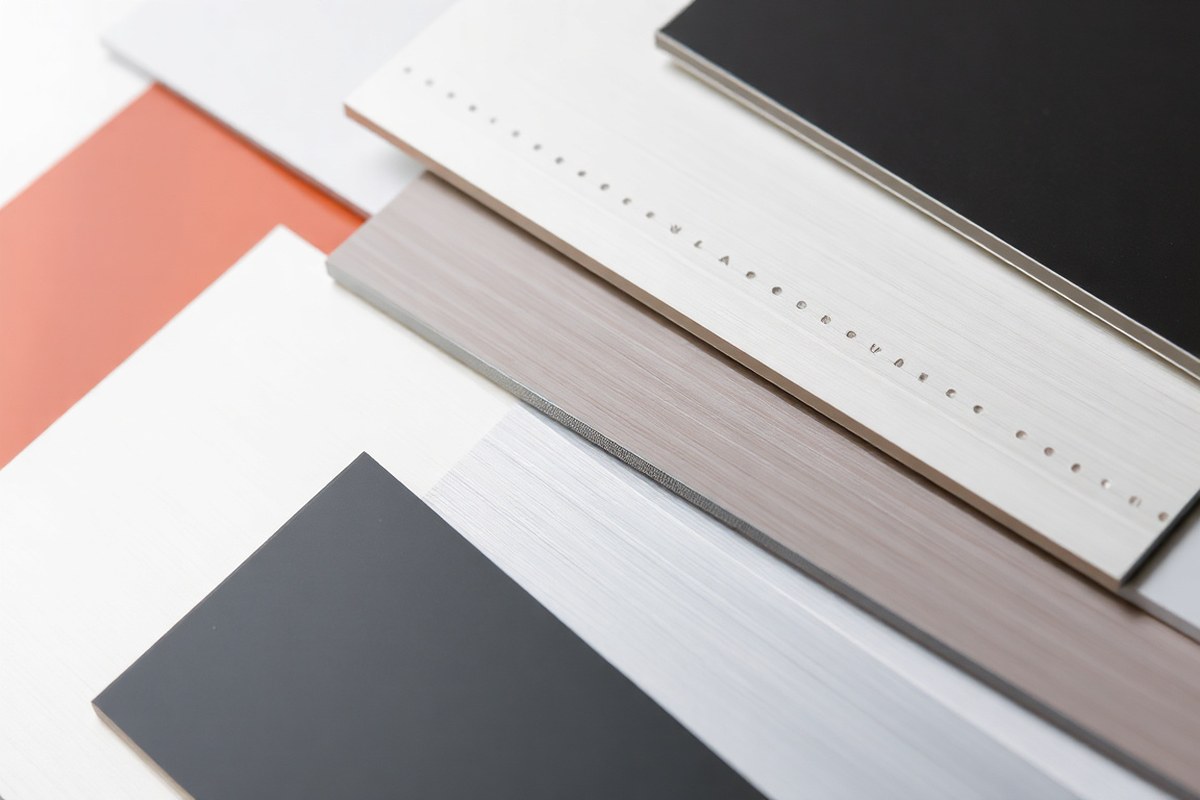
Raster Braille signs can be produced on a broad range of materials suitable for both indoor and outdoor use. The choice of substrate impacts not only the durability but also the visual appeal and tactile accuracy of the Braille dots. Using materials designed for the environment and traffic they will face ensures long-lasting, legible signage that meets ADA requirements.
Common Materials for Indoor and Outdoor Signs
The Raster Braille method, which uses drilled holes filled with acrylic beads, works with a variety of substrates. These include photopolymer, acrylic, plastic engraving stock, and different metals such as brass, aluminum, and stainless steel. Outdoor signs often use aluminum and stainless steel because they resist corrosion and endure weather conditions longer.
Indoor signs often use materials such as photopolymer and acrylic, which offer excellent fidelity for tactile elements and permit a variety of colours and finishes. Metal and laminate are stronger and preferred in high-traffic public spaces. Wood can be used for a warm aesthetic but requires sealing for durability. Choosing a UV-stable acrylic or metal is essential for signs exposed to sunlight to avoid fading and maintain clarity.
- Photopolymer: excellent for indoor wayfinding and room identification
- Acrylic: offers UV stability and variety in colours, suitable indoors and outdoors
- Plastic engraving stock: cost-effective, commonly used indoors
- Aluminum: corrosion-resistant and durable for outdoor use
- Stainless steel: ideal for harsh weather and vandal resistance outdoors
- Laminates: good for indoor applications with moderate wear
- Wood: suitable for decorative indoor signs, less durable outdoors
Material Properties Affecting Braille Quality
Raster Braille dots need to be precisely raised and consistently shaped for legibility and compliance. Materials that allow fine drilling and secure bead embedding lead to better tactile results. Harder metals and plastics hold the bead more securely but require precision machining.
The surface finish plays a role in both aesthetics and touch sensitivity. Smooth, matte finishes reduce glare and improve readability, whereas glossy surfaces may hinder tactile detection. UV resistance and weatherproofing influence how long outdoor signs retain their Braille clarity and appearance under sun, rain, or snow exposure.
Material Selection Guidelines
Choosing the right material depends on the sign’s placement, expected wear, budget, and design goals. For outdoor signs, aluminium or stainless steel with UV stable acrylic beads are recommended to ensure compliance and weather resistance. Indoor signs offer more flexibility and can use less expensive plastics or photopolymer with striking colours or textures.
Maintaining ADA compliance requires a substrate that holds up under cleaning, as tactile areas must remain raised and legible without degradation. Signs in high-traffic areas should favour scratch-resistant metals or laminates. Consider the thickness of the substrate because it affects drilling depth and bead installation. Standard panel thickness ranges from 1/8 to 1/4 inch depending on material.
Use UV-resistant materials for any sign exposed to sunlight to prevent fading and maintain tactile clarity over time.
Ensuring ADA Compliance with Raster Braille Signs
Raster Braille signs comply fully with ADA signage standards by meeting all the specific dimensional and tactile criteria required. This method ensures precise dot height, spacing, and shape that align with federal guidelines, thereby providing accessible and readable Braille for visually impaired users. By following established verification steps, you can confidently confirm your Raster Braille signage meets ADA compliance in both design and function.
Key ADA Braille Requirements
The ADA mandates that Braille dots must be domed and raised to a height between 0.025 and 0.0375 inches. Each dot should have a smooth, rounded shape to be easily identifiable by touch. Adequate spacing is essential: a dot spacing of 0.090 to 0.100 inches within a cell, and a cell spacing of 0.300 to 0.400 inches horizontally. Importantly, the Braille must be positioned below the corresponding text, which should use a sans-serif font to comply with readability standards.
This precision in size, shape, and placement ensures tactile legibility, allowing users to read signs with minimal effort. Raster Braille production achieves these dimensions reliably, thanks to its engraving and routing technology, which closely controls dot formation. These dimensional rules are not suggestions but are federally mandated requirements designed to provide consistency and accessibility across all public and private buildings.
Checklist for Raster Braille Compliance
To verify that Raster Braille signs meet ADA requirements, start by measuring dot height using a calibrated micrometer to confirm it falls within 0.025 to 0.0375 inches. Next, check that dot diameter and spacing conform to the required ranges, using a precise ruler or digital caliper. Confirm the alignment of Braille cells relative to accompanying text, ensuring the Braille appears directly below and not offset. The background material’s contrast and the text font must also meet ADA standards, favoring high contrast and simple sans-serif fonts for visual clarity.
Cost factors include investing in measurement tools and the precision engraving systems capable of producing Raster Braille consistently on a variety of materials, such as plastics or metals. Partnering with experienced sign fabricators who specialize in ADA signage can streamline compliance and reduce errors. This checklist guides a consistent quality control process, minimizing rework and ensuring signs pass inspection.
Verification and Quality Control Tips
Implement a routine quality control procedure that documents each dimensional measurement, comparing it against the ADA baseline standards. Use magnification tools to inspect the shape of each Braille dot for proper doming and smoothness; rough or flattened dots reduce legibility and fail compliance. Periodic calibration of engraving equipment ensures ongoing accuracy in dot height and spacing.
Incorporate user testing with individuals familiar with Braille reading to verify practical legibility under various environmental conditions, such as different lighting and mounting heights. Keep records of these tests as evidence of compliance diligence. When discrepancies occur, adjusting the engraving settings or refining the raster pattern can resolve issues before the sign reaches installation.
Comparison of Raster Braille with Other Braille Production Methods
The choice between Raster Braille, applique Braille, and UV printing methods depends on balancing cost, durability, compliance, and visual appeal. You should consider how each method aligns with your project’s requirements and budget constraints to ensure the signage meets ADA standards without sacrificing longevity or aesthetics.
Raster Braille uses a grid of tiny raised dots created by a digital embossing process, providing precise tactile patterns. This method stands out for producing consistent Grade 2 Braille characters, including contractions for efficient reading. Applique Braille involves attaching pre-formed tactile dots onto the sign surface, typically using adhesives. UV printing applies raised UV-curable ink directly onto the surface, forming the Braille texture.
| Factor | Raster Braille | Applique Braille | UV Printing |
|---|---|---|---|
| Cost per sign | Moderate; requires specialized embossing equipment | Low to moderate; manual placement adds labor | Lower initial cost; setup cheaper but may need frequent reprinting |
| Durability | High; deep embossing resists wear and cleaning | Moderate; dots can detach over time or in harsh environments | Low to moderate; UV ink raised dots prone to surface wear |
| ADA Compliance | High precision for tactile accuracy & spacing | Good if dots follow dimensional standards; potential misalignment risks | Variable; achieving precise dot height (0.016 to 0.025 inches) consistently is challenging |
| Aesthetics | Crisp, clean dot appearance; integrates well with digital designs | May appear slightly raised or “added on” depending on dot style | Visually smooth but tactile quality can look less defined |
| Production speed | Slower; embossing takes additional time after sign fabrication | Moderate; manual placement can be time-consuming | Faster; printing process integrated with sign surface finishing |
Among the three, Raster Braille delivers the best balance of ADA compliance and durability. Its embossed dots maintain their shape and height, essential for tactile readability over long-term use and rigorous cleaning. Applique Braille suits lower budgets but risks durability issues if adhesive fails or installation lacks precision. UV printing offers quick production and visual smoothness but requires careful quality control to meet legal tactile heights and resist surface wear.
Professionals often prioritize the sign’s expected environment when selecting a method. High-traffic or outdoor locations favor Raster Braille for its resilience against frequent contact and cleaning chemicals. For indoor signs with limited wear exposure, applique Braille may be adequate if installed properly. UV printing fits projects with fast turnaround needs but demands frequent inspection to ensure compliance.
To achieve ADA-compliant tactile signage, precisely measure dots at 0.016 to 0.025 inches in height and maintain spacing consistent with Grade 2 Braille standards. Raster Braille’s digital embossing technology reliably hits these measurements, while applique and UV printing vary more depending on materials and operator skill. Your choice should reflect the priority you give to enduring tactile performance versus quicker, lower-cost production.
Tools and Equipment Used for Raster Braille Production
Creating Raster Braille relies on specialized tools that place small, durable beads onto signage surfaces. These tools come in manual and automatic forms, each suited to different production scales and precision needs. Understanding the equipment helps you choose the right method for your project’s complexity and volume.
Manual Raster Braille Pens
Manual Raster Braille pens allow you to apply individual Raster spheres one at a time. The pen’s barrel is filled with tiny, secure beads that stick to the sign surface as you press the pen down. This method offers high control for custom or low-volume signs but requires steady handwork and time.
By using a manual pen, technicians can ensure each braille dot’s placement matches exact spacing. Because the spheres are securely encased in the sign, the braille produced is wear-resistant and durable. However, the speed depends on the installer’s skill and the complexity of the braille text.
Auto-Raster Universal Attachment
The Auto-Raster Universal Attachment automates bead insertion, significantly speeding up production. This device clamps onto various engraving machines or CNC routers, pressing beads into the surface in rapid succession according to programmed layouts. It serves high-volume operations well, as it reduces labor time and improves consistency.
The automatic system precisely controls bead placement and depth, maximizing ADA compliance and tactile clarity. The production capacity increases notably, able to lay thousands of dots a day compared to the manual method’s dozens or hundreds. This equipment suits sign fabricators scaling up to meet bulk orders or producing multiple identical signs.
- Manual pens require no power and have low upfront cost.
- Automatic attachments demand compatible machines and a higher initial investment.
- Manual production suits custom, low-quantity projects with flexible timing.
- Automatic tools excel in high-volume, standardized signage runs.
- Automatic devices improve consistency but require operator training and maintenance.
- Durability and tactile quality remain high for both tools if used correctly.
Maintain consistent bead supply and clean pen tips regularly to avoid misplacement or adhesive buildup during manual application.
Equipment Purchasing and Rental Options
Businesses interested in Raster Braille have options to buy or rent tools, depending on their budget and expected usage frequency. Manual Raster Braille pens are affordable and widely available for purchase, making them accessible for small contractors or sign shops testing Raster Braille capabilities.
Conversely, automatic bead inserters and attachments often represent a larger financial commitment, usually priced in the thousands of dollars. Some providers offer rental agreements or leasing, allowing companies to add production capacity temporarily or evaluate equipment before deciding on full purchase.
Choosing whether to buy or rent depends on project volume, budget constraints, and growth plans. Regular users benefit from ownership for ongoing projects, while rentals fit well for short-term spikes or pilot programs exploring ADA compliance upgrades.
Design and Aesthetic Advantages of Raster Braille Signage
Raster Braille offers significant design flexibility that benefits both visual appeal and functional clarity. Because the Braille dots are formed by arranging small raised pixels rather than solid, fixed shapes, designers can blend tactile information smooth with a wide variety of visual elements. This method supports full-color digital printing across the entire sign face, enabling the inclusion of logos, branding, and custom artistic backgrounds without sacrificing readability or compliance.
Using Raster Braille, you can choose to make the Braille dots either color-matched to remain subtle or in contrasting colors to serve as a deliberate design feature. For instance, printing the dots in a slightly darker or lighter shade than the background creates Braille that is noticeable to touch but minimally intrusive to the eye. Conversely, selecting a bold color contrast turns the Braille into a visible texture element, adding aesthetic interest without compromising tactile function. This flexibility lets you balance accessibility with brand identity more effectively than with traditional solid Braille methods.
To integrate Raster Braille with custom printed graphics, start by designing your sign artwork digitally. Include the Braille text as a high-resolution pixel map that corresponds to the required character layout and dot heights, usually between 0.5 mm and 0.7 mm tall for ADA compliance. The digital file is then printed using UV-cured inks or dye sublimation onto materials that can accept both the print and the subsequent tactile embossing or molding. This process is precise enough to maintain sharp edges and clear color transitions, allowing detailed logos and backgrounds to coexist with tactile dots.
Cost-wise, combining Raster Braille with full-color printing typically involves a slightly higher upfront expense due to the more advanced printing and embossing equipment required. Expect a premium compared to simpler, single-color embossed signs. However, the visual impact and branding consistency it enables can justify the investment, especially for corporate or institutional facilities where signage quality is part of the user experience. The production timeline generally remains comparable to other Braille signage methods, with digital file preparation being the main variable depending on design complexity.
Good results show crisp, legible Braille dots clearly raised from the sign surface, aligned precisely with printed elements, and durable enough to withstand frequent touching. Problems arise if the print and embossing steps are not well coordinated, causing dots to blend too much into the background or fade quickly. Selecting materials with consistent surface texture and using UV-resistant inks improve longevity and tactile distinction. By planning the design and production phases carefully, you can achieve signs that meet ADA tactile requirements while supporting attractive, customized graphics that improve facility branding and visual coherence.
Durability and Maintenance of Raster Braille Signs
Raster Braille signs are known for their solid durability across a range of environments, from indoor office settings to outdoor public spaces. Because Raster Braille consists of raised dots formed by a grid of tiny indentations, its physical structure tends to resist wear better than some other Braille production methods that rely on surface adhesives or stickers. When produced on materials such as aluminum, acrylic, or high-grade plastics, these signs can last for several years without significant degradation. This longevity matters since signs need to maintain their tactile clarity to ensure accessibility compliance and usability.
Maintaining Raster Braille signs mainly involves cleaning and routine inspections to avoid dirt buildup or damage that can obscure the tactile patterns. For indoor signs, gently wiping them every few weeks with a damp, soft cloth keeps dust and grime from accumulating. Avoid using abrasive cleaners or rough brushes because these can erode the subtle raised dots and compromise readability. Use a pH-neutral mild detergent only when necessary, dilute it in water, and apply it sparingly. After cleaning, make sure the sign is completely dry to prevent moisture damage.
Outdoor Raster Braille signage faces more challenging conditions such as UV exposure, rain, and temperature fluctuations. Signs in these environments should be cleaned quarterly or as needed with a non-abrasive cleaner and water. Pressure washing or strong chemical solvents should be avoided since they can damage both the substrate and the raster dots. Inspect outdoor signs routinely for signs of fading, surface cracks, or physical wear. Damage to the raised dots can make a sign non-compliant, so timely replacement or repair is necessary to maintain proper function.
Temperature extremes do not generally harm Raster Braille signs on metal or durable acrylic substrates, but excessive heat can sometimes soften plastic materials and distort the braille dots. When the sign faces constant temperatures above 140°F, use metal-backed Raster Braille to prevent deformation. In cold climates, exposure to ice and snow may trap moisture around the dots, so ensure signs are cleaned and dried as soon as possible after winter weather.
Cost-wise, maintaining Raster Braille signage is relatively low compared to replacement expenses. A soft cloth and mild cleaner generally cost under $10 and can extend the life of these signs significantly. Regular maintenance prevents the need for early sign replacement, which can run from $100 to several hundred dollars depending on size and material. You can use a checklist or log to schedule cleaning and inspections every few months to keep signs fully tactile and compliant.
Common Pitfalls and Troubleshooting in Raster Braille Production
Common mistakes when producing Raster Braille signs often involve inaccurate dot placement, incorrect dot size, or inconsistent spacing, which can all render Braille unreadable or noncompliant. The precision of Braille dots is critical because users depend on tactile accuracy to interpret the signs correctly. Following exact measurements for dot diameter and spacing as per ADA standards ensures the Braille is both legible and compliant.
To avoid these issues, use a detailed production checklist during the fabrication process. This checklist should include verifying the diameter of each dot, the spacing between dots within a character (generally 0.09 inch or 2.3 mm), and the distance between Braille cells (about 0.27 inch or 6.9 mm). Precise placement along horizontal and vertical lines is essential. When working with Router or Raster Braille, the dot height should measure roughly 0.025 inch (0.635 mm) above the sign surface to guarantee tactile recognition without being prone to damage.
- Double-check the digital template for Braille before production to ensure correct cell layout and spacing
- Use high-resolution Raster settings to produce smooth, rounded dots that meet ADA dot size specifications
- Calibrate CNC or engraving machines regularly to maintain consistent dot height and placement accuracy
- Test samples with Braille readers during the prototype stage to confirm readability and comfort
- Inspect finished signs under magnification to catch subtle misalignments or size deviations
- Store tools and templates in a controlled environment to prevent warping that alters dot precision
Common troubleshooting includes adjusting machine feed rates and pressure to correct uneven or flattened dots. If dots are too shallow, raise the cutting or embossing depth; if too tall, reduce it to avoid snagging or damage. Accurate software programming of dot positions relative to the sign border also prevents errors caused by material shifting or setup inconsistencies during production.
Use a tactile gauge or braille measuring tool after production to verify dot size and spacing, ensuring compliance before final installation.
Material choice can affect dot quality too. Harder substrates require slower feed rates and deeper raster passes, whereas softer materials may need gentler settings to avoid deformation. In all cases, following a step-by-step protocol with detailed measurements is key to maintaining control over the tactile accuracy and consistency of Raster Braille signage.
Getting Started with Raster Braille Signage: A Step-by-Step Plan
Follow these steps to begin incorporating Raster Braille into your signage projects efficiently and with confidence.
- Before you start: Review ADA standards relevant to tactile signage to understand compliance requirements. Confirm your sign designs meet minimum dot size and spacing guidelines to avoid rework.
- Week 1: Select appropriate materials such as high-quality acrylic or metal sheets compatible with Raster Braille engraving. Verify material thickness supports braille dot height standards.
- Week 2: Acquire or verify access to raster engraving equipment capable of precise, repeatable dot placement. Run test patterns on sample materials to check dot clarity and adherence to dimensional requirements.
- Week 3: Begin producing prototype signs, including all critical tactile and visual elements. Have potential users or compliance officers check readability and durability.
- Week 4: Implement routine quality control procedures during production to catch common issues like incorrect dot height or spacing. Adjust equipment settings if necessary.
- After 1 month: Establish a maintenance schedule to inspect installed Raster Braille signs periodically for wear or damage, ensuring ongoing accessibility and compliance.
Frequently Asked Questions
What Industries Most Commonly Use Raster Braille Signage?
Hospitals, universities, corporate buildings, and government facilities widely use Raster Braille due to its versatility and ADA compliance, serving public-access spaces requiring durable and readable signage.
How Does the Raster Braille Tool Integrate with Other Equipment?
The Raster Braille Tool works smooth with Zünd routing and engraving machines, improving efficiency by drilling holes and inserting spheres automatically during fabrication.
Can Raster Braille Be Removed or Altered After Installation?
Raster Braille is designed for permanence and durability; altering or removing spheres is difficult without damaging the sign, making it a reliable choice for long-term ADA signage.
Does Raster Braille Accommodate Color Contrast for Visibility?
Yes, Raster Braille signage allows for customizable color contrast, which helps meet ADA visibility requirements by distinguishing text and braille dots clearly against the background.
What Are the Environmental Limitations of Raster Braille Signs Outdoors?
While Raster Braille signs are durable, extreme weather can affect substrates differently; choosing UV-resistant and weatherproof materials extends outdoor sign longevity.
How Quickly Can Raster Braille Signs Be Fabricated Compared to Traditional Methods?
The applique and Raster Braille process is typically faster than traditional methods, simplifying production and speeding delivery without sacrificing quality or compliance.
Final Thoughts
Raster Braille offers a reliable method to create tactile signs that satisfy both functional and aesthetic needs for accessibility. By applying precise dot patterns on durable materials, you can produce compliant, user-friendly signage suited to public and commercial spaces. Start by evaluating your current signage projects for Raster Braille feasibility and connect with qualified fabricators or equipment suppliers to explore your options further.