How to Hang a Sign on a Fence: 8 Effective Methods That Actually Work
Knowing how to hang a sign on a fence starts with choosing the right method for your fence type and sign size. Using screws, zip ties, hooks, or adhesive strips ensures a secure hold without damaging the fence. Always prepare both the sign and the fence surface before mounting to increase durability.
Key Takeaways
- Drill 1/4-inch holes in signs without pre-drilled holes using a drill press for clean, damage-free holes.
- Use screws and anchors on wooden fences for a stable hold but avoid overtightening to prevent warping.
- Zip ties are ideal for chain-link or wire fences, offering a fast and damage-free hanging option.
- Adhesive strips work well on smooth fences but clean the surface with rubbing alcohol beforehand for better adhesion.
- Add spines perpendicular to the grain on signs over 8 inches tall to increase strength and prevent sagging.
- Leave a small gap or back screws out slightly each year to accommodate fence expansion without stress.
1. Best 8 Ways to Hang a Sign on Any Fence

Several reliable methods exist for hanging signs securely on fences made of wood, vinyl, metal, or chain-link materials. The choice depends on your fence type, sign weight, and whether you want a temporary or permanent solution. Each method has advantages and specific tools or materials you’ll need. Here are eight commonly used ways to hang signs on various fences with key considerations for each.
Screws and anchors work best on wooden fences. They require a drill and screwdriver and provide a strong, permanent hold for heavier signs. You’ll want to pre-drill holes to avoid splitting the wood, then use appropriate wall anchors for additional support. This method withstands wind and impact well but is less ideal for vinyl or plastic fences, where drilling can cause damage.
Zip ties are a fast, inexpensive option highly suited for chain-link fences or wire racks. Use heavy-duty zip ties that can hold your sign’s weight, and cut off the excess tie tails for a clean look. This method is flexible and easy to remove but may not look as polished on wood or vinyl surfaces.
Adhesive strips, such as Command strips, work on smooth, clean surfaces like painted vinyl fences or metal gates. You’ll need rubbing alcohol to prep the mounting area. These strips are easy to install and remove without damage but shouldn’t be used for heavy or large signs outdoors, especially where rain or heat can weaken the adhesive.
Hooks and rope offer a gentle way to hang signs from fence rails or beams without drilling or adhesives. Use sturdy hooks or rope tied securely around the fence slats. This method is great for temporary signs or decorations but requires that your fence structure allows for looping around rails or beams.
Specialized pole brackets fit metal fence posts 2 to 3 3/8 inches in diameter. They offer a stable, professional mount for medium to large signs and need tools like a wrench and drill. Brackets keep signs away from the post surface, preventing damage and making cleaning easier.
Magnetic signs only work on metal fences with enough ferrous material to attract magnets. Attaching a metal sheet to a plastic fence can allow magnetic mounts. These are simple to install and remove but only suitable for compatible fence types and lighter signs.
Standoffs produce a visually appealing, flush mount on smooth surfaces but require specialized kits, a drill, and careful measuring. This method suits lighter, indoor-facing signs more than outdoor fences.
For large signs with pole pockets or grommets, rope or hook suspensions provide a secure hold while allowing for easy removal. Ensure the hooks or rope used can support your sign’s weight and that they’re installed to avoid catching on passersby or wildlife.
| Method | Best Fence Type | Materials/Tools Needed | Durability | Cost | Ease of Use |
|---|---|---|---|---|---|
| Screws & Anchors | Wood, Masonry | Drill, Screws, Wall Anchors, Level | High (Permanent) | Low to Moderate ($5-$15) | Moderate (Requires Tools) |
| Zip Ties | Chain-link, Wire Racks | Zip Ties, Cutters | Moderate (Semi-Permanent) | Low ($1-$3 per bundle) | Easy |
| Adhesive Strips | Vinyl, Metal (smooth surfaces) | Command Strips, Rubbing Alcohol | Low to Moderate (Temporary) | Low to Moderate ($5-$10) | Easy |
| Hooks & Rope | Wood, Metal Rails, Vinyl | Hooks, Rope | Moderate (Temporary to Semi-Permanent) | Low ($2-$10) | Easy |
| Pole Brackets | Metal Poles (2″, 3 3/8″) | Wrench, Drill, Brackets, Tape Measure | High (Permanent) | Moderate ($15-$30) | Moderate (Requires Tools & Skill) |
| Magnetic Mounts | Metal Fences | Magnetic Backing or Metal Sheet | Low to Moderate (Temporary) | Low to Moderate ($5-$15) | Very Easy |
| Standoffs | Smooth Surfaces (Indoor) | Drill, Standoff Kit, Level | High (Permanent) | Moderate to High ($20-$50) | Hard (Precision Required) |
Your sign’s weight strongly influences the method choice. Heavy or large signs need stronger, more permanent mounts like screws, anchors, or pole brackets to avoid bending or damaging the fence. Lightweight signs can be secured with zip ties, ropes, or adhesive strips.
Consider how long you want the sign to stay up. Removable options like zip ties, adhesive strips, or magnetic mounts work well for temporary displays. For long-term installations, drilling and using brackets, screws, or standoffs offer better stability and weather resistance.
Applying these methods correctly ensures your sign stays secure without damaging the fence. Preparing the fence surface, cleaning it and selecting mounting points, helps avoid problems like slipping, warping, or rust. Matching the mounting method to the fence type and your sign’s size will give the best results for display durability and aesthetics.
2. Preparing Your Sign and Fence for Secure Hanging
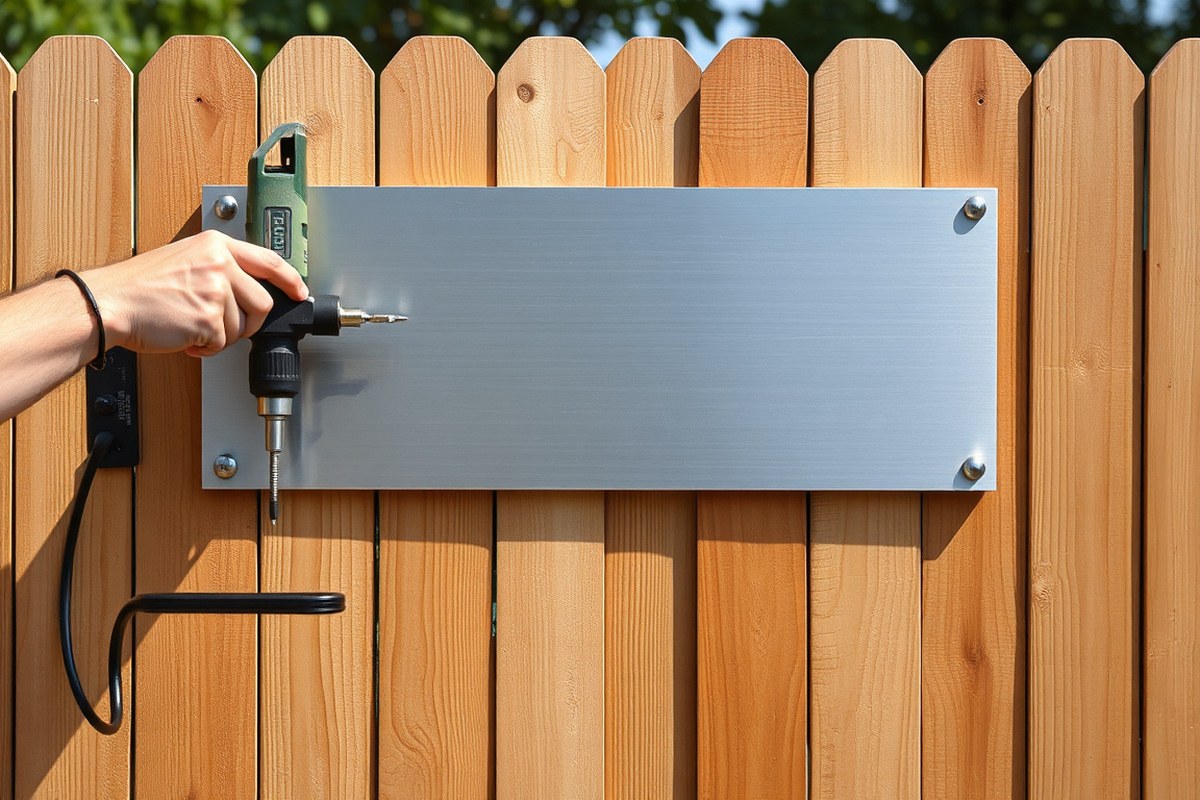
Proper preparation of both your sign and fence surface is key to secure, damage-free hanging. Drilling clean holes in the sign and ensuring the fence is clean, level, and structurally sound help prevent warping, falling, or damage to fragile fence materials. Taking careful measurements and respecting the fence type increases the longevity of your installation.
Using a Drill Press for Clean, Accurate Holes
Drilling holes in your sign requires precision to avoid warping or damaging the material. A drill press provides steady, consistent pressure and speed, producing clean, even ¼-inch holes, especially important for thin aluminum or plastic signs. Avoid handheld drills for new holes as they often buckle the material.
When drilling, place the sign flat on the drill press table and secure it with clamps to prevent movement. Drill holes near the corners, leaving at least one inch of material from the edge to avoid cracking. A step drill bit can help create smooth-edged holes that fit bolts or screws precisely.
Cleaning and Leveling the Fence Surface
Before mounting, clean the fence surface to remove dirt, dust, and grime, which interfere with adhesives or screws holding firmly. Use rubbing alcohol on a cloth to wipe down the fence area where the sign will attach, then allow it to dry fully, usually 5 to 10 minutes in warm weather. Clean surfaces ensure stronger bonds, especially with adhesive strips and double-sided tape.
Level the mounting area to prevent signs from hanging crooked or sagging over time. Use a carpenter’s level or a smartphone level app against the fence to mark horizontal and vertical lines for reference. Uneven mounting may cause tension on fasteners, leading to premature loosening or damage.
Testing Fence Condition for Safe Mounting
Evaluate the fence for damage or weakness before securing your sign, with extra care for fragile or vinyl fences. Gently press or tap around the intended mounting spot to check for cracks, brittleness or soft spots. Cracks or holes in vinyl fences can worsen if stressed by screws, so alternate fastening methods may be necessary.
Inspect fence posts for stability and rot, especially on wooden fences. Weak posts may not hold screws or bolts securely, risking sign failure or fence damage. Reinforce or select a different mounting location if the fence condition is questionable.
Marking and Measuring Hole Locations
Accurate marking of hole positions on your sign and fence prevents misalignment and reduces rework. Measure twice, mark once, and space holes evenly, ideally with at least 6 inches between them to distribute weight. Use a pencil or washable marker for clear, removable marks.
Align the sign on the cleaned, leveled fence area and hold it in place or clamp it lightly. Mark hole centers on both the sign and the fence to create pilot holes. Double-check spacing, level, and alignment before drilling or fastening.
- Place the sign flat and clamp securely on a drill press table.
- Use a ¼-inch step drill bit to drill holes near corners, at least one inch from edges.
- Wipe the fence surface with rubbing alcohol and let dry completely.
- Use a level to mark horizontal and vertical reference lines on the fence.
- Check fence condition for cracks, softness, or instability.
- Position the sign on the fence, align with level lines, and mark hole locations.
- Drill small pilot holes in the fence if screwing is needed, avoiding damage.
Tip: Do not overtighten screws on aluminum signs; stop tightening as soon as the washer contacts the metal to prevent warping.
Tools and Materials Checklist
Gather these essentials before prepping your sign and fence: drill press with a ¼-inch step drill bit, clamps, rubbing alcohol, clean cloths, pencil or washable marker, carpenter’s level or smartphone level app, measuring tape, drill with appropriate bit for pilot holes, and screws or fasteners suited to your fence type. Choosing the right tools helps avoid damage and saves time. For vinyl fences, use screws designed for plastic or alternative mounting like adhesive strips to minimize risk. Having everything ready upfront prevents delays during installation.
3. Hanging Signs on Wooden Fences Safely and Neatly
Hanging a sign on a wooden fence can be done using screws, hooks, or adhesives, each suited to different needs and avoiding damage when applied properly. Screwing offers long-term security with minimal warping when done right, hooks and ropes create easier removability without holes, and adhesives provide damage-free, temporary options. Choosing the method depends on how long the sign will stay, the fence condition, and how permanent you want the fix.
Using Lag Screws and Washers Correctly
Lag screws are ideal for wooden fences when you want a sturdy and lasting hold. Choose 1/4-inch diameter lag screws long enough to go through the sign and at least 1 to 1.5 inches into the wood. Using a washer on each screw spreads pressure and prevents the screw head from pulling through the sign material, preserving its integrity.
Drill pilot holes first with a bit slightly smaller than the screw diameter to reduce wood splitting. The pilot hole should be straight and deep enough to accept the screw fully. Tighten screws until snug but avoid over-tightening, which can warp or crack the wood and the sign. Leaving about a 1/2-inch gap between the sign and fence surface allows airflow, reducing moisture buildup and wood damage.
Applying Command Hooks on Wood
Command hooks provide a damage-free hanging solution on wooden fences, especially for lightweight signs or temporary displays. They stick well to clean, dry wood surfaces and can be removed without residue if installed according to instructions. Clean the fence area with rubbing alcohol and let it dry completely before application to maximize adhesive strength.
Press the hook firmly onto the wood for at least 30 seconds and wait one hour before hanging the sign to ensure the adhesive sets. These hooks support signs up to about 5 pounds depending on the product type. They come off easily by pulling the adhesive strip downward slowly, avoiding wood finish damage. Use multiple hooks for heavier or wider signs to distribute weight evenly.
Zip Ties vs Rope for Quick Installation
For signs with grommets or holes, zip ties and rope offer fast and removable options without drilling into the wood. Zip ties are inexpensive, weather-resistant plastic, ideal for short to medium term use. Ropes, made of nylon or cotton, provide a reusable and adjustable solution better suited for signs that may need repositioning.
- Zip ties are easy to tighten and lock firmly but cut them carefully when removing to avoid splinters.
- Rope can be tied with simple knots like square knots for secure holding and untied to reposition.
- Use UV-resistant zip ties or synthetic rope for outdoor durability.
- Both allow hanging from fence rails, pickets, or hooks without damaging wood surfaces.
- Consider wrapping rope or zip ties with tape where friction might rub the wood to prevent wear.
These methods make restoration or seasonal sign changes quick, with no permanent marks or holes.
Tips for Aligning and Leveling Signs on Wood
Correct alignment improves sign visibility and ensures a professional look. Start by marking the fence with a pencil or painter’s tape at the intended mounting points before attaching anything. Use a small level or smartphone app level on the back of the sign when positioning screws, hooks, or ties.
For narrow picket fences, try to fasten the sign across two or more pickets to prevent uneven stress and give better stability. Check the sign from the front after hanging to ensure it is straight and adjust ties or hooks accordingly before finalizing. Avoid hanging signs in spots prone to direct water runoff or wood rot to extend both the sign’s and fence’s life.
4. Mounting Signs on Vinyl and Plastic Fences Without Damage
Vinyl and plastic fences are popular for their durability and low maintenance, but their surface and structure require special care when mounting signs. These fences are typically hollow or have thin walls, meaning drilling holes can weaken the panels or cause cracks. Because plastic fences lack the solid backing of wood or metal, avoid using screws or nails directly unless you target the fence posts rather than the panels themselves. Drilling into the plastic surface risks permanent damage such as cracking or warping, especially under temperature swings between 0°F and 120°F.
Non-damaging mounting options work best for plastic fences. Magnetic signs are ideal when you need temporary signage since they attach easily without any hardware. For more permanent setups, using zip ties around the fence rails or posts spreads the sign’s weight and prevents bending. Thread zip ties through grommets or pre-drilled holes on the sign and secure them loosely enough to allow natural expansion of the plastic but tight enough to hold the sign steady. Avoid overtightening, which can deform the fence.
Another good option is the use of adhesive strips or double-sided tape designed for outdoor use; however, the plastic surface must be clean and dry before application, and these adhesives perform best on flat, smooth sections of the fence. Adhesive methods may require replacement every 6 to 12 months depending on weather exposure. Signs framed with lightweight materials benefit from these approaches, but heavy signs risk sagging or pulling the fence panels out of shape.
Careful weight distribution is important to keep the fence stable. Avoid concentrating all the sign’s weight on one spot. Instead, use multiple attachment points spread across the sign’s width and height to share the load evenly. For example, a 24-inch by 18-inch sign weighing around 2 pounds should have at least four attachment points spaced evenly. This setup helps the plastic fence maintain its form and extends its lifespan.
When hanging signs over the top rail, simply hooking or draping the sign frame can work well without any fasteners. This method eliminates the risk of holes or adhesive residue and allows quick removal when needed. For signs with frames, using the frame’s built-in hardware along with zip ties or hooks attached to the fence rails is effective and secure.
Overall, avoid penetration or harsh adhesives on the plastic panel surfaces. Stick to lightweight, evenly supported signs with zip ties, magnetic mounts, or removable adhesive strips. These choices cost little, zip ties and magnetic mounts typically cost under $10 for supplies, and protect your fence’s structure while keeping your signage visible and neat.
5. How to Use Zip Ties, Hooks, and Rope for Fast Outdoor Hanging
Zip ties, hooks, and rope offer quick, affordable, and weather-resistant ways to hang signs on fences temporarily or semi-permanently. These methods work well on chain link, wire, wooden, and metal fences. Using durable materials and proper techniques helps keep your sign secure through wind and rain, while minimizing damage to the sign or fence.
Selecting Durable Zip Ties and Hooks
Choose black UV-resistant zip ties rated for outdoor use, as these can last several months exposed to sun and rain without snapping. For hooks, consider metal wire hooks with a protective coating to avoid rusting, or peel-and-stick hooks designed for outdoor conditions if attaching to smoother surfaces. The right hardware prevents ongoing replacements and keeps your sign stable in changing weather.
Look for zip ties at hardware stores or online, usually selling in packs of 50 for around $5 to $10. Wire hooks often cost about $1 to $3 each depending on size and material. Purchasing slightly larger zip ties or hooks than needed gives you flexibility with different fence types and sign sizes.
Looping Through Grommets and Fence Sections
Signs with grommets allow for easy attachment with zip ties or rope by threading through the holes and around fence wires or poles. On fences without grommets, securing the sign by looping rope or zip ties around sturdy fence sections avoids damaging the sign material.
- Align the sign on the fence and hold it level.
- Thread one zip tie or rope through each grommet or corner of the sign.
- Loop the zip tie or rope around the fence wire, pole, or picket.
- Pull the zip tie tight or tighten the rope securely without stressing the sign fabric.
- Repeat for all sign attachment points for balanced support.
Thread zip ties through grommets rather than directly around the sign’s edge to prevent tearing under wind stress.
Knotting and Securing Rope for Stability
Good-quality polypropylene or nylon rope works well outdoors because it resists moisture and UV damage. Use knots that hold tight under tension but are easy to untie later, like a bowline or a taut-line hitch. These knots allow you to adjust the rope tension to keep the sign flat against the fence without sagging or fluttering.
To tie a bowline knot, form a small loop near the end of the rope, pass the working end through the loop, around the standing part, and back down through the loop. Tighten firmly but leave enough slack to adjust tension easily by sliding the knot.
Cutting and Tucking Excess Materials
After securing the sign, trim excess zip tie tails close to the locking head using wire cutters or scissors to avoid sharp edges that can catch or injure. With rope, cut any extra length to prevent flapping in the wind and tuck the ends under the tightened loops or behind the fence framework to keep a neat appearance.
Trimmed and neatly tucked fasteners reduce wear on the sign and fence, and improve safety for anyone passing by. Check the sign a day after installation and re-tighten or adjust knots as needed to maintain a level, stable display.
6. Using Adhesive Strips and Double-Sided Tape on Fence Signs
Adhesive strips and double-sided tape can hold light signs well on clean, smooth fence surfaces like vinyl or metal. These adhesives are popular because they avoid holes and provide a neat appearance. For best results, clean the fence area thoroughly with rubbing alcohol or a mild detergent solution and allow it to dry completely. Dirt, dust, and moisture reduce adhesion significantly and cause the tape to peel off quickly, especially outdoors where weather exposure is constant.
Not all tapes are suitable for outdoor conditions. Look for industrial-grade double-sided tapes labeled as weather resistant or UV resistant. Brands with outdoor specifications often withstand temperature ranges from 14°F to 140°F and resist rain or humidity for weeks to months. For example, 3M VHB (Very High Bond) tape is a common choice; it adheres strongly to non-porous surfaces and can last from several months up to a year depending on exposure. However, these tapes are better for smooth, non-porous surfaces and rarely stick well to rough textures like wood grain or peeling paint.
Rough or porous fences, such as untreated wood or textured surfaces, pose challenges for adhesive strips. The tape can’t make full contact, leaving air pockets that rapidly weaken the bond. If your fence surface feels uneven or splintered, adhesive strips are unlikely to hold securely outdoors. In these cases, anchors or fasteners that physically penetrate the material offer better reliability. Also, avoid using adhesives on wet or damp fences; exposure to moisture during application prevents proper bonding and reduces lifespan.
When applying adhesive strips, press the sign firmly against the fence for 30 seconds to activate the adhesive fully. Avoid repositioning once stuck, as this can reduce adhesion. Temperature matters too: apply tape or strips when the fence temperature is between 50°F and 100°F for optimal stickiness. Prices vary but expect to spend around $10 to $20 for a roll of good outdoor double-sided tape, which can cover several small signs.
Signs attached this way can stay up steadily if lightweight, think under 5 pounds, and on smooth surfaces like metal fences or PVC panels. Signs that are heavier, bulky, or exposed to high winds should not rely on adhesive strips alone, as wind pressure can peel tape away. Check the adhesive monthly, especially after storms or temperature swings, and replace it at first sign of loosening to avoid damage or loss of the sign.
7. Common Mistakes and How to Fix Hanging Issues on Fences
Signs often bow or warp after hanging because the mounting hardware is overtightened or the surface was not properly prepared. Overtightening screws on metal signs like aluminum can cause the material to deform. To prevent this, tighten screws only until the washer just contacts the metal surface. Stopping at that point avoids bending the sign and keeps it flat and visually neat.
Signs may fall or come loose when the mounting surface is dirty or when fasteners are not the right type for the fence material. Dirt, dust, or moisture reduce adhesion for tapes and strips, and loose screws or zip ties can slip under wind stress. Clean the fence surface with a mild detergent and dry it completely before attaching the sign. Also, choose fasteners designed for your fence type and check their tightness after installation.
Damage to fences happens if you use incorrect fasteners, drill without care, or apply too much force during installation. For wooden fences, nails driven at sharp angles or too close to edges can split the wood. Non-wood fences suffer cracks or surface damage from improper hooks or staples. Always match fasteners to fence material and install gently. Pre-drilling pilot holes in wood helps avoid cracks and splits, reducing repair needs.
- Overtightening screws – causes warping – tighten only until washer touches metal.
- Unclean fence surfaces – reduce adhesive strength – clean and dry before hanging.
- Using wrong fasteners – risk fence damage – select type for fence material.
- Drilling too deep or near edges – wood splits – pre-drill pilot holes carefully.
- Ignoring sign weight guidelines – loose signs fall – wait 1 hour after adhesive and check supports.
Waiting time matters for adhesives and tapes. Heavy signs require at least an hour to cure before supporting weight fully. Skipping this step leads to premature failure and falling signs. After hanging, inspect the sign frequently to tighten loose fasteners or replace worn ties. Adjustments prevent accidents and maintain your fence’s appearance and integrity over time.
8. Tips for Professional-Looking Finishes and Long-Term Maintenance
To achieve a professional finish when hanging a sign on a fence, concealing mounting hardware is key. Countersink screws just enough so the screw heads sit flush or slightly below the surface of the sign or fence. Then fill the holes with wood filler or an exterior-grade putty that matches your sign’s color or the fence’s paint. After drying, gently sand the area smooth and apply matching paint or sealer. For metal signs, use small caps or decorative fasteners designed to cover screw heads for a clean look without compromising stability. This extra step typically adds a few extra minutes per hole but dramatically improves the appearance by hiding unsightly screws or bolts.
Proper maintenance also extends your sign’s life and keeps the mounting site secure. Inspect both the sign and the fence at least twice a year, ideally before and after peak weather seasons. Look for rust on metal hardware, wood rot near screw holes, and any loosening caused by wind or temperature changes. Tighten or replace loose or corroded hardware promptly. Cleaning signs regularly with mild soap and water prevents buildup of dirt and grime that can degrade materials. Avoid high-pressure washing, which might damage paint or loosen fasteners.
Sealing and repainting fence signs protect them against harsh weather. Signs made of wood should be resealed every two to three years with a waterproof exterior sealer. Use a brush-on polyurethane or spar varnish for the best moisture protection. Vinyl and metal signs don’t need sealing but might require occasional cleaning and repainting to brighten faded colors. Repainting fences under signs restores appearance and guards against rot or rust that could weaken mounting points. Typically, repainting fences every three to five years preserves wood or metal integrity, depending on climate exposure.
For weather protection, use rust-resistant hardware like stainless steel or galvanized screws, especially in humid or rainy areas. Applying a thin coat of clear rust inhibitor on exposed metal parts adds extra protection. At installation, add a bead of exterior-grade silicone caulk around screw holes to prevent water penetration into the fence structure, which can cause wood rot or metal corrosion over time. This simple step can save costly fence repairs later.
Always inspect your mounted sign periodically and address loose hardware or early signs of wear to avoid more extensive damage to your fence and sign.
Step-by-Step Action Plan for Hanging Your Sign on a Fence
Follow these steps to hang your sign securely and keep it looking good over time.
- Before you start: Choose the right type of fastener based on your fence material, wood, vinyl, or metal. Test the fastener on a small, hidden section to avoid damage.
- Day 1: Clean and dry the fence area where you’ll mount the sign. This helps adhesive sticks well and prevents slipping.
- Day 1: Attach the sign using your chosen method, such as zip ties for metal fences or adhesive strips for vinyl. Make sure the sign is level and tight.
- Day 3: Check the sign’s stability. Tug gently to ensure it’s firmly in place but avoid loosening any fasteners.
- After 1 week: Inspect the sign for any weather-related wear or loosening. Replace or tighten fasteners if needed.
- Monthly maintenance: Clean the sign and fence around it to prevent dirt buildup and maintain adhesion or fastening strength.
- Seasonal check: Before harsh weather seasons, reinforce or remove and remount the sign to avoid damage.
Frequently Asked Questions
Can I Hang a Heavy Sign on a Rotting Wooden Fence?
Avoid hanging heavy signs on rotting fences, as the wood may not support the weight and could worsen damage. Consider reinforcing the fence or choosing a different mounting location.
Is Drilling into a Vinyl Fence Safe for Hanging Signs?
Yes, drilling into vinyl fences is possible but requires care to avoid cracking. Use the right drill bit and seal holes to prevent water damage.
How Can I Hang a Sign Neatly on a Chain-Link Fence?
Use zip ties threaded through the sign’s grommets and around the fence links for a secure, tidy mount that’s easy to adjust or remove.
Are Adhesive Strips Reliable for Outdoor Fence Signs?
Adhesive strips work best on smooth, clean surfaces and in mild weather. They may fail in rain or extreme temperatures, so test their hold first.
What’s a Quick Method to Hang a Sign on a Metal Fence Post?
Use specialized hooks or clamps designed for metal posts to suspend your sign without damaging the fence or needing tools.
How Do Spines Help When Mounting Large Wooden Signs?
Spines add strength by reinforcing signs over 8 inches high, preventing warping or sagging when hung perpendicular to the wood grain.
Key Points to Remember
Securely hanging a sign on your fence takes a bit of planning and the right materials for the job. The best method depends on your fence type and how long you need the sign to stay up. Start with a clean surface and suitable fasteners to avoid damage and keep your sign in place. Now, gather your tools and materials and try hanging your sign with confidence today.