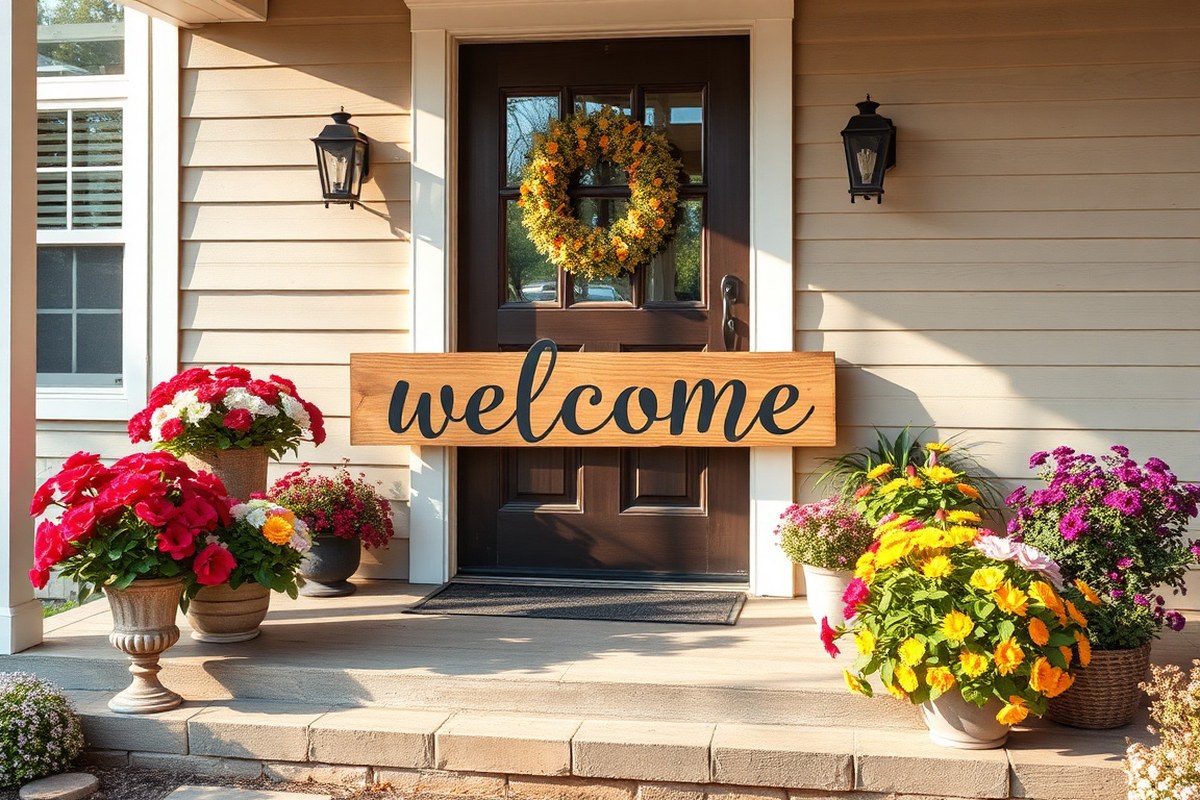
Welcome Sign Ideas: 12 Creative Ways to Craft Unique, Inviting Designs
Welcome sign ideas provide a simple yet effective way to make your entryway inviting and reflective of your personal style. Using unique materials beyond traditional wood, you can craft signs that stand out and suit various occasions. Start by selecting a base material that complements your home’s aesthetic for an immediate impact that lasts.
Key Takeaways
- Use materials like metal, fabric, or chalkboard instead of just wood to create standout welcome signs.
- Customize your sign with seasonal or event-specific decorations to reflect different occasions.
- Measure your entry space first to choose the right size for your welcome sign’s visibility and balance.
- Keep your welcome sign budget-friendly by using upcycled or readily available crafting supplies.
- Start with simple designs to learn techniques before attempting more complex welcome sign projects.
- Add lighting or 3D elements to your sign for extra dimension and improve curb appeal.
1. Creative Welcome Sign Ideas Beyond Wood
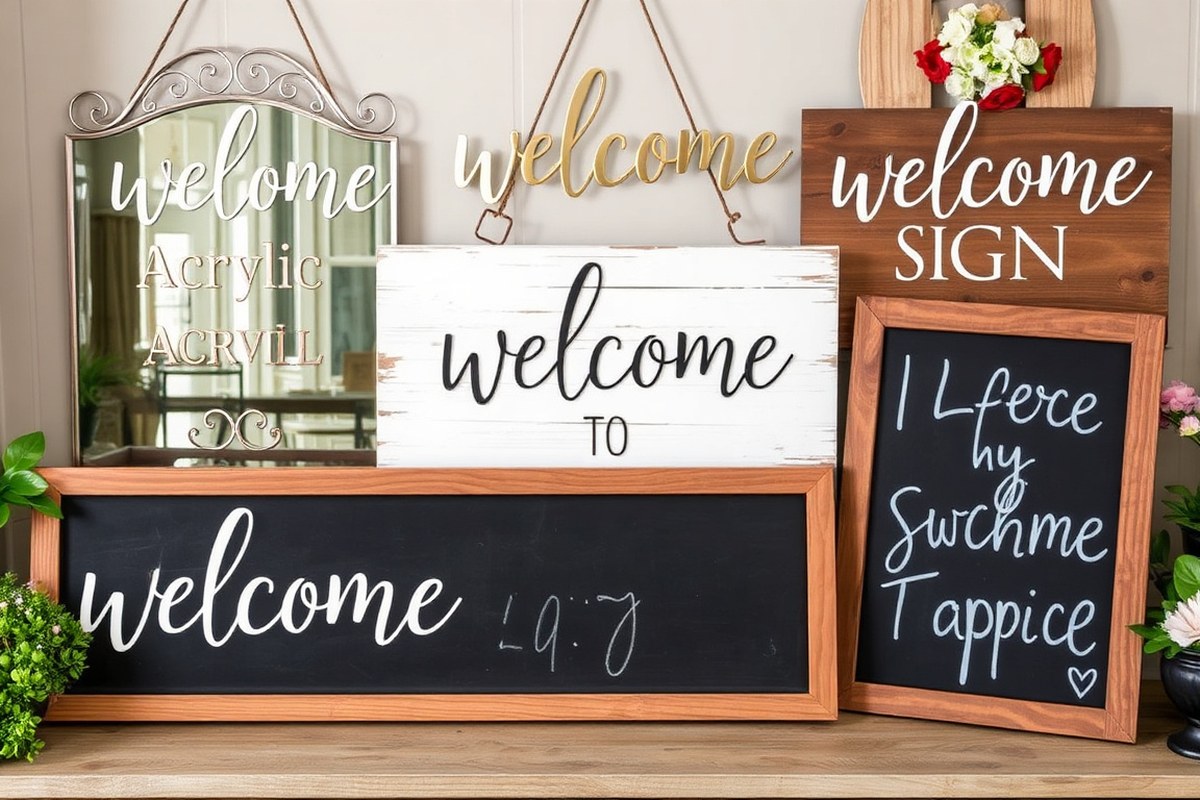
Welcome signs don’t have to be limited to traditional wood. Several alternative materials can create distinctive looks for your home décor, each suited to different indoor or outdoor settings. Metals like aluminum or steel offer a sleek, modern feel. They resist weather well, making them excellent for outdoor use. A sign made of brushed aluminum can cost between $30 and $75 for a 12-by-18-inch size, depending on thickness and finish. Metals also allow for laser-cut lettering, which adds a precise, clean edge that lasts longer than paint or vinyl.
Glass and acrylic signs provide a more elegant or contemporary option, often preferred for indoor spaces like entryways or offices. Acrylic is lighter and less fragile than glass, usually costing around $20 to $60 for DIY projects of similar size. Both materials work well with backlighting or etched designs to draw attention. However, they aren’t as durable outside unless protected from direct impacts. UV-resistant coatings or lamination help extend outdoor life. These signs require careful handling during installation, as damage can be costly to fix.
Another unique choice is repurposed materials such as pallet wood or old crates. These can be crafted into rustic, charming signs that make each piece one of a kind. Using reclaimed wood can cost little to nothing if you source materials on hand. The worn textures and natural imperfections add personality but need sealing for outdoor exposure. Sturdy weatherproof paint and clear sealant can protect them for one to three seasons depending on climate. Indoors, these signs become cozy focal points that fit cottage or farmhouse styles.
Fabric signs made from canvas or burlap also stand out, especially indoors or under covered porches. You can paint or stencil letters on durable fabrics, which may cost $5 to $15 for materials. These signs are lightweight and easy to swap for seasonal messages. Keep in mind they are vulnerable to moisture and fading from sun, so limit outdoor use unless in a protected area. Hanging options can include wooden dowels, curtain rods, or simple frames to keep the fabric taut and readable.
| Material | Best For | Cost Range | Durability | Key Considerations |
|---|---|---|---|---|
| Metal (Aluminum, Steel) | Outdoor and modern indoor | $30 – $75 | High | Great for laser-cut designs; heavy; rust-resistant coatings recommended |
| Glass / Acrylic | Indoor, sheltered outdoor | $20 – $60 | Medium | Elegant look; fragile; UV protection extends lifespan outdoors |
| Reclaimed Wood / Pallets | Rustic indoor/outdoor | Free – $20 | Medium | Needs sealing; unique textures; eco-friendly |
| Fabric (Canvas, Burlap) | Indoor, covered porch | $5 – $15 | Low | Lightweight; easy to swap; avoid direct weather impact |
Choosing the right material comes down to where you plan to display your welcome sign and the style you want. Metal and sealed reclaimed wood are your best bets outdoors for weather resistance. Acrylic or glass fit indoor entries where elegance matters. For easy seasonal changes, fabric signs offer flexible uses with minimal setup. Each alternative carries different costs and care requirements, so consider your environment and the time you’ll want to invest in maintenance before deciding which material to use.
2. How to Personalize Welcome Signs for Different Occasions
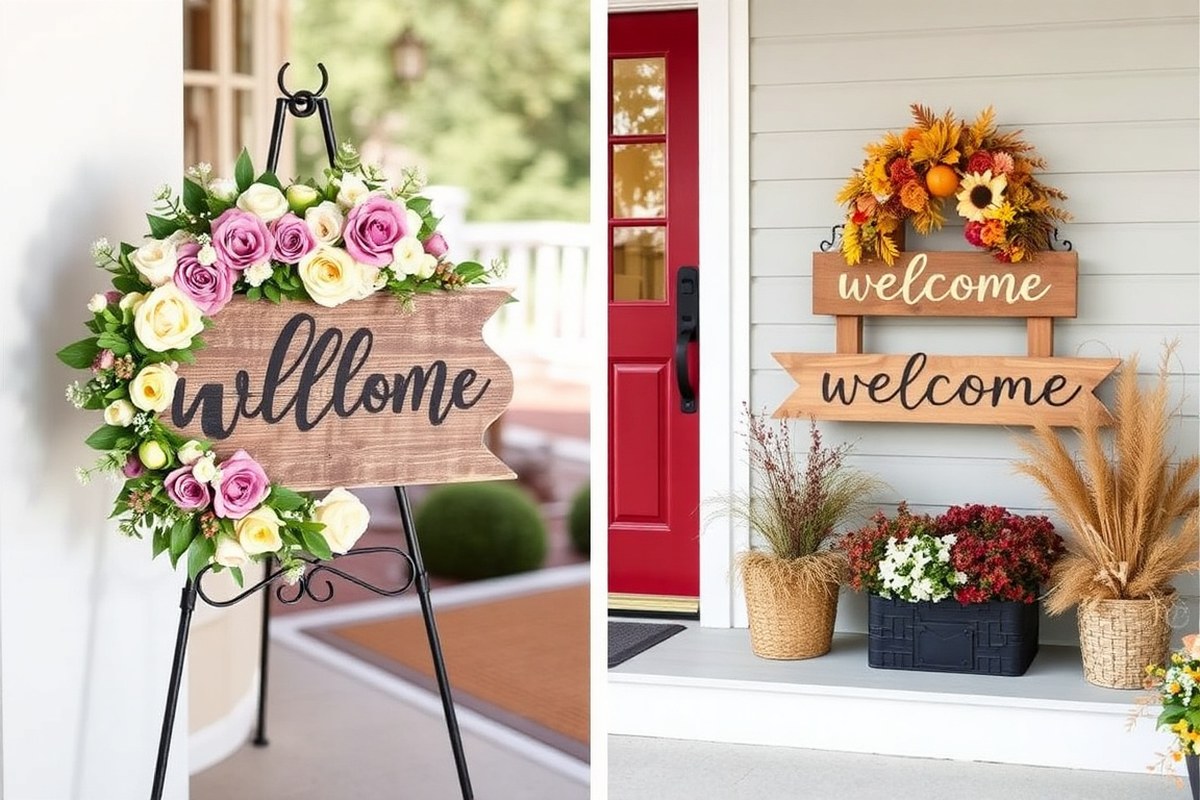
Customizing welcome signs to suit different occasions like weddings or holidays makes your entryway feel special and festive. You can easily switch out elements, add specific decorations, or use different materials to highlight the purpose of your event or season. This approach helps your sign do double duty as charming seasonal decor while still greeting guests warmly.
Seasonal Themes with Removable Elements
One practical way to personalize your welcome sign for various occasions is to use removable features like interchangeable letters, magnetic attachments, or chalkboard surfaces. A chalkboard sign lets you write different greetings or draw holiday-themed art with chalk markers, which you can wipe clean and redo in minutes. This method costs just a few dollars for chalk and markers and allows unlimited design changes throughout the year.
For example, having an interchangeable “O” on a wooden sign lets you decorate it with a pumpkin cutout during fall or a snowflake in winter. Magnetic or Velcro-backed accents work well on metal or acrylic signs, so you can swap out holiday icons, wedding motifs, or sports team colors. This flexibility extends your sign’s usefulness and keeps your home décor fresh without extra storage needs.
Design Ideas for Weddings and Formal Events
Weddings call for welcome signs that match the event’s style and tone. Glass or acrylic signs with painted or vinyl-lettered calligraphy provide a sleek, formal look. Adding hand-drawn floral designs or small bouquets on the top corners improve the charm and personal touch, making guests feel appreciated from the moment they arrive.
To personalize the message, include the couple’s names, wedding date, or a short welcoming phrase like “Welcome to Our Celebration.” Such signs average about 12 by 18 inches and can be made for around $15 to $30 using simple craft supplies or ordered from a vendor. Keep your lettering crisp and easy to read by using stencils or vinyl decals to avoid smudging.
Crafting Holiday-Specific Welcome Signs
Holiday welcome signs can be themed around colors, symbols, or sayings that immediately convey the festive spirit. For Christmas, consider a wooden sign painted red and green with a small wreath or string lights attached. For Halloween, black or orange backgrounds with painted pumpkins or spooky lettering add a playful vibe.
Use craft store supplies like ribbon, miniature ornaments, or seasonal garlands to embellish the sign. Spending about $10 to $20 on materials usually covers paint, brushes, and decorative additions. Keep the overall size manageable around 10 by 14 inches to fit most front doors. For outdoor use, apply a weatherproof sealant to protect the design.
Tips for Creating Versatile Welcome Signs
Choose base materials that support multiple styles and modifications for the best long-term value. Wood and chalkboard surfaces are ideal because they accept paint, chalk markers, and adhesives well. Acrylic signs work best indoors and offer a modern look with easy cleaning afterward.
Consider assembling a basic welcome board with clips or hooks, allowing you to hang seasonal cards, small bouquets, or printed winter scenes. This adds depth and highlights the current occasion without permanently altering your main sign. Plan to spend under $5 for clip-on accessories, making this a budget-friendly decorating tip.
Use water-based paints or markers for easy cleaning and fewer fumes, especially if you plan to update your welcome sign frequently for different seasons or events.
3. Choosing the Right Size and Placement for Your Welcome Sign
Selecting the right size and placement for your welcome sign ensures it captures attention and fits your space without overwhelming it. Consider the scale relative to the location, whether it’s a porch wall, front door, or yard stake. Proper placement improve visibility, making your greeting warm and clear from the first glance.
Match Sign Size to Viewing Distance and Location
The size of your welcome sign should correlate with how far guests will be when they see it. For example, signs meant for a front porch or near the entry door generally work best in the range of 12 to 24 inches wide. This size fits most porch wall spaces without crowding and stays readable from a close distance of 3 to 6 feet.
Signs displayed outdoors from the street or driveway need to be larger, at least 18 to 30 inches wide or taller, because guests might see them from 10 feet or more away. Large yard or stake signs can reach up to 36 inches tall for maximum impact. Too small a sign in a wide open space risks being missed entirely, while a sign too large near a cozy entry may look bulky or out of scale.
Consider the Surface and Mounting Options
Choose a flat, smooth surface when placing your sign for easy mounting and neat appearance. Wooden porch walls, entryway columns, or the front door itself can hold signs securely with screws or adhesive strips. For free-standing signs like chalkboards or planter combos, place them on level ground close to the door or walkway for clear visibility.
Think about the sign’s weight and what mounting hardware is appropriate. Lightweight acrylic or thin wood signs might only need strong double-sided tape, while heavier pallet signs call for sturdy brackets or hooks. Avoid placing signs where they interfere with door movement, windows, or obstruct walkways.
Balance Proportion with Existing Decor
Your welcome sign should complement your home’s style and existing outdoor decor without competing for attention. For a small porch decorated with plants and lanterns, a compact sign around 12 to 18 inches wide works best. On larger entryways with multiple seating or décor pieces, signs closer to 24 inches wide provide a good balance.
Check your wall space and measure before buying or making a sign. Signs too large will crowd other decorations, while signs too small can look lost. The key is to maintain visual harmony, so the welcome message feels like a natural part of the porch rather than an afterthought.
Plan for Lighting and Weather Conditions
When positioning your sign outdoors, account for lighting conditions that affect visibility and mood. Signs near porch lights benefit from improve readability at night. For acrylic or translucent materials, integrating LED lighting can give your sign a bright, glowing appeal that stands out after dark, grabbing attention and adding charm.
Also consider sun exposure and weather. Direct sunlight can fade paint or vinyl quickly. Place signs where some shade is available or use UV-resistant finishes to prolong color vibrancy. When mounting outside, choose durable materials and fastening methods to prevent damage from wind or rain.
Checklist for Choosing Size and Placement
Use this simple checklist to guide your decisions:
- Measure the viewing distance: smaller signs for close-up entryways, larger signs for visible yards or streets
- Assess available mounting space and surface type (door, porch wall, stake in ground)
- Match sign size to surrounding decor and porch scale to maintain balance
- Plan for lighting conditions, choose a location with good natural or artificial light
- Consider weather exposure and select weatherproof materials and mounting
- Verify mounting hardware strength suits the sign weight and surface type
- Ensure sign placement doesn’t block doors, windows, or walkways
Following this checklist will help you create a welcome sign that is perfectly sized, well-placed, and visually appealing to greet guests warmly and clearly.
4. Budget-Friendly Welcome Sign Projects Anyone Can Make
Creating a beautiful welcome sign on a budget is achievable using common materials and simple DIY techniques. Start with a basic wooden board, often available at home improvement stores for under $10 or reclaimed from old pallets for free. Sand the surface to smooth any rough spots, requiring just a small sanding block costing around $5, or using leftover sandpaper from other projects.
Use acrylic paints for lettering and decoration. A basic set of acrylic paints costs about $10, and they dry quickly, usually within 30 minutes to an hour, allowing you to finish the sign in one afternoon. Choose stencil letters about 5 inches high to make hand-painting easier, ensuring clear, professional-looking results without needing advanced art skills. A simple black paint on a white or natural wood background works well to create a striking contrast that’s easy to read from the porch.
For added texture or interest without extra cost, consider distressing the wood lightly with sandpaper after painting to give a rustic, weathered look. This technique takes just a few minutes and only requires gentle sanding along the edges and flat surfaces. Sealing the sign with a clear outdoor sealer, costing around $8, will protect your work from weather and extend the lifespan if it’s displayed outside. Apply one or two coats and allow drying time of at least 24 hours before mounting your sign.
A typical budget-friendly welcome sign can be completed in 3 to 5 hours from start to finish, depending on the level of detail and drying times. Beginning with sanding the board takes about 20 to 30 minutes, painting the letters and decorations roughly 1 to 2 hours, including stenciling or careful lettering, and finishing with sealant application and drying. Minimal tools are needed, a paintbrush, sanding block, and stencils, which can often be reused for multiple projects.
This approach works well for front porch signs, indoor entryways, or even seasonal decor. For variations, you might swap paint for permanent markers on acrylic sheets or use leftover fabric to create a no-carve stencil. Color choices and wording can be customized easily, such as “Welcome Home,” “Hello Friend,” or seasonal greetings like “Happy Fall.” The key is to keep materials simple and focus on clean lettering to maintain an inviting and warm appearance.
Common difficulties include uneven paint coverage or smudging, both of which can be avoided by working in thin layers and allowing each layer to dry fully. Avoid overly intricate designs if you want to complete your project in one day. If weatherproofing isn’t needed for indoor signs, the sealing step can be skipped, saving time and cost.
5. Step-by-Step: Making a Rustic Pallet Welcome Sign
Creating a rustic welcome sign from pallet wood gives you a charming, weathered decoration that adds character to your porch or entryway. Using reclaimed wood saves money and ups the rustic vibe. Follow these steps to prep, paint, stencil, and finish your sign for a custom look that lasts.
Preparing Pallet Wood for Painting
Start by selecting pallet wood boards with minimal damage and no chemical stains. Clean the wood by wiping off dirt and debris with a damp cloth. Let the wood dry completely before sanding to avoid raising the grain unevenly. Sand the boards with medium-grit (80-120) sandpaper to smooth rough spots and remove splinters. Sand again with fine-grit (180-220) paper for a soft surface that paint will adhere to better. Arrange your boards side by side until you reach the desired size, usually about 18 by 24 inches for a visible porch sign.
Secure the boards together from the back using two horizontal support strips made from 1×2 wood pieces screwed into place. This adds stability and keeps the sign flat while painting and hanging.
Stenciling and Lettering Techniques
Choose a clear, bold font for your welcome message. Print and cut stencils from cardstock or buy reusable plastic stencils for repeated use. Position the stencil on the dried and primed pallet surface using painter’s tape to secure it. Use a stencil brush or small foam roller to apply paint lightly over the opening, avoiding pressing too hard to prevent bleeding. White or cream paint contrasts well with dark-stained or natural wood for rustic charm.
Allow the paint to dry for at least 30 minutes between coats. For sharper edges, remove the stencil cautiously while the paint is slightly tacky. Lightly sand the edges afterward to distress them and create an aged effect, if desired. You can add rustic designs like arrows or small vines using freehand painting or additional stencils.
Finishing and Sealing the Sign
Once the paint has dried fully, apply a clear matte or satin polyurethane sealer. This protects your sign from moisture and sun damage outdoors without adding too much shine. Use a high-quality synthetic brush and apply two thin coats, letting each coat dry for 4 to 6 hours. Avoid thick layers to prevent peeling.
Attach hanging hardware such as D-rings or a sawtooth hanger on the back for easy mounting. For outdoor placement, consider using waterproof screws or hooks on your porch. Check the sign periodically for wear and reapply sealer as needed every 1 to 2 years to maintain its appearance.
- Clean and dry pallet wood boards.
- Sand boards smooth; assemble and secure with support strips.
- Prime boards (optional) and position stencils.
- Apply paint carefully using stencil brush or foam roller.
- Let painted letters dry and remove stencils.
- Distress edges lightly with sandpaper (optional).
- Seal with two coats of clear outdoor polyurethane.
- Add hanging hardware and mount your sign.
Wear a dust mask while sanding to avoid inhaling wood particles, and work in a well-ventilated area when painting and sealing to minimize fumes.
6. Creative Ways to Add Lighting and 3D Effects
Adding lighting and three-dimensional (3D) effects to your welcome sign can transform it from a simple decoration into a striking focal point, visible both day and night. One popular option is using LED lights, which are energy-efficient, long-lasting, and available in various colors. You can attach LED strips around the edges of the sign or use small LED bulbs to backlight letters for a glowing effect. These lights often run on battery packs or low-voltage power sources, costing anywhere from $15 to $50 depending on length and brightness. For an easy DIY project, stick adhesive LED tape on the backside of plywood letters or around the perimeter of a framed sign. Make sure to hide wires neatly to maintain a clean look.
Another way to add depth is by mounting letters using metal spacers or standoffs. Spacers typically raise the letters 1/2 to 1 inch off the sign base, creating shadows and a 3D effect that draws attention. This method works well with wooden or acrylic signs and offers a professional appearance. To install, first secure metal standoffs to the sign backing with screws or adhesives designed for outdoor use if the sign is outside. Attach letters using screws or magnets that fasten to the spacers. The cost for spacers is usually around $1 to $3 each, with the number needed depending on letter size and sign width.
Combining LED lighting with 3D letters takes your welcome sign to the next level. For instance, backlit 3D letters create a halo effect around each letter, making the sign stand out even from a distance. This technique requires hollow or translucent letters, LED light placement inside or behind, and careful wiring. It may take more time and some electrical know-how, so consider your comfort level or hiring a professional if needed. Expect materials to cost between $50 and $150 depending on size and complexity.
Pay attention to placement and functionality when adding lighting. Avoid overly bright lights that can cause glare or discomfort for visitors. Soft white or warm yellow LEDs achieve an inviting atmosphere suited to welcome signs. Ensure power sources are weatherproof and wires are secured to prevent damage or accidents.
Common mistakes include using bulky lighting that clashes with rustic or minimalist sign styles and neglecting to plan for outdoor weather conditions like rain and temperature changes. Failing to space 3D letters evenly or using weak adhesives can lead to letters falling off, diminishing the sign’s appeal. Always test your lighting setup indoors before final installation to troubleshoot any flickering or connection issues.
For smaller projects or temporary signs, battery-operated LED string lights wrapped around the sign frame can create charming illumination without complex wiring. In contrast, permanent signs benefit from hardwired or solar-powered lighting for maintenance-free operation. Combining textured materials like twine, plywood, or cardboard letters with subtle lighting can give your welcome sign a handcrafted yet polished look.
7. Weatherproofing and Maintenance Tips for Outdoor Signs
Creating a weather-resistant welcome sign that lasts outdoors requires choosing the right materials and applying effective protective measures. Signs made from naturally durable materials like metal plaques with brushed finishes or sealed woods can withstand rain, sun, and temperature changes better than untreated wood or foam. However, wood is a popular choice for a warm, rustic look and can be made durable by proper weatherproofing.
To preserve a wooden welcome sign, start by selecting exterior-grade wood such as cedar or redwood, which are naturally resistant to rot. Next, sand the surface smooth to prepare for sealing. Apply at least two coats of a clear outdoor sealant or spar urethane, allowing 24 hours to dry between coats. This acts as a water-resistant barrier and shields the wood from UV damage, preventing fading and cracking. Use exterior acrylic paint made for outdoor use when painting your sign, and apply the same sealing process over the paint to protect it longer.
Maintenance involves regular inspections every six months to catch early signs of weathering such as paint peeling, discoloration, or rough patches in the finish. When the sealant looks worn, sand the surface gently, then apply a new coat. During winter or rainy seasons, consider moving the sign to a more sheltered location or placing it under an overhang to reduce direct exposure to elements. This simple step can add years to your sign’s usable life.
For signs made of alternative materials like foam board, understand they are less durable outdoors without protection. These are better suited for short-term use, such as wedding welcome signs at an outdoor event. In contrast, metal signs require less upkeep but may need a rust-resistant coating if exposed to harsh climates. Brushed metal surfaces tend to hide weathering better than painted ones.
Costs for weatherproofing supplies vary. A quart of outdoor sealant can cost around $15 to $25, covering about 100 square feet, enough for several signs. Sandpaper and brushes are inexpensive but necessary tools. For paint, budget roughly $10 to $20 per quart. This investment prevents costly replacements and keeps your welcome sign attractive and inviting over time.
Following these steps ensures your welcome sign stays as charming and neat as when you made it, giving guests a friendly first impression. Neglecting weatherproofing can result in warped wood, fading paint, or even mold growth, which quickly ruins your sign’s appearance and durability. Avoid these issues by sealing your sign promptly and keeping up a maintenance schedule tailored to your local climate conditions.
8. Quick and Easy Welcome Sign Ideas for Beginners
Starting your welcome sign project doesn’t have to be complicated or expensive. For beginners, opting for simple materials like popsicle sticks or canvas boards ensures a manageable crafting experience. For instance, creating a welcome sign with popsicle sticks requires only a few dozen sticks, some glue, paint, and markers. This approach often costs under $10, and you can complete it in about an hour. The sticks can be arranged in a rectangular shape or even spelled out to form your message. Painting them with bright colors or designs adds personality and makes the sign attractive without needing advanced skills.
Another beginner-friendly project is using ready-made wooden plaques or pre-cut MDF shapes. These can be purchased at craft stores for around $5 to $15. You simply paint the base color, let it dry for 30 minutes, and then add your welcome message using stencils or printed templates. Printable templates can be found online or created using free design tools. You print the letters on regular paper, cut them out, and use carbon paper underneath to trace them onto your sign. This technique helps if you’re not confident with freehand lettering.
For those who prefer a fuss-free option, printable welcome signs are a great choice. You can find downloadable PDF templates that include various fonts and decorative elements. Print them on sturdy cardstock at home or a local print shop for less than $2. To display, you can place the print inside a simple frame or attach it to a wooden board with double-sided tape. This method takes about 20 minutes and requires only basic household tools.
Using chalkboard paint on a small wooden plaque is another quick method. Apply two coats of chalkboard paint, letting each dry for at least an hour. Write your welcome message using colored chalk or chalk markers. This design offers flexibility since you can erase and update the message anytime. The total time for this project is roughly 2 to 3 hours, mostly drying time, and materials cost about $15 for paint and the plaque.
Simple stenciling projects can also produce neat results with minimal effort. Purchase a welcome message stencil for about $5, place it on a wooden or canvas board, and apply paint with a sponge or brush. The stencil guarantees clean, uniform lettering. Expect to invest around 1 to 2 hours, including drying, depending on your paint choice. Climate affects drying time; warmer, drier weather speeds it up.
Variations like adding seasonal accents, such as small artificial flowers, faux greenery, or ribbons, allow you to customize your sign without making a major alteration. These extras can be attached with hot glue or staples, adding color and texture in less than 10 minutes.
Avoid using heavy paints or coatings on lightweight materials like popsicle sticks to prevent warping or bending of the sign.
9. Popular Lettering Styles and Painting Techniques
Choosing the right lettering style and painting technique can make your welcome sign stand out while ensuring it’s easy to read. Fonts like serif, sans-serif, script, or block letters each create different moods. For a classic, easy-to-read look, use clean block or sans-serif fonts, which are bold and simple. Script fonts add elegance and charm but should be large enough and spaced well to remain legible from a distance.
Stencil painting is one of the most popular methods. It keeps letters neat and consistent, especially if your freehand painting skills are limited. You can buy stencils for around $10 to $25 or make your own by printing letters from home and cutting them out. Secure the stencil with painter’s tape, apply paint with a sponge or stencil brush using dabbing motions, and let it dry before removing. This technique works well for outdoor signs because it prevents bleeding and uneven edges.
Freehand painting offers more personalization, especially if you have some experience. Use a pencil to lightly sketch your design first, then fill it in with acrylic or outdoor paint, which costs about $5 to $10 per small bottle. Thin brushes (1/4 to 1/2 inch) give you control for finer details, while broader brushes cover larger areas quickly. Freehand works best on smooth surfaces, like sanded wood or metal, and adds unique charm but requires a steady hand to avoid mistakes.
For a rustic farmhouse vibe, consider wood-burning your lettering. This technique melts the wood surface to create dark, permanent letters. A basic wood-burning kit costs between $20 and $50. Trace your design lightly with a pencil, then slowly burn the lines following the manufacturer’s instructions. This method is durable and weather-resistant, ideal for porch signs, but takes time and careful attention to avoid burning too deeply or uneven lines.
Another option is using vinyl lettering. Cut your desired font from adhesive vinyl sheets using a cutting machine or order pre-cut letters online. Vinyl is weatherproof and applies easily by peeling and sticking onto any smooth sign surface. It costs around $15 to $40 based on size and complexity. This technique is fast, precise, and allows you to change letters later by peeling them off, but it may not stick well on rough wood without a sealant coat.
For added texture and depth, try layering paint with sponging or dry brushing. Sponging involves dipping a sea sponge into paint and lightly dabbing it on the sign surface around the letters to create a mottled, aged look. Dry brushing uses a dry, stiff brush to apply a minimal amount of paint, emphasizing wood grain or creating highlight effects on the letters. Both methods cost just the price of paint and brushes and add visual interest to a simple design.
Good contrast between lettering and background is essential for legibility. Dark letters on a light background or vice versa work best. Make sure paint is evenly applied and fully dry to prevent smudging; outdoor paints recommend drying times of 2 to 4 hours in warm weather. Avoid overly detailed fonts on small signs since they can become hard to read from afar. Consistent spacing, adequate letter size (at least 2 inches high for porch signs), and attention to neat edges mark successful lettering.
10. Interchangeable and Reusable Welcome Sign Designs
Interchangeable and reusable welcome signs offer great flexibility and creativity for your home décor. By using elements that can be switched out easily, you can change the message or style to match seasons, holidays, or special events without crafting a whole new sign each time. This saves you time, effort, and money in the long run while keeping your entryway fresh and inviting.
One effective way to create such a sign involves a base board paired with interchangeable pieces. Start with a sturdy, attractive background, such as a painted wooden pallet or acrylic sheet, which is both lightweight and easy to clean. Acrylic costs roughly $15 to $25 per 12×12-inch sheet, depending on thickness and finish, making it an affordable choice for a sleek, modern look. Paint the base with chalkboard paint or a neutral color to ensure letters and decorations stand out clearly.
Next, prepare your interchangeable elements as letters, words, or shapes that attach to the base using Velcro strips, magnets, or small hooks. Velcro offers strong hold and quick removal, costing about $5 to $10 for a set, while magnets work well if your base or letters have metal backing. For example, cut out letters from lightweight wood, foam, or acrylic, then glue their corresponding Velcro or magnet pieces on. This method allows you to update your welcome sign in minutes by rearranging or substituting the elements.
Another approach uses slotted frames or small clips mounted on the base to slide in cards or panels with different messages. This suits easier updates, like seasonal greetings or welcoming new family members. You can print or hand-paint these cards on sturdy cardstock or thin wood panels, which typically cost under $2 each. Slide the new panel into the frame without damaging your original sign. This option works well indoors or in covered entryways where weather exposure is minimal.
To maximize versatility, design your sign’s layout with modular sections. One part can greet guests, another can display the date or season, and a third can feature customizable details like family names or event-specific greetings. Keep text and images simple and large enough to read from a distance, usually 2 to 3 inches tall letters on a 12- to 24-inch wide sign. Use contrasting colors and a clean font for easy reading.
Things to avoid include using heavy materials that make swapping elements cumbersome or weather-sensitive components for outdoor signs without protection. Extreme temperatures or moisture can weaken adhesive or cause materials like paper and thin wood to warp. Ensure your attachment method can withstand wind if placed outside.
Interchangeable welcome signs are especially useful for busy DIYers who want to keep their home’s entrance attractive and adaptable. They combine creativity with practical convenience. You can create a stylish door hanger by cutting a 12×18-inch acrylic panel, painting a permanent design on the bottom half, and leaving the top clear for sliding in an interchangeable welcome message. This approach brightens your doorway and lets you personalize the greeting anytime without starting over.
11. Creative Wedding Welcome Sign Ideas and Styles
Wedding welcome signs set the tone for your special day and greet guests with style. A creative wedding welcome sign combines your theme, colors, and personality while providing useful information like the couple’s names, ceremony time, or directions. Choosing between a DIY or ready-made sign depends on your skills, budget, and event timeline.
One popular option is a wooden sign painted with elegant calligraphy or bold typography. You can purchase a pre-cut wooden board for $20 to $50 and use paint pens or stencils to create a polished look. Pairing this with floral arrangements matching your bouquet boosts cohesion. For a rustic setting, use a distressed wood pallet and personalize it with a soft white paint layer, then stencil the greeting in a natural brown or black. This process usually takes a weekend including drying times.
Fabric signs offer a softer, unique alternative. Stretch a piece of burlap or linen over a frame and use fabric paint or markers for the lettering. Hand-painting names and dates adds a personal touch and can cost under $30 for materials. For a functional twist, sewing pockets into a scrap fabric sign provides storage for small gifts or welcome cards, doubling as décor and utility. This option suits crafty couples wanting a hands-on keepsake from their preparations.
When the wedding style is vintage or retro, a bold printed sign on a metal or acrylic base works well. Etsy offers custom printed welcome signs starting at $60, featuring warm, muted palettes and nostalgic fonts inspired by the 1970s. These signs arrive ready to hang and save time compared to DIY, but allow less customization on texture.
In garden or outdoor weddings, chalkboard signs offer flexibility and charm. Use a large framed chalkboard and write your welcome message with chalk markers for clear, dust-free lines. Weather concerns call for sealing the chalkboard with a fixative spray or covering it with a clear acrylic sheet. Chalkboards enable easy last-minute changes to the message or schedule, which can be handy for dynamic events.
Matching your welcome sign design to the wedding theme creates a welcoming atmosphere that guests remember. Mixing colors from your palette, echoing floral motifs, or highlighting a key phrase in a unique font all rely on consistency to tie the décor together. Consider where to place the sign: near the entrance, at the guest book, or by the gift table. Size should be large enough to read from a few feet away, typically around 18 inches wide by 24 inches tall.
Choose weather-resistant materials or sealants for outdoor wedding signs to avoid smudging or damage from unexpected rain or humidity.
12. Safety Tips When Making Your Own Welcome Sign
Handling power tools while making your welcome sign requires careful attention. Always wear safety goggles to protect your eyes from dust or flying debris. Using gloves can help prevent cuts or splinters when working with wood or metal. Make sure your work area is well-lit and free of clutter to avoid accidents. Before cutting or drilling, double-check that clamps or other holding devices secure your materials firmly. If available, use a dust mask, especially when sanding, to prevent inhaling fine particles. Power tools should be unplugged when changing blades or making adjustments to avoid accidental starts. Keep cords away from the cutting path to reduce tripping risks or accidental cuts to the cord, which can cause electrical hazards.
Paints and finishes also require specific safety measures. Choose a well-ventilated space, preferably outdoors or near open windows, to reduce inhaling fumes. Some spray paints or sealants contain chemicals that can irritate your respiratory system or skin. Wearing a respirator mask or a cartridge respirator certified for organic vapors offers protection beyond a simple cloth mask. Gloves protect your skin from potential allergic reactions or chemical burns when applying paints or stains. Always read the product’s label for recommended drying times and safety instructions, and never rush the process by applying thick coats or reheating materials, which can emit harmful fumes or cause uneven finishes.
For indoor projects or when working with children, opt for water-based paints that have lower levels of volatile organic compounds (VOCs). These paints often cost a few dollars more per quart compared to traditional options, but they reduce harmful emissions and are easier to clean up with just soap and water. Use drop cloths or newspaper to protect your work surface and floor, preventing stains and ease cleanup.
Planning your workspace setup helps avoid many hazards. Keep a first aid kit nearby for minor cuts or splinters, and have a fire extinguisher available if using flammable materials or heat tools. Use clamps instead of holding pieces by hand when cutting or painting, providing stability and allowing hands to remain free of sharp edges or wet surfaces. Lastly, always store your tools, paints, and materials out of reach of children and pets after finishing your work session to prevent accidental exposure or injury.
Step-by-Step Action Plan for Your Welcome Sign Project
Follow these steps to create a welcome sign that fits your style and space. Each phase helps move your project forward with clear goals.
- Day 1: Choose the type of welcome sign you want, considering materials and style based on your space and event. You’ll know it worked when you have a clear design direction.
- Day 2: Gather all materials and tools, including wood or alternative surfaces, paints, brushes, and lighting if desired. Success means having everything ready to start without delays.
- Days 3, 4: Personalize your sign with names, dates, or seasonal touches using your chosen lettering style and technique. You’ll notice your sign looks unique and meaningful.
- Week 2: Add three-dimensional accents or lighting, ensuring they’re securely attached and safe. Check that all additions work and improve the sign’s appearance.
- Week 3: Weatherproof and finish your sign with protective coatings. Success is a durable finish that feels smooth and solid to the touch.
- Week 4: Find the right spot for your sign, considering visibility and size fit, and mount it securely. Your sign should be well-placed, stable, and visible to guests or visitors.
- After 1 month: Inspect the sign for any weather-related wear or damage and perform any needed maintenance. A well-maintained sign looks fresh and inviting.
Frequently Asked Questions
What Materials Work Best for Durable Outdoor Welcome Signs?
Metal, acrylic, and treated wood resist weather well outdoors. Choose materials suited to your climate to ensure long-lasting signs.
How Can I Incorporate Seasonal Themes into My Welcome Sign?
Change detachable elements like wreaths or holders for each season. This keeps your sign fresh without making a whole new one.
What Tools Are Essential for Beginners Making Welcome Signs?
Basic tools include paintbrushes, stencils, a drill, and sandpaper. Start simple and add tools as your projects get more complex.
How Do I Safely Hang Heavy Welcome Signs?
Use proper anchors and mounts rated for the sign’s weight. Secure installation helps prevent accidents and damage.
Can Welcome Signs Be Used Effectively Indoors?
Yes, they can brighten entryways or offices and set the tone. Use decor styles that match indoor themes for a cohesive look.
What Are Creative Ideas for Reusable Welcome Sign Text?
Use chalkboard paint or removable vinyl lettering. This allows you to update messages without making a new sign.
The Bottom Line
Crafting a welcome sign that speaks to your style and occasion makes your space more inviting. Start by picking a design you like and take simple steps to build it. Once your sign is up, check it regularly to keep it looking great and ready to welcome everyone who visits.