Light Up Sign Ideas: 11 Creative Ways to Brighten Your Space
Light up sign ideas can instantly brighten your space with personality and style using creative lighting solutions. Choosing the right type of sign, from neon and LED to 3D designs, makes all the difference in impact and energy use. Start by picking a sign style that fits your space and suits your lighting needs for the best visual and practical effect.
Key Takeaways
- Neon signs offer vibrant colors but use more power than modern LED signs, which are more energy-efficient and long-lasting.
- 3D illuminated signs are perfect for businesses and outdoor spaces due to their visibility and depth effect.
- Essential DIY materials include EL light wire, a wooden board, white tape, and a drill matching wire thickness.
- Simplified DIY neon signs can cost under $10 in supplies and still make a big visual impact.
- Hiring a graphic designer for a custom sign design can cost as low as $5 on freelancing platforms like Fiverr.
- A simple A-frame sign usually costs under $50 before design fees when ordering from online print services like VistaPrint.
1. Popular Types of Light Up Signs and Their Differences
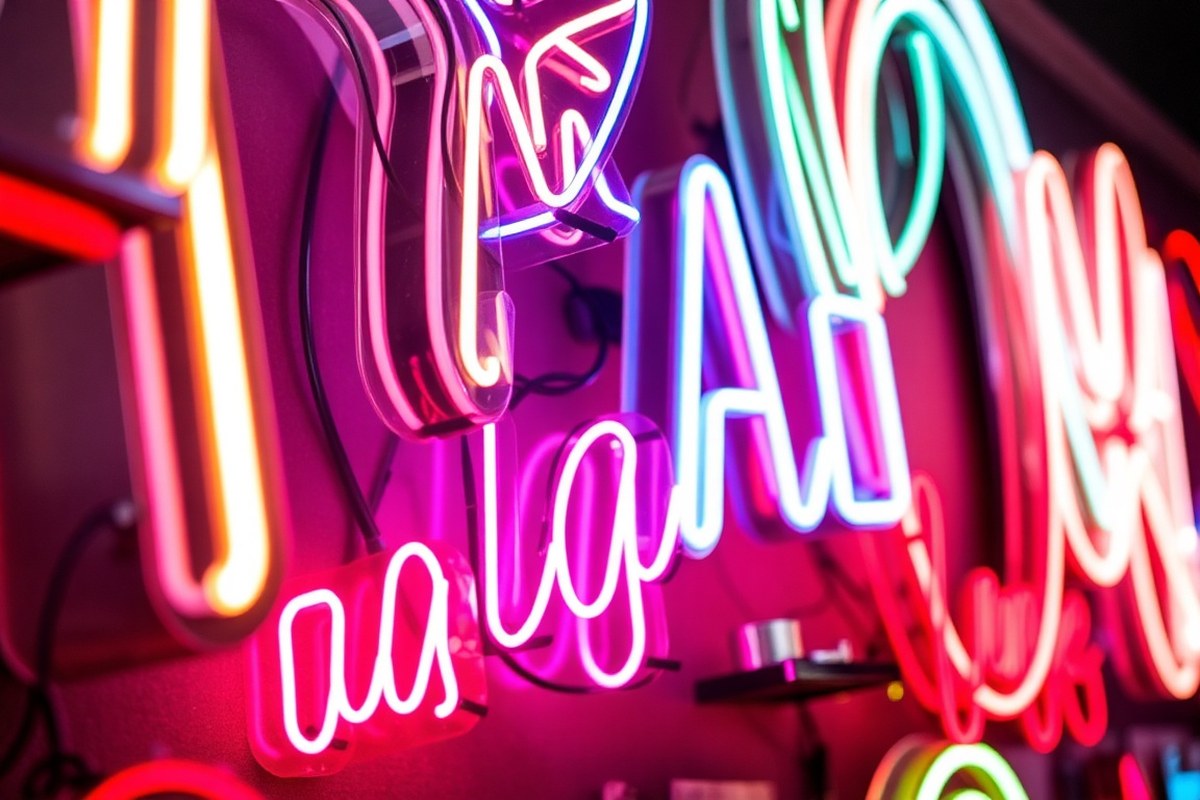
Light up signs come in several popular types: LED, neon, electroluminescent (EL) wire, and digital displays. Each type differs in appearance, cost, durability, and ideal uses, so knowing their strengths helps you choose the right sign for your project.
LED signs use semiconductor light sources arranged as pixels or strips. They can mimic neon shapes by bending LED neon flex tubing or assembling small LED bulbs inside channel letters. LED is energy-efficient, lasting up to 50,000 hours or more, and consumes up to 80% less power than traditional neon. They cost between $100 and $500 or more for custom DIY kits, depending on size and complexity. LED signs work well indoors, though some weather-resistant models handle outdoor use. They provide sharp colors and can include dynamic lighting effects.
Classic neon signs use glass tubes filled with inert gases that glow when electrified, producing a distinctive warm, colorful light. Neon is eye-catching and has a nostalgic charm, ideal both indoors and outdoors for businesses or decorative rooms. However, neon is fragile, requires high voltage, and tends to cost more, custom signs typically start around $300 and can reach well above $1,000 due to handcrafting and materials. The lifespan varies but averages around 15,000 to 20,000 hours. Neon’s thick glass tubes are less suitable for rough environments or DIY projects.
EL wire is a flexible, thin, wire-like light source coated with phosphor and powered by an inverter. It produces a continuous, soft glow ideal for creating unique shapes and designs. EL wire is very affordable, often under $50 for a few meters, making it great for creative indoor projects and temporary outdoor use in dry conditions. It’s less bright than LEDs or neon and requires external power sources that can limit placement options.
Digital signs use LED matrix panels or LCD screens capable of dynamic content like animations and videos. These signs range widely in cost, from a few hundred dollars for small indoor displays to thousands for large outdoor boards. Digital signs are versatile and attract attention through motion but consume more power and need careful weatherproofing for outdoor use. They excel in commercial settings where changing messages or promotions matter.
For a side-by-side comparison: LEDs offer long lifespan and energy savings and suit both indoor and some outdoor uses. Neon provides a unique appearance perfect for business storefronts or signature decor but costs more and breaks easily. EL wire fits budget-friendly indoor crafts or accent lighting but lacks brightness and durability for permanent outdoor signs. Digital displays deliver dynamic visuals for businesses but require higher investment and maintenance.
In choosing between these types, select LED signs for long-term, low-maintenance light with flexibility. Pick neon for classic style and strong visibility, especially outdoors. Use EL wire to add colorful highlights to indoor spaces or short-term events. Opt for digital if your sign needs to display changing content with high visibility. Consider your budget, location, power access, and desired effect to find what suits your project best.
2. Essential Materials and Tools for DIY Light Up Signs
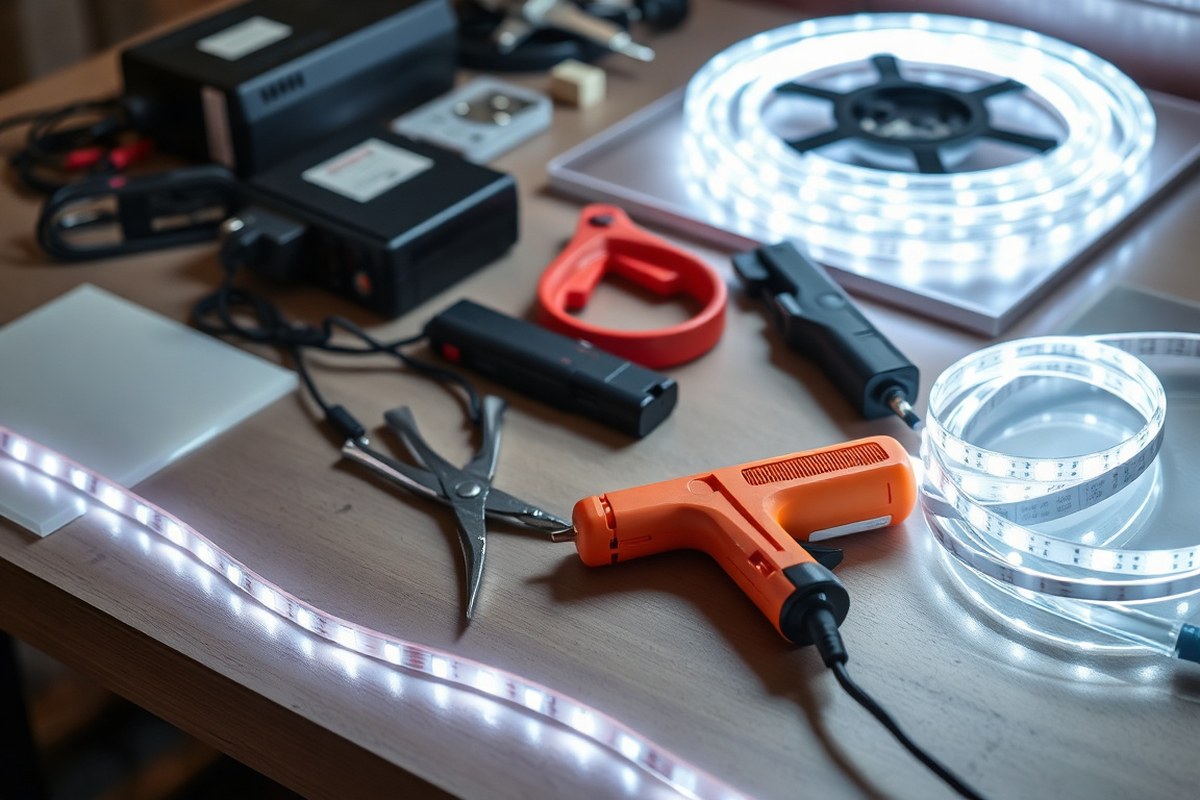
To create a custom light up sign, you’ll need a set of materials and tools that depend on the sign type and lighting method. Essential materials include the light source (LED strips, neon tubes, or EL wire), a backing or frame (plywood, acrylic, or metal), wiring components, and mounting hardware. For beginners, basic cutting, fastening, and electrical tools are sufficient. The quality of materials directly influences durability, brightness, and overall appearance of your sign.
Materials for Different Sign Types
The material choice varies by the sign style and lighting technology. For LED light up signs, flexible LED strips are affordable, energy-efficient, and easy to work with. Neon signs require glass tubes or more accessible faux neon LED ropes. The backing material could be plywood for rustic or sturdy signs, acrylic panels for vibrant color diffusion, or metal for a sleek finish. Wiring and power components, like DC adapters, connectors, and switches, are a must for any illuminated sign.
For example, a simple LED sign project might use 5 meters of flexible LED strip ($10, $20), a 24-inch by 36-inch acrylic panel ($15, $30), mounting clips, and a 12V power supply. Neon tube materials or EL wire kits usually cost more, often starting at $30 for DIY sets. Using quality materials ensures better longevity; most well-made illuminated signs can last 7 to 10 years if assembled correctly and maintained.
Essential Tools for Beginners
Starting with basic, affordable tools is practical for DIYers. You’ll need a few hand tools and some electrical basics to handle most sign projects. Cutting tools like a jigsaw or handsaw work well for wood or acrylic. A drill with bits lets you make mounting holes or attach hardware. Wire strippers and a soldering iron or connectors are necessary for wiring LED strips or neon lights.
Additional helpful tools include a measuring tape, a pencil for marking layouts, and clamps to hold pieces steady while assembling. Having a multimeter can verify power connections and avoid electrical faults. Spending around $50, $100 on tools will cover essentials without breaking the bank, with some tools reusable for future projects.
How Materials Affect Sign Quality
The durability and visual impact of your light up sign depend heavily on the materials you choose. For instance, higher-quality acrylic diffuses LED light evenly, producing a professional glow, while thin or scratched plastic can cause uneven brightness or glare spots. Using lower-grade plywood risks warping or cracking over time, especially when exposed to humidity or heat from lighting.
Choosing flexible LED strips with high lumen output (up to 100 lumens per foot) improve brightness and color saturation, whereas older or cheaper strips might be dimmer or flicker. Proper wiring and waterproofing, especially for outdoor signs, protect components and extend lifespan. Planning for these factors early helps avoid common issues like uneven illumination, short circuits, or fading colors.
Checklist: What You Need to Start Your Light Up Sign
- Light source: flexible LED strips, neon tubes, EL wire, or LED ropes
- Backing material: plywood, acrylic panel, or metal sheet
- Mounting hardware: screws, clips, d-rings, adhesive strips
- Power components: power supply, wiring, connectors, switches
- Basic tools: jigsaw or handsaw, drill, wire strippers, multimeter
- Measuring and marking tools: tape measure, pencil, clamps
- Safety gear: gloves, eye protection, and ventilation if soldering
Gathering these materials before starting keeps your work smooth and organized. It helps to buy a bit extra wiring or mounting clips to account for mistakes or adjustments during assembly.
Always double-check your power supply voltage matches your lighting components to avoid damage and reduce fire risk.
3. Designing Your Sign: Fonts, Colors, and Layouts That Work
Choosing the right fonts, colors, and layout is key to making a light up sign both attractive and easy to read. Select bold, simple fonts paired with high-contrast colors and ensure that letter size and spacing are balanced for clear visibility day and night. Paying attention to these details maximizes impact and achieves your sign’s purpose.
Choosing Readable Fonts for Illuminated Signs
Clear readability requires fonts that are bold and simple rather than ornate or script styles. Sans-serif fonts like Arial Black, Helvetica Bold, or Futura work well because their thick lines shine evenly when lit. Avoid fonts with thin strokes or excessive curves, as these can blur when illuminated and reduce legibility from a distance.
For channel letter signs lit from the front, use block letters with even letter thickness to allow light to shine straight through. Large signs that cover a wall give you more flexibility to use some stylized fonts, but smaller signs should stick to strong, uniform lettering. Letter height should be at least 6 inches for signs viewed from 20 feet away, scaling up accordingly for longer distances.
Color Combinations That Maximize Day and Night Impact
Choose light colors around 4000, 5500K white LEDs for front-lit signs, as this neutral white creates a clear backdrop that makes your brand colors pop. For outdoor signs that must be visible in daylight as well as dark, high-contrast pairs like white light on dark backgrounds or black text on bright neon colors work best. Light box or flag signs mounted perpendicularly to a building catch attention from multiple angles regardless of daylight conditions.
Neon signs allow for creative color use, but picking colors that contrast well is essential. Bright pink, blue, purple, and warm tones like amber attract eyes after dark. For signs near bedtime areas, warm light colors create a cozy vibe. Frosted sides or subtle halo effects can soften the light for minimalist or upscale looks without sacrificing visibility.
How Size and Spacing Affect Sign Design
Letter size and spacing directly influence how well the sign reads from a distance. Larger letters improve readability but must be balanced with adequate spacing to avoid crowding. A good rule is to allow letter spacing equal to about 10% to 20% of the letter width, which helps light spread evenly without merging letters visually.
The overall layout depends on your sign’s placement. Wall-sized signs can afford tighter spacing and more complex layouts since viewers are typically closer or have a broad view. Smaller signs benefit from simple, single-line text and ample white space around words to avoid visual clutter and ensure the lighting highlights each character fully.
Balancing Design Elements for Your Sign’s Purpose
Consider your sign’s goal, whether to inform quickly, build brand identity, or create ambiance, when choosing fonts, colors, and layout. Informational or business signs prioritize clarity and high contrast with straightforward fonts and colors that stand out. Signs meant for home decor or mood lighting can take more liberties with script fonts, soft glows, and creative color blends.
Professional design assistance is affordable and can help tailor your sign for maximum effect. Services like Fiverr offer custom sign designs starting around $5, helping you refine font choice, colors, and layout to suit your space and branding. Make sure to review lighting options as well, since the type of illumination impacts how design elements come across in real settings.
4. Creative Light Up Sign Ideas by Room and Occasion
Light up signs can add personality and purpose to any room or event, transforming common spaces into visually engaging environments. Bedrooms benefit from personalized neon signs featuring names or motivational phrases like “Dream Big” or “Stay Cozy.” These signs should measure about 18 to 24 inches wide for bedroom walls, easy to install with adhesive hooks or lightweight wall anchors. They provide a soft, warm glow ideal for relaxation or as nightlights.
Kitchens can feature signs that combine function and style, such as “Eat Here” or “Fresh Brew” in LED light box formats. Opt for waterproof or splash-resistant designs since kitchens experience humidity and occasional spills. Installing these signs above counters or on open shelving helps improve the cooking space’s mood, with typical sign sizes ranging from 12 x 6 inches to 24 x 12 inches.
Bars and entertainment rooms benefit from high-energy neon signs with witty sayings like “Cheers” or “Happy Hour,” or custom logos for personal flair. Use bold colors like red, blue, or green to complement dark or industrial decor. Mount these signs above bar shelves or as focal points on walls; ensure they have a dimmer switch or adjustable brightness to suit different lighting needs for day and night.
- Wedding reception signs with couple names and wedding dates using elegant script fonts and soft white or pastel LED lighting.
- Gaming rooms with vibrant RGB LED signs featuring gamer tags or iconic game-related quotes for dynamic color changes.
- Motivational signs for home offices or workout rooms that display phrases like “Keep Going” or “Focus” in clean, minimalist fonts.
- Whimsical children’s room signs shaped like stars, clouds, or animals with gentle multicolor LED lighting for a playful atmosphere.
- Business storefront signs combining traditional neon with digital elements to catch attention during day and night.
- Outdoor event signs on pole mounts highlighting sponsor names or event themes, designed for visibility from streets and sidewalks.
Wedding light up signs often feature cursive fonts mimicking handwriting, sized between 24 to 36 inches wide to ensure readability across reception spaces. Lightweight acrylic or metal backing keeps them transportable for event setups. Their soft glow creates ambiance without overpowering floral or candle decorations.
Gaming rooms can use signs with customizable RGB LEDs programmable to shift colors every few seconds or react to sound for a competitive vibe. Signs 20 to 30 inches wide stand out without dominating the room. Make sure to hide power cords inside cable raceways or behind furniture to keep the space tidy. Motivational or whimsical themes rely mostly on text style, lighting temperature (warm for cozy, cool for energetic), and size to fit each space’s purpose.
5. Planning and Building Your Own DIY Light Up Sign Step-By-Step
Building your own light up sign involves a careful process from planning to final assembly to ensure safety and a quality finish. You need to prepare a clear design and template first. Then, attach the lights and plan the wiring safely. Finally, test everything thoroughly before mounting or sealing your sign. Avoid common pitfalls like uneven lighting, tight wiring bends, and poorly secured mounts to get the best results.
Preparing Your Design and Template
Start by sketching your sign idea on paper or using design software. This helps you visualize the layout, letter spacing, and how the lighting will fit. Use an acrylic panel as your base to trace the letters or shapes carefully. Keeping consistent 4mm-wide channels for the LED neon strips is important for even light diffusion and to avoid shadows or hotspots. Avoid tight bends in your lettering or design because LEDs don’t illuminate evenly in sharp curves.
Make a physical or printed template of your sign to serve as a guide when assembling. Mark the position of each letter or segment clearly. This saves time and prevents mistakes during electrical assembly or mounting.
Attaching Lights and Wiring Safely
Attach the LED neon trim into mounting clips or channels that align with your template. Press the LED strips gently but firmly into these mounts to prevent loosening when moving or hanging the sign. Plan your wiring route so that cables are neat, hidden where possible, and away from areas people might reach or accidentally damage.
Connect the LED lights to their power source following the manufacturer’s instructions. Use connectors designed for your specific LED type and check voltage compatibility. Keep wiring tidy and secure to prevent shorts or safety risks. When mounting, make sure your fixing method suits the wall or surface and can hold the sign’s weight reliably.
Always keep wiring out of reach and follow the manufacturer’s mounting instructions to avoid hazards or damage to your DIY light up sign.
Testing and Troubleshooting Before Finishing
Test your entire setup once the lights and wiring are connected but before final mounting or sealing. Check that each LED section lights evenly and that the power supply works without flickering or overheating. If you see dim spots or dead LEDs, recheck the strip installation and wiring connections.
Make sure the sign sits flush on the mounting surface and that all cables have sufficient slack to avoid strain. Performing this test lets you catch faults without dismantling the finished product, saving time and effort. Once everything works perfectly, complete the final assembly steps, such as securing the backing panel or sealing edges for a polished look.
- Sketch your design and create a clear template on acrylic or a similar backing.
- Mark out consistent channels approximately 4mm wide for LED strips to fit evenly.
- Attach LED neon lights by pressing them carefully into mounting clips or channels along the template.
- Plan wiring routes to be safe, tidy, and out of reach, then connect lights to a compatible power supply.
- Test lighting to check for even illumination and stable electrical connections.
- Troubleshoot any dim areas or wiring faults before sealing or mounting the sign permanently.
- Secure the finished sign to the wall or surface using the method recommended by the manufacturer.
6. Mounting and Displaying Your Light Up Sign for Maximum Effect
Choosing the right mounting method and placement makes a big difference in how your light up sign looks and how safely it functions. For wall-mounted signs, adhesive hooks are a simple option that won’t damage your walls and allow easy removal or repositioning. Screws provide a stronger hold for heavier or outdoor signs, which need to resist wind and weather. For freestanding signs, a sturdy base or frame keeps them stable without wall attachments.
Hiding wires and power sources keeps your setup clean and safe. Run cords along baseboards or inside cable covers painted to match your walls. For outdoor signs, make sure power connections are waterproof and rated for damp environments to avoid shorts or corrosion. Position power supplies out of sight inside cabinets or behind furniture, accessible but not obvious. Use zip ties or adhesive clips to secure loose wires against surfaces.
Placement affects visibility and impact. In a children’s party or event, place signs out of reach to prevent accidents, and keep the message short and bright for quick attention. Above workbenches or tool chests, signs add functional and mood lighting while elevating the workspace style. Mounting near large mirrors creates reflected light that visually expands a room, great for fitness areas or dance studios.
- Use adhesive hooks for lightweight signs and indoor use
- Secure outdoor signs with screws and weatherproof mounting hardware
- Run wires in cable covers or along discreet edges to conceal them
- Place power supplies in hidden but accessible locations
- Keep children’s party signs out of reach for safety
- Mount above workspaces to boost lighting and ambience
- Position near mirrors to multiply sign brightness
Signs mounted properly stay secure and maintain both visual appeal and electrical safety. Avoid placing signs too close to heat sources or damp areas indoors, which can damage components. Choosing locations that catch natural eye lines, near entrances or focal walls, ensures your illuminated message shines brightly without strain. Following these practical steps delivers results that look professional and last longer.
7. Power Options and Wiring Tips for Illuminated Signs
LED signs perform best with low-voltage DC power supplies that match their voltage and current requirements. Most common LED light up signs run on 12V or 24V DC adapters, which you can buy online or at hardware stores for around $15 to $30. These adapters convert household 120V AC to safe, efficient low voltage. For neon signs, especially traditional glass tube types, you’ll need a high-voltage transformer that steps up the power to 3,000 volts or more, suitable for the gas inside tubes. However, modern LED neon flex signs run on similar low-voltage power as other LEDs, making them safer and simpler to wire indoors without worrying about heat or shock risks.
Wiring for your illuminated sign should prioritize safety and durability, especially for continuous use. Use wires with an appropriate gauge; 18 to 22 AWG is typical for small LED signs. Connectors like waterproof quick-connect plugs or soldered joints sealed with heat shrink tubing ensure a solid, moisture-resistant connection that won’t loosen over time. Avoid twisting wires together bare, as this can cause shorts or failures. Mount the power supply in a dry, ventilated area and route wires away from anything sharp or hot. For outdoor signs, use outdoor-rated cables and enclosures to prevent moisture damage. Double-check polarity before powering up to prevent LED damage.
Energy efficiency is a strong advantage of LED over traditional neon or incandescent signs. LED neon signs draw significantly less power, often under 20 watts for a sizable indoor display, compared to hundreds of watts for neon gas tubes or incandescent bulbs. Choosing LED also reduces heat output, lowering risks and cooling costs. Some advanced LED setups offer DMX512 pixel control, enabling dynamic lighting effects while still using energy efficiently. For a DIY option, electroluminescent wire (EL wire) provides a low-power glow effect that may suit smaller or accent signs, but it’s less bright than LEDs. Checklist for powering and wiring your light up sign:
- Confirm voltage and current requirements of your LEDs or neon tubes.
- Choose a power supply with matching output voltage and at least 20% more current capacity than your sign needs.
- Use correct wire gauge (typically 18, 22 AWG for LEDs) and durable connectors rated for your environment (indoor or outdoor).
- Seal all connections with heat shrink tubing or waterproof connectors, especially for outdoor use.
- Mount power supply in a ventilated, dry location away from high heat or flammable surfaces.
- Check polarity and test your sign briefly before permanent installation.
- Consider energy-efficient LEDs or EL wire to reduce power use and heat.
Following these steps helps you avoid common issues like overheating, flickering, or premature component failure. Good wiring and power management let your sign stay bright and safe for everyday enjoyment in any space.
8. Common Mistakes When Ordering or Making Light Up Signs
Ordering or making a light up sign comes with some common pitfalls that can reduce its impact and longevity. One major mistake is choosing colors without considering how they look when lit. Soft white or light pink tones often offer the most flattering light, avoiding harsh glare or washed-out effects. Another issue is neglecting the backing material; installing a mirrored backing behind neon or LED bars doubles the light’s visual impact and adds a professional finish.
Wiring errors are frequent in DIY projects. Incorrect voltage or poor connections can cause flickering or total failure. Use the recommended voltage specified for your lights and secure all wiring firmly with insulated connectors. Avoid twisting wires together without proper connectors as this risks shorts or fire hazards. In addition, poorly planned mounting can lead to instability. Use sturdy brackets and ensure the sign is level and secure to avoid accidents or damage over time.
- Choosing overly bright or harsh colors instead of soft white or pastel shades, which can cause glare.
- Skipping mirrored or reflective backing, which lowers brightness and visual appeal.
- Using incorrect voltage or subpar wiring materials, leading to flickering or failure.
- Failing to securely mount signs, risking damage or unsafe conditions.
- Ignoring environmental factors like moisture or outdoor exposure without proper sealing.
- Ordering signs without checking size and font legibility at the intended viewing distance.
- Neglecting to test the sign before final installation to catch defects early.
Planning carefully before ordering or building helps prevent costly mistakes. Measure your installation space and view your design at scale. Use color swatches or samples illuminated by your chosen lights to confirm the look. When working with wiring, test all electrical connections with a multimeter and power your lights temporarily before mounting. Environmental protection is important for outdoor or damp locations, seal all connections and use weatherproof components rated for your conditions.
Always verify the power supply matches your lighting specifications exactly to avoid damage or poor performance.
Signs made with attention to wiring quality, color choice, mounting stability, and backing materials will last longer and impress more. Avoid rush orders and allow time to troubleshoot a prototype or sample sign to achieve a professional finish. The investment in proper preparation reduces repair costs and ensures your light up sign shines as intended.
9. Maintaining and Troubleshooting Your Light Up Sign
Keeping your light up sign clean and well-maintained helps it stay bright and attractive for years. For LED signs, gently wipe the surface with a soft microfiber cloth to remove dust and fingerprints. Avoid harsh chemicals; a mild soap solution diluted in water works best if needed. Neon signs require extra care since they are fragile; dust them using a dry, soft brush or a microfiber cloth without applying pressure. Regular cleaning every one to two months keeps your sign glowing without buildup that dims the light.
Flickering or dimming often points to electrical issues or worn components. Check all wiring connections for looseness or corrosion, especially around power plugs and adapters, since poor contact can cause inconsistent lighting. For LED signs, flickering can also result from a failing power supply or incompatible dimmer switches. Neon signs might flicker if the transformer is aging or if there’s a gas leak inside the tube. Troubleshoot by first unplugging the sign and inspecting cables, then test with a multimeter if you have one to verify voltage stability. Replacing damaged wiring or adapters usually solves flickering at a low cost, typically under $20, while transformer replacements for neon signs might cost $50 to $100.
Knowing when to replace parts compared to the entire sign depends on damage scope and age. Replacing LED bulbs or modules is often easier and affordable, costing between $10 and $50 depending on size and style. Neon tubes are more delicate; minor leaks or cracks require professional repair or tube replacement, which can run $100 to $250 or more per section. If multiple sections fail or the sign’s frame is damaged, consider investing in a full replacement to avoid frequent repairs. Signs over 10 years old might also be less energy efficient and more expensive to maintain, so upgrading could save money long term.
A simple maintenance checklist begins with cleaning the sign’s surface monthly. Test all connections quarterly by unplugging and plugging back in each cable, watching for any flickers. Inspect the power supply and transformer annually for signs of wear or overheating. When troubleshooting flickers, prioritize fixing broken or loose wires first, then power supply components. Keep the sign in a consistent indoor environment, avoiding extreme temperatures above 104°F (40°C) or high humidity to prolong electronics life. Scheduling checks during seasonal home cleaning ensures your light up sign stays vibrant and safe.
10. Advanced Lighting Options: Color Changes and Dynamic Effects
Multicolor LEDs make it possible to create signs with changing colors and dynamic animations. These LEDs combine red, green, and blue diodes in one unit, blending light to display millions of colors. This technology allows you to pick any hue or transition smoothly between shades. Such versatility is ideal for signs that attract attention or reflect a brand’s colors. Controlled by microcontrollers or specialized LED drivers, these systems can be programmed to produce effects like fading, flashing, or chasing light patterns.
The hardware for dynamic lighting usually includes an LED strip or individual pixels, a control board (often based on Arduino or similar platforms), and a power supply suited for the total wattage. For example, a 5-meter RGB LED strip drawing 14.4 watts per meter requires a 72-watt power supply to run continuously without overheating. Remote controls or smartphone apps connect via Wi-Fi or Bluetooth, offering an easy way to change colors or patterns without physical access to the sign.
Programming is done through software platforms or custom code. Systems like WS2812 or SK6812 LEDs are popular because they integrate addressable RGB LEDs: each pixel’s color can be independently controlled. You can load predefined scripts or design your own sequences using platforms like FastLED or NeoPixel libraries for Arduino. This enables effects such as rainbows, pulses, or animations synced with music. For DIY decorators, numerous tutorials and prebuilt scripts reduce the learning curve significantly.
The tradeoff for advanced lighting options is cost and complexity. Compared to single-color LEDs, RGB strips and programmable controllers add around 30% to 50% more to material costs. Setup demands some coding and wiring skills. Mistakes in power management or programming can cause uneven lighting, flickering, or even damage to LEDs. Yet the results, signs that can change ambience, highlight sales seasons, or adjust visibility throughout the day, often justify the effort.
For signs in homes or small shops, a basic Wi-Fi enabled LED strip kit with remote control costs roughly $30 to $60, powering up to 16.4 feet (5 meters). Incorporating addressable LEDs and microcontrollers might raise the cost to $80 to $150, depending on complexity. Businesses aiming for 3D signage with halo lighting or multicolor effects might invest more, especially using commercial-grade drivers and custom programming.
To avoid common issues, keep power supply capacity above 20% of the total demand and use appropriate heat sinks for longer LED runs. Place signs with halo lighting a few inches (3 to 6 inches) from the wall to achieve a clear glowing outline. During installation, test sequences on your programming platform before fixing LEDs to the sign surface. Using remote controls with timer functions can help manage brightness and run times, extending LED lifespan and reducing energy costs.
Dynamic effects work best in venues where the sign can be easily seen and changed, such as storefronts, event spaces, or game rooms. If wiring or programming is too complex, simpler options like multicolor single LEDs with a preset remote still offer visual impact without custom coding. For businesses that need detailed animations or color branding, hiring a professional programmer or using off-the-shelf smart lighting systems might be more cost-effective in the long run.
11. When to Hire Professionals for Custom Light Up Signs
Signs that involve complex electrical components, large-scale installations, or custom fabrication beyond basic materials typically require professional expertise. For example, signs with intricate LED control systems, high-voltage neon tubing, or heavy metal framing are best left to licensed sign makers and electricians. Professionals have the skills to meet safety codes and quality standards, preventing costly mistakes and hazards.
Cost-wise, professional services range widely depending on size, complexity, and materials. Custom neon signs can start around $200 and easily exceed $1,000 for elaborate designs. Installation fees, especially for outdoor or commercial signs, can add several hundred dollars. DIY projects cost less but risk lower durability and possible safety issues if wiring or mounting is done incorrectly. Professionals provide in-house design, fabrication, and installation, which streamlines the process and ensures the sign lasts longer and looks polished.
Before reaching out to a custom sign maker, prepare your design concept clearly. Use tools like a free neon sign maker to create a digital preview of your desired sign. Know the dimensions and preferred location for installation. Check local electrical codes and obtain any needed permits, especially for commercial displays. Have a budget range in mind to guide material choices. Also, gather inspiration photos or sketches to communicate your vision effectively. Providing this information upfront saves time and improves results.
A practical decision rule is to hire professionals if your project includes electrical wiring beyond simple plug-in components, requires a permit, or involves mounting in hard-to-reach or weather-exposed areas. Small indoor signs or simple plug-in LED boards, by contrast, can usually be handled safely on your own. Professional installation ensures compliance with safety standards like UL listing and minimizes risk of electrical shorts or fire.
Never skip checking local codes before installing illuminated signs; violating them can result in fines or mandatory removal.
Step-by-Step Action Plan for Your DIY Light Up Sign
Follow these key steps to create or order a light up sign that fits your space and style effectively.
- Before you start: Choose the type of sign that matches your purpose and location, such as LED channel letters for business or marquee bulbs for home décor. Confirm your choice by listing its pros and cons for your use.
- Week 1: Sketch your design with your preferred fonts, colors, and layout. Use free online tools or graph paper to ensure spacing and readability work. Check your design’s visibility in different lighting conditions.
- Week 2: Gather necessary materials and tools based on your design, like LED strips, acrylic sheets, and a soldering kit. Confirm you have everything by cross-checking against your materials list before purchasing.
- Week 3: Build your sign following step-by-step instructions, securing wiring safely. Test wiring and lights after assembly for full functionality and consistent brightness.
- Week 4: Mount your sign using the appropriate hardware for your wall type, positioning it for maximum visibility and room lighting balance. Confirm stability and check the sign’s power source accessibility.
- After 1 month: Perform routine maintenance by cleaning and inspecting wiring for faults. Confirm ongoing operation by checking for dimming or flickering lights and replacing parts as needed.
- Ongoing: Consider upgrading to advanced lighting options like programmable colors if you want more dynamic effects and appeal. Test new settings in your space and note any power or heat concerns.
Frequently Asked Questions
What Are Safe Lighting Options for DIY Outdoor Light Up Signs?
LED lights with waterproof casing are safe for outdoor DIY signs. They resist weather and reduce fire risk. Make sure to secure wiring in a waterproof conduit and follow local electrical codes for outdoor use.
Can I Use Recycled Materials to Make a Light Up Sign?
Yes, recycled materials like old wood or plastic can be used creatively. Ensure they are clean and sturdy enough to support the lights. Using recycled parts saves money and adds a unique, eco-friendly touch to your sign.
How Can I Make My Light Up Sign More Energy-Efficient?
Use LED bulbs to improve energy efficiency. They consume less power and last longer than traditional bulbs. Also, consider a timer or a dimmer switch to control when and how bright your sign shines.
What Are Good Light Colors for Visibility at Night?
Bright white, warm white, and primary colors like red or blue stand out at night. Choose colors that contrast strongly with the background. This improves readability and catches attention easily in low light conditions.
How Do I Protect a Light Up Sign from Vandalism?
Install your sign at a visible, well-lit location to deter vandals. Use shatterproof materials and secure mounting. Surveillance cameras and alarms nearby can also reduce risks of damage or theft.
Can I Integrate a Light Up Sign with Smart Home Systems?
Yes, many LED signs can connect with smart home hubs using Wi-Fi or Bluetooth. This lets you control brightness, colors, and schedules from a smartphone app. Check compatibility before purchasing parts or a finished sign.
Final Thoughts
Creating or choosing the right light up sign improve your space with personalized lighting and style. Start by planning your design carefully, then move forward with gathering materials and assembling your sign safely. This hands-on approach gives you full control over your décor or business image and ensures the sign fits exactly where and how you want it. Begin today by sketching your sign idea and exploring materials to bring it to life.