How to Make Plant Markers with Durable Materials and Creative Ideas
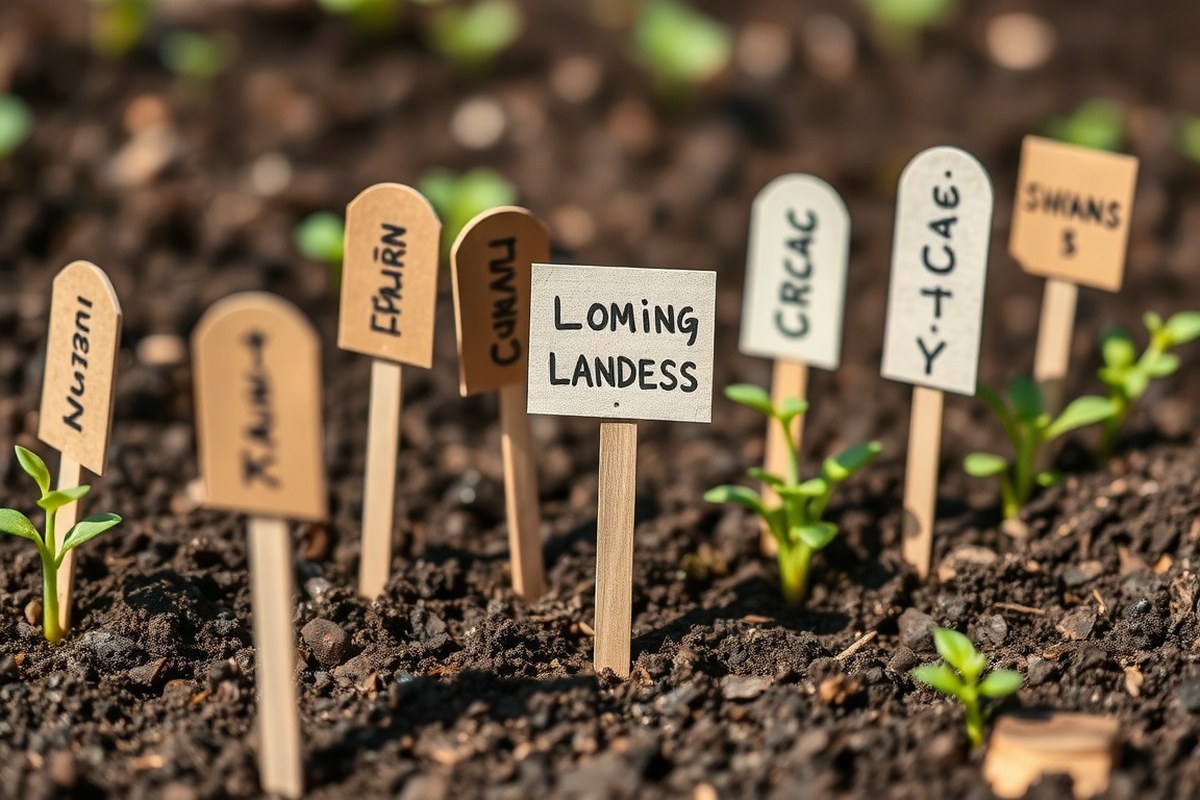
How to make plant markers starts with choosing durable materials like wood, clay, or repurposed household items that withstand outdoor weather. Baking clay markers for 30 minutes or sealing wooden ones with UV-resistant Modge Podge keeps labels legible through sun and rain. Begin by selecting materials that balance sturdiness with ease of writing and decorating for the best results.
Key Takeaways
- Use 1- to 1.5-inch thick wooden stakes for sturdy, easy-to-handle plant markers.
- Bake air-dry or oven-bake clay markers at recommended temperatures for 30 minutes to harden them.
- Apply at least two coats of outdoor Modge Podge UV Sealant to protect wooden markers from weather damage.
- Write plant names with permanent markers or use a wood burning tool for long-lasting labels.
- Repurpose common household items like plastic spoons or tape-covered sticks for quick, inexpensive markers.
- Choose marker sizes around 4 cm wide and 18 cm long for clear visibility and stability in soil.
Easy DIY Plant Markers Using Common Household Items
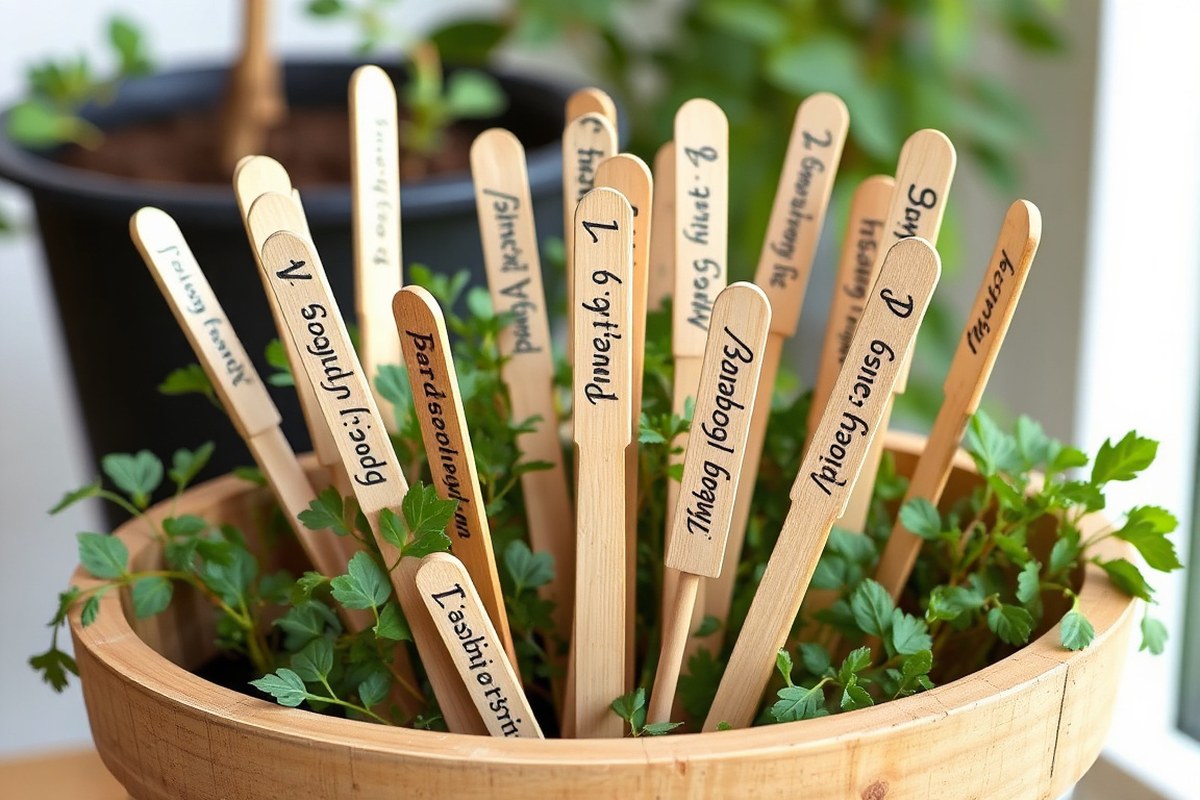
Using household items to make plant markers saves money and helps you organize your garden efficiently. Common materials like wooden paint stir sticks, plastic milk jugs, and smooth rocks are easy to prepare and label. These options are beginner-friendly and only take a few minutes to turn into useful garden markers that last for the growing season.
Wooden paint stir sticks offer a simple solution because their flat surface works well for writing. Plastic milk jugs provide durable marker strips once cleaned and cut. Smooth rocks are a natural option, adding a decorative touch while anchoring labels in the soil. Each material needs cleaning, drying, and clear labeling using waterproof methods to ensure your plant names stay visible.
Follow these step-by-step instructions to create effective plant markers from these items. Writing surfaces need to be clean to prevent fading. Use a permanent marker or outdoor acrylic paint for best results. Let labels dry completely before inserting markers into the garden soil to avoid smudging.
- Clean your materials: Rinse paint stir sticks, plastic milk jug sections, or rocks with warm soapy water. Remove dirt, grease, or residue then dry completely.
- Cut plastic markers: Cut the milk jug into strips about 1 inch wide by 4 inches long using scissors. Trim edges to remove sharp points.
- Sand wooden sticks (optional): Lightly sand wooden sticks for a smoother writing surface. Wipe off any dust with a dry cloth.
- Write plant names: Use a permanent marker or outdoor acrylic paint to write the plant name clearly on each marker. Label both sides if desired.
- Seal markers (optional): For extra durability, apply a thin coat of clear waterproof sealer or mod podge. Let it cure according to product instructions.
- Place markers: Insert wooden sticks or plastic strips about 3 inches deep into the soil close to your plants. Position rocks flat on the soil near the plants.
Wooden stir sticks generally cost about $1 to $3 for a pack of 25 at hardware stores, making them an affordable option. Plastic milk jugs reuse household waste, so the cost is zero beyond your time. Rocks can be gathered from your yard or garden naturally. Expect paint or markers to cost around $3 to $5 if you do not already have them.
Good results show legible text that resists smearing after watering and weather exposure. Avoid placing markers where heavy shade or water pooling could accelerate fading. If you notice fading or peeling, re-label or replace markers mid-season to keep your garden well organized.
Choosing the Best Materials for Weatherproof Plant Markers
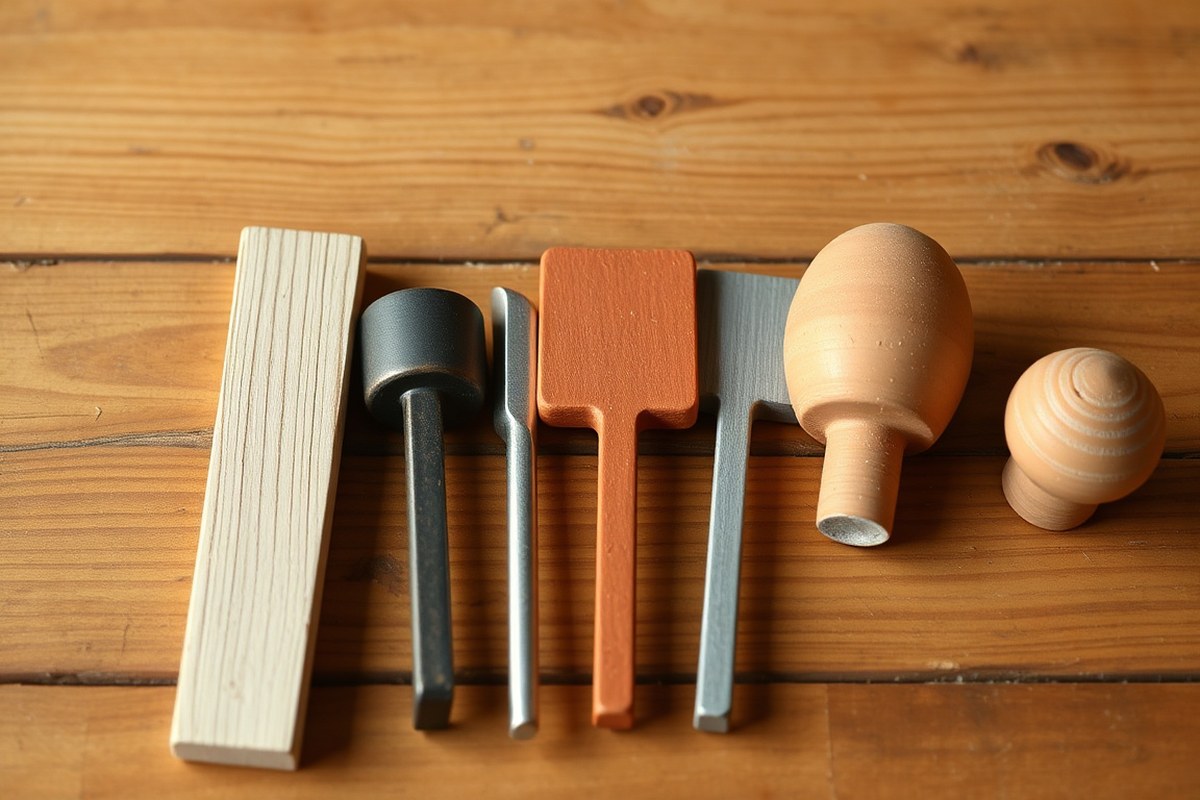
Choosing the right material for plant markers depends on your garden’s climate, soil type, and how long you want the markers to last. Wood is a popular, affordable option that looks natural and is easy to write on with a wood burning tool or chalk marker. However, untreated wood breaks down within a year or two outdoors, especially in damp soil. Metal markers are very durable and weather-resistant but can be expensive and harder to label unless you use metal stamps or engraved tags. Plastic markers, such as those made from recycled bottles, resist water and decay well but may fade or crack in strong sun. Clay markers can last for years if properly fired and sealed, offering excellent durability and a classic appearance, though they require more time and materials to make.
| Material | Durability (Outdoor) | Cost | Ease of Handling | Weather Resistance | Writing/Painting Methods |
|---|---|---|---|---|---|
| Wood | 1-2 years (unless sealed) | Low ($1-$3 per stick) | Easy to cut, burn, or paint | Low without sealant; rots in wet soil | Wood burning tool, chalk marker, weather-resistant paint |
| Metal | 5+ years | High ($5+ per marker) | Requires metalworking tools | High resistance to rain and sun | Metal letter punches, engraved or painted with enamel |
| Plastic (e.g., bottles) | 2-3 years | Very low (often recycled materials) | Easy to cut, less sturdy | Good if thick; may fade/warp in sun | Permanent marker, laminated paper labels |
| Clay (air-dry or oven-bake) | 3-5+ years if fired and sealed | Moderate ($2-$10 depending on materials) | Requires drying/firing time and sealing | Excellent if sealed properly | Stamped, carved, or painted; seal with weather-resistant coating |
The garden climate influences material choice heavily. For humid or rainy regions, metal or sealed clay works best to prevent rot and fading. Dry, sunny climates suit plastic or metal since wood can crack or decay faster. In acidic or clay-heavy soils, choosing markers that won’t degrade from moisture or soil chemistry is important. You’ll want to seal wood or clay markers with weather-resistant paint or spray for longer life. Metal markers withstand nearly all weather types but require investment in tools or pre-made tags. If cost and ease matter more, plastic markers made from recycled bottles can last a couple of seasons well, especially if kept out of direct sun exposure when possible.
Always seal stamped or carved clay markers with a waterproof coating to prevent fading and damage from rain and soil moisture.
How to Write and Decorate Plant Markers for Longevity
Writing and decorating your plant markers correctly makes sure the names stay clear and readable season after season. Choosing the right tools and sealing methods prevents fading from sun and water exposure. Using paint, permanent markers, wood burning, or metal stamping means prepping your marker surface carefully and applying a protective sealant to add durability and legibility.
Best Writing Tools for Wood, Plastic, and Metal
Different surfaces need different writing tools to ensure the plant names don’t smudge or fade. For wood markers, acrylic paint with a fine brush or a paint marker works well, especially on smooth, sanded wood. Permanent markers such as Sharpies are a quick option on plastic or wood but may not last as long in direct sun, so UV-resistant alternatives are better for outdoor use.
Metal markers benefit from stamping or engraving since paint can chip off. Using small alphabet stamps on aluminum pieces or directly burning wood names with a wood burning tool gives clear, lasting results. For wood burning, writing the name first in pencil helps guide the tool for neat lettering.
Sealing Plant Markers Against Rain and Sun Exposure
Applying a sealant is key to protecting your work. Outdoor Mod Podge UV Sealant provides a weatherproof layer that prevents water damage and UV fading. Two or more thin coats, allowing at least 15 minutes drying time between coats, work best for long-lasting protection.
Before sealing, make sure all paint or marker ink is fully dry, usually 24 hours for acrylic paint and permanent markers. For wood-burned markers, sealing also helps prevent moisture damage to the wood. Seal both the front and back if possible for thorough protection.
Decorative Ideas That Don’t Block Plant Names
Decorating plant markers can brighten your garden, but clarity comes first. Paint the whole marker a light, solid background color before writing the names in a dark, contrasting paint or marker. You can add simple accents like dots or stripes around the edges rather than over the lettering.
Attach small beads or tiny wooden shapes below or on one side of the label without covering the letters. For metal labels, wrapping aluminum strips around wooden stakes with stamped names keeps decoration minimal yet stylish. Avoid thick decorations or glues that might obscure text or cause the marker to degrade.
- Sand or smooth the marker surface to remove rough spots that interfere with writing.
- Write the plant name using your chosen method: acrylic paint, permanent marker, wood burning, or stamping.
- Allow the writing to dry completely, 24 hours for paint or markers; no drying needed for wood burning other than cooling.
- Apply the first coat of outdoor UV sealant evenly over the entire marker surface.
- Let the sealant dry for about 15 minutes, then apply a second coat for improved durability.
- When you use wooden markers, sealing the reverse side helps prevent warping and moisture absorption.
- Add decorative touches around, not on, the plant name after sealing if desired.
Making Durable Clay Plant Markers from Air-Dry or Oven-Bake Clay
Creating durable clay plant markers involves shaping the clay to your preferred size, properly drying or baking it to harden, then labeling the markers before sealing them to withstand outdoor conditions. Using air-dry or oven-bake clay offers flexibility depending on your tools and time. Sealing the finished markers protects your labels from weather and fading.
Preparing and Rolling Out Clay Evenly
Start with air-dry or oven-bake clay that is easy to work with and widely available at craft stores for around $5 to $15 per pound. Roll the clay out to an even thickness between 1/4 inch (6 mm) and 1/2 inch (12 mm). Thinner clay risks cracking or breaking, while thicker pieces take longer to dry or bake and may not cure evenly.
Use a rolling pin with guide sticks or dowels on either side to maintain a uniform thickness. Cut the markers into shapes using a knife or cookie cutters. Rectangles, spoons, or leaf shapes work well. Shape sizes around 3 to 5 inches long and 1 to 2 inches wide fit nicely in garden beds and provide enough space for clear labeling without being intrusive.
Proper Drying and Baking Temperature and Time
Air-dry clay typically needs 24 to 72 hours to fully harden at room temperature, depending on thickness and humidity. Place the clay markers on a flat surface with parchment paper to avoid sticking and turn them about halfway through drying.
Oven-bake clay requires a controlled baking process. Set an oven to the temperature specified by the clay brand, often around 275°F (135°C). Bake the markers on a prepared baking sheet for 15 to 30 minutes per 1/4 inch (6 mm) of thickness. For example, a 1/2 inch (12 mm) thick marker should bake for 30 to 60 minutes. Avoid exceeding recommended temperatures to prevent burning or warping.
Labeling Clay Markers with Stamps, Paint, or Marker
You can personalize your clay markers by pressing letter stamps or cookie cutters into the soft clay before drying or baking to create indentations for plant names. This pressed lettering is durable and weather-resistant once sealed.
For added clarity, paint the letters with acrylic paint after baking or drying, then let the paint dry thoroughly. Alternatively, use outdoor weatherproof markers to write names once the clay is dry. After labeling, sealing the markers with an outdoor-mod podge or waterproof clear sealer shields them from moisture, sun, and dirt. Use a paintbrush to apply a thin, even coat and allow it to dry fully before placing markers outside.
- Roll out air-dry or oven-bake clay to 1/4 to 1/2 inch thickness using guide sticks for evenness.
- Cut shapes using a knife or cookie cutters sized about 3 to 5 inches long.
- Stamp or press plant names into soft clay before drying or baking.
- Dry air-dry clay flat for 24 to 72 hours, flipping halfway; or bake oven-bake clay at about 275°F for 15 to 30 minutes per 1/4 inch thickness.
- Allow markers to cool completely after baking or finish drying.
- Paint stamped letters with acrylic paint or write with waterproof markers.
- Brush on a waterproof outdoor mod podge or clear sealer in thin coats; let dry fully before gardening use.
Creative and Decorative Plant Marker Ideas That Still Work
Adding decorative touches to plant markers can improve your garden’s appearance while still making it easy to identify your plants. Using painted designs, colorful accents, or small flags balances function with style. The goal is to keep the plant names clear and readable while giving each marker a unique look that complements your garden’s theme.
One effective way to decorate without obscuring text is to paint a small border or frame around the label area. This draws attention to the writing without covering it. Another option is attaching tiny flags or symbols at the top or side of the marker; these can be color-coded to group similar plants, such as herbs in green and flowers in pink. You might also add simple painted icons related to the plant, like a carrot image next to vegetable names, to make markers visually appealing and easy to scan.
Choosing contrast in your colors is essential. Use a light background with dark lettering or vice versa for maximum readability in various light conditions. Matte paints reduce glare, making labels easier to read on sunny days. Reserve bold, bright colors for decorative accents, not the writing itself, to avoid interfering with clarity. Keep the written area smooth and free from busy patterns.
- Hand-paint simple borders or geometric patterns around the label area for distinction
- Attach small, colorful flags or beads that correspond to plant types or garden sections
- Use weather-resistant paint pens for writing and decoration to maintain sharpness over time
- Incorporate thematic shapes relevant to your garden style, like rustic wooden leaf cutouts or modern metallic dots
- Add a wash of color to the marker base, leaving a blank space for writing
- Use waterproof stickers for quick, uniform icons and symbols if painting is challenging
The cost for these decorations varies by materials. Weatherproof paint pens can cost around $5 to $10 each, while small accents like flags or beads may range from a few cents to a couple of dollars each depending on craft suppliers. Painting requires minimal supplies but does take some time and a steady hand. Deciding whether to decorate before or after writing the plant name affects your process; it often helps to complete writing first, then add accents around the text.
Successfully combining function with decoration means clear label placement is a must. Avoid writing over textured or uneven surfaces, as this can blur letters. Leave about one-third of the marker’s top or side area free for decorative elements so the plant name remains the focal point. This layout also helps viewers quickly identify the plant without distraction.
Use light pencil guidelines to keep text straight and centered before adding paint or decorations for a polished look.
Weatherproofing and Maintaining Plant Markers for Longevity
Sealing and maintaining plant markers keeps labels clear and markers stable during rain, sun, and wind. Sealants protect against fading from UV rays and water damage, while regular upkeep ensures markers don’t fall over or become unreadable. Different materials need specific sealants to work best. For example, outdoor acrylic spray works well on wood or paper markers, while varnish or polyurethane suits wood and clay. Plastic markers benefit from clear, waterproof permanent marker pens instead of Sharpies, which fade quickly. Transparency and waterproofing maintain label legibility.
To weatherproof your markers effectively, follow these sealing steps. The process creates a protective layer that resists moisture and UV exposure, extending marker life. After sealing, plan to reseal or clean your markers every 6 to 8 weeks in harsh conditions like heavy rain or direct sun. Check for dirt, fading, or cracks regularly. Clean with a damp cloth and mild soap if necessary, then reseal once dry. Repairs like sanding rough edges or reapplying label text keep markers readable and upright.
- Clean the marker surface by wiping away dirt and dust with a damp cloth. Let dry completely before sealing to ensure good adhesion.
- Choose a sealant suitable for your marker material. Use an outdoor acrylic spray for wood and paper, polyurethane for wood and clay, or waterproof permanent marker pens for plastic.
- Apply sealant in a well-ventilated area. Spray or brush on thin, even coats to avoid drips and bubbles. Let each coat dry for at least 1 hour.
- Repeat for 2 to 3 coats for thorough coverage. This usually takes a full day including drying time.
- Label your markers after sealing if using waterproof marker pens, or label first if sealant is clear and meant to protect ink underneath.
- Set your markers upright in the garden by pushing at least 3 inches (7.5 cm) into the soil. Add support with stakes or clips if needed to prevent falling over.
- Inspect markers every 6 to 8 weeks for fading, dirt, or damage. Clean gently and reseal if you notice wear or faded labels.
- Repair or replace damaged markers promptly. Sand rough edges or reapply labels. Replace markers that have cracked, broken, or lost all legibility to avoid confusion later.
Proper maintenance may take 10 to 20 minutes per inspection session, depending on how many markers you have. A gallon of outdoor acrylic spray costs around $8 to $15 and covers dozens of plant markers. Double-check that all sealants are non-toxic and safe for garden use to protect your plants. Following these steps extends marker life and saves you time identifying plants during the growing season.
Tips for Positioning and Displaying Plant Markers Effectively
Choose plant markers that are tall enough to be seen above the foliage but not so tall that they become unstable. Generally, markers between 6 and 12 inches high work well in most gardens. The width or shape should be broad enough to clearly write plant names while fitting into your garden’s style, rectangular or paddle shapes offer good writing surfaces without taking too much space.
Place markers deep enough to avoid tipping or being pulled out by wind or animals. Push stakes or markers at least 3 to 4 inches into the soil, and if the soil is loose or sandy, insert them even deeper. This ensures a firm hold, especially for taller markers that catch more wind. When the marker is on a thin stake, attach it to a stronger base such as a wooden stake or metal rod for better durability.
Position plant markers so that the writing faces outward and is easy to read from your usual viewpoint. Orient them so rainwater runs off rather than pools, which can wear down paint or ink more quickly. Placing markers slightly angled away from heavy irrigation spray can prevent soil from splashing onto the surface and obscuring text.
- Use stakes made of wood, metal, or thick plastic to keep markers stable in the soil.
- Tie markers to rebar or bamboo stakes with garden twine for extra support.
- Add small flat stones around the base to reduce soil movement and erosion near the marker.
- Install markers after planting to avoid disturbing roots but early enough to mark seed locations.
- Consider placing markers on raised beds or container edges for better visibility and to avoid damage during weeding.
Avoid placing markers too close to the plant stem to minimize root disturbance and reduce risk of soil splash during watering. Higher placement, like 1 to 2 inches above the soil surface, helps keep the marker clean and readable. Markers that start to lean over time should be reset by removing and pushing them in deeper or by adding stronger bases. These simple steps help ensure your plant markers stay visible and last through wind, rain, and garden activity.
Advanced Methods: Printing and Personalized Digital Plant Labels
Printing your own plant labels at home using waterslide paper, an inkjet printer, and digital templates offers precise and professional-looking markers that can last outdoors. This method allows for clear, detailed text and custom designs that are difficult to achieve by hand. To get durable results, it’s essential to choose the right materials, design thoughtfully, and seal your labels properly to protect them from moisture and wear.
Choosing the Right Waterslide or Printable Vinyl Paper
Waterslide decal paper is specifically designed for inkjet printers and allows you to transfer your printed designs onto various surfaces smoothly. Printable vinyl paper is another option if you want thinner, more flexible labels that stick directly on the markers. Both types require careful selection to ensure compatibility with your printer and the outdoor conditions your labels will face.
Most waterslide papers come in 8.5 by 11-inch sheets, matching the common paper size for home printers. Check the package instructions for printer compatibility to avoid smudging. Waterproof or weatherproof variants provide longer durability but can be more expensive. Printable vinyl offers a self-adhesive backing, which is handy but may require a clear sealant to withstand outdoor moisture.
Designing Plant Labels with Free Templates
Using digital design tools like Canva lets you create precise plant labels that fit your materials perfectly and include personalized text and imagery. Start by setting your canvas size to match your printing paper, typically 8.5 by 11 inches. Free templates can provide label shapes and layouts that save time and maintain consistency across your design.
Keep your font clear and legible at small sizes, ideally using sans-serif fonts and increasing letter spacing slightly. You can add illustrations or paint-like textures that resemble the plants themselves for an added decorative touch. Remember to leave a small margin around each label so cuts don’t encroach on your design.
Applying and Sealing Printed Labels on Different Materials
Once printed, the labels must dry completely before you can apply them to your plant markers. This usually takes at least 15 minutes but can vary by printer and ink type. After drying, follow these steps to transfer and seal your labels effectively:
- Cut your printed sheet into strips or individual labels matching your marker dimensions.
- For waterslide paper, soak the cut decal in water (about 15 to 30 seconds) to loosen the design from its backing.
- Slide the decal onto your marker surface carefully, positioning it with tweezers or fingers to avoid wrinkles and air bubbles.
- Allow the label to dry completely on the marker surface, which can take several hours.
- Apply at least three coats of clear sealant spray over the label, letting each coat dry (approximately 30 minutes) before the next.
- Let the sealed markers cure for 24 hours before placing them outdoors.
Spraying sealant in a well-ventilated area with light coats helps prevent bubbling and ensures a smooth, protective finish.
For printable vinyl labels, peel off the backing and stick the label directly to clean, dry markers. Use the same sealing process to extend outdoor lifespan. Avoid printing additional labels on used waterslide paper once sealed, as it will no longer accept ink properly.
Step-by-Step Action Plan for Making Durable Plant Markers
Follow these steps to create plant markers that last through seasons and keep your garden organized efficiently.
- Before you start: Gather materials like weatherproof markers, durable stakes, and optional decoration supplies to ensure you’re ready to make lasting labels.
- Day 1: Choose your preferred plant marker base, whether wood, metal, or clay, and cut or shape it to size; test the stiffness or durability by gently bending or handling it.
- Day 2: Write the plant names clearly using weatherproof pens or embossing techniques; allow ink or paint to dry thoroughly and verify the text resists smudging by lightly wiping it.
- Day 3: Decorate your markers with simple designs or colors, avoiding excess coatings that might peel; confirm decorations are secure by checking for flaking or fading after drying.
- Day 4: Apply a weatherproof sealant suitable for your materials to protect against rain and sun; wait 24 hours and test water resistance by sprinkling water on the marker’s surface.
- Day 5: Position markers near corresponding plants ensuring they’re visible and stable in the soil; check stability by lightly shaking the marker to prevent tipping or uprooting.
- After 2 weeks: Inspect markers for signs of wear, fading, or damage; reapply sealant or rewrite labels as needed to maintain clarity and durability.
Frequently Asked Questions
How Do You Label Your Plants?
Use durable markers like metallic sharpies or paint pens to write plant names on weatherproof materials, then seal with outdoor Mod Podge to protect from elements. This keeps your garden organized and makes identifying plants easier.
Does Dollar Tree Have Plant Labels?
Dollar Tree often carries inexpensive plant labels, including plastic or wooden stakes, suitable for DIY garden markers. These are a budget-friendly option to organize small or beginner gardens.
What to Use to Write on Metal Plant Markers?
Use paint pens or permanent metallic markers designed for outdoor use to label metal plant markers. They resist fading and rust, ensuring names remain visible throughout the season.
What Are Some Weatherproof Plant Markers?
Weatherproof plant markers include coated wood, metal, or plastic stakes sealed with UV-resistant paint and sealants. These withstand rain, sun, and soil exposure for long-lasting garden organization.
How Do I Keep Plant Markers Looking Good All Season?
Apply at least two coats of outdoor UV sealant over your writing and materials to protect against fading and wear. This maintenance step keeps markers legible and attractive throughout the growing season.
Can I Reuse Plant Markers from Last Year?
Yes, clean and reseal reused plant markers to remove old labels and protect them before writing new ones. This saves money and reduces waste in your garden.
Wrapping Up
Creating your own plant markers improves garden organization and adds a personal touch to your outdoor space. Start with simple materials you already have, then build your set with more durable options as you gain confidence. Make your first marker today by selecting a plant to label and crafting a weatherproof nameplate to see immediate benefits in your garden’s order.