How to Make a Wedding Sign with Cricut: A Complete Step-by-Step Guide
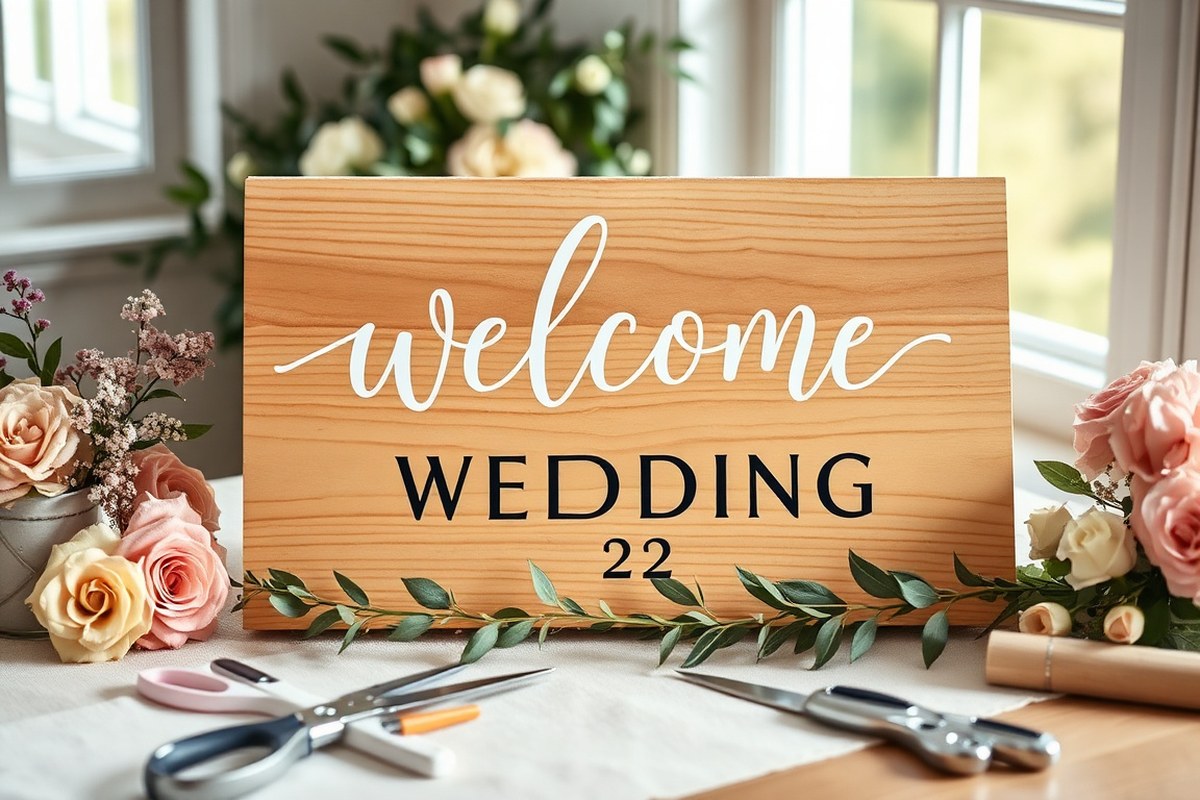
Knowing how to make a wedding sign with Cricut lets you create personalized decorations quickly and professionally. Use Cricut Design Space to design your sign, choose the right materials like vinyl or acrylic, and cut precisely with your Cricut machine. Start by selecting the perfect machine based on your project size and speed needs to make the process smooth.
Key Takeaways
- The Cricut Maker 3 is ideal for fast, large wedding signs due to its 11.3 inches per second cutting speed.
- Choose vinyl for easy application on wood or acrylic to create classic “Welcome to Our Wedding” signs.
- Use Cricut Design Space to resize and personalize your design to fit your sign materials precisely.
- For big projects like banners or layered signs, consider the Cricut Explore 5 for its large cutting capacity.
- Weed vinyl carefully to avoid tearing small details before transferring the design onto your sign surface.
- Applying transfer tape smoothly ensures your vinyl stays in place and results in clean, professional edges.
How to Make a Wedding Sign with Cricut: Step-by-Step Process
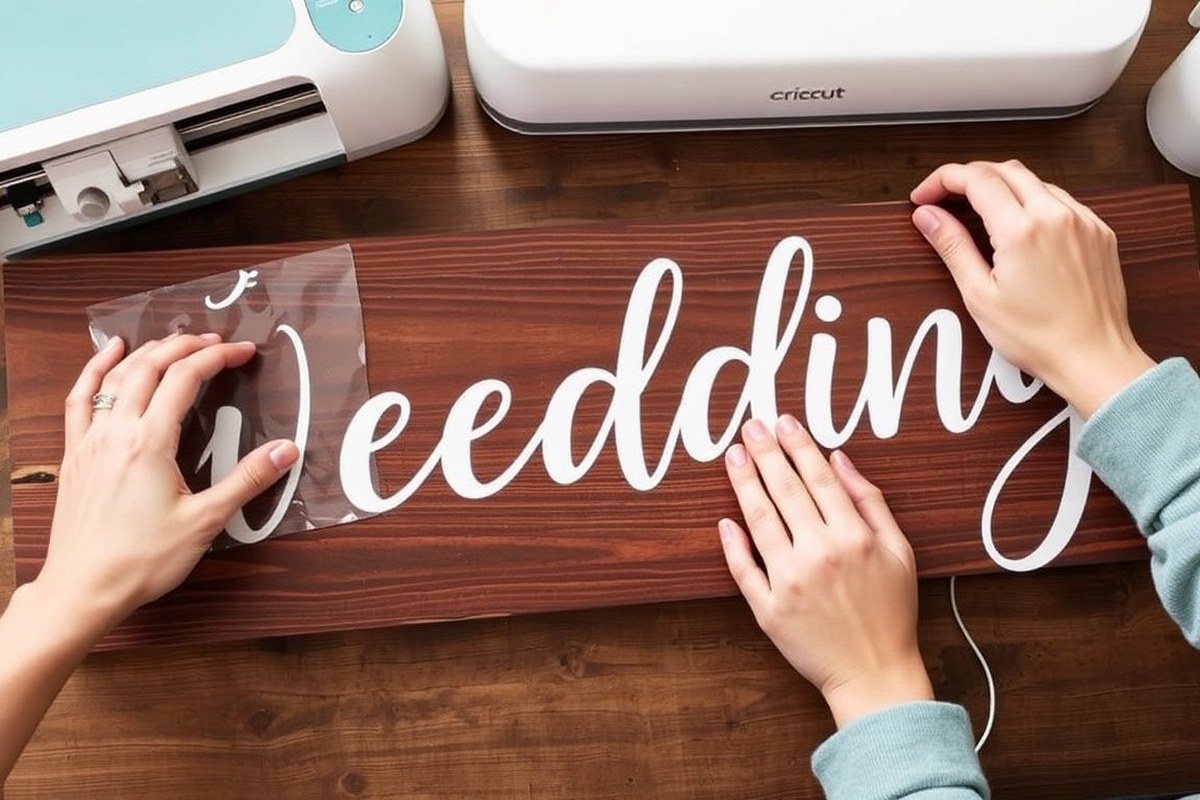
Making a wedding sign with a Cricut machine involves several clear steps, from preparing the design to applying the vinyl on your sign surface. You’ll need your design file ready in Cricut Design Space, the correct vinyl and transfer tape, and a smooth, clean sign board, like wood or acrylic. Precise execution of each step ensures your design looks clean, professional, and lasts through the wedding day.
Start by having all your materials handy: vinyl, transfer tape, your sign base, and a Cricut machine set up for cutting. The sequential steps below break down the process in a way any beginner can follow confidently.
- Cut the vinyl design: Load your vinyl into the Cricut machine with the shiny backing down. In Design Space, size your design to fit your sign precisely. Select the vinyl setting on your machine, then start the cutting job. Use a sharp blade to ensure clean cuts, especially for detailed lettering.
- Weed the vinyl: Remove the unwanted vinyl around your design carefully using a weeding tool. Pull away all the pieces not part of the final design, including bits inside letters. Take your time to avoid ripping or stretching the vinyl, ensuring sharp, readable text or images.
- Use transfer tape: Select a piece of transfer tape a little bigger than your finished design. Remove the tape’s backing, then gently lay the sticky side onto your vinyl. Press down firmly with a scraper tool to eliminate air bubbles and secure the tape to the vinyl.
- Prepare the sign surface: Make sure your sign base is clean, dry, and free of dust or oils. Wipe it down with a damp cloth and let it dry completely. This step is essential for the vinyl to stick properly, especially on porous surfaces like wood.
- Transfer the vinyl design: Position the vinyl with transfer tape onto your sign where you want it. Use the “hinge method” by applying a thin strip of painter’s tape along one edge of the design to act as a hinge, allowing precise placement without shifting. Press the vinyl firmly onto the surface using a scraper tool, moving from the center outward to prevent bubbles.
- Remove the transfer tape: Slowly peel the transfer tape back at a 90-degree angle while holding the vinyl in place with your other hand. Go slowly to avoid pulling up the vinyl, leaving the design neatly adhered to your sign.
- Add finishing touches: Inspect the sign for any air bubbles or edges peeling up. Use a pin to gently pop bubbles, then smooth down the vinyl again with the scraper. Adding a clear acrylic sealer spray (following product instructions) can help protect your design, especially for outdoor or long-duration displays.
Choosing the Right Cricut Machine for Your Wedding Sign
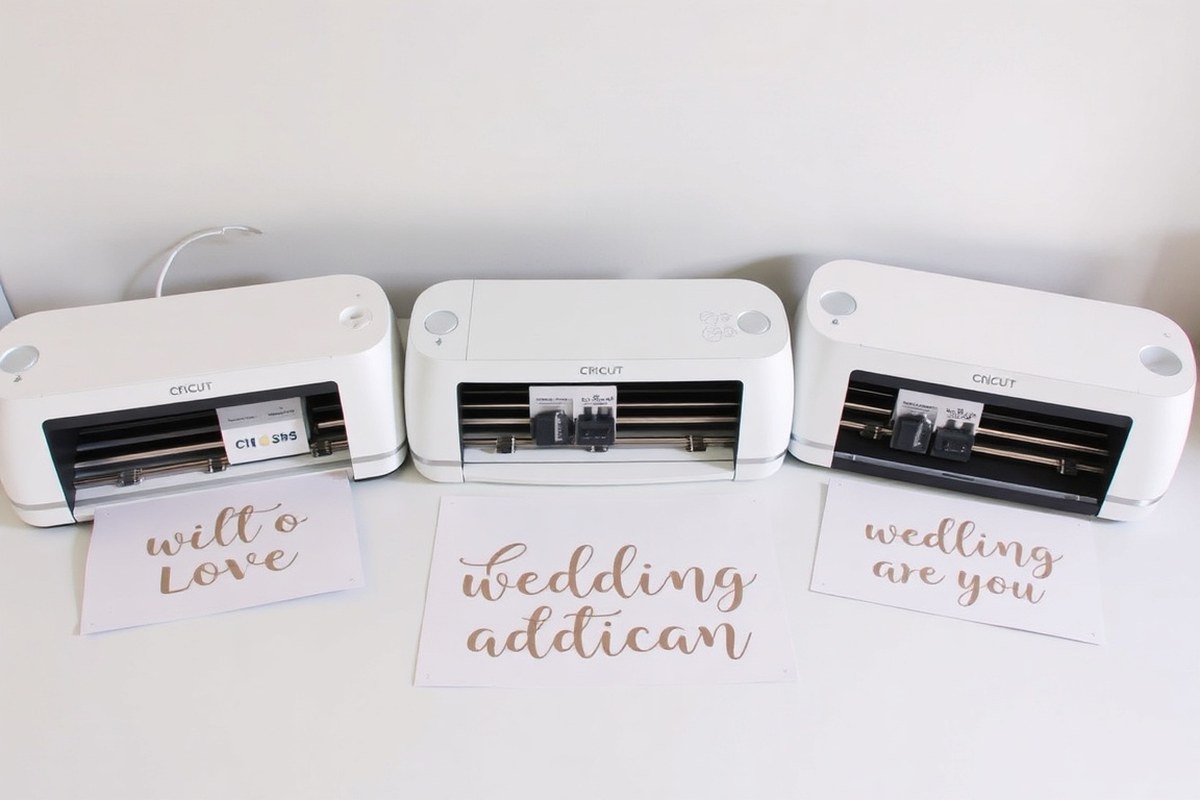
Choosing the right Cricut machine depends largely on your sign size, project complexity, and budget. Large wedding signs or multi-layered projects benefit from machines with bigger cutting areas and versatile tool compatibility. Speed also matters when producing batch projects like invitations or party favors, as some models cut faster than others, saving you time during tight wedding prep schedules. Budget constraints often lead casual DIYers to opt for smaller, simpler machines that still produce sharp, professional results. Here’s a comparison of popular Cricut models suitable for wedding signage, focusing on their cutting size, speed, and capabilities:
| Model | Max Cutting Size | Cutting Speed | Capabilities | Approximate Price |
|---|---|---|---|---|
| Cricut Explore 5 | 12 in. X 24 in. | Up to 4x faster than Explore Air 2 | Large banners, 3D flowers, batch projects | $250-$300 |
| Cricut Maker 3 | 12 in. X 24 in. | Similar speed to Explore 5, supports faster cutting | Advanced materials, acrylic etching, layered signs | $370-$400 |
| Cricut Explore Air 2 | 12 in. X 24 in. | Standard speed | Good for most vinyl and paper projects | $200-$250 |
| Cricut Joy | 4.25 in. X 6 in. (card size) | Compact and quick for small cuts | Small signs, labels, casual DIYers | $150-$180 |
The Cricut Explore 5 is an excellent choice when you want to create large wedding décor like banners or seating charts because it supports cutting up to 24 inches wide and works well for multi-piece projects. Its speed is up to four times faster than older models, which is a big advantage for batch production ahead of the wedding day. The Cricut Maker 3 offers similar size and speed but adds the ability to cut and etch tougher materials like acrylic, ideal for intricate layered signs or table numbers. This extra capability comes with a higher price tag, so it makes sense if your design plans include specialty materials.
Smaller machines such as the Cricut Joy cater to DIYers on a budget or those making smaller pieces like place cards, favor labels, or small welcome signs. Its cutting area is limited, so it’s not suitable for large signs but is compact and easy to use. The Explore Air 2 sits in the mid-range for price and capabilities, handling most vinyl and paper projects well but without the speed improvements or acrylic etching tools.
Check your desired sign size before buying: a machine that can’t cut your largest piece will require splitting your design, which can complicate alignment and extend project time.
To decide, first measure your biggest wedding sign or planned project piece. For projects larger than 4 inches, you’ll need a different option.25 by 6 inches, narrow your choices to Explore or Maker models. When your budget is below $200 and you only want small accents, the Cricut Joy works well. For multi-layered or acrylic signs, prioritize the Maker 3. Otherwise, Explore 5’s balance of size, speed, and price will cover most wedding signage needs effectively.
Best Materials for Cricut Wedding Signs and Their Uses
Choosing the right material for your Cricut wedding sign depends on where you’ll display it and how durable you need it to be. Adhesive vinyl is the most common choice for adding designs to wood or acrylic because it sticks well and comes in various finishes. For wood surfaces like plywood, permanent adhesive vinyl works best, especially if the sign will be outdoors. For acrylic, both permanent and removable vinyl can be used, but permanent vinyl is preferable for signs exposed to moisture or frequent handling.
Thickness matters when selecting wooden or acrylic bases. Plywood sheets up to ¼ inch thick fit well on cutting mats, which the Cricut Maker 3 and similar machines use for transferring vinyl. Since the machine does not cut plywood directly, you use it as a surface for your vinyl decals. Acrylic sheets for signs are typically between ⅛ to ¼ inch thick and cannot be cut by the machine but can be decorated with vinyl or specialized acrylic markers.
Waterproof or outdoor-safe options are essential if your wedding sign will face weather. Permanent vinyl is designed to resist water and sunlight, making it suitable for outdoor signs. Some premium brands also offer vinyl with UV protection that limits fading. However, placing your sign under cover or indoors increases its longevity. Below is a comparison table of popular materials for making wedding signs with Cricut machines and how they perform based on key factors:
| Material | Compatible Vinyl | Thickness (inches) | Outdoor Use | Key Tips |
|---|---|---|---|---|
| Project Plywood | Permanent Adhesive Vinyl | Up to 0.25 (1/4 inch) | Yes, with sealant | Seal plywood for outdoor use; prep surface by sanding clean |
| Acrylic Sheet | Permanent or Removable Vinyl | 0.125 to 0.25 (1/8 to 1/4 inch) | Yes, best indoors or covered areas | Clean thoroughly before applying vinyl; center design on mat in Cricut Design Space |
| Foam Board | Permanent or Removable Vinyl | Varies, typically 0.25 to 0.5 | Indoor use only | Lightweight; avoid moisture |
Applying vinyl smoothly is critical for a clean look. Always clean your chosen surface with rubbing alcohol and let it dry fully before adding vinyl. For wood, sanding the spot helps the vinyl stick better. When working with acrylic, be gentle removing backing paper to prevent curling or tearing the vinyl. Using a scraper tool will push out air bubbles and ensure firm adhesion.
For longer signs, Smart Vinyl materials that cut up to 12 feet can reduce seams and provide a polished appearance. They don’t require mats, which makes handling large acrylic panels or plywood easier. If you want to try alternatives, acrylic markers can add hand-drawn touches on acrylic signs for a personalized but professional finish.
Designing Your Wedding Sign in Cricut Design Space
Creating and customizing your wedding sign design in Cricut Design Space starts with choosing the right fonts, adjusting the size and spacing to fit your sign blank, and saving your project for future use. Knowing how to align your design elements properly and select wedding-appropriate fonts can make your sign look polished and professional. Saving templates also saves time if you want to create multiple signs or reprint designs.
Selecting Wedding-Appropriate Fonts
Cricut Design Space offers over 1,000 fonts, but not all match the elegant and personal tone of a wedding. The most suitable fonts tend to be script fonts with clean, flowing lines or simple serif or sans-serif fonts for a modern, minimalist look. Popular choices include fonts like “Alex Brush,” “Great Vibes,” and “Montserrat” for text that is both readable and stylish. Using a combination of script for names or headings and a simpler font for details often works best.
If you want extra flair with swirls or flourishes, Cricut Design Space has limited tools for this. You can export your text to programs like PicMonkey to add custom swirls before importing the design back into Design Space. Always choose SVG files or fonts tested for cutting compatibility to avoid issues during the cutting phase, designs from Etsy or Cricut Contributing Artists are good starting points for reliable files.
Adjusting Letter Spacing and Size Precisely
Start by measuring the exact dimensions of your sign blank, whether it’s wood, acrylic, or mirror, and create a corresponding shape inside Cricut Design Space. This shape acts as a visual guide for sizing your design elements. Adjust your fonts by dragging the size slider or typing exact height and width values in the size boxes. For large signs, keeping letter spacing consistent helps maintain legibility from a distance.
Use the letter spacing tool in Design Space to increase or decrease the space between letters to prevent crowding or too much empty space. Aligning text horizontally or vertically can be done with the alignment tools found in Design Space, which let you center or distribute words evenly. Here’s a checklist to keep your design balanced:
- Measure your sign blank and create a shape of the same size in Design Space
- Set font size to match your desired visual impact (typically 2, 4 inches for main text on large signs)
- Adjust letter spacing to avoid overlaps or excessive gaps
- Use alignment tools to center or evenly distribute text and elements
- Preview your design at 100% zoom to check readability
- Group design elements to move and resize them together
This process might take a few trial runs. Designs that are too large risk cutting problems or vinyl wasting while designs too small can be hard to read. Good signs have balanced spacing and a size that makes the message clear from several feet away.
Saving and Reusing Sign Templates
After finalizing your design, save a copy in Cricut Design Space to keep your layout, font choices, and spacing intact. Save your file with a clear name like “WeddingSign_JohnJane_V1” so you can find it easily later if you want to create matching signs or tweaks for other parts of the wedding décor.
Design Space allows you to save projects without cutting, so you can return multiple times to make changes or duplicate the template for different cuts. Consider saving both the full design and separated layers if you plan to use multiple materials or colors. Backup your projects by exporting them as SVG files, which can be stored outside of Design Space and imported again if needed.
Templates speed up production, especially if you’re crafting signs for multiple locations or events. They also make it easier to stay consistent with your wedding’s font and style choices without redesigning from scratch.
Preparing and Cutting Vinyl on Cricut for Wedding Signs
Accurate measuring and proper material preparation are essential for cutting vinyl decals that fit your wedding sign perfectly. Before cutting, measure your sign board’s surface to determine the size of the decal. For large vinyl pieces, make sure your cutting mat supports the vinyl size, usually 12 by 24 inches for standard mats, or use the Matless Cutting mode if your Cricut supports it.
Select the blade and machine settings that match your material. The Fine Point blade is ideal for most vinyl and iron-on materials, providing clean, precise cuts. If you use thicker materials like stencil vinyl or cardstock, a Deep Point blade may be necessary. Always choose the material setting in Cricut Design Space that corresponds to your vinyl type to avoid cutting too deep or not enough.
Preparing the mat properly helps avoid shifting during cutting, which can ruin your design. Clean your cutting mat and apply vinyl smoothly, sticky side down, without wrinkles or bubbles. Feeding the mat correctly into the Cricut ensures even cutting. Common errors like incomplete cuts or tears often come from dull blades, incorrect settings, or improperly loaded mats.
- Measure the sign surface using a tape measure and note the width and height for your vinyl decal size.
- Place vinyl on the cutting mat with the backing side down, sticky side up, smoothing out air bubbles from the center outward.
- Load the cutting mat into your Cricut machine using the guides. Ensure it is firmly aligned and fed evenly.
- Select the appropriate blade (Fine Point for standard vinyl) and check it’s sharp and seated correctly in the carriage.
- Set the material in Cricut Design Space to your vinyl type (e.g., Premium Vinyl) to adjust blade pressure and cutting speed.
- Start the cut and monitor the machine for any lifting or shifting of the material during the process.
- Unload the mat carefully once finished and remove the vinyl as one piece to prevent curling or damage.
Always check your blade condition before cutting large or detailed designs; dull blades cause incomplete cuts that waste vinyl and time.
Weeding and Transferring Vinyl: Avoiding Common Mistakes
Removing unwanted vinyl pieces and applying transfer tape correctly are key steps for creating a polished wedding sign. Careful weeding avoids damage to small, intricate letters, while a smooth transfer tape application prevents bubbles and misalignment. Follow a clear script to handle these steps precisely and achieve a clean, professional look.
Step-by-Step Vinyl Weeding Techniques
Use a pointed weeder tool to remove the tiny negative spaces from your cut design. Start by peeling the excess vinyl away from the letters gently, taking special care around narrow or delicate shapes. Work slowly with steady pressure to avoid tearing or lifting small sections.
For intricate letters, hold the sign flat on a firm surface and use bright light to see where cuts separate. When small pieces stay attached, use the hook end of the weeder tool instead of pulling with your fingers. This targeted approach reduces the chance of accidentally removing parts of your design.
Remove all unwanted vinyl carefully to prevent leftover bits from showing through after transfer. Good weeding leaves sharp, clean edges on every letter or shape, ensuring your wedding sign looks crisp and well-made.
Applying Transfer Tape with a Smooth Finish
Peel the backing off your transfer tape and hold it from the corners. Align the tape so its center matches the center of your full vinyl design. Slowly lay the transfer tape down starting at the center and press outward to minimize air bubbles.
Use a scraper tool to firmly rub the tape over the vinyl letters. Apply steady pressure across the entire design, especially along thin lines and edges, to ensure strong adhesion to the tape. Good pressure also reduces the risk of peeling during the transfer step. Here’s a checklist for applying transfer tape smoothly:
- Peel transfer tape backing carefully without touching the adhesive side
- Position tape centered over the vinyl design, starting at the middle
- Press tape onto vinyl moving outward to avoid bubbles
- Use a scraper to apply firm, even pressure over the whole design
- Check for and gently push out any small air bubbles
Following these actions helps keep your vinyl letters perfectly attached to the tape and ready to transfer without wrinkles or gaps.
Final Application Tips and Fixes
Before placing the vinyl on your sign base, double-check that the transfer tape aligns straight and centered. Slowly lower the vinyl onto the sign from one side, brushing outward with the scraper tool as you go. This technique presses out any trapped air and ensures smooth, even contact.
After the vinyl is on the sign, wait a few moments for the adhesive to settle, then carefully peel the transfer tape away at a sharp angle. Pull slowly and steadily; rushing can lift vinyl pieces or cause tears. Pat down the letters again with the scraper if any parts seem loose.
Air bubbles that appear after application can be pricked with a pin, then press the vinyl flat. For minor misalignments, gently lift and reposition small sections using the transfer tape, though be cautious to avoid damage. Patience is key throughout to achieve a flawless finish that will last and resist peeling, water damage, or fading for your wedding day.
Making Acrylic and Layered Signs with Cricut
Cricut machines can write on some acrylic surfaces using special pens but do not engrave acrylic. For layered wedding signs, combining vinyl with acrylic or wood pieces creates depth and visual interest. Using the Cricut pen tool for lettering on clear acrylic adds elegance while layering different materials requires careful alignment and strong adhesive.
Engraving and Writing on Acrylic Signs
Cricut machines cannot engrave acrylic directly but can use pens to write on smooth acrylic or acetate sheets. Choose pens designed for your Cricut model, such as fine-point or gel pens, and select the acrylic or acetate material setting when preparing your design. Ensure the acrylic fits securely on the cutting mat to avoid slipping during the writing process.
For best results, clean the acrylic surface with a lint-free cloth to remove fingerprints or dust. After loading the pen into the tool holder, the Cricut will write your design precisely. Hand lettering or detailed designs work well on acrylic sheets 1/16 inch thick or less without damaging the material.
Layering Vinyl with Wood or Acrylic Pieces
Layering vinyl on acrylic or wood adds dimension to your wedding signs. Begin with the base layer, typically a wood plaque or an acrylic sheet. Cut your vinyl decals or lettering using the Cricut machine and weed out the excess carefully to ensure clean edges.
Use transfer tape to position vinyl perfectly before applying it to the acrylic or wood. For multi-layered vinyl designs, apply each vinyl layer one at a time, starting with the darkest or largest area and ending with the lightest or smallest details.
Finishing and Assembling Layered Signs
Once you have your individual layers ready, assemble them by stacking the acrylic and wood pieces carefully. Use a strong craft adhesive suitable for both acrylic and wood, such as clear-drying epoxy or double-sided mounting tape designed for signage. Apply adhesive sparingly to avoid overflow and press layers firmly for several minutes.
Lay your sign flat for 24 hours to allow adhesive curing fully. Check for any misalignment before the adhesive sets. Add hanging hardware or stands depending on the sign’s intended display.
- Prepare your design in Cricut Design Space and select the writing tool for pen use on acrylic.
- Clean acrylic or wood surfaces to ensure smooth adhesion.
- Load the appropriate pen or blade into your Cricut machine and select the correct material settings.
- Let the Cricut write on the acrylic sheet; for vinyl, cut the design and weed unwanted parts.
- Use transfer tape to apply vinyl layers one by one, starting with base colors or larger shapes.
- Adhere vinyl and acrylic pieces onto the wood or base layer using strong craft adhesive.
- Press all layers firmly and allow the glue to cure for 24 hours before handling or displaying.
Caring for and Troubleshooting Cricut Wedding Signs
Using permanent adhesive vinyl is key for wedding signs meant for outdoor use, as it resists water and fading. Acrylic signs don’t require extra sealing if you use this vinyl type, which simplifies preparation and helps your signs hold up under sun and moisture. For extra protection, especially if your sign will face rain or heavy traffic, applying a clear removable spray sealant made for vinyl can safeguard against scratches and premature wear without damaging the design.
Cleaning your signs gently preserves their finish. Use a soft cloth with mild soap and water to avoid harming vinyl surfaces. Harsh chemicals or abrasive pads can cause peeling or dullness. Let signs fully dry before storing them flat in a cool, dry place to prevent warping. When transporting, pack signs in rigid containers or wrap them in bubble wrap to protect edges and vinyl layers from lifting or scratches.
Common issues with vinyl on wedding signs include peeling edges and fading. To refresh peeling vinyl, warm the surface lightly with a hair dryer on low heat to soften the adhesive, then press down edges using a plastic scraper or credit card. Peeling often happens when signs are bent or stored improperly, so keeping them flat and supported prevents this. For fading, replacement is usually needed, but premium outdoor vinyl often retains vivid colors for years when used as directed.
- Clean signs with a soft cloth and mild soap, no abrasive cleaners
- Seal vinyl with a clear removable spray if the sign faces harsh weather
- Store signs flat in a cool, dry spot away from direct sunlight
- Wrap signs with bubble wrap or use hard containers during transport
- Use a hair dryer and plastic scraper to fix peeling vinyl edges
- Expect to replace vinyl if fading occurs despite protection
- Handle signs carefully to avoid bending and cracking vinyl layers
Do not seal vinyl with permanent sprays or thick coatings, as they can crack or discolor your design over time.
Keeping your wedding signs in good shape involves consistent care and sensible storage. Avoid stacking heavy objects on top of them, and minimize exposure to extreme heat which could warp acrylic or soften vinyl adhesive. When repairing, test small areas first and always apply heat gradually to avoid damage. Taking these steps guards your investment and helps your personalized signs make a lasting impression on your big day.
Step-by-Step Action Plan for Your Wedding Sign
Follow these clear steps to create a custom wedding sign with your Cricut that looks polished and professional.
- Before you start: Choose your Cricut machine and gather your materials based on your design idea. Confirm your machine is set up and working by cutting a simple test shape.
- Day 1: Design your wedding sign in Cricut Design Space, including font and layout. Preview your design to check for correct sizing and spacing.
- Day 2: Prepare your vinyl or chosen material by cleaning the surface and cutting your vinyl mat to size. Load the material into the machine and perform a test cut.
- Day 3: Weed your vinyl carefully, removing excess material without pulling up the design. Lay transfer tape over the weeded vinyl, pressing smoothly to avoid bubbles.
- Day 4: Transfer your vinyl onto the sign base, such as acrylic or wood, applying firm pressure and smoothing the surface. Check edges to ensure full adhesion.
- Day 5: Add any additional layers or embellishments using the layering method if your design requires it. Test stability by gently handling the sign.
- After 1 week: Care for your finished sign by storing it in a safe place away from moisture and direct sunlight to maintain its appearance.
Frequently Asked Questions
What Size Should a Cricut Wedding Sign Be for Best Impact?
Aim for at least 18 by 24 inches to ensure readability at a distance; larger sizes work well for entrance or seating signs. This size balances visibility with ease of cutting on most Cricut machines.
Can I Use Cricut to Make Signs for Outdoor Weddings?
Yes, use weather-resistant vinyl and seal your sign to protect it from moisture and sun damage. Outdoor signs require durable materials to last through the event.
How Do I Choose Fonts for a Wedding Sign Made with Cricut?
Pick fonts that are elegant yet easy to read from a distance. Avoid overly intricate fonts to ensure clean cutting and good visibility.
Are There Eco-Friendly Materials to Use for Cricut Wedding Signs?
Use recyclable or biodegradable vinyl and sustainably sourced wood for eco-conscious signs. These options reduce environmental impact without sacrificing style.
How Do I Fix Mistakes While Transferring Vinyl on a Wedding Sign?
Carefully lift the vinyl off the transfer tape and reposition it; warming the backing with a hairdryer can help avoid tears. Patience during transfer prevents common damage.
Can I Add Embellishments to My Cricut Wedding Signs After Cutting Vinyl?
Yes, you can add paint, glitter, or small flowers to improve your sign’s look. Just make sure adhesives and materials won’t damage the vinyl.
Final Thoughts
Creating a personalized wedding sign with a Cricut lets you add a unique touch to your big day that guests will remember. Start by designing something simple and build your skills as you go. Try cutting a small project today to feel confident before tackling your main wedding sign.