DIY Wooden Sign Guide: Materials, Methods, and Pro Tips for Best Results
A DIY wooden sign offers a personalized, cost-effective way to improve your home decor or gift giving. It involves choosing suitable wood, preparing the surface, transferring your design, painting or lettering, and sealing the final product to protect it. Start by selecting wood that suits the sign’s intended use to ensure durability and an attractive finish.
Key Takeaways
- Choose wood like pine or plywood for an affordable, smooth surface ideal for painting and design transfer.
- Cut wood pieces with an extra 1.5 inches in height to accommodate framing or mounting needs.
- Use Mod Podge as a transfer medium to apply printed designs onto wooden surfaces effectively.
- Begin painting with a built-in primer and top coat that dries matte in 24 hours for ease and durability.
- Frame your sign using 1×2 boards cut to size for a polished, sturdy edge.
- Seal your sign with outdoor-grade sealant and let it dry for 24 hours before displaying to maximize protection.
What Is a DIY Wooden Sign and How Is It Made?
A DIY wooden sign is a handcrafted decorative piece made from wood, customized to display words, phrases, or designs that reflect your personal style or home theme. These signs often feature inspirational quotes, family names, or fun sayings, adding character and charm to indoor or outdoor spaces. Creating your own sign allows you to tailor the size, font, and finish to your specific taste, making it a meaningful addition that mass-produced signs can’t match.
The basic process of making a DIY wooden sign starts with selecting the right piece of wood, which could be a smooth plywood panel or reclaimed wood like pallet slats or fence pickets. After choosing the wood, the next step involves preparing the surface, this includes sanding to remove rough spots and ensure paint or stain adheres well. Following preparation, you transfer your chosen design onto the wood using methods appropriate to your skill level and tools, such as tracing, stenciling, or freehand drawing.
Once the design is in place, painting or lettering comes next. Selecting the right type of paint, usually acrylic for indoor signs or outdoor-rated paint for garden signs, will affect the durability and appearance. Adding coats and allowing adequate drying time, often several hours or even a full day, helps achieve a professional look. Finally, sealing the sign with a clear protective finish guards against moisture and wear, which is essential if the sign will be displayed outdoors.
Making your own wooden signs instead of buying offers several advantages. It’s typically cost-effective; using scrap wood and basic supplies often keeps material costs around $4 per sign. The hands-on nature of the project is relaxing and rewarding, giving you a sense of accomplishment that comes from crafting something yourself. Plus, doing it yourself means you can customize fonts, colors, and messages precisely how you want, fitting your decor perfectly.
Good results come from careful sanding, clean lines in the design transfer, and multiple thin paint layers for a smooth finish. Common challenges include uneven surfaces that make painting tricky and visible brush strokes if paint is too thick. Allowing a full 24 hours for the sealant to dry before use prevents smudging or damage. Depending on the size and complexity, a simple sign can be completed over a weekend, making it an accessible project for beginners and a satisfying one for intermediate crafters alike.
Choosing the Best Wood for Your Wooden Sign
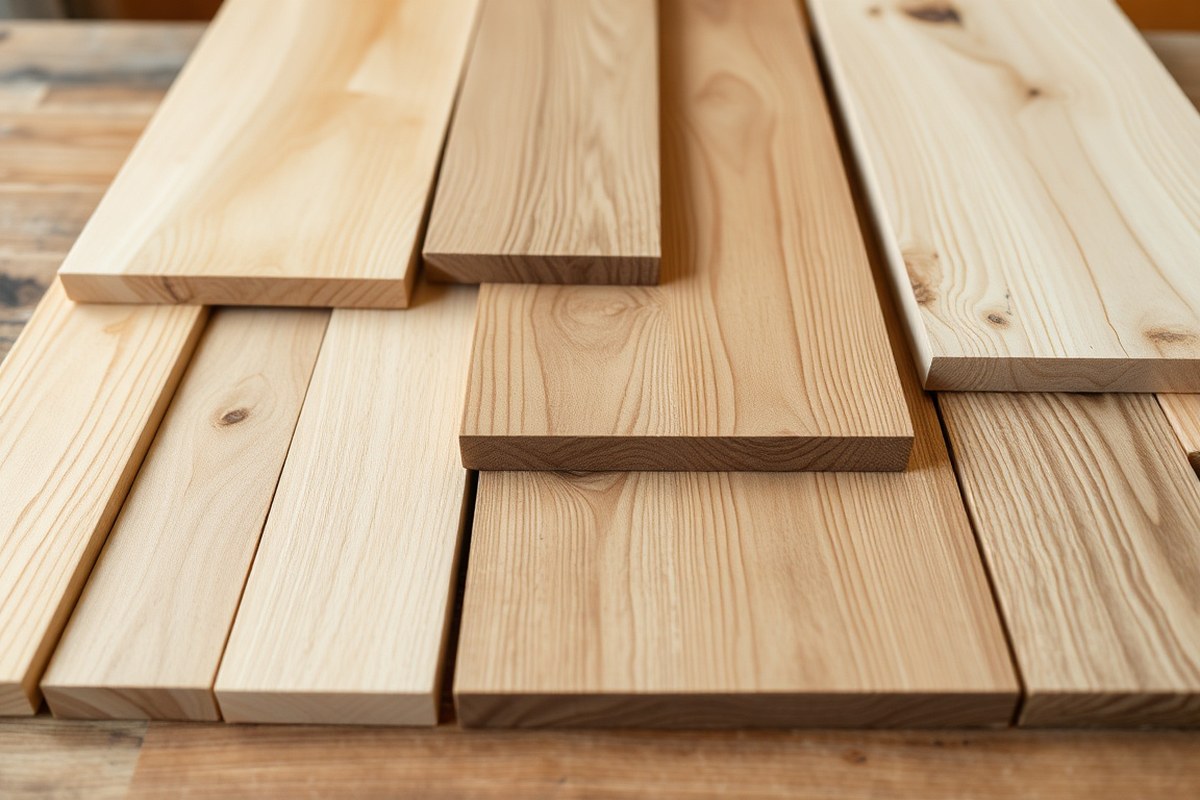
Picking the right wood for your DIY wooden sign depends on where you plan to display it and how you prioritize durability, ease of work, and budget. For indoor signs, wood species that are easy to cut and paint, like birch plywood, work well. For outdoor signs, you want wood with better rot resistance and stability to withstand weather conditions.
Durability refers to how long the wood can resist decay and damage, especially outdoors. Workability is about how easy it is to saw, sand, or paint the wood. Cost is a big factor, especially if you plan on making several signs or large ones. Premium woods like teak and white oak offer great durability but come at a high price. More affordable choices like cedar or even treated plywood can also do the job well if properly sealed.
| Wood Type | Rot Resistance | Stability | Cost & Notes |
|---|---|---|---|
| Cedar | Excellent | Very Good | Moderate. Lightweight, easy to work with, top DIY choice |
| Redwood | Excellent | Very Good | High. Durable softwood that can last decades outdoors |
| White Oak | Excellent | Good | High. Strong and durable hardwood, but heavy |
| Teak | Outstanding | Excellent | Very High. Gold standard for outdoor use, expensive |
| Marine-Grade Plywood | Good (with sealing) | Excellent | Moderate to High. Needs sealing but very stable |
For outdoor signs, cedar and redwood are excellent choices if you want good durability without a high price tag. White oak adds strength but may be harder to handle for beginners. Teak is far more expensive but offers unmatched weather resistance, ideal for signs meant to last decades. Marine-grade plywood is a good option if sealed properly but may require more prep. Indoors, birch plywood works well as it’s smooth and affordable, making painting and lettering easier.
Always seal outdoor wood signs with a weatherproof finish to avoid rot, even with rot-resistant woods like cedar or redwood.
Budget-friendly projects can start with cedar or birch plywood, which cost roughly $20 to $40 for a few boards suitable for medium-sized signs. Investing in pricier woods only makes sense if the sign will be outdoors and exposed to harsher conditions. Consider the balance between how much you want to spend and how long you want the sign to last. The easier it is to work with your chosen wood, the better the final result usually looks.
Tools and Supplies Needed for DIY Wood Signs
Making a DIY wooden sign requires certain tools and supplies that range from very basic to moderately advanced, fitting a variety of skill levels and options for power tool use. At a minimum, you’ll need some wood, paint, brushes, and a method for applying your design. You can complete a sign using only hand tools and inexpensive materials, which keeps costs low and simplifies cleanup.
Essential hand tools include a measuring tape, pencil, and sandpaper for prepping the wood surface. A small handsaw or coping saw can help you trim wood pieces, but you can also buy pre-cut wooden boards or signs if you want to skip cutting. For transferring your design, tracing paper or carbon paper works well without needing machines or stencils. To paint your sign, basic acrylic craft paints are affordable and provide solid coverage. Choose paints labeled for outdoor use if your sign will face the elements.
- Wood board (scrap, pallet, or pre-cut pine or cedar, 1/2 to 3/4 inch thick)
- Measuring tape and pencil for layout
- Sandpaper (medium and fine grit, around 120 and 220 grit)
- Handsaw or pre-cut boards (optional) for shaping
- Acrylic paints (outdoor-grade if exposed to weather), paint brush set including small detail brushes
- Tracing paper or carbon paper for transferring designs
- Clear protective finish such as water-based polyurethane or outdoor varnish
The paint you choose influences durability and appearance. Acrylic paints are water-based, dry quickly, typically within 15 to 30 minutes per coat, and clean up easily with soap and water. For a glossy or durable finish, apply a clear protective coat after the paint fully dries. A water-based polyurethane or outdoor spar varnish will shield your sign from moisture, UV damage, and general wear. Let the clear coat dry at least 24 hours before handling or hanging the sign to ensure maximum protection.
No power tools are necessary to create a beautiful wooden sign, making this project very accessible for beginners or those without a workshop. Using pre-cut wood and hand sanding keeps things simple. You might spend under $25 on materials if you source scrap wood and small tubes of craft paint, and less if you already own brushes. More advanced options like a cordless drill or electric sander can speed steps but aren’t required for good results. The key to success is thorough sanding for a smooth base, careful painting layers, and complete drying times between coats.
Preparing and Finishing Wood for Best Painting Results
Preparing your wood properly is key to achieving a smooth, durable paint finish on your DIY wooden sign. Start by sanding to create an even surface, then apply stain or paint, and finish with a sealant that protects your work from wear and weather. The right order and method improve adhesion and prevent peeling or cracking.
Choosing the Right Sandpaper Grit
Begin sanding with lower grit to level rough areas, then move to finer grits for a smooth finish. Using 150 grit sandpaper helps remove surface imperfections and any splinters from raw wood. Follow with 220 grit sandpaper to achieve the soft, even texture needed for paint or stain to apply properly. Sand along the wood grain instead of against it to avoid scratches.
After sanding, wipe the surface with a clean cloth or tack cloth to remove dust. This step prevents grain raise and blotchiness during staining or painting.
Applying Wood Stain Correctly
Stain adds color and highlights wood grain, but application technique influences the final look and durability. Use a cotton cloth or brush for even coverage and work consistently in sections to avoid lap marks. Apply the stain following the wood grain, gently rubbing it in if using a cloth.
Let the stain penetrate the wood for 5 to 15 minutes, depending on how dark you want the finish. Wipe off excess stain with a clean cloth to avoid sticky or blotchy spots. Allow the stained wood to dry completely for at least 24 hours before the next step. Good airflow and temperatures between 65°F and 80°F speed drying without causing defects.
Best Sealants for Indoor and Outdoor Use
Sealants protect your sign from moisture, UV rays, and abrasion. Choose a water-based polyurethane or acrylic sealer for indoor signs to keep colors vibrant and surfaces smooth. For outdoor signs, select a sealant labeled for exterior use, preferably with UV protection to reduce fading.
Apply the sealant evenly with a synthetic brush or foam applicator in thin coats to avoid drips and bubbles. After the first coat dries, lightly sand with 220 grit sandpaper to smooth out brush marks. Apply 2 to 3 coats total, allowing each coat to dry according to the manufacturer’s instructions, usually 2 to 4 hours for water-based products.
- Sand the wood with 150 grit sandpaper to remove rough spots and splinters.
- Follow with 220 grit sandpaper to smooth the entire surface evenly.
- Wipe away sanding dust with a clean or tack cloth.
- Apply stain evenly using a brush or cloth, following the wood grain.
- Let stain soak for 5 to 15 minutes, then wipe off excess with a clean cloth.
- Allow the stain to dry completely for 24 hours in a well-ventilated area.
- Apply a thin coat of sealant suitable for your sign’s location.
- After drying, sand lightly with 220 grit sandpaper and apply additional coats as needed.
Methods to Transfer Your Design Onto Wood
Choosing the right method to transfer your design onto wood depends on your skill level, available tools, and budget. You might like the accuracy of vinyl stencils, the ease of carbon paper tracing, or the freedom of freehand painting, as each way offers its own advantages and difficulties. Understanding how to use them well will help you get a cleaner and more professional-looking wooden sign.
Using Carbon Paper for Tracing Designs
Carbon paper transfer is a budget-friendly way to move your design onto wood. Start by printing your design on regular paper. Turn your design paper over, then place a sheet of carbon paper between the wood and your design, with the carbon side facing the wood.
Trace over the design lines with a sharp pencil or pen, applying firm, even pressure. This presses the graphite from the carbon paper onto the wood surface, creating a faint yet visible outline you can paint over. A pack of 100 carbon sheets usually costs under $10, making this method economical for beginners and those making multiple signs.
- Choose a simple design for cleaner outlines, especially with rough wood grain.
- Secure the design and carbon paper with tape to avoid shifting while tracing.
- Use a medium-hard pencil to apply enough pressure without tearing the paper.
- Check the transferred lines before removing papers to avoid missing details.
- Some lines may be faint; go over them by hand with a careful touch to darken them.
Test the carbon paper on a scrap piece of wood first to see if the lines are dark enough for your painting style.
This method requires no special tools beyond carbon paper and a printer, making it accessible and straightforward. Keep in mind, fine details may blur due to wood texture, so designs with bold shapes work best.
Applying Vinyl Stencils or Decals
Vinyl stencils offer sharp, precise edges and are ideal for intricate or repeatable designs. You’ll need a cutting machine like a Cricut or Silhouette to cut your vinyl stencil based on your digital design. After cutting, use transfer tape to pick up and place the vinyl stencil onto your wood surface.
Before you paint, press the stencil firmly to ensure it adheres properly and seal the edges to prevent paint bleed. Paint carefully over the stencil, then remove it while the paint is slightly wet to avoid peeling paint off with the vinyl. Vinyl stencils tend to cost more upfront due to the need for special tools and materials but can be reused for multiple projects, offering value for frequent makers.
- Design your sign digitally for precise cutting and resizing.
- Weed excess vinyl carefully to keep only your design elements.
- Use transfer tape to position the stencil accurately on your wood.
- Seal stencil edges with a thin layer of clear paint or a spray fixative.
- Remove stencil gently before paint fully dries to avoid damage.
Keep the blade of your cutting machine sharp and clean for crisp stencil edges.
Vinyl stencils produce professional results and work well for detailed fonts or logos. They work best on smoother wood surfaces for a cleaner transfer. This method is faster than manual tracing after setup but requires investment in a cutting machine and vinyl materials.
Painting Freehand with Guidelines
Freehand painting is the most flexible method and suits those confident in their brush control or wanting a personalized, one-of-a-kind look. Start by drawing light pencil marks or guidelines directly on the wood for letter or design placement.
Use these guidelines to paint your design by hand, adjusting as needed. This method requires minimal tools, just paint and brushes, and allows creative freedom in style and color. It is ideal for simple designs or when the goal is a rustic, handmade aesthetic. While it demands more practice and patience, freehand painting avoids transfer errors common in other methods.
- Sketch your design with a light pencil to map out proportions.
- Choose fine brushes for detail and flat brushes for filling areas.
- Practice on scrap wood to get your brush strokes steady.
- Use multiple paint layers for vivid colors and sharp edges.
- Work slowly and step back regularly to check your progress.
Keep a damp cloth nearby to quickly correct small mistakes before paint dries.
This method costs the least but demands steady hands and an eye for spacing. Mistakes can be repainted or sanded down with patience. It is an excellent option to express style and personality without needing cutting machines or transfer papers.
Painting and Lettering Techniques for Professional Signs
The best paint for your wooden sign’s base color usually is acrylic paint. It dries quickly, generally within 20 to 30 minutes under normal indoor temperatures, and sticks well to wood that’s been properly prepped. Acrylics come in a wide variety of colors and finishes, from matte to glossy, letting you customize your sign. For larger signs, using a small foam paint roller helps spread the base color evenly and faster, without visible brush strokes. For smaller areas or detail work, a good-quality synthetic bristle brush around 1 to 2 inches wide provides enough control and smooth coverage.
When painting lettering, sharp and clean edges are key to a professional look. The best tool for this is a Sharpie oil-based paint pen, which gives you solid control and smooth lines. These pens create long-lasting, vibrant letters that resist fading and chipping because the oil-based paint adheres strongly to the wood. Compared to trying to hand-paint letters with a brush, paint pens drastically reduce the effort and risk of uneven edges or paint bleeding.
For those who want to use stencils, choose plastic or vinyl stencils that lay flat on the wood to prevent paint from bleeding under the stencil edges. Hold the stencil securely with painter’s tape. Apply paint using a small foam brush or a stippling brush with light tapping motions rather than strokes to keep paint within the stencil. Several thin layers work better than one thick coat to avoid drips or smudges. Remove the stencil carefully before the paint dries completely, usually within 15 minutes, to maintain clean lines.
Clean lettering also depends on good preparation. Make sure to sand the wood smooth before painting. Avoid applying paint in thick globs or rushing the drying time between layers, which causes smudging. Let each layer dry fully at room temperature, ideally 65 to 75 degrees Fahrenheit, and keep your work area dust-free. Using quality brushes or pens might cost a little more upfront, expect to spend $8 to $15 for a good paint pen and about $5 to $10 for a decent foam roller or brush, but the time saved and appearance gained are worth it.
Common issues include paint bleeding under stencils, uneven brush strokes, or letters that look too bulky or thin due to inconsistent pen pressure. To fix bleeding, apply a clear acrylic spray sealer after the paint dries to smooth edges and protect the design. Practice your lettering on scrap wood to get comfortable with pressure and speed with paint pens. If your handwriting is shaky, printing your design, then tracing it with carbon paper onto the sign allows precise painting or pen work over the traced lines, ensuring crisp results.
Building and Adding Frames to Your Wooden Sign
Building a solid frame for your wooden sign not only improve its appearance but also protects the edges from damage. Using the right materials and precise cutting ensures the frame fits well and stays securely attached, giving your sign a polished, professional look.
Selecting Frame Materials and Dimensions
Choose a durable wood like pine or poplar for the frame; these woods are easy to cut and paint, and they match well with most wooden signs. Opt for 1×2 or 2×2 lumber strips to create a noticeable yet balanced border around your sign. The frame width typically ranges from 1 to 2 inches depending on your sign size and style preference.
Plan the frame dimensions by adding 1.5 inches to both the height and width of your wooden sign. This extra length accounts for the frame overlap at the corners and ensures the frame fully encloses the sign. Using consistent dimensions helps maintain symmetry and balance in your finished piece.
Measuring and Cutting for Perfect Fit
Accurate measurements and clean cuts are key to neat, flush joints in your frame. Begin by measuring each side of your sign carefully with a tape measure. Record the exact height and width, then add 1.5 inches to each measurement to find your frame piece lengths.
Use a miter saw or a hand miter box to cut the frame pieces. Cut four pieces: two for the height and two for the width. Cut the ends of all pieces at 45-degree angles to form miter joints at the corners. This angle cut helps the pieces fit tightly together for a smooth look.
Attaching Frames Securely to Signs
Secure the frame pieces with wood glue and finishing nails for sturdiness and a clean finish. It’s important to clamp the frame pieces during gluing to ensure tight joints and alignment. Use a square to check the corners are exactly 90 degrees before the glue dries.
After gluing and nailing, let the frame dry completely for 1 to 2 hours. Once dry, fill any nail holes or gaps with wood filler, sand smooth, and paint or stain for a uniform appearance. This process helps your frame stay durable and visually appealing. Follow these step-by-step instructions to build and attach your wooden sign frame:
- Measure your wooden sign’s height and width, then add 1.5 inches to each dimension for frame pieces.
- Select 1×2 or 2×2 wood strips suitable for your frame width and cut two pieces to the adjusted height measurement.
- Cut two more pieces to the adjusted width measurement with ends mitered at 45 degrees.
- Apply wood glue to the edges of the frame pieces and join them at the corners, forming a rectangle around your sign.
- Clamp the frame to maintain tight, flush joints and confirm the corners are square with a carpenter’s square.
- Nail the frame pieces together using finishing nails, spacing nails about every 6 inches for stability.
- Attach the frame to the wooden sign’s edges with wood glue and small finishing nails, or use flat-head screws if extra strength is needed.
- Fill nail holes with wood filler, sand once dry, and finish with your choice of paint, stain, or sealant to protect and complete your sign.
Sealing, Protecting, and Displaying Your Finished Sign
Sealing your wooden sign depends largely on whether it will be displayed indoors or outdoors. For indoor signs, applying a clear acrylic spray or a water-based polyurethane protects the paint and wood from dust and minor moisture without yellowing over time. Outdoor signs need more strong protection, such as an exterior-grade polyurethane or marine varnish with UV inhibitors that prevent fading and water damage. Plan your sealing in stages: first, apply a thin coat with a foam brush or spray. Let it dry for 4 to 6 hours in a dust-free area at about 70°F, then lightly sand with a fine-grit sandpaper (220 grit) to smooth out any raised grain. Repeat for 2 to 3 coats for durable coverage, allowing a full 24 hours cure time before handling or hanging.
Maintaining your wood sign also extends its life. Regular dusting using a soft, dry cloth prevents surface buildup that can degrade the finish. For outdoor signs, check every 6 to 12 months for signs of wear, such as fading or peeling. Reapply a single coat of your sealant when needed to keep moisture out and protect the paint. Avoid harsh cleaners or scrubbing, which can damage the paint layer. Proper sealing combined with regular light maintenance can keep your wooden sign vibrant for years and prevent warping or cracking.
Mounting your finished sign with care ensures it will be displayed safely and attractively. Position the sign at eye level, typically 57 to 60 inches from the floor to the center of the sign for comfortable viewing. Keep the sign vertical or tilt it slightly backward (about 5 degrees) to avoid glare and help shed water if placed outdoors. Use sturdy hardware like keyhole hangers or D-rings attached to the back of the sign, anchored with screws suitable for the mounting surface, anchors for drywall or masonry screws for brick. When hanging outdoors, consider spacing the mounting points at least two-thirds the width of the sign for even support and less stress on the wood. Avoid using nails alone, as they can loosen over time and damage your sign.
Always read and follow the manufacturer’s instructions on sealants for the best drying times and safety precautions, especially when working indoors with sprays or varnishes.
Step-by-Step Action Plan for Making Your DIY Wooden Sign
Follow these steps to create a wooden sign that looks great and lasts long.
- Day 1: Choose and Prepare Your Wood, Select a wood like pine or cedar and sand its surface smooth; the wood should feel clean and even with no rough patches.
- Day 2: Transfer Your Design, Print or draw your design and transfer it onto the wood using carbon paper or stencils; check that the outline is clear and matches your design.
- Day 3: Paint Your Sign, Use acrylic paint with a small brush for lettering and details; ensure the paint covers evenly without smudges and dries fully.
- Day 4: Add a Frame (Optional), Cut and attach frame pieces with nails or wood glue; confirm the frame fits snugly around the sign and is securely fastened.
- Day 5: Seal and Protect, Apply a clear outdoor sealer or polyurethane; wait until the finish feels dry and leaves a slight sheen on the wood.
- Day 6: Choose a Display Spot, Find an area protected from direct harsh sun and rain, such as a covered porch; hang or place your sign using hooks or stands that hold it steady.
Frequently Asked Questions
What Are Some Creative Ideas for DIY Wooden Sign Themes?
Creative themes include seasonal sayings, motivational quotes, family names, or favorite hobbies. Choosing themes that reflect your personality makes your sign more meaningful and ties it into your home decor.
Can I Use Reclaimed Wood for My DIY Wooden Sign?
Yes, reclaimed wood can add unique character and texture to your sign. Just make sure to clean and sand it well before starting your project.
How Do I Choose the Right Font for My Wooden Sign?
Pick fonts that are clear and match your sign’s style, such as rustic or modern. Avoid overly complex fonts to ensure easy reading from a distance.
Is Staining Wood Better Than Painting for a Sign?
Staining highlights the wood grain and gives a natural look, while painting offers bright colors and bold designs. Your choice depends on the style you want.
Can I Make a Wooden Sign Without Special Woodworking Tools?
Basic tools like a sander, paintbrushes, and sandpaper are enough for simple signs. Power tools help with larger projects but aren’t always necessary.
How Do Weather Conditions Affect Outdoor Wooden Signs?
Exposure to sunlight, rain, and humidity can fade paint and warp wood. Sealing your sign with outdoor-grade finishes helps protect it.
Before You Go
A wooden sign adds charm and personality to your space when made carefully from start to finish. Start by choosing your wood and transferring a simple design today to see your project come alive. Your first painted letters will motivate you to complete a sign you’ll be proud to display.