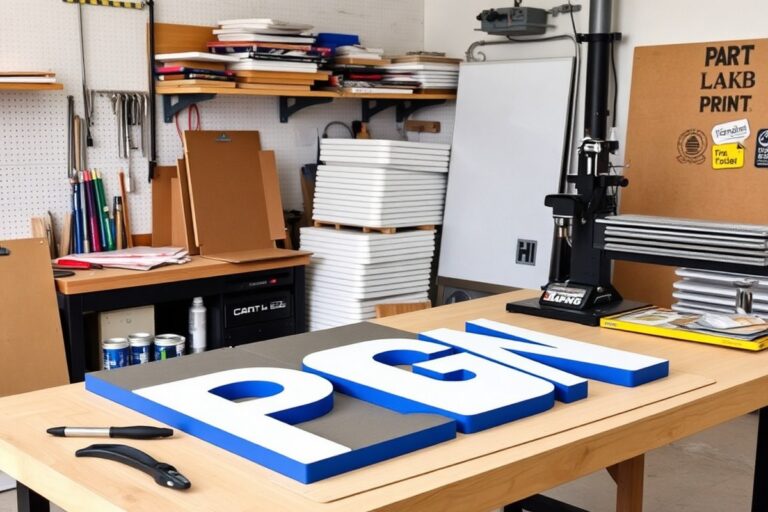
Diy Porch Sign: Complete Guide to Materials, Design & Finishing
A DIY porch sign adds a personalized touch that welcomes guests and sets the tone for your home’s entryway. Creating one yourself lets you choose the perfect size, message, and style to suit your porch. Start by selecting wood that fits your porch dimensions, usually between 3.5 and 6 feet tall for vertical signs.
Key Takeaways
- Use 8-inch wide by 48-inch tall boards for a balanced, inviting vertical porch sign that fits most home entryways.
- Allow painted wood surfaces to dry for at least 24 hours before finishing to avoid peeling or uneven coating.
- Apply a clear matte water-based polycrylic finish to protect your sign from weather without sacrificing style.
- Consider Cricut Maker 3 or Explore 3 for precise vinyl lettering; use Smart Vinyl for cutting longer matless vinyl pieces.
- Bring porch signs indoors during extreme cold or heat to prevent wood splitting or finish damage.
- Frames should have clean 45-degree miter cuts to keep corners tight and professional-looking.
What Is a DIY Porch Sign and Why Make One?

A DIY porch sign is a handcrafted decorative piece designed to hang on or near your front door, reflecting your personal style and welcoming guests. Creating one yourself means selecting the design, size, message, and colors that best fit your home’s character. This personalized touch can’t be matched by mass-produced signs, which often lack originality and customization.
Making a porch sign by hand has several benefits. It allows you to control the exact look, ensuring it complements your home’s exterior and landscaping. You can include family names, seasonal greetings, or motivational words that resonate with your household. This personalization not only improve curb appeal but also makes your porch inviting and unique. A customized sign stands out and often serves as a conversation starter with neighbors or visitors.
Cost is another key factor. Buying a high-quality, unique porch sign can range from $30 to over $100, depending on materials and design complexity. By making your own, you can control expenses and often spend less on materials like wood, vinyl, and paint. For example, you might spend about $20 to $40 on supplies for a simple wooden sign with painted lettering. It also gives you flexibility to update the sign seasonally without buying new pieces each time.
To create a DIY porch sign that lasts and looks great, start by selecting a suitable board size, usually around 12 to 18 inches wide and 24 to 36 inches tall. Choose durable materials such as cedar or pine for outdoor use. The design can be straightforward, with clear text and minimal graphics, or more complex with layered vinyl lettering made using cutting machines like Cricut. Applying a weatherproof sealant after painting or vinyl application ensures the sign withstands sun, rain, and freezing temperatures, helping it maintain vibrancy through changing seasons.
One common challenge in DIY porch sign making is achieving accurate alignment of letters and graphics. For neat lettering, use transfer tape and carefully measure spacing to avoid crooked or bubbled vinyl. Taking your time with these steps greatly improves the final appearance. Also, waiting for paint or sealants to dry fully, often 24 hours, before handling the sign prevents smudges or peeling.
By spending a few hours and $20 to $50, you can produce a porch sign that reflects your taste and invites warmth to your home’s entrance. This creative project fits weekend schedules and can be tailored for various seasons or events. A well-made DIY sign adds a welcoming vibe and boosts curb appeal in a way off-the-shelf options rarely achieve.
Materials and Tools Needed for DIY Porch Signs

Creating a durable DIY porch sign begins with choosing the right materials and tools. Using weather-resistant wood, proper outdoor paints, and effective sealants helps your sign last through rain, sun, and frost. Essential tools include saws, sanders, and brushes, with optional devices like cutting machines that simplify lettering and stenciling.
Recommended Wood Types and Their Durability
For porch signs, cedar and redwood are excellent choices because they resist rot and insects naturally, making them ideal for outdoor use. Pine and fir are more affordable alternatives but usually require extra sealing to withstand moisture. Pressure-treated lumber is another option, though it may need additional sanding and priming before painting. Typically, a 1-inch thick board around 12 to 18 inches wide suits most porch signs, with lengths varying based on your design, common sizes include 24 to 48 inches.
Reclaimed wood can add rustic charm but check for damage or rot before use. Smooth the surface with 120- to 220-grit sandpaper to prepare it for painting and sealing. Proper preparation ensures paint adheres well and that the wood’s surface won’t trap moisture, which can lead to warping or cracking.
Paints, Stains, and Sealants for Longevity
Use exterior acrylic latex paint for the best outdoor durability. It resists fading and cracking through temperature changes. In contrast, oil-based paints provide a harder finish but take longer to dry and emit stronger fumes. For wood tones or partial coverage, semi-transparent stains help protect the grain while adding color.
Seal your sign with a clear outdoor waterproof polyurethane or spar varnish to defend against moisture and UV rays. Apply at least two coats, allowing each to dry 24 hours between applications. This step is important for surviving August humidity and January ice, keeping edges sealed to prevent water infiltration that causes peeling.
Essential and Optional Tools Checklist
Basic carpentry and painting tools are key to getting a professional look. A saw (circular or miter) is necessary for cutting your wood to size. Sandpaper or an electric sander smooths rough edges and surfaces. Paintbrushes or foam brushes help apply paint and sealants evenly. A drill and screws or wood glue ensure sturdy assembly if your sign has multiple parts.
Optional but helpful tools include a Cricut or Silhouette cutting machine, which simplifies stenciling or vinyl lettering. Carbon paper tracing sheets can assist in transferring designs by hand. A ruler and pencil are essential for measuring and sketching layouts before painting. Safety gear such as goggles, gloves, and a dust mask protects you during cutting and sanding.
- 1 wood board (cedar, redwood, or pressure-treated pine), 12, 18 inches wide, length by design
- Exterior acrylic latex paint or outdoor stain
- Clear waterproof sealant (polyurethane or spar varnish)
- Saw (circular or miter) for cutting wood
- Sandpaper (120-220 grit) or electric sander
- Paintbrushes or foam brushes
- Drill with screws or wood glue
- Optional: cutting machine (e.g., Cricut), carbon paper, measuring tools, safety gear
Always wear safety glasses and a dust mask when cutting or sanding wood to protect your eyes and lungs from debris.
Attention to material quality and proper tool selection will save time and improve the finished sign’s resilience. Using inappropriate wood or skipping sealing can lead to fading, cracking, or warping within months, especially in harsh weather conditions. Matching tools with your project complexity ensures you control precision and detail, while safety precautions prevent accidents.
Choosing the Right Size, Design, and Message for Your Sign
Choosing the right size, design, and message for your porch sign depends on your porch’s available space, your exterior style, and the mood you want to set. Measuring the area carefully ensures your sign complements rather than overwhelms your entry. Design elements like colors and fonts should endure outdoor exposure and match your home’s character. Your message sets the vibe and can be customized to welcome guests or reflect your personality.
Standard Porch Sign Sizes and When to Use Them
Measure the width of the wall space next to your door to find the ideal sign size. A popular dimension is 8 inches by 48 inches, which fits well beside most standard front doors without crowding. Choose a sign about one-third to one-half the width of your door frame to maintain balance. For example, if your door is 36 inches wide, a 12- to 18-inch wide sign works well. Taller porches with more vertical space allow for longer signs, like 8 by 60 inches, but avoid exceeding 6 feet in length to keep transport and placement manageable.
Different porch types call for distinct sizing decisions. A narrow entryway benefits from a slimmer sign to prevent clutter. Wide, open porches can handle larger signs or even multiple smaller designs stretched out. Adjust height based on where the sign will hang or lean; it should be readable at eye level without obstructing door hardware or entry lighting. Use a tape measure and masking tape to mark the intended sign area before purchasing lumber to visualize scale and ensure proper fit.
Popular Design Styles and Color Combinations
Outdoor signs last longer when designed with weather-resistant paint and colors proven to fade less under sun exposure. Neutral tones paired with one or two accent colors offer versatility and appeal. For example, a farmhouse style often uses white or cream backgrounds with black or charcoal lettering. Coastal cottages might feature navy blue signs with white or sandy beige text. Rustic designs lean on natural wood finishes improve by barn red or forest green lettering. Bold modern styles can combine bright aqua or coral with stark white fonts.
Fonts should be easy to read from a distance, so choose simple sans serif or classic script styles rather than intricate fonts that blur outdoors. High contrast between background and lettering improves visibility. Consider colors that complement your door and exterior trim. Matte or satin finishes reduce glare and add a subtle charm. Test paint samples on scrap wood exposed to sunlight and rain for a week before finalizing to make sure color holds up well.
Creative and Seasonal Phrase Ideas
Your sign’s message sets the atmosphere and welcomes visitors. Simple, timeless phrases like “Welcome,” “Home Sweet Home,” or just “Hello” work all year and suit most styles. For a personalized touch, use a phrase template such as “The [Family Name] Home” or “Est. [Year]” to include your family identity or housewarming date. Changing messages seasonally keeps your porch fresh, for instance, “Pumpkin Spice & Everything Nice” for fall or “Joy to the World” during winter holidays.
Interchangeable signs offer flexibility, such as using a blank board with clips or slots to add removable seasonal vinyl lettering or decorations. You can find many free SVG files and phrase ideas online for Cricut cutting machines to customize your messages continually without repainting. Popular seasonal ideas include “Gather” for Thanksgiving, “Spring Has Sprung” for warmer months, or a simple “Happy Holidays” in December. Mix greetings with small graphics like leaves, flowers, or snowflakes to improve your sign’s theme and appeal year-round.
Step-by-Step Process to Build a Wooden Porch Sign
Building a wooden porch sign involves careful preparation of your wood, painting with crisp lettering, and secure mounting. Completing these steps thoughtfully ensures a durable, attractive sign that welcomes guests and stands up to outdoor conditions. Follow these instructions to craft your sign from raw board to finished display.
Preparing and Sanding Your Wood Surface
Start with a smooth, clean wood board to help your paint and lettering stick well. Most porch signs use pine or reclaimed wood boards sized around 1″ x 10″ or 2″ x 12″. When possible, have your board cut at your local hardware store to your desired size.
Use 220-grit sandpaper to smooth the surface and edges. Sanding removes splinters and evens out rough areas, creating a clean canvas. After sanding, wipe away dust with a dry cloth, or use a tack cloth for better results. This step usually takes 10 to 15 minutes per board depending on roughness.
Applying Paint and Lettering Techniques
Painting the board sets the background color and protects the wood. Use a foam brush for chalk paint on the face and edges; chalk paint adheres well and gives an attractive matte finish. Let the paint dry for 24 hours for best results, though 12 hours may suffice if you’re eager to continue.
Lettering can be added using vinyl cut with a machine like the Cricut Maker 3 or hand-painting. For vinyl lettering, create or download an SVG file sized for your board. Cut the letters from adhesive vinyl and transfer them carefully onto the dry painted surface, smoothing out bubbles. For hand-painting, use stencils or freehand with fine brushes and acrylic paint. To add depth, cut letters from a thin wood board and attach them with wood glue.
- Choose and cut your wood board to size, around 1″ x 10″ or 2″ x 12″ for a standard porch sign.
- Sand the entire board with 220-grit sandpaper, focusing on smoothing edges and surface imperfections.
- Remove dust from sanding using a dry or tack cloth.
- Apply chalk paint with a foam brush evenly across the face and edges; allow to dry 12 to 24 hours.
- For vinyl lettering, cut your design on a Cricut with Smart Vinyl sized to your sign, then apply to the painted board.
- For hand-painted lettering, use stencils and fine brushes with acrylic paint; allow paint to fully dry.
- Optional: glue thin wood letters onto the sign for a layered 3D effect.
- Seal with a clear water-based polycrylic finish for protection (optional, but recommended).
Framing and Installing Your Porch Sign
Adding a frame improve the look and strengthens your sign. Cut two narrow wood pieces to the width of your board and nail them across the back horizontally. This also creates a mounting surface and prevents warping. Scrap wood can work well as frame pieces.
To hang, install a post or use your existing porch wall next to the doorbell or entry. Attaching screw hooks or heavy-duty picture wire to the frame’s back allows easy hanging. Place the sign at eye level for maximum visibility and charm.
Using Cutting Machines Like Cricut for Sign Lettering
Cutting machines like Cricut bring precision and speed to creating vinyl lettering and stencils for porch signs. Models such as the Cricut Maker 3 and Cricut Explore 3 stand out because they can handle long cuts, up to 12 feet, without needing to piece vinyl sections together. This capability simplifies large sign projects and ensures crisp, smooth lettering. Cricut Design Space, the accompanying software, allows you to design and resize text to any dimension within the machine’s limits, making it straightforward to adapt designs to your porch sign size. For example, you can lay out text at full scale or split it into sections that fit your vinyl rolls. Using rolls of Cricut Smart Vinyl means you can cut the whole design in one go, avoiding the alignment hassle that comes with smaller sheets.
To get started with the Cricut for porch signs, open Cricut Design Space and set your canvas to match your sign’s dimensions. Upload or create your lettering design, then select Smart Vinyl as your material. Position the vinyl roll on the machine without a cutting mat and send the design to cut. After cutting, weed out the excess vinyl and apply transfer tape for perfect placement on your wooden sign. Press the vinyl onto the prepared surface, then slowly peel away the transfer tape to reveal clean, sharp lettering. This method reduces the chance of stretching or misalignment common with hand-cut stencils or vinyl transfers.
For those without a cutting machine, creating porch sign lettering is still possible. Using pre-cut stencil letters or tracing printed designs and cutting them with a craft knife can produce crisp results. One alternative approach is to use pre-made vinyl letters or buy stencils from craft stores. Another is the “vertical sign tutorial” method, which involves cutting and piecing smaller vinyl sections by hand but aligning them carefully to maintain a professional look. While this process takes more time and skill, it can be more budget-friendly if you don’t want to invest in a cutter, which typically costs between $200 and $400 depending on the model and features.
A quick comparison shows that Cricut Maker 3 offers more versatility with materials and can cut thicker items, but the Explore 3 covers most vinyl-cutting needs for porch signs at a lower price point. Older models or less expensive machines often require mats and limit cut size, making work on large porch signs slower and more complex due to necessary piecing.
Ensure your vinyl is firmly secured to avoid any shifting during cutting, as this can cause jagged edges or inaccurate letters.
Waterproofing and Weatherproofing Your Porch Sign
Protecting your DIY porch sign from sun, rain, and temperature changes begins with choosing the right sealant. Exterior paint designed for outdoor use offers excellent waterproofing and UV resistance, shielding the wood or base material from moisture and fading. On top of paint, applying a clear sealer helps extend durability. Polyurethane is a popular option that provides a hard, protective finish resistant to humidity and abrasion. Look for one specifically labeled for outdoor use. Spar urethane also works well because it remains flexible under temperature swings, reducing crack risks. Both require multiple thin coats applied with a brush or spray for the best seal.
Permanent outdoor vinyl, such as Cricut Premium Smart Vinyl or Oracal 651, is highly recommended for lettering or decals. These vinyls are designed to resist UV damage and water exposure better than removable craft vinyl. Applying vinyl onto a painted or sealed surface adds another layer of protection, helping your design stay vibrant through harsh weather conditions.
After applying paint and sealant, curing time is important before hanging your sign outdoors. Typically, exterior paint needs at least 24 hours to dry to the touch, but full cure may take up to 7 days depending on temperature and humidity. Polyurethane finishes usually dry within 4 to 6 hours but fully cure in about 72 hours. Spar urethane may take longer, around 7 days, to reach maximum hardness. Make sure your porch sign stays in a dry, dust-free area during curing to prevent any surface defects and ensure optimal weather resistance once displayed.
Maintaining your porch sign will keep it looking fresh year-round. Regular cleaning with a soft cloth or brush removes dirt and mildew buildup. Avoid harsh chemicals that can degrade sealants and paints. Every couple of years, inspect the sign for peeling, cracking, or fading. You can quickly refresh the protective layer with an additional coat of outdoor-rated clear sealer or polyurethane. For vinyl lettering, gently wash without scrubbing to preserve the adhesive and print quality.
In harsher climates where signs face long periods of sun exposure or heavy rain, consider applying two or three coats of sealant instead of one to build a thicker, more durable barrier. For wooden signs, check for any swelling or splitting seasonally and re-seal vulnerable areas to prolong life. Taking these simple steps will help your DIY porch sign withstand the elements and maintain its charm through changing weather.
Creative Ideas and Seasonal Themes for Front Porch Signs
Seasonal themes and personal touches make your porch sign stand out and welcome guests throughout the year. Popular messages include short, warm greetings like “Welcome,” “Hello Fall,” “Happy Holidays,” or “Spring Blessings,” matching the mood of each season. For example, autumn signs featuring pumpkins, acorns, or leaves complement fall porch decor nicely. Winter signs with snowflakes, “Noel,” or “Joy” work well to create a festive atmosphere. Adding seasonal motifs like flowers for spring or beach icons in summer aligns your sign with outdoor elements and colors around your porch.
Creating a reversible or changeable sign saves space and time. You can paint or stencil different messages on each side, using weatherproof materials like exterior acrylic paint or outdoor vinyl lettering to withstand elements. Another approach is attaching interchangeable panels or sliding boards using hooks or small nails, allowing easy swaps without repainting. Magnetic strips or velcro can also hold lightweight panels securely and enable quick updates. This method lets you switch from a cheerful summer greeting to a cozy autumn welcome in minutes.
Decorative elements improve your sign’s look and help it blend with other porch décor. Adding natural accents like small pinecones, dried flowers, or burlap ribbons complements rustic wooden signs well. For more modern styles, try metal hooks or painted wooden cutouts as embellishments. Mount your sign using sturdy screws or brackets that hold it securely in place but also make removal simple for seasonal changes. Hanging options include rope or chain hung from an exterior hook or a free-standing sign holder placed near your door.
- Spring: pastel colors, flowers, “Hello Spring,” “Bloom Here”
- Summer: beach icons, bright colors, “Welcome Sunshine,” “Hello Summer”
- Fall: leaves, pumpkins, “Give Thanks,” “Happy Fall”
- Winter: snowflakes, ornaments, “Noel,” “Warm Wishes”
- Holiday-specific: “Merry Christmas,” “Happy Hanukkah,” “Spooky Halloween”
- Everyday options: “Welcome,” “Home Sweet Home,” “Friends Gather Here”
- Reversible signs with two seasonal messages, using weatherproof paint or interchangeable panels
Good results come from planning your messages and motifs to match your existing porch style and using materials that endure weather changes. Avoid overly detailed designs that may wear or fade and keep lettering clear and bold for easy reading from the street. To keep costs minimal, repurpose scrap wood or inexpensive plywood and use leftover craft paints. Reversible and changeable signs reduce clutter and storage needs, giving you flexibility to update your porch look with each season efficiently.
Common Mistakes and Tips to Avoid in Porch Sign Projects
One of the most common mistakes in porch sign projects is applying vinyl or paint before the base has fully cured. Paint needs to dry for at least 12 to 24 hours, depending on humidity and temperature, to ensure that vinyl adheres properly. Using indoor vinyl outside or skipping alignment marks often results in peeling or crooked lettering within weeks. Avoid this by always using outdoor-rated vinyl and carefully placing registration marks during application.
Uneven lettering and paint drips usually come from rushing the painting process or using brush strokes that are too heavy. Thin, even layers of paint work best, and waiting for each coat to dry before adding another prevents runs. Tools like stencil brushes or rollers designed for fine detail can help maintain crisp edges. When using cutting machines, double-check your design alignment so letters don’t slant or overlap.
Outdoor conditions demand protective finishes, but applying sealants incorrectly can cause wood damage. Seal your sign in thin, even coats and allow drying time between layers. Changes in temperature and moisture cause wood to expand and contract, so it’s best to bring your sign indoors during ice storms or days hotter than 95 degrees Fahrenheit to stop cracking.
Safety often gets overlooked in these projects. Wear gloves when handling sharp tools and protective masks when spraying sealants or paints to avoid inhaling fumes. Work in well-ventilated areas and store tools safely to prevent accidental injuries. Electrical tools should be unplugged when not in use or during adjustments.
| Mistake | Fix or Prevention |
|---|---|
| Vinyl applied on uncured paint | Wait 12, 24 hours for paint to cure before applying vinyl |
| Indoor vinyl used outdoors | Buy outdoor-rated vinyl for durability and weather resistance |
| Skipping registration marks | Use marks for alignment to prevent crooked letters |
| Paint drips and uneven lettering | Apply thin coats, wait between layers, and use the right brush |
| Ignoring weather effects on wood | Bring signs indoors during extreme heat or ice storms |
| Unsafe tool use | Wear gloves, masks, and follow safety instructions for tools |
When wrapping up your project, carefully check each element for flaws: Is your paint smooth and even? Are the edges of the letters sharp? Does the sign feel sturdy with no loose parts? Confirm the sealant is fully dry without sticky areas that could attract dirt. This final quality review takes about 10 to 15 minutes but makes a big difference in how your sign holds up.
Always allow each layer of paint or sealant to dry thoroughly before handling your porch sign; applying vinyl or finishing touches too soon can ruin days of work.
Step-by-Step Action Plan to Create Your DIY Porch Sign
Follow these clear steps to build a porch sign that looks great and stands up to the weather.
- Before you start: Choose your wood and design. Pick a size and message that fits your porch and style to keep your project focused.
- Day 1: Cut and assemble the wood. Check that edges are smooth and boards fit tightly for a sturdy base.
- Day 2: Apply primer or base paint. Let it dry fully; this prevents peeling and helps colors pop.
- Day 3: Add lettering using stencils, hand paint, or a cutting machine like Cricut. Confirm letters are even and clear before moving on.
- Day 4: Seal the sign with outdoor polyurethane or sealant. Once dry, test water resistance by sprinkling water lightly.
- Day 5: Attach hanging hardware or stands. Make sure everything holds firm to avoid accidents outdoors.
- After 1 week: Check for wear or fading. Touch up paint or sealant as needed to extend your sign’s life.
Frequently Asked Questions
What Is the Best Wood Type for a Durable DIY Porch Sign?
Cedar and redwood resist rot well, making them good options for outdoor porch signs. These woods handle weather changes better than pine or plywood.
Can I Use Leftover Paint for My DIY Porch Sign?
Yes, leftover acrylic or exterior latex paint works well for porch signs. Make sure to apply a weatherproof sealer over the paint to prevent fading.
How Much Time Should I Allocate for a Basic Porch Sign Project?
Plan for about 3 to 5 hours including drying times and assembling. Weatherproofing steps can add extra time but improve longevity.
Is It Better to Hand-Paint or Use Vinyl Letters for My Porch Sign?
Vinyl letters give a cleaner, uniform look and quicker application, while hand-painting allows more personalization but takes longer and needs steady hands.
What Maintenance Does a DIY Porch Sign Require?
Wipe the sign periodically and reapply waterproof sealant every 1 to 2 years to keep it looking fresh and protected from weather damage.
Can I Make a Reversible Porch Sign with One Project?
Yes, reversible signs let you change messages seasonally by painting or applying vinyl on both sides. Just ensure your mounting allows easy flipping.
Wrapping Up
Your DIY porch sign can greet guests and brighten your entryway while lasting through the seasons. Start by sketching your design today, then gather your materials so you can turn your idea into a long-lasting porch statement that fits your home and personality.