Pyrography for Beginners: A Complete Guide for Fast, Safe Results
Pyrography for beginners means learning to burn designs into wood safely and creatively. Start with a quality wood burning tool that has adjustable temperature settings to control the heat precisely. Choose light, smooth wood like basswood to get clean, easy burns. Setting up a proper workspace away from flammable materials reduces accident risks and lets you focus on your art.
Key Takeaways
- Select a woodburning tool with adjustable heat settings between 250-750°C for versatile control.
- Use basswood or poplar for beginner projects because they are light, smooth, and affordable.
- Place carbon paper face down on wood to transfer designs accurately before burning.
- Maintain good ventilation and avoid resins on woods like pine to prevent toxic fumes.
- Start with simple shapes to build skills before attempting detailed shading techniques.
- Wear heat-resistant gloves and keep a fire extinguisher nearby to stay safe.
What Is Pyrography and How Does It Work?
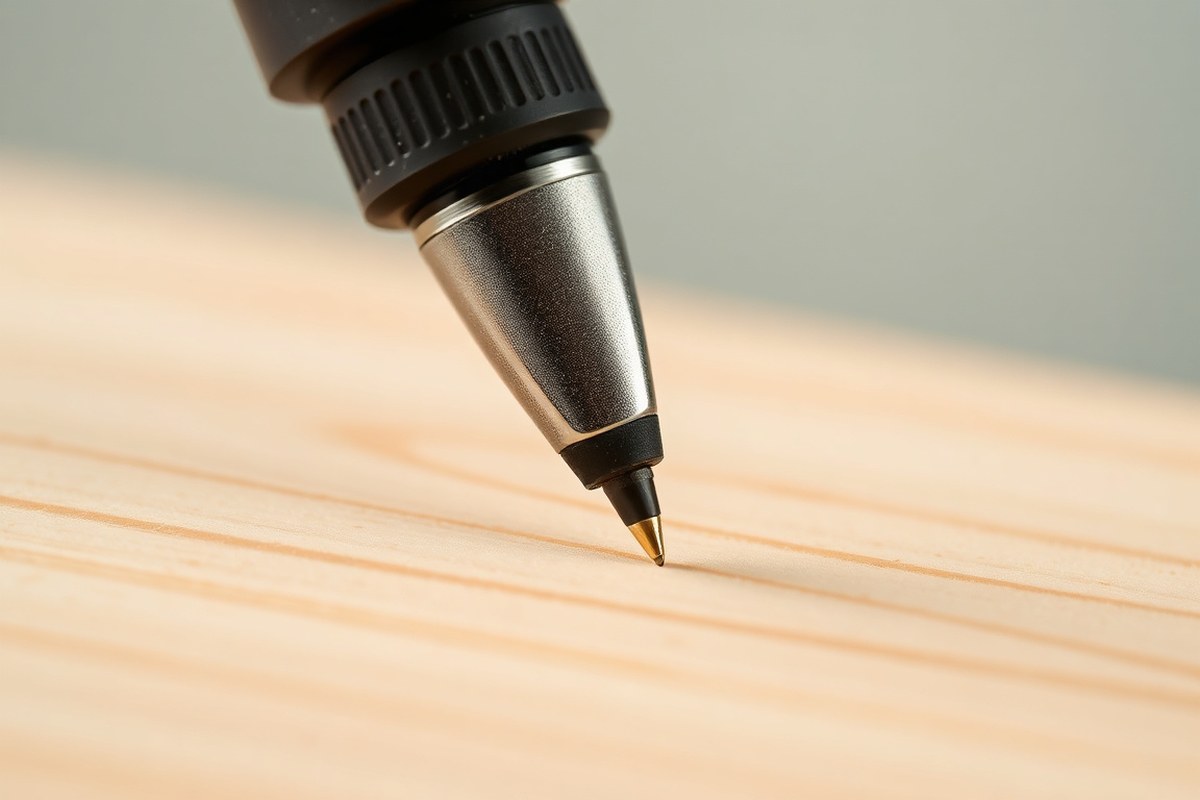
Pyrography is the craft of creating designs by burning marks into wood or other materials using a heated tool. Typically, this tool looks like a pen with a metal tip that heats up enough to burn the material’s surface. When you press the hot tip onto wood, it leaves dark or blackened marks, allowing you to draw lines, shading, or patterns. This method showcases your creativity by permanently decorating wooden items such as coasters, cutting boards, or furniture.
The wood burning tool works by heating the metal tip through an electric current or other power source. You can control the temperature, often between 200 and 500 degrees Fahrenheit, depending on the tool and wood type. A kit like the Preciva 45 in 1 Block Burn Pyrography Pen comes with adjustable temperature settings and multiple tips, helping you achieve different line thicknesses and shading effects. Working at a medium temperature is usually best for beginners using soft woods like basswood or birch, which burn evenly without producing too much smoke or burning too fast.
During pyrography, you guide the hot tip over your design, applying the right amount of pressure and speed to control the darkness and depth of the burn. Lighter pressure or quicker movements create subtle shading, while slower and firmer application creates bold, dark lines. Since the tool is extremely hot, it can burn skin quickly, so handling it with care and using safety measures is essential. The tool also remains hot for some time after use, so placing it in a proper holder reduces accidents.
Besides wood, pyrography can be done on materials such as leather, gourds, and even paper, though the results and safety precautions differ. For instance, leather burns at lower temperatures and produces different smoke, so working in a well-ventilated area is important. Some woods, like oak or resinous options such as cedar, should be avoided because they burn unevenly or release toxic fumes. Safer choices for beginners include basswood, pine, birch, and poplar, each providing a smooth surface that responds well to burning.
Good pyrography results show consistent, clean lines or shading that contrast sharply with the wood’s natural colour. Uneven pressure or too high a temperature can cause blotchy burns or scorch marks that ruin the design. Beginners should start with simple patterns and practice controlling their tool on scrap wood before moving to a finished piece. The whole process requires patience and a steady hand, but the satisfaction of creating custom woodburned art makes it a rewarding hobby to learn.
Choosing the Right Tools for Your First Pyrography Project
Choosing the right pyrography tool can make your first wood burning experience smoother and more enjoyable. Two main types exist: solid-nib burners and wire-nib burners. Solid-nib burners usually have a fixed temperature and work well for beginners or casual small projects because they are simple and affordable, often around $20. Wire-nib burners offer adjustable temperature control, from about 250 to 750°C, which is ideal for detailed work and professionals who need precision and different shading effects.
Beginner kits often include a pyrography pen set with multiple tips, sometimes up to 23 different wire tips, to help you explore various textures and patterns. These tips range from fine points for delicate lines to shading tips for filling larger areas. Some kits even come with two pens for simultaneous use of different tips. Accessories might include practice wood pieces and instructions or project ideas such as making coasters or kitchen spoons, which are excellent starter projects to develop control and confidence.
| Tool Type | Best For | Key Features |
|---|---|---|
| Solid-Nib Burners | Beginners, Casual Hobbyists, Small Projects | Fixed temperature, Interchangeable tips, Affordable (~$20) |
| Wire-Nib Burners | Detailed Work, Professionals, Large-Scale Art | Adjustable temperature (250-750°C), Precision tips, Longer lifespan |
Temperature control matters because it directly affects your ability to achieve different effects. Lower temperatures create lighter, subtle marks suited for delicate shading, while higher temperatures produce darker, deeper burns. Using an electric woodburning tool with a digital display helps monitor and maintain consistent heat, essential when switching between different wood types or project details. Always start with a lower temperature and increase slowly to avoid burning too deep or charring your work.
When selecting a kit, consider your budget and skill level. A solid-nib burner kit is suitable if you want a simple start with fewer variables, costing around $20 to $30. For more versatility and learning potential, invest in a wire-nib pen set, which can range from $40 to $80, often including numerous tips and accessories. Starting with small practice projects like coasters or kitchen spoons lets you test different tips and temperatures safely.
Tip: Begin with practice boards and small simple projects to get comfortable adjusting the temperature and using different tips before moving on to complex designs.
Best Wood Types for Beginners and Why
You’ll find that softwoods with fine grains offer the smoothest and easiest burning experience for beginners. Woods like basswood, birch, and pine burn evenly without the tool catching on knots or rough patches, making them perfect for learning pyrography techniques. Their lighter color also provides better contrast with the burn marks, which helps your designs stand out.
Harsh, uneven grains or dense hardwoods like oak can cause your wood burning iron to snag or produce inconsistent lines. Hardwoods take longer to burn, requiring more heat and skill to avoid scorching or damaging your project. These woods are better suited for more experienced wood burners who have developed better temperature control and patience.
The wood grain direction affects how smoothly you can burn detailed lines. Grain running parallel to your strokes produces clean lines, while crossing the grain can result in uneven or lighter markings. Choosing a wood with a consistent and tight grain is important when practicing simple wood burning ideas. Below is a comparison table of some common woods, highlighting their suitability for beginners based on smoothness, burn ease, availability, cost, and potential drawbacks:
| Wood Type | Smoothness | Ease of Burning | Availability | Cost | Drawbacks |
|---|---|---|---|---|---|
| Basswood | Very smooth, fine grain | Very easy, burns evenly | Common in craft stores | Affordable ($5, $10 per board foot) | Soft, dents easily |
| Birch | Smooth, fine to medium grain | Easy to burn consistently | Widely available | Moderate ($7, $12 per board foot) | May have occasional knots |
| Pine | Less smooth, uneven grain | Easy but can scorch quickly | Very common | Cheap ($3, $7 per board foot) | Contains resin, smells strong |
| Maple | Smooth, tight grain | Harder, requires higher heat | Common | Higher ($10, $15 per board foot) | Can burn unevenly |
| Oak | Coarse grain | Hard to burn evenly | Easy to find | Moderate ($7, $12 per board foot) | Takes longer, rough surface |
To prepare your wood, lightly sand it to achieve an even smoother surface, eliminating bumps and small fibers that could catch your tool. Sanding with 220-grit sandpaper is a good standard for beginners. Test a small spot before starting your full design, checking how the wood responds to your iron’s temperature and speed. Using softer woods like basswood or birch and orienting your design so you burn along the grain will help you achieve clean, sharp lines. Avoid woods with knots or resin pockets that can ruin your design or damage your equipment. Starting with a manageable wood type keeps the focus on mastering your technique without frustration.
Setting Up a Safe and Comfortable Woodburning Workspace
Start by choosing a work area with good ventilation to keep smoke and fumes from burning wood away from your breathing space. An open window or a room with a fan that directs air outside works well. You can also use an air purifier with a charcoal filter to reduce smells and particles. Avoid working in small, closed rooms without airflow, as the smoke can build up quickly and cause irritation.
Your workspace should be clear of flammable items like paper, fabric, or sawdust because pyrography tools get very hot and could start a fire if knocked over. Use a non-combustible mat or surface under your project to catch any sparks or ashes. Always keep your pyrography tool in its stand when not in use to prevent burns or accidental fires.
- Work near an open window or exhaust fan to keep air moving
- Wear a protective mask designed for fine particles and safety goggles
- Set your pyrography tool to medium temperature, around 750°F to 900°F, suitable for softwoods like basswood or birch
- Use a stable, non-combustible surface and keep the area free from flammable debris
- Keep a fire extinguisher or a bucket of water close by as a precaution
- Take regular breaks to avoid fatigue, which can lead to accidents
Protective gear is essential. A mask with a particulate filter will guard against inhaling harmful smoke and tiny wood particles. Safety goggles protect your eyes from stray bits of hot wood or dust. Gloves can protect your hands from accidental contact with the hot tip, but keep them thin for good control over the tool.
Ergonomic comfort makes it easier to work steadily for longer. Use a chair with back support and adjust your workspace so your arms rest comfortably without strain. Good lighting focused on your workpiece helps prevent eye strain and mistakes. A small adjustable lamp is an affordable way to get this setup right.
Stop work immediately if you notice any increase in irritating smoke or if the tool starts to smell harsh. Put the tool back in its stand and let it cool fully before cleaning or changing tips. This practice keeps your workspace safe and preserves your equipment.
Basic Pyrography Techniques Every Beginner Should Master
Mastering foundational pyrography techniques like clean lines, shading, stippling, and layering sets the stage for creating detailed and visually appealing woodburned art. Each technique requires control over your tool’s temperature, pressure, and movement to achieve precise effects. Practicing these basics helps you build depth and texture in your work while avoiding common pitfalls like uneven burns or blotchy shading.
Drawing Clean Lines and Outlines
Clean lines form the backbone of your pyrography designs, defining shapes and letters sharply. Using a universal point tip heated to medium-high temperatures (around 600-700°F) helps create crisp edges on your burn marks. Controlling the pressure you apply is key: pressing too hard burns too deeply, while too light may cause gaps.
Start by sketching your design softly with pencil, then trace over it with your pen using steady, even strokes. Adjust your speed, moving too fast can cause faint or broken lines, while too slow may darken the wood excessively.
- Heat your universal point tip to around 650°F for medium-dark lines.
- Place your wood surface on a stable, flat workspace.
- Lightly trace your pencil outline once to test your hand speed and pressure.
- Use light to moderate pressure, keeping your wrist steady to maintain line width.
- Work in short, consistent strokes rather than long continuous lines for better control.
- Allow the tip to cool slightly before adjusting temperature for thinner or thicker lines.
Apply even pressure and keep your hand steady to avoid wobbly or erratic lines.
Creating Smooth Shades and Gradients
Shading adds dimension and realism by simulating light and shadow. The shading spoon tip, heated between 450-550°F, is best for producing soft, even gradients on wood. Gradual shading involves moving the tip slowly while slightly rocking it to spread heat evenly.
To shade successfully, build up several light layers instead of trying to achieve the darkest tone at once. This layering technique reduces the chance of scorching the wood and lets you control the gradual darkening. Pay attention to changes in your hand speed and pressure to achieve smooth transitions.
- Attach a shading spoon tip and set your pen temperature to 500°F for gentle shading.
- Lightly touch the tip onto the wood surface and move it in slow, small circular or back-and-forth motions.
- Apply minimal pressure and vary speed to create lighter or darker areas.
- Allow the wood to cool briefly after each layer.
- Repeat the shading process in additional layers to deepen shadows as needed.
- Blend edges by softening transitions between light and dark areas with quick, light strokes.
Patience is key: multiple light passes produce smoother shading than one heavy burn.
Using Stippling and Textures
Stippling uses a dot tip to create texture and detail through rapid tap burns. This technique is excellent for representing fur, feathers, or rough surfaces in your design. Control your tap speed and distance precisely to keep dots evenly spaced and avoid merging into blotches.
Texturing improve the tactile quality of your artwork, making it more interesting both visually and by touch. Layering dots or small marks adds depth by simulating natural variations. Start with lighter dot density, gradually increasing in darker regions.
- Fit your pen with the dot tip and set temperature according to wood type, usually 550-650°F.
- Hold the tip lightly above the wood surface.
- Tap the tip down briefly and gently, lifting immediately to create small dots.
- Space your taps evenly to establish desired texture.
- Build texture in layers, increasing dot density for shadow or contrast.
- Use different tap speeds and pressures to vary dot size and darkness.
- Combine stippling with line work or shading for richer detail designs.
Rapidly tapping the tip helps keep dots crisp without overheating the wood.
How to Transfer Designs and Plan Your Pyrography Project
You can transfer your design onto wood by using carbon paper or freehand drawing. Carbon paper helps trace printed or drawn patterns onto the wood, while freehand lets you sketch directly on the surface. Planning your burning order based on detail and shading will make the process smoother and your results cleaner.
Using Carbon Paper to Transfer Patterns
Carbon paper is a helpful tool when you want to apply a printed design onto wood. It lets you easily trace detailed lines or text so you have a clear guide for burning. You can find carbon paper at craft stores for under $10. Using carbon paper reduces guesswork and is a good choice if you’re not confident with freehand drawing.
To transfer your design, start by selecting a pattern you want to burn. Print or draw it on regular paper. Place the carbon paper face down on your wood, then position your design paper on top. Trace over the design lines with a pencil to leave a clear carbon outline on the wood.
- Place the wood on a flat surface where it won’t move.
- Set carbon paper face down on the wood surface.
- Put your printed or drawn design on top of the carbon paper, aligning it properly.
- Use a sharp pencil to firmly trace the lines of the design.
- Remove the paper and carbon paper carefully to check the transferred lines.
- Make any needed touch-ups by lightly redrawing lines on the wood with pencil.
- Begin burning along the traced lines following your project plan.
This method works best for intricate patterns, text, or small designs like initials. It gives a clear outline and helps you avoid mistakes in drawing. Keep your traced lines light, not too dark, to avoid burning mistakes or visible pencil marks leftover under the wood finish.
Freehand Drawing Directly on Wood
Sketching your design freehand on wood is simple and flexible if you prefer not to use carbon paper. Use a light pencil to sketch your design directly onto dry, clean wood. This method works well for basic shapes, simple patterns like leaves or dots, or when you want creative freedom.
Start with small, lightweight wood pieces to practice. Light pencil lines make it easy to adjust your design before burning. You can erase or lighten lines as you go. This approach suits beginners wanting to build confidence gradually while exploring original designs.
Be careful not to press too hard with your pencil, as deep lines can show after burning. Use a sharp pencil for finer lines, and keep your wood surface clean from dust. Freehand allows quick changes but takes more drawing skill to get clean outlines.
Organizing Your Burning Sequence
Planning the order in which you burn the wood is important. Starting with the smallest, most detailed areas first prevents smudging or burning over previous work. Burn light shading before dark areas to layer textures better.
Sketch a simple plan by dividing your design into sections. Start by burning outlines, then add interior details and finally shading or fills. This sequence helps maintain control and makes clean work easier.
For example, if your design includes text and floral patterns, burn the text first, then delicate petals, and finish with larger leaves or background shading. This prevents accidental burning over fine details. Taking your time and following a logical sequence improves results significantly.
Common Beginner Mistakes and How to Fix Them
Keep your pyrography pen at medium heat (around 650°F) to prevent scorching Make quick, steady strokes instead of lingering on one spot Hold the pen with light pressure to avoid deep gouges Take breaks every 15-20 minutes to cool the pen and protect the wood Practice on inexpensive wood squares before working on a final piece Lightly sand or erase mistakes before continuing your design Use shading techniques to cover or soften errors
Finishing Your Woodburned Art: Cleaning and Protection Tips
After finishing your woodburned design, cleaning away burn residue and protecting your art with the right finish helps preserve it for years. Proper cleaning removes soot and charcoal particles that can smear or affect adhesion, while a clear finish shields the wood from moisture and fading. You can also add paint or color safely if you prepare the surface properly.
Removing Burn Residue and Soot
Burn residue often appears as fine soot or blackened charcoal on the wood’s surface. Removing it before applying any finishes improves the look and prevents smearing. Use a soft brush or cloth to avoid damaging your design.
- Let the woodcool completely to prevent smearing while cleaning.
- Gently brush the surface with a dry, soft-bristle brush or microfiber cloth to lift loose soot.
- Use a fine-grit sanding sponge (around 220-grit) lightly across the surface to remove stubborn residue without sanding through your design.
- Wipe the surface with a tack cloth or a slightly damp cloth, then let it dry fully.
- Erase any remaining pencil sketch lines carefully with a soft eraser.
Tip: Avoid using water or harsh cleaners on raw pyrography wood, since moisture can cause blotching or raise the grain.
Choosing the Right Finish for Protection
Once your artwork is clean, apply a clear finish to protect it against moisture, dirt, and UV exposure. The finish also prevents the burnt design from rubbing off and improve color contrast. Several types of finishes work well for pyrography.
Water-based polyurethane offers quick drying, low odor, and a clear finish that won’t yellow over time. Apply 2 to 3 thin coats with a synthetic brush, sanding lightly with 320-grit between coats. Oil finishes like tung oil or boiled linseed oil provide a natural look but dry slower and need reapplication every few years. Clear shellac dries fast and supplies a warm tone with decent protection but is less durable outdoors. Test your chosen finish on a scrap piece of the same wood to make sure it doesn’t blur or darken your burning excessively.
Caution: Follow label instructions carefully for ventilation and drying times to avoid inhaling harmful fumes.
Optional Coloring and Decoration
You can safely add paint, stains, or colored pencils over sealed pyrography, but never apply these directly to raw burned wood. Seal the wood with your finish of choice first, then add water-based paints or pencils to avoid color bleeding or damage to the burning.
If you want a more natural look, light wood stains can be applied before sealing, but avoid overlapping on burnt areas to prevent muddy colors. Painting directly on burned areas without sealing risks peeling and uneven color.
- Apply your chosen clear finish and let it dry completely.
- Use water-based acrylic paints or colored pencils lightly over the surface.
- Allow any paint or coloring to dry fully.
- Consider a top coat of clear finish over the added colors for extra protection.
Note: Avoid oil-based paints on pyrography as they can darken or dissolve the burnt wood texture.
Step-by-Step Action Plan to Start Your First Pyrography Project
Follow these steps to begin your woodburning journey with confidence and see clear progress.
- Day 1: Set up your workspace in a well-ventilated area and gather your pyrography tool, a piece of basswood or poplar, sandpaper, and pencil. Confirm your workspace is comfortable with good lighting.
- Day 2: Practice making basic lines, dots, and shading techniques on a scrap piece of wood. You’ll know you’re ready when your lines are clear and consistent.
- Week 1: Choose a simple, small design and transfer it onto your wood using tracing paper or graphite transfer. Verify the design is clear and positioned where you want it.
- Week 2: Begin burning your design slowly, focusing on controlled pressure and steady hand movements. Success means a smooth, even burn without scorch marks.
- After Week 3: Clean your finished project with a soft brush and apply a thin coat of finishing oil or varnish. The surface should feel smooth and your design protected after drying.
- After a Month: Try a more detailed design or experiment with different tips and wood types to expand your skills. Notice how your control and confidence have improved.
Frequently Asked Questions
What Is the Easiest Project for a Pyrography Beginner?
Wood-burned kitchen spoons are easy and practical starter projects. They combine decoration with function and help you practice basic techniques on a small surface.
Can You Use a Regular Soldering Iron for Pyrography?
Regular soldering irons can work but lack temperature control needed. A proper pyrography pen set offers adjustable heat for safer and better results.
How Do You Maintain Pyrography Tools?
Clean the tips regularly with a fine abrasive or tip cleaner. This keeps them effective and extends tool life during your projects.
Is It Okay to Pyrograph on Painted Wood?
Pyrography works best on untreated, unfinished wood for clear burn marks. Painting first can interfere with burning and damage your tool.
What Temperature Setting Is Best for Beginners?
Set your tool to medium heat, ideal for soft woods like basswood or birch. This balance prevents burning too deeply or too lightly.
How Long Does It Take to Complete a Beginner Project?
Simple projects like small spoons or cutting board designs can take a few hours. Time depends on detail and size of your art piece.
Before You Go
Woodburning offers a rewarding creative outlet that grows with your skills. Start by mastering simple shapes and techniques, and allow yourself to improve gradually. Pick a small project today and focus on steady, controlled strokes, that hands-on experience is key to progress.