How to Install House Numbers on Stone: 8 Expert Tips for Durable Results
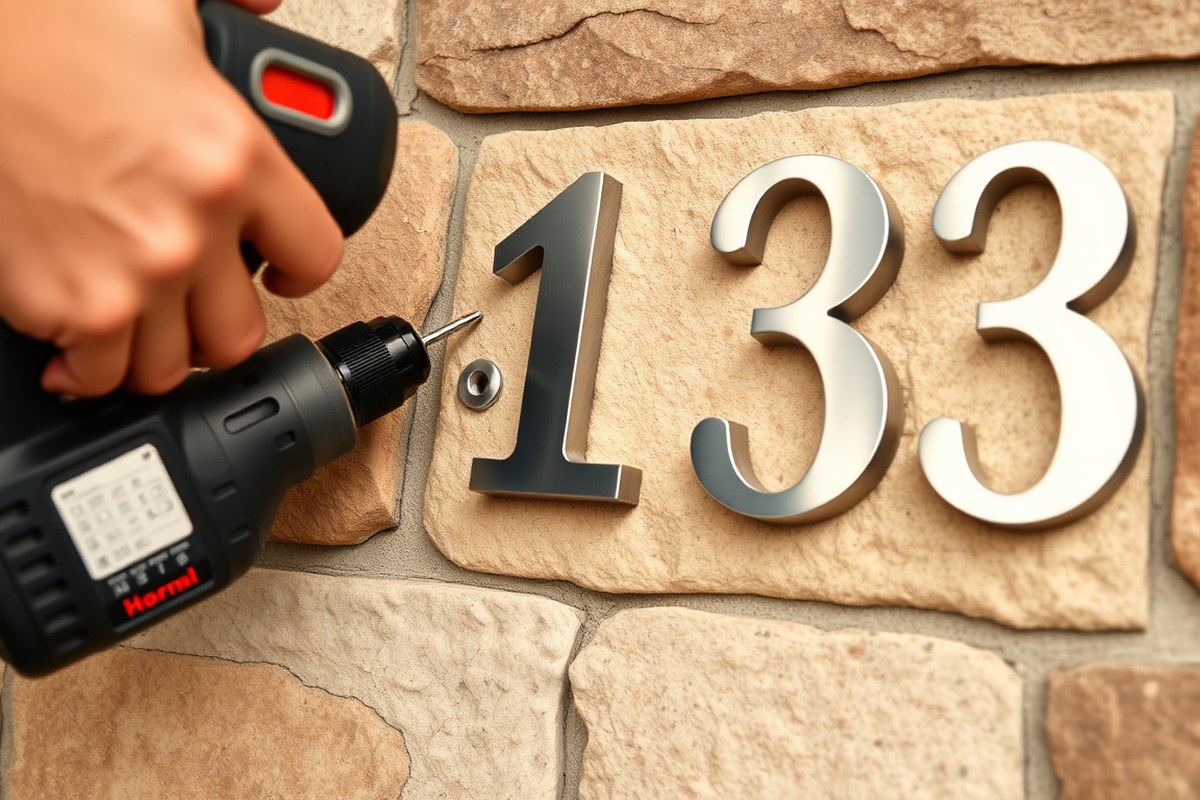
How to install house numbers on stone starts with choosing the right mounting method to ensure durability and a neat appearance. Use masonry anchors and a hammer drill for a secure hold, or opt for strong outdoor adhesive if you prefer not to drill. Begin by marking your layout carefully on the stone to achieve precise placement.
Key Takeaways
- Mark house number placement on stone with a pencil to ensure accurate alignment before any drilling or gluing.
- Use a hammer drill with a 3/16-inch masonry bit to drill into stone safely and accurately.
- For drilling, insert anchors that match the screw size of your house numbers to secure them firmly.
- Apply strong construction adhesive for a drill-free installation, allowing at least 24 to 48 hours to cure completely.
- Tape house numbers in place during the adhesive curing process to prevent shifting or slippage.
- Choose house numbers with contrasting colors or materials to make them stand out on stone surfaces.
1. How to Securely Install House Numbers on Stone Surfaces

Yes, you can install house numbers directly on stone surfaces. The main methods for securing them include drilling and anchoring with screws or using strong adhesives designed for outdoor stone applications. Drilling provides a permanent, sturdy hold, while adhesive methods offer a no-drill alternative suitable for lighter numbers or historic stone surfaces where drilling is not an option.
For a secure installation, start by choosing the method that fits your stone type and the house numbers you have. Drilling works well for medium to large-sized numbers made of metal or stone. Adhesives or mounting tape are great for smaller, lighter numbers and smooth stone. Either way, positioning and preparation are important for a durable hold that withstands weather changes. Follow these steps to install house numbers on your stone surface:
- Select the location. Pick a visible and convenient spot on your stone façade or wall. Use a level to ensure your numbers will be straight and well aligned.
- Mark drilling points or adhesive areas. Place a template or hold the house numbers in place and mark where each mounting hole or adhesive pad will sit. This prevents mistakes during installation.
- Prepare the stone surface. Clean the area of dirt, dust, and loose particles using a stiff brush and mild detergent. Allow it to dry completely before proceeding.
- Drill holes if using screws. Use a hammer drill with a masonry bit sized to the wall anchors or rods included with your numbers. Drill at the marked points to the recommended depth, usually around 1 to 2 inches.
- Install anchors or rods. Insert plastic or metal anchors into the holes for solid grip. If your numbers have rods on their back, insert them into the holes after applying a small amount of construction adhesive for extra hold.
- Attach the numbers. Screw the numbers manually or with a drill, tightening gently to avoid damage. For adhesive mountings, apply heavy-duty construction adhesive or outdoor-rated epoxy to the back of each number before pressing firmly against the stone.
- Secure and level the numbers. Use painter’s tape or clamps to hold the numbers in place for at least 30 minutes if gluing. Check leveling once more before the adhesive begins to set.
- Allow to cure. Let the adhesive cure fully according to the product instructions, usually 24 hours, to ensure a firm bond. Avoid touching or stressing the numbers during this time.
The cost of installation can vary. Drilling requires a hammer drill ($40 to $100 for rental) and anchors ($0.50 to $2 each), while adhesive methods need heavy-duty outdoor epoxy or mounting tape ($10 to $25 per tube or roll). Both methods deliver a clean, weather-resistant result suited to different stone surfaces. Drilling is best for heavier or protruding numbers, while adhesives work well for smooth, flat stones or temporary placements. A poorly prepared surface or incorrect adhesive can lead to numbers falling off or loosening in time.
2. Preparing Stone Surfaces for House Number Installation

Preparing the stone surface properly before installing house numbers ensures a strong hold, accurate drilling, and a professional look. This involves a thorough cleaning to remove dirt and debris, careful marking to guide drilling or adhesive placement, and verifying that the surface is even and level. Proper preparation prevents installation errors and improves longevity.
Cleaning and Removing Debris
Cleaning the stone surface removes dust, dirt, grease, and loose particles that can interfere with adhesion or cause drill bits to slip. Use a stiff brush or a soft-bristle broom to sweep away surface debris. For stubborn grime or mildew, apply a mixture of water and mild detergent, scrubbing gently with a sponge. Rinse the area with clean water and allow it to dry fully, ideally for 24 hours in warm, dry conditions.
Stone surfaces, especially porous types like limestone or sandstone, absorb moisture, so it’s important the surface is completely dry before mounting or drilling. Moisture can weaken adhesives or cause screws to loosen over time.
- Sweep or brush the area to remove loose dirt and dust.
- Wash with mild detergent and water for grease or stains.
- Use a sponge or brush suited to the stone’s texture to avoid damage.
- Rinse thoroughly with clean water to remove soap residue.
- Let the surface dry for at least 12 to 24 hours before proceeding.
- Wear gloves when handling cleaning solutions to protect your skin.
Do not use acidic cleaners like vinegar or harsh chemicals that can etch or discolor the stone.
Selecting and Marking the Installation Area
Choosing the right spot on the stone includes considering visibility, weather exposure, and surface texture. Measure the height and spacing that suits both aesthetics and local regulations or postal guidelines. Use a tape measure and pencil to lightly mark the general placement area.
If your house numbers come with an installation template, position it carefully on the stone. Tape the template in place so it doesn’t shift during marking. Use a sharp pencil or a fine-tip marker to transfer hole locations or adhesive boundaries precisely onto the stone surface.
On uneven or textured stone, press the template firmly so it lies flat, then mark each hole or corner individually rather than trying to outline the whole template all at once. This prevents misalignment caused by gaps or irregularities.
Test your marks with the actual house numbers or template before drilling to confirm correct placement and spacing.
Ensuring Level and Aligned Placement
Using a level is essential to keep the house numbers straight. Place a small level above or below the marked area. Adjust the marks until the bubble is centered, indicating a level line. For longer sets of numbers or those installed on uneven stone, repeat the check along the entire layout.
Masking tape can hold the template while you check for level and alignment. After marking the spots, remove the tape and template carefully. Double-check the marks with your level and measuring tape before proceeding with drilling or adhesive application.
Good alignment not only looks better but also helps maintain the numbers’ adhesion or anchor stability over time. Poorly aligned numbers can skew or loosen with weather changes, reducing durability.
3. Choosing the Right Tools and Materials for Stone
Installing house numbers on stone requires tools and materials suited for hard, porous surfaces. Start with a hammer drill and a masonry drill bit sized 3/16 inch (or 11/64 inch). These bits are designed to penetrate stone or brick without cracking it. The drill bit size matches common masonry screw anchors, ensuring a secure hold.
For fasteners, opt for specialized masonry screws paired with expansion anchors. This combination anchors the screw firmly within the drilled hole, resisting outdoor elements like temperature changes and moisture. Alternatively, heavy-duty mounting brackets with expansion anchors can be used when extra strength is needed or the numbers are heavier.
Adhesives provide a drilling-free option or extra bonding strength. A two-part epoxy adhesive like Selleys Araldite Epoxy creates a durable, weather-resistant bond on stone. Outdoor-rated mounting tapes such as FIX-PRO® Outdoor Mounting Tape work well on relatively smooth surfaces and offer clean installation without holes but might not last as long on rough stone.
The house numbers themselves should be made of weather-resistant materials like metal or durable plastics. Vinyl numbers are cheaper but less durable outdoors, especially on rough or uneven stone where adhesives may struggle. Use the following table to decide which tools and materials fit your installation needs and conditions:
| Item | Recommended Type | Why It Matters | Typical Cost Range |
|---|---|---|---|
| Drill | Hammer drill | Delivers percussive action needed to drill stone | $50-$200 (rental or purchase) |
| Drill Bit | 3/16″ (or 11/64″) masonry bit | Fits anchors; designed for hard materials | $5-$15 each |
| Fasteners | Masonry screws with expansion anchors | Strong grip in stone, resists weather | $10-$25 per pack |
| Adhesive | Selleys Araldite Epoxy | Waterproof, strong bonding for stone | $12-$20 per tube |
| Mounting Tape | FIX-PRO® Outdoor Mounting Tape | No drilling, suitable for smooth stone | $8-$15 per roll |
| House Number Material | Metal or durable plastic | Resists fading and weather damage | $10-$60 depending on style |
Select a hammer drill and the proper masonry bits to drill clean holes without cracking the stone. Using anchors sized to fit the drill holes maximizes grip. When using epoxy adhesive, fill the hole completely and press the mounting screw into the adhesive before it sets. For mounting tape, cut it to length and firmly press the numbers onto a clean, dry stone surface. Avoid vinyl numbers if you want longevity, especially on rough or porous stone.
4. Drilling into Stone: Techniques and Safety Precautions
Drilling into stone for mounting house numbers requires careful technique and safety precautions to avoid damaging the stone or injuring yourself. Using the right tools, appropriate drill bits, and following a slow, steady drilling method will help prevent cracks or chips in the stone surface. Proper preparation and safety measures ensure a clean, secure installation.
Choosing and Wearing Proper Safety Gear
Wear safety goggles to protect your eyes from stone dust and small debris thrown up by the drill. A dust mask or respirator helps prevent inhalation of fine particles when drilling stone. Gloves protect your hands from sharp edges or accidental contact with the drill bit. Ear protection is advisable, especially when using a hammer drill, since it can be quite loud.
Ensure your work area is clear and well-lit. Secure the stone surface and your templates with painter’s tape to keep everything steady during drilling. Also, wear sturdy shoes to protect your feet from falling tools or chips of stone.
Hammer Drill Settings and Drill Bit Handling
Use a hammer drill set to a low or medium impact mode to avoid excessive force that can crack the stone. Attach a carbide-tipped masonry drill bit sized for your anchor bolts or screws, typically starting with a small bit (around 1/8 inch) to create a pilot hole, then moving up to a larger size (such as 1/4 inch) for the final hole.
Keep the drill bit perpendicular to the stone to maintain straight holes and prevent slippage. Avoid applying too much pressure; let the drill bit do the work. When the stone is soft or brittle, use a rotary drill without hammer action to lower the chance of spalling.
Step-by-Step Drilling Best Practices
Start by marking your hole locations clearly on the stone surface. Secure the mounting template firmly with painter’s tape. Begin drilling pilot holes with a small bit (around 1/8 inch) to guide the larger bits.
Apply water or a light steady spray periodically to cool the drill bit and reduce dust. Drill slowly and steadily, stopping to clear debris and cool the bit if needed. Insert the drill bit into the pilot holes to slowly enlarge them to the required size, about 7/8 inch deep for standard mounting anchors.
- Mark hole locations precisely on the stone with a pencil or marker
- Use painter’s tape to secure the template and prevent shifting
- Drill pilot holes first with a 1/8-inch bit for accuracy
- Use a 1/4-inch bit to widen holes for screw anchors
- Keep drill perpendicular to stone for even holes
- Apply light water spray to cool drill bit and suppress dust
- Drill slowly, clearing debris frequently to avoid overheating
Protecting the stone from excessive heat and impact helps minimize cracking or chipping. When you see cracking, stop right away and check the bit size or drill settings. Proper technique and patience lead to secure, damage-free mounting holes for your house numbers on stone surfaces.
5. Installing House Numbers Without Drilling: Adhesive and Tape Methods
Installing house numbers on stone without drilling is possible using strong adhesives, epoxy, or outdoor-rated mounting tape. These alternatives can securely attach numbers while preserving the integrity of your stone surface. Choosing the right method depends on the stone type, outdoor exposure, and the desired finish.
Using Construction Adhesive or Epoxy
Construction adhesives such as polyurethane-based glues or high-strength epoxy provide a durable hold for house numbers on stone surfaces. Start by cleaning the stone area with rubbing alcohol to remove dirt and grease, ensuring a strong bond. Apply a thin, even layer of adhesive to the back of each house number following the product instructions. Press the number firmly onto the stone for about 30 seconds, and if needed, use painter’s tape to hold it in place temporarily while the adhesive cures.
Allow the adhesive to cure fully for 24 to 48 hours without disturbing the numbers. This curing time is essential for achieving maximum strength. Construction adhesives typically cost between $5 and $15 per tube, which should be enough for several numbers. Epoxy options may require mixing two components and can offer a more rigid and waterproof bond, suitable for harsh weather conditions.
Applying Outdoor-Rated Mounting Tape
Outdoor-rated mounting tape is a double-sided tape designed to withstand weather elements and bond well with rough surfaces like stone. Before applying, clean the stone surface thoroughly and ensure it’s dry. Cut the tape to fit the back of each house number and press it firmly onto the number. Then peel the protective liner off and press the number firmly onto the stone surface for at least 30 seconds.
Mounting tape bonds quickly but still benefits from a curing period of 24 to 48 hours where it remains undisturbed. This method is quicker and less messy than adhesives, with tapes priced around $10 to $20 per roll. It works best on relatively smooth stone surfaces and for lighter numbers. For very rough or porous stone, adhesive or epoxy will typically provide a stronger hold.
Pros and Cons Compared to Drilling
Non-drilling methods avoid damaging stone surfaces, preserving their look and structural integrity. They are generally easier and faster for DIY installation, with less cleanup and no need for special tools. Adhesives and tapes are versatile, adapting well to irregular surfaces and avoiding the risk of cracking stone during drilling. However, non-drilling bonds can be less reliable under extreme weather or if the surface is very uneven.
Drilling offers the most secure attachment, especially for heavy or large house numbers, but requires skill and can weaken or crack stone. Adhesives and tapes may fail if the stone is very porous or if improper surface preparation occurs. You may need to replace numbers sooner than drilled installations, particularly in areas with high humidity or freeze-thaw cycles.
Ensure the stone surface is completely clean and dry before applying any adhesive or tape to maximize bonding strength.
6. Ensuring Proper Alignment and Leveling on Uneven Stone
Marking and aligning house numbers on uneven or irregular stone surfaces requires patience and precise tools to avoid crooked or misaligned results. Begin by cleaning the stone and then use a pencil or chalk to lightly outline the placement of the numbers. A drilling template, if provided with your house numbers, is the best tool to mark exact spacing and hole locations. Attach the template temporarily with painter’s tape so it doesn’t slip during marking. This step is important because crooked installation often leads to damage if you try to correct it later on rough stone.
Using a carpenter’s level is essential to keep the numbers straight. Place the level on the template or along the drawn line, adjusting until the bubble sits perfectly between the markers. On uneven stone, you may find the surface rises or dips, which makes it tricky for a long straight line. To handle this, make multiple small level checks in short sections rather than relying on one long line. Draw small, level horizontal guides where each number will sit. This method prevents your numbers from looking misaligned due to bumps or unevenness in the stone.
For stones with significant irregularities or a rough texture, consider placing a thin, weather-resistant backing such as a metal or wooden spacer board behind the numbers. This spacer can be patched to the stone and sanded or trimmed to create a flatter mounting surface. Secure the spacer with appropriate masonry screws or strong adhesive designed for exterior use. This technique ensures that each number can be installed level and straight despite the uneven stone beneath.
Some homeowners prefer to measure the height and spacing for each digit individually when the surface is very rough. Use a tape measure to ensure consistent vertical and horizontal distances, such as 3 to 4 inches apart horizontally. Keep in mind that spacing depends on the size of your numbers and overall visible impact. Mark each spot clearly and double-check with a level before drilling or adhering.
Costs for alignment tools are generally low, as a quality level can be found for $10 to $25, and painter’s tape costs under $5. Templates usually come free with the house numbers or printable from the manufacturer’s website. The time invested in proper marking and leveling, roughly 20 to 30 minutes for a typical 3- or 4-digit number on stone, prevents costly repositioning or visible misalignment later.
Good results will look balanced and straight from a distance, with each number mounted flush and sitting evenly along the imaginary horizontal line you established. Problems appear as numbers that tilt upward or downward along an uneven surface or vary in their spacing, creating a disorganized look. Avoid rushing placement or skipping the leveling steps because correcting mistakes on stone can be difficult and sometimes damaging.
7. Finishing Touches: Curing, Sealing, and Maintenance
Allow adhesive or epoxy at least 24 to 48 hours to fully cure before stressing the installation. Most two-part epoxy adhesives reach their maximum strength in this timeframe, ensuring your house numbers stay firmly attached. Cooler temperatures or high humidity can extend curing time, so check the product instructions for specific recommendations. While curing, avoid touching or applying pressure to the numbers to prevent misalignment or weakened bonds.
After curing, seal any drilled holes or anchors against moisture intrusion using a clear outdoor-grade silicone caulk or waterproof sealant. This prevents water from seeping into the stone and potentially causing freeze-thaw damage or loosening the adhesive over time. Apply the sealant around the edges of each hole or anchor, smoothing it with a damp finger or tool for a clean finish.
Clean excess adhesive or residue immediately after installation with a cloth dampened in rubbing alcohol or the solvent recommended by the adhesive manufacturer. Avoid using harsh cleaners that might damage your stone surface or the numbers’ finish. For routine maintenance, inspect your house numbers once a year, checking the adhesive bond and anchor points for any loosening. Temperature shifts and moisture can degrade adhesives or corrode screws, so timely repairs keep your numbers secure.
For longer-lasting outdoor display, consider applying a UV-resistant clear coat over metal or painted numbers if the manufacturer permits it. This adds extra protection against fading and grime build-up. Vinyl numbers mounted with adhesive blocks generally require less maintenance but still benefit from annual inspections and gentle cleaning to remove dirt that can trap moisture.
Maintain a simple checklist: wait 24-48 hours for adhesive to cure, seal drilled holes with silicone caulk to block moisture, clean off residue promptly, and inspect yearly for loosening or wear. For repairs, remove loose numbers carefully, clean old adhesive completely, reapply fresh epoxy, reseal holes, and allow full curing before reinstalling. This approach keeps your house numbers firmly attached and looking fresh for many seasons.
8. Common Mistakes and When to Hire a Professional
Common mistakes when installing house numbers on stone include drilling too close to edges, using improper anchors, and failing to level the numbers correctly. Drilling near the edge of a stone surface increases the risk of cracking, which can cause significant damage and require expensive repairs. Using anchors not rated for masonry can lead to loose mounting, causing the numbers to fall off over time. Misalignment or uneven placement not only looks unprofessional but can make the numbers difficult to read from the street.
Fixing misaligned house numbers usually means carefully removing them without damaging the stone, then repositioning. For adhesive-mounted numbers, gently prying them off with a plastic scraper can avoid surface damage. For drilled installations, fill the old holes with a stone patch repair kit designed for masonry, following the product instructions exactly. After the patch cures for at least 24 to 48 hours at temperatures above 50°F, re-drill carefully at the correct level and spacing.
Knowing when to hire a professional is important to prevent costly errors, especially if your stone surface has a rough texture, fragile or thin stones, or if you lack the necessary masonry tools and experience. A professional installer typically charges between $100 and $250 for a standard house number installation on stone, depending on complexity and location. They can ensure precise drilling, proper anchor selection, and long-lasting mounting without damaging the stone. Local community rules may also require a licensed contractor for exterior modifications in some areas.
- Drilling too close to stone edges leads to cracks and chips.
- Using wall anchors not designed for masonry results in loose numbers.
- Failing to level numbers makes them hard to see and unattractive.
- Ignoring manufacturer instructions for adhesives reduces bond strength.
- Not cleaning the stone surface before installation causes poor adhesion.
- Applying too much or too little torque when tightening bolts can crack stone or let numbers loosen.
- Skipping local permits or guidelines may cause fines or require removal.
Test drill a small hole in an inconspicuous area first to check for cracks and debris before installing your house numbers on stone.
A practical way to decide if you should call a professional is to assess your comfort level with masonry tools and stone repair. Avoid attempting drilled installations if you have no experience with hammer drills or masonry anchors. Opt for professional help when your stone surface shows signs of fragility, such as visible fractures or thin slabs, to avoid worsening the damage. Professionals also bring specialized equipment like diamond-tipped drill bits and experience in selecting grade-specific anchors to guarantee a secure hold.
Professional installation also helps when aligning numbers on uneven or irregular stone surfaces, as they can use custom shims or backing plates to achieve a level, readable display. Taking these precautions improves not only the longevity of the installation but also property curb appeal and compliance with local standards.
Step-by-Step Action Plan
Follow these steps to install your house numbers securely on a stone surface and ensure a lasting, attractive finish.
- Before you start: Gather your materials and tools, house numbers, drill with masonry bit, adhesive or mounting screws, level, tape measure, and cleaning supplies. Confirm the stone surface is clean and dry.
- Day 1: Decide on your method: drilling or adhesive. For drilled numbers, mark the mounting points with a pencil or masking tape and double-check alignment with your level.
- Day 1: Drill holes carefully using a masonry drill bit and wear safety gear. Drill at a slow speed to avoid cracking or damaging the stone.
- Day 1: Insert anchors into drilled holes or apply strong construction adhesive to the back of your numbers if using the non-drilling method. Press numbers firmly against the stone.
- After installation: Adjust the alignment gently before adhesive cures or screws fully tighten. Confirm stability by lightly tugging on the numbers once mounted.
- Within 24 hours: Let adhesive or sealant cure as per product instructions to ensure a durable bond.
- After 2 weeks: Inspect the installation for any loosening or damage. Apply a stone sealer around the edges if desired for added protection.
Frequently Asked Questions
Can I Install House Numbers on Natural Stone Without Causing Damage?
Yes, using strong adhesive or mounting tape avoids drilling and protects the stone. Adhesives designed for outdoor use offer a solid bond without risking cracks or chips.
What Type of Adhesive Works Best for Stone Surfaces Outdoors?
Outdoor-rated construction adhesive or epoxy resists weather and holds well on stone. Ensure the product is waterproof and UV-resistant for lasting adhesion.
How Do I Ensure House Numbers Stay Level on an Uneven Stone Surface?
Use a level and position a template to mark holes or adhesive points before installing. This prevents crooked placement despite irregular stone shapes.
Can I Use Magnetic House Numbers on a Stone Façade?
Magnetic numbers require a metal surface behind the stone, which is rare. Most stone surfaces won’t hold magnets firmly unless metal is installed beneath.
Is Drilling Necessary to Mount Heavy Concrete House Numbers on Stone?
Drilling provides a secure hold for heavy numbers, but strong adhesives can work on smooth stone with care. For porous or rough stone, drilling offers better stability.
What Maintenance Do House Numbers on Stone Require After Installation?
Check adhesive bonds periodically and clean the numbers gently. Seal exposed drilled holes to prevent water damage and prolong the lifespan of the installation.
Key Points to Remember
Installing house numbers on stone surfaces takes careful prep and choosing the right method for your stone type and location. Taking your time with alignment and securing the attachment will give you a neat, professional look that lasts. Next, try installing one number first to build your confidence before completing the full set.