Will Vinyl Stick to Plastic? A Complete Guide with Proven Tips
Will vinyl stick to plastic depends on the type of plastic and vinyl you use. Not all vinyl sticks well to every plastic surface. Some plastics like polyethylene resist vinyl adhesives, while others like acrylic accept them easily.
Choosing the right vinyl is key. Permanent vinyls like Oracal 651 and 3M vinyl work best on most plastics.
They provide strong, water-resistant bonds that last up to three years. Removable vinyls usually don’t hold well on plastic.
Preparing the plastic surface before applying vinyl matters a lot. Clean the surface thoroughly.
Wipe it down with isopropyl alcohol to remove oils and dust. Applying vinyl within 30 minutes of using a primer or promoter improves adhesion.
Temperature also affects how well vinyl sticks to plastic. Work in a room between 60 and 80°F for the best results. Avoid both extreme heat and cold as they can weaken the bond.
Key Takeaways
- Permanent vinyls such as Oracal 651 offer the best adhesion on most plastics.
- Clean plastic surfaces with isopropyl alcohol before applying vinyl decals.
- Avoid vinyl on polyethylene plastics, as most adhesives won’t stick well.
- Use a gentle heat source around 100°F to soften adhesive on curved plastics.
- Apply vinyl within 30 minutes after using a surface promoter for better grip.
- Maintain application temperatures between 60°F and 80°F with low humidity.
Does Vinyl Stick to All Types of Plastic Surfaces?
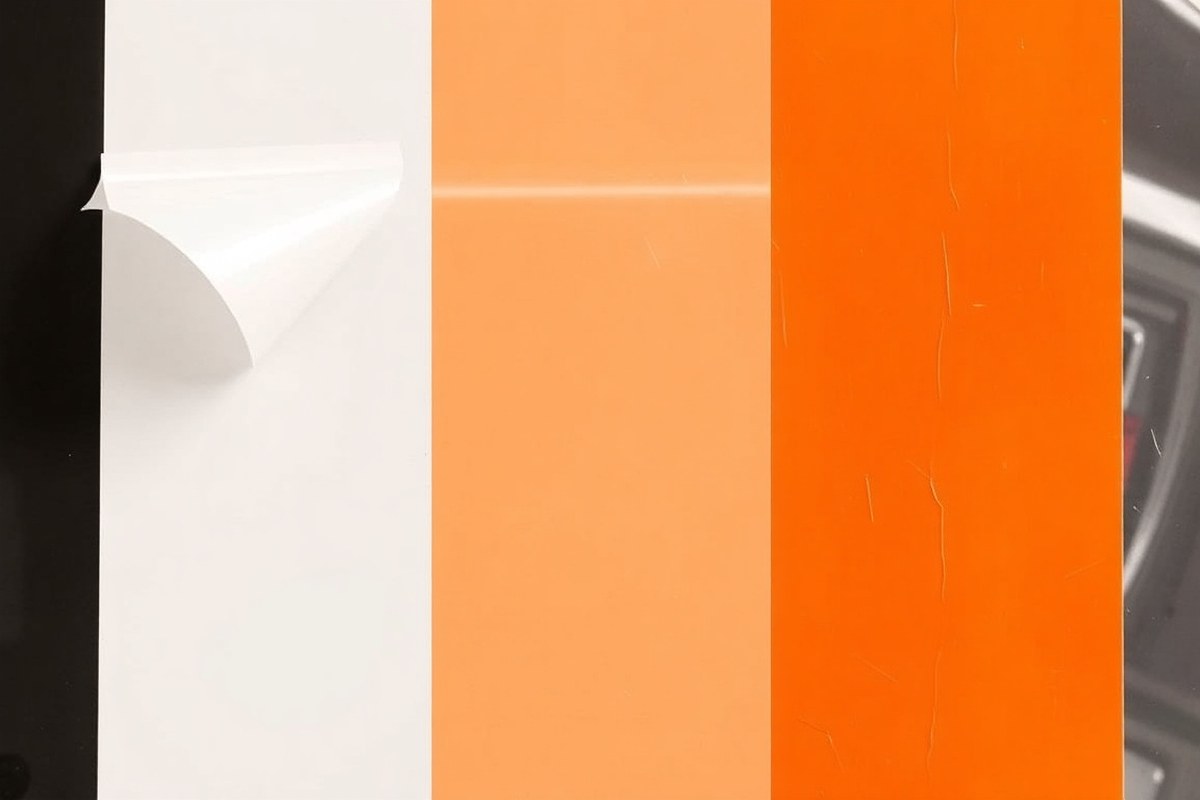
Vinyl won’t stick equally well to all plastic surfaces. Adhesion depends on the plastic’s surface energy and texture. Plastics with higher surface energy let vinyl bind better without extra help.
Some plastics, like ABS and PVC, offer a good base for vinyl. Their moderately textured or rigid surfaces help the adhesive grip firmly. Some plastics like polyethylene (PE) or polypropylene (PP) have low surface energy.
This makes vinyl stick poorly. You must treat the surface first for better adhesion.
Cleaning plastic with rubbing alcohol is key before applying vinyl. Some plastics benefit from light abrasion or primers. Plastics with very low surface energy need special treatments.
Flame or plasma treatments can help stick the vinyl. These treatments boost adhesion effectively.
| Plastic Type | Vinyl Adhesion Quality | Preparation Requirements |
|---|---|---|
| Acrylonitrile Butadiene Styrene (ABS) | High | Clean and scuff lightly |
| Polycarbonate (PC) | Moderate | Thorough cleaning, possible primer |
| Polypropylene (PP) | Low | Primer or adhesion promoter required |
| Polyethylene (PE) | Low | Surface treatment such as flame or plasma |
| Polyvinyl Chloride (PVC) | High | Clean thoroughly |
Vinyl stuck to ABS or PVC usually feels secure and resists peeling. Vinyl on PE or PP often peels without extra steps. Using an adhesion promoter on these plastics costs around $10 to $20, but it pays off.
Don’t skip cleaning or abrasion on plastics like ABS. Poor prep causes bubbling or lifting.
Harder, rigid plastics tend to hold vinyl better than softer ones. Smooth plastics like polycarbonate may need a primer for a strong bond.
You can test your plastic by taping vinyl to a cleaned spot and pressing firmly. Try a primer or a different vinyl type when the vinyl peels after 24 hours.
Which Types of Vinyl Work Best on Plastic Surfaces?

Vinyl sticks best to plastic when you choose the right type. Permanent vinyl offers a strong hold but is hard to remove.
Removable vinyl lets you peel it off easier but may not last long. Specialty vinyl is made for tricky plastics with low surface energy.
Permanent Vinyl Characteristics
Permanent vinyl has a strong adhesive that bonds tightly to smooth plastic. It works well on flat or slightly curved surfaces where longevity counts. Brands like Oracal 651 and 3M vinyl are popular choices.
They are known for durability and a strong hold on plastic. Many crafters trust these brands for long-lasting results.
This vinyl can last months or years outdoors if you prepare the surface well. It is difficult to remove without leaving sticky residue or damaging the plastic. Use permanent vinyl on items you want to keep decorated or labeled long term.
Removable Vinyl Features
Removable vinyl uses a lighter adhesive that lets you peel it off cleanly. It’s good for temporary signs or projects that change often. Though easier to remove, it does not stick as firmly on plastic and peels sooner.
This vinyl is less expensive and works on smooth plastic but not on textured surfaces. It is best for short-term use indoors where the plastic won’t get wet or scratched much. Clean and dry surfaces improve how well removable vinyl sticks.
Specialty Vinyl for Low-Energy Plastics
Low-energy plastics like polypropylene or polyethylene need stronger adhesives. Specialty vinyl like PlaStick has aggressive adhesive designed for these tricky surfaces. It can stick to powdered paint and textured plastics more reliably than standard vinyl.
Some specialty vinyl brands include Pitbull, which works well on textured surfaces. These products often cost more but avoid peeling and improve durability. Use specialty vinyl when standard types won’t stick or on plastics with powder-coated paint.
Here’s a quick comparison of vinyl types for plastic surfaces:
| Vinyl Type | Adhesive Strength | Durability | Plastic Compatibility |
|---|---|---|---|
| Permanent (Oracal 651, 3M) | Strong | High (months to years) | Smooth, flat plastics |
| Removable | Medium to low | Short-term (weeks to months) | Smooth plastics (indoor use) |
| Specialty (PlaStick, Pitbull) | Very strong | High (handles textures and powders) | Low-energy & textured plastics |
Choose your vinyl by the plastic type and project length. You want the right balance of stickiness and clean removal. Without proper vinyl choice, decals could peel or leave residue even on clean plastic.
Make sure the plastic is fully clean and dry before applying vinyl for best adhesion.
How to Prepare Plastic Surfaces for Vinyl Application
Cleaning plastic surfaces well is the first step to good vinyl adhesion. Use isopropyl alcohol to remove oils and dirt. For textured or tough plastics, adding light abrasion or primers helps vinyl stick better.
Cleaning with Isopropyl Alcohol
Start by washing the plastic with mild soap and water. Dry it completely before using rubbing alcohol. Isopropyl alcohol removes oils, silicone residues, and dust that block adhesives.
Apply the alcohol using a clean cloth or cotton ball. Rub the surface gently but thoroughly. Let the plastic air dry completely.
You can also wipe it down. This helps avoid moisture under the vinyl.
Light Abrasion and Scuffing Techniques
Some plastics have smooth or textured finishes that vinyl doesn’t grip well. Lightly sanding the surface with fine-grit sandpaper (around 600 grit) creates tiny scratches for better hold. Avoid heavy sanding that damages or discolors the plastic.
Focus on the exact spot where you want to place the vinyl. Use gentle, circular motions to scuff evenly. Then clean again with alcohol to remove dust before applying vinyl.
Using Adhesion Promoters or Primers
For plastics that resist sticking, use a vinyl adhesion promoter or primer. These products boost the bond by prepping the plastic surface chemically or physically. Common options include Teflon-based or silane adhesion primers.
Apply the adhesion promoter sparingly with a foam brush or cloth. Wait about 5 to 10 minutes for it to dry fully before adding the vinyl. Follow all product directions closely to avoid weakening the adhesive.
Follow this checklist to prepare your plastic surface before vinyl application:
- Wash the plastic with warm, soapy water to remove loose dirt.
- Dry the surface with a clean cloth or air dry completely.
- Apply isopropyl alcohol with a lint-free cloth to remove grease and oils.
- Let the alcohol evaporate fully and check the surface for residue.
- Lightly sand smooth or textured plastics with 600-grit sandpaper if needed.
- Clean off sanding dust by wiping again with alcohol.
- Use an adhesion promoter on plastics with low surface energy or stubborn finishes.
- Wait for the promoter to dry before sticking your vinyl decal.
Does Applying Heat Improve Vinyl Adhesion to Plastic?
Applying heat helps vinyl stick better to plastic by softening its adhesive. Warm adhesive flows more and grips curves or textured surfaces firmly.
Heat also makes the vinyl more flexible. So it molds tightly around plastic shapes without lifting.
Use a heat gun or hair dryer to apply gentle heat. Aim for about 120°F to 150°F (49°C to 65°C). Keep the temperature steady to avoid damage.
Keep the heat moving to avoid melting the plastic or the vinyl. Hold the heat source about 6 to 10 inches away.
Move it back and forth across the area. Do this for 30 seconds to 1 minute per section.
Heat the vinyl only after placing it on the plastic. Smooth it down with a squeegee or credit card first. This helps the vinyl stick better.
Start heating from the center and move outwards to avoid trapping air bubbles. Let the vinyl cool for a few minutes to let the adhesive set fully.
Too much heat can warp the plastic or make the vinyl bubble. Test a small corner first to see how both materials react.
Some plastics tolerate only lower heat and need care to avoid damage. Avoid heating over 180°F (82°C) without checking the plastic’s heat tolerance.
Heating costs almost nothing, just a few cents for electricity if using a hair dryer. You’ll need a basic heat gun or hair dryer if you don’t own one. This step takes about 5 minutes for an average decal but improves long-term adhesion and appearance.
Good results show vinyl stuck snugly without wrinkles or air pockets. The surface feels smooth, and the edges don’t lift after cooling. Don’t skip heating or heat unevenly, or peeling can happen.
This problem is worse on curves or rough plastic surfaces. Heat helps keep the vinyl smooth.
Step-By-Step Process to Apply Vinyl Decals to Plastic
Applying vinyl decals to plastic takes careful steps from cutting to transfer tape removal. Following the right process helps avoid air bubbles and keeps your decal smooth. Use transfer tape to handle and place the vinyl, especially for detailed designs.
Cutting and Weeding the Vinyl
Start with a good quality vinyl suitable for plastic surfaces. Use a sharp blade in your cutting machine for a clean edge. Precise cuts make weeding easier and reduce the chance of tearing small parts.
Remove the excess vinyl by peeling away the unwanted pieces. Use a weeding tool for small or intricate areas. Leave the design intact on the liner before placing it on the transfer tape.
Positioning and Burnishing the Decal
Place the cut vinyl face-down on transfer tape. Carefully peel off the liner.
Position the decal on your plastic surface at the desired spot. Press down gently and adjust if needed before the final burnish.
Use a soft squeegee to apply even pressure across the decal. Push any air bubbles from the center outwards. Go over the entire decal to secure it well and avoid lifting edges.
Removing Transfer Tape Properly
After burnishing, slowly peel back the transfer tape at a low angle. Pull the tape back over itself, not straight up, to protect the vinyl. A slow and steady pull prevents the vinyl from lifting off the plastic.
Press down any vinyl that lifts with the tape. Then, re-burnish it.
Removing transfer tape properly leaves the vinyl smoothly adhered without wrinkles or bubbles. Check your edges and smooth out any small bubbles with your finger.
- Cut your vinyl design with a sharp blade on your cutting machine.
- Weed away excess vinyl using a weeding tool carefully.
- Place the vinyl design face-down onto transfer tape, then peel the liner.
- Position the decal on the plastic surface where you want it.
- Burnish firmly with a squeegee, pushing air bubbles toward the edges.
- Slowly peel the transfer tape back at a low angle to expose the vinyl.
- Press down any edges or spots that lift and smooth out bubbles.
Tip: Take your time removing the transfer tape. This helps all vinyl stick tight.
Common Mistakes and How to Fix Vinyl Peeling on Plastic
Vinyl peeling from plastic mostly happens when the surface is dirty, oily, or too slick. Even tiny dust or grease spots block the vinyl glue, making it fail.
Sometimes, the plastic’s texture or type stops the vinyl from sticking well. This causes the adhesive to fail soon after application, leaving corners lifting and edges curling.
Fixing peeling vinyl starts with spotting the source of trouble. Press down bubbles or loose edges firmly using a plastic squeegee. You can warm the vinyl carefully using a hair dryer (keep it about 6 inches away).
Heat softens the glue and helps it grip better. Don’t overheat or the vinyl may warp or melt.
Here are common mistakes and how to fix or avoid them:
- Skipping surface cleaning: Use isopropyl alcohol and a lint-free cloth to wipe plastic first.
- Applying vinyl over textured or scratched plastic: Sand smooth with 400-grit sandpaper, then clean before applying.
- Not applying an adhesion promoter can cause problems on tricky plastics. Apply a thin layer of promoter. Follow the product instructions carefully.
- Peeling vinyl without re-heating: Gently warm stubborn edges before pressing back down.
- Forgetting to wait for curing time hurts the vinyl bond. Let the vinyl sit 24 hours. Keep it in a dry, warm place.
Vinyl peeling after a few days needs extra care. Dry the area well first. Then add a thin coat of clear sealant or laminate.
This seals the edges and strengthens the bond. Small projects usually just need standard permanent vinyl. Add an adhesion promoter for better hold.
The cost is about $5 to $10 per application. Large or outdoor projects may need a heavy-duty sealant costing $15 or more for long-lasting protection.
Paying close attention to these steps can save you from peeling problems. Preparing well and fixing problems early helps your vinyl last longer.
Take your time with plastic surfaces. This keeps decals looking sharp and attached.
How Long Does Vinyl Take to Fully Adhere and How Durable Is It?
Vinyl usually takes 24 to 72 hours to fully set. It reaches maximum adhesion on plastic during this time. This time lets the adhesive properly cure and bond.
It needs stable conditions to stick well. Don’t disturb the vinyl while it cures. Keep it away from water to get the best hold.
Temperature and humidity affect how well vinyl sticks to plastic and how durable it stays. Adhesives perform best in moderate temperatures, typically between 60°F and 80°F. High humidity or cold weather can weaken the bond. This may cause the vinyl to peel or lift early.
Sunlight and moisture play big roles in vinyl’s lifespan on plastic outdoors. Ultraviolet rays from the sun gradually break down vinyl material and adhesive.
So stickers or decals lose grip faster in harsh sunlight. Expect high-quality vinyl on plastic to last about 3 to 5 years outside, depending on exposure.
Preparing the surface well and using the right adhesive or vinyl type extends durability noticeably. Commercial adhesion promoters help vinyl stick strongly to tricky plastics like polyethylene.
Vinyl wraps on plastic parts of vehicles last for years. Clean surfaces and heat during application help them stick well.
Plan for some wear over time when vinyl faces rough weather or frequent washing. Protect vinyl by avoiding harsh soaps or scrubbing on decals.
Check the adhesion a few days after applying the vinyl. This can help catch lifting early for touch-ups.
Outdoor strong adhesives prevent peeling of vinyl. They resist moisture and changing temperatures well. Most craft vinyl gives good results when paired with adhesion promoters.
But heavy-duty glues built for plastic offer the longest-lasting bonds. Always match the adhesive and vinyl type to the plastic you’re working on for long-term durability.
When to Use Professional Adhesives or Call an Expert
Some plastics resist vinyl sticking without special adhesives. Low-energy plastics like polyethylene and polypropylene need professional-grade glues made for those surfaces. These adhesives have chemical primers that bond well with vinyl and plastic.
This improves durability. It also helps prevent peeling.
You should consider using these specialty adhesives if your project involves smooth or flexible polyolefin plastics. Costs run higher on such materials, reaching about $1.50 to $2.50 per vinyl decal. DIY options work on many plastics.
Some tricky plastics need stronger bonding agents. These stronger types aren’t in common craft glues.
Professional application is recommended for large, complex, or outdoor projects where failure is costly. Experts use precise surface preparation, controlled heat, and pro adhesives to guarantee long-lasting results. For example, they might apply a plastic primer first.
Then, they put the vinyl on. Finally, they cure the bond with a heat gun set at 120°F to 140°F.
You can decide when to ask for professional help by checking the plastic type. Also, consider the size of your project. The plastic may be low surface energy.
The project might need strong weather resistance. Hire a specialist in these cases.
Also, pros save you from mistakes if you lack time or tools. They prevent costly rework.
Test a small vinyl patch with your glue first. This helps avoid surprises later.
Professional adhesives typically contain ingredients like acrylic-based primers and stronger solvents, which penetrate tough plastic surfaces. You can ask adhesive suppliers for product specs mentioning polyolefin compatibility.
Expect to pay $10 to $30 per adhesive tube, plus possible primer products. This investment usually pays off in better stick strength and longer life.
DIY crafters sometimes try to make it work with household glues. But these rarely offer enough chemical bonding on challenging plastics. Weak adhesion causes lifting edges and bubbling.
It can lead to total failure. This often happens after heat or moisture exposure. The extra upfront cost and effort for pro-grade products and trained hands substantially reduce these risks.
Step-by-Step Action Plan for Applying Vinyl on Plastic
Follow these steps for a smooth vinyl application on plastic surfaces. You’ll see good adhesion and long-lasting results.
- Before you start: Clean the plastic with soap and water, then dry thoroughly. The surface should feel smooth and free of dust.
- Day 1: Wipe with isopropyl alcohol on a lint-free cloth. This removes oils and helps the vinyl stick better.
- Day 1: Test the vinyl on a small hidden area first. Wait 24 hours to check if it sticks well without peeling.
- Day 2: Apply your vinyl decal carefully, smoothing out bubbles as you go. Use a scraper tool for even pressure.
- Day 2: Apply gentle heat with a heat gun or hair dryer. Heat it for 10 to 15 seconds only. Use low heat to avoid damage. Keep it moving to avoid warping the plastic.
- After 48 hours: Avoid washing or heavy handling of the vinyl area. Let the adhesive set fully for best durability.
- After 1 week: Check edges and corners. Press down any peeling spots gently with your fingers or a scraper.
- After 2 weeks: Your vinyl should be firmly bonded. Problems persist? Try professional adhesives or get expert advice instead.
Frequently Asked Questions
Can I Use Vinyl on Flexible Plastic Without It Peeling Off?
Vinyl can stick to flexible plastic with strong adhesive vinyl. Prepare the surface well before applying.
This helps the vinyl hold better. Avoid sharp bends after application to prevent peeling or cracking over time.
Does Temperature Affect How Vinyl Sticks to Plastic?
Yes, warmer temperatures around 70°F to 80°F help vinyl adhere better. Cold surfaces or cold weather can make the adhesive less sticky and cause lifting.
Can I Remove Vinyl from Plastic Without Damaging the Surface?
You can remove vinyl carefully using heat and gentle peeling. Use a heat gun on low heat to soften the adhesive.
This avoids scratching the plastic. Gently lift the vinyl while heating.
Are Matte or Glossy Vinyl Finishes Better for Plastic Surfaces?
Glossy vinyl tends to stick better due to its smoother backing. Matte vinyl can work but sometimes has weaker adhesion on slick plastic surfaces.
Does Surface Texture of Plastic Impact Vinyl Adhesion?
Yes, smoother plastic surfaces help vinyl stick better. Rough or textured plastics may need sanding or primer to improve the vinyl’s grip.
Can Vinyl Decals Be Reapplied After Removal from Plastic?
Most vinyl adhesives lose strength once removed. Reapplying vinyl decals usually causes poor adhesion.
Use new vinyl for the best stick. This ensures a stronger, longer-lasting bond.
Before You Go
Vinyl can stick well on plastic with the right surface prep and materials. Take your time cleaning and testing first. Start your project step-by-step so the vinyl holds strong and looks great.