How to Cut Vinyl with Scissors: Simple Steps for Clean, Accurate Cuts
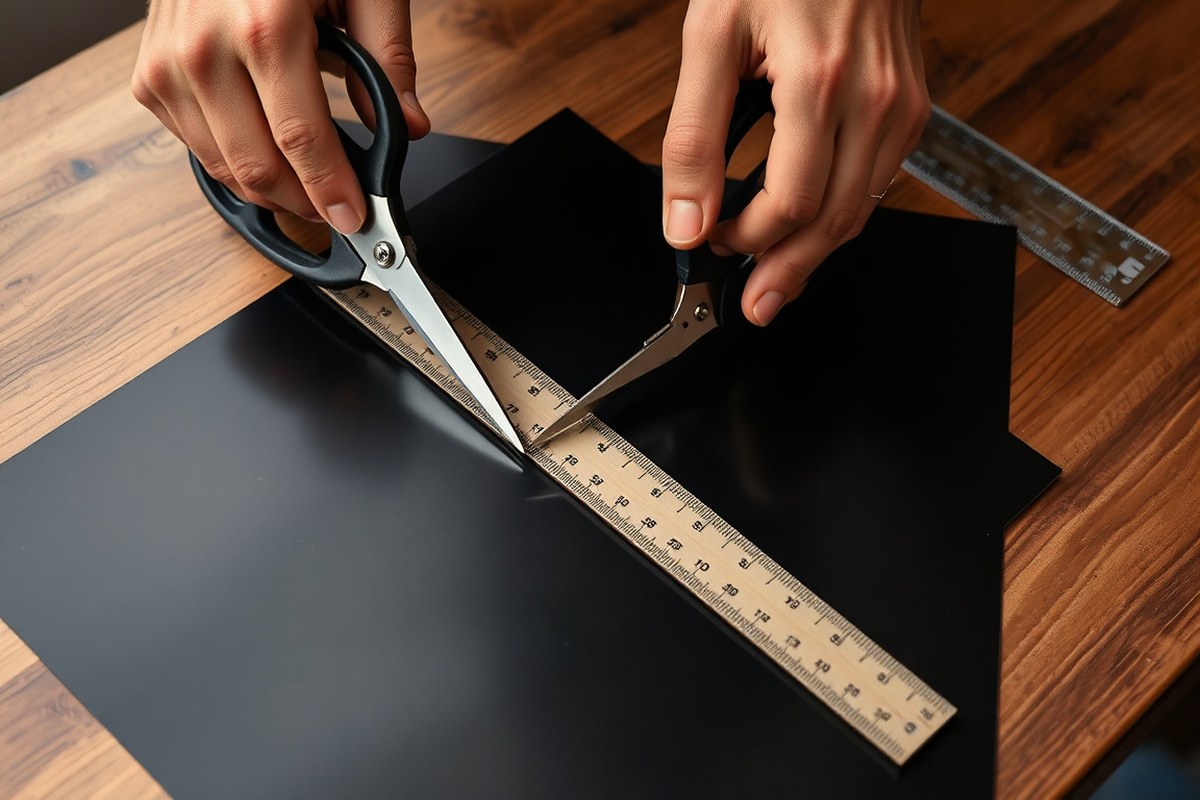
How to cut vinyl with scissors depends on choosing the right type of scissors and prepping the vinyl properly for smooth, clean cuts. Use sharp, heavy-duty scissors designed for cutting thick materials to avoid jagged edges. Start by laying the vinyl flat and marking your cut lines clearly for accuracy and neat results.
Key Takeaways
- Use sharp, heavy-duty scissors or fabric shears for cleaner, more precise vinyl cuts.
- Allow vinyl flooring or tiles to acclimate in the room for at least 48 hours before cutting.
- Lay vinyl flat on a clean, stable surface to prevent slipping during cutting.
- Measure and mark cut lines with a ruler or straight edge before cutting.
- Leave a 3-inch excess margin when rough-cutting sheet vinyl for easier trimming later.
- Work slowly when cutting complex shapes or corners to maintain accuracy.
Can You Cut Vinyl with Scissors? What Works Best
Cutting vinyl with scissors is possible, but it depends on the type and thickness of the vinyl you’re working with. Thin sheet vinyl and peel-and-stick tiles are the easiest kinds to cut cleanly with heavy-duty scissors or shears. These materials usually have a thickness under 4 millimeters, which allows scissors to slice through without too much effort or damage. Flexible luxury vinyl tile (LVT) often fits into this category, making scissors a practical choice for small or medium cuts.
When the vinyl is thicker or features a rigid core, like wood plastic composite (WPC) or stone plastic composite (SPC) vinyl plank flooring, scissors are generally not the best tool. WPC vinyl, which ranges from 5 to 8 millimeters thick, has a foam core that resists snapping. Cutting with scissors might crush or tear the material unevenly. SPC vinyl, at about 4 to 7 millimeters thick, is even more rigid and can crack or chip if not cut with a fine-tooth power saw. Regular household scissors lack the strength and precision for these materials, often resulting in jagged edges or fluttering cuts.
Scissors work best when cutting flexible vinyl sheets or tiles for small projects, cleanup trims, or shaping edges without heavy resistance. They offer good control and avoid the heat or fumes that come from hot knives or blades. Heavy-duty scissors designed for tough fabrics or plastic can help maintain a clean edge on thinner materials. For larger or thicker vinyl pieces, tools like rotary cutters, utility knives, or specialized vinyl plank cutters provide a smoother, straighter cut with less strain.
When planning to cut vinyl with scissors, keep thickness and vinyl composition in mind. If the material is under 4 millimeters and flexible, scissors are cost-effective, easy to use, and won’t damage your workspace. On the other hand, if you’re dealing with rigid vinyl flooring or planks thicker than 5 millimeters, scissors won’t deliver clean results and can lead to wasted materials and extra work smoothing edges.
Using scissors incorrectly on thick vinyl might result in jagged edges or even cracking along the cut line, which can cause fit problems later. For best outcomes, measure your cuts carefully, cut along a marked straight edge, and avoid forcing the scissors through thick or rigid vinyl. In cases where large shapes must be cut from vinyl rolls, a brief heat application followed by heavy scissors or a hot knife can soften the vinyl enough for a clean cut without snapping.
What Scissors Are Best for Cutting Vinyl Cleanly
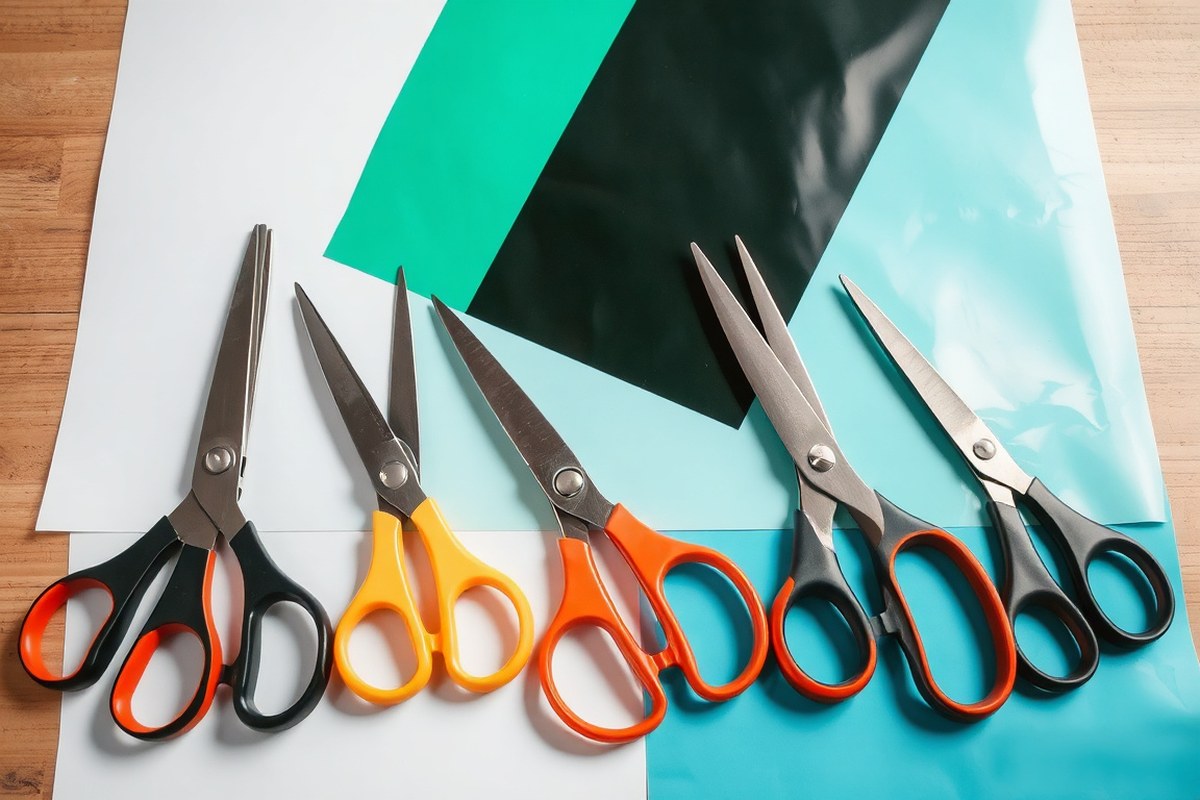
To cut vinyl cleanly with scissors, choose sharp blades designed for precision. Thin, flexible vinyl suits sharp household or craft scissors, while thick or rigid vinyl flooring needs heavy-duty or specialized scissors. Blade type, size, and sharpness affect the quality of your cuts and the ease of handling different vinyl materials.
Household vs Craft Scissors
Regular household scissors can work well for thin, flexible vinyl such as adhesive sheets or heat-transfer vinyl, provided the blades are sharp and kept in good condition. They often have longer blades around 7 to 8 inches, which helps with straight cuts on larger sheets. However, they might struggle or cause tearing when cutting thicker or rigid vinyl.
Craft scissors are usually smaller, with blades about 5 inches in length, offering more control for fine, detailed work and small shapes. They often feature finer, sharper edges, essential for cleanly cutting vinyl without jagged edges. A set dedicated to crafting vinyl will remain sharper longer, avoiding dullness from cutting other materials.
Use household scissors for bigger, straightforward cuts on soft vinyl. Switch to craft scissors for intricate shapes or thin vinyl that requires accuracy. Avoid using dull household scissors, as they can tear vinyl or leave rough edges.
Self-Sharpening and Non-Stick Blades
Scissors with self-sharpening blades maintain their edge longer, which is important for clean cuts through flexible vinyl layers without tearing. These blades often feature softer steel or carbide tips, designed to cut through adhesive and vinyl smoothly. A fine-toothed blade reduces chipping by evenly distributing pressure along the cut.
Non-stick coatings on blades prevent vinyl’s adhesive from gumminess on the scissors, keeping cutting smooth and reducing frequent cleaning. This feature is particularly helpful with sticky, adhesive vinyl used in decals and crafting. Scissors with both self-sharpening and non-stick blades typically cost $10 to $25 but save effort and improve cut quality over time.
Choosing blades with these features improves cut precision and reduces edge fraying, especially for repeated or complex cutting tasks. Keep in mind, non-coated blades require more frequent cleaning and sharpening to maintain effectiveness.
Ergonomic Handles for Control
Comfortable, ergonomic handles improve control, especially when cutting thick or multiple vinyl layers. Larger handle loops and cushioned grips reduce hand fatigue during precise or extended cutting sessions. Look for scissors with symmetrical handles if you are left-handed, as many scissors are designed primarily for right-handed users.
For thicker or rigid vinyl, scissors with spring-action handles provide more assistance in opening the blades, easing repetitive cuts. These can cost between $15 and $30 but make cutting easier and safer for your hands. Control is essential to avoid slips that can damage the vinyl or result in uneven edges.
Choose scissors that fit your hand size well so that you can apply consistent, controlled pressure. Avoid scissors with small, hard handles that pinch or cause discomfort during use.
- Use sharp, fine-toothed blades to cut thin vinyl cleanly without tearing.
- Select self-sharpening and non-stick blade scissors to maintain sharpness and minimize adhesive buildup.
- Match blade length to project size, long blades for sheets, short blades for detail cuts.
- Choose ergonomic handles with cushioned grips for better control and less fatigue.
- Reserve heavy-duty scissors or shear-style cutters for thick or rigid vinyl flooring.
- Dedicate a pair of scissors solely for vinyl to keep blades sharp and clean.
Avoid using dull or household scissors not designed for vinyl; they increase tearing and uneven cuts, especially on thicker materials.
Preparing Vinyl and Workspace Before Cutting
Preparing your vinyl and workspace before cutting makes the process smoother and the cuts more accurate. Taking time to unroll, flatten, measure, mark, and secure your vinyl sheet reduces mistakes and material waste. Setting up properly also helps avoid frustration and ensures cleaner edges when you start cutting with scissors.
Unrolling and Flattening Vinyl
Vinyl often arrives tightly rolled, which causes curl and warping. Before cutting, unroll the vinyl fully and allow it to relax on a flat surface for at least 30 minutes. Warped or curled vinyl can shift or resist scissors, leading to jagged edges or uneven cuts.
For thicker vinyl sheets, laying a few heavy flat objects on the edges can help flatten the material more quickly. Avoid pressing too hard; just enough weight to reduce curls without damaging the vinyl surface. If you have time, leaving vinyl at room temperature for 24 to 48 hours improves flexibility, especially for flooring projects. This acclimation prevents shrinking or gaps after cutting and installation.
Measuring and Marking Cut Lines
Accurate measurements are key for clean cuts that fit your project. Use a steel or plastic ruler or measuring tape that can handle vinyl’s slick surface without slipping. Mark cut lines lightly with a pencil or a china marker designed for non-permanent vinyl markings. These marks guide your scissors and minimize errors.
Before cutting, double-check your dimensions against your project template or pattern. For complex shapes, consider tracing the design onto paper first and then transferring it onto the vinyl with carbon paper or by holding the design under a light table. Keeping markings light prevents visible smudges on the vinyl.
- Measure the desired cut size carefully with a ruler or tape measure.
- Use a pencil or china marker to draw clear, straight lines on the vinyl.
- Re-measure your marks to confirm accuracy before cutting.
- Adjust any curves or angles on your markings as needed for the design.
Securing Vinyl to Prevent Movement
Vinyl can easily slip or shift while cutting, so securing it is important for neat, accurate edges. Lay the vinyl on a clean, flat surface like a cutting mat or table. Use low-tack painter’s tape along the edges or corners of the vinyl to hold it in place. Avoid masking tape as it can leave residue or pull the material when removed.
For smaller cuts or delicate designs, consider using small weights or clips at the edges to stabilize the vinyl further. Make sure the tape or weights don’t cover the area you plan to cut, as this could damage your scissors or cause uneven cuts. Keeping your workspace free of clutter and well-lit also aids controlled cutting.
- Place the vinyl on a flat, clean surface suitable for cutting.
- Apply painter’s tape at edges and corners to hold vinyl steady.
- Optionally, place small weights to further prevent movement.
- Check that the secured areas do not interfere with your cut lines.
- Prepare your scissors and workspace lighting before starting to cut.
Step-by-Step Technique for Cutting Vinyl with Scissors
Holding the scissors and vinyl correctly, along with choosing the right cutting angle and speed, is essential to produce clean edges and avoid jagged or torn cuts. Using sharp scissors designed for fabric or all-purpose cutting reduces strain and improves precision. Applying steady, even pressure and cutting in a slow, smooth motion helps your scissors glide through the vinyl without catching or tearing. Positioning the vinyl with the cut line supported near the edge of your workspace adds stability, making the cutting process more controlled. Here’s a detailed, step-by-step method to cut vinyl cleanly with scissors, focusing on hand placement, pressure, and cutting motion:
- Place the vinyl on a flat, sturdy surface with the marked cut line aligned along the edge of a table or workbench. This gives you control and frees up the scissors to move smoothly.
- Hold the vinyl firmly with your non-dominant hand near the starting point of the cut to keep it flat and prevent shifting. Make sure your fingers stay clear of the scissors’ path to avoid injury.
- Grip the scissors comfortably with your dominant hand, positioning your thumb in the top handle and your fingers in the bottom handle. Keep your wrist straight and relaxed for better control.
- Align the blades of the scissors perpendicular to the vinyl surface so they cut straight through the material. Avoid angling the scissors too steeply, as this can cause uneven edges.
- Apply steady, firm pressure as you begin the cut, then slice through the vinyl slowly using a smooth, continuous motion. Quick, jagged cuts increase the risk of tearing or jagged edges.
- Maintain a single cutting stroke without stopping or lifting the scissors when possible. If multiple passes are necessary for thicker or heavier vinyl, do so gradually with consistent pressure to avoid rough edges.
- Guide the scissors along the cut line carefully, adjusting hand position if needed to follow curves or angles without forcing the scissors.
- Complete the cut and set the vinyl aside gently to avoid bending or warping the fresh edge. Inspect the cut for any rough spots that can be trimmed with small, careful snips.
Cutting at a steady pace lets the sharp scissors slice cleanly through the vinyl, producing smooth edges that save time on cleanup. Use sharp blades; dull ones tear and cause jagged lines, especially on heavier vinyl. Your non-cutting hand should hold the vinyl steady but not too tightly, preventing the material from moving without stressing it. Avoid rushing. Slow, confident cuts with even pressure offer the best professional look. For thicker sheets, multiple gentle passes improve edge quality instead of forcing the press.
How to Cut Vinyl Flooring with Scissors Safely
Vinyl flooring can be cut with scissors, but this depends mainly on the flooring type and thickness. Thin sheet vinyl, generally less than 2 mm thick, is the most suitable for scissors cutting. Thicker vinyl planks, especially rigid-core luxury vinyl planks (LVP) and stone plastic composite (SPC) types, are too dense and hard for scissors, requiring scoring and snapping or power tools instead. Using scissors on thick or rigid flooring risks damaging the blades and results in uneven cuts.
To prepare vinyl flooring for cutting with scissors, lay it flat on a clean, stable surface. Ensure the vinyl is at room temperature; vinyl can become brittle and harder to cut if cold. Warming the material slightly, for example by leaving it indoors for a day, helps achieve cleaner cuts. Mark your cutting line clearly with a pencil or masking tape to guide steady cutting. Measure twice to avoid costly mistakes.
To cut sheet vinyl thinner than 2 mm, use sharp heavy-duty scissors made for fabric or upholstery. Begin at one edge and cut slowly, pausing just before the blades fully close each time. Move the scissors forward a bit overlapping the last cut to keep the edge straight and smooth. This method avoids jagged cuts and limits wear on the scissors.
Safety is important when using scissors on vinyl flooring. Keep your non-cutting hand away from the scissor blades and hold the vinyl firmly to avoid slipping. Cut away from your body and use smooth, deliberate strokes. Always wear safety glasses if the vinyl edge might cause sharp debris, and keep children and pets away from the work area.
When vinyl flooring is too thick or rigid, scissors will not provide a clean cut and may cause frustration or even injury. In these cases, switch to recommended tools like a utility knife for sheet vinyl or a score-and-snap cutter for rigid planks. Power saws or jigsaws with fine-toothed blades offer more precise and safer cutting for thick vinyl and complex shapes. Using the right tool reduces wasted material and improves installation quality.
Attempting to force scissors through thick vinyl flooring risks dulling blades quickly and producing uneven edges; stop if the scissors don’t cut smoothly and switch to a scoring knife or vinyl cutter instead.
Common Mistakes When Cutting Vinyl and How to Fix Them
Vinyl tears or cracks during cutting mostly because it is too cold or when excessive force is applied unevenly. Cold vinyl becomes brittle and breaks more easily, which makes smooth cutting impossible. Pressing too hard with scissors can also damage the vinyl or cause jagged edges. Adjust the temperature by letting vinyl reach room temperature, around 68-72°F, before cutting. Use steady, moderate pressure to let the scissors glide through material smoothly.
Fixing rough or jagged edges requires simple tools and slow work. After cutting, gently rub the edges with fine sandpaper, such as 220-grit, to remove burrs or chips. Take only a few light passes to avoid thinning the vinyl too much. This step improves the look and prevents peeling or curling over time. For minor rough spots, a deburring tool or nail file also works well.
Scissors that bind or slip often have dull blades or dirty surfaces. Sharp scissors designed for vinyl, cleaned regularly, deliver cleaner cuts and prevent drag. Test scissors on a scrap piece before main cuts. If binding happens, wipe blades clean with rubbing alcohol and sharpen as needed. Avoid cheap or multi-purpose scissors as they rarely cut vinyl cleanly. Below is a table outlining common cutting mistakes, why they happen, and simple fixes you can apply.
| Problem | Cause | How to Fix or Prevent |
|---|---|---|
| Vinyl tears or cracks while cutting | Vinyl too cold; scissors too much pressure | Warm vinyl to room temp; use moderate pressure |
| Jagged, uneven edges | Dull scissors; uneven cutting speed | Sharpen scissors; cut slowly and steadily; sand edges with 220-grit paper |
| Scissors bind or slip | Dirty or dull blades; wrong scissor type | Wipe blades clean with alcohol; sharpen scissors; use vinyl-specific scissors |
| Edges curl after cutting | Too much pressure; vinyl not supported well | Support vinyl fully during cutting; use gentle, continuous strokes |
| Cut edges chip or flake | Cutting too cold vinyl; dragging scissors | Warm vinyl; keep scissors moving evenly and avoid stopping mid-cut |
When you experience any of these issues, adjusting your materials and techniques typically fixes the problem. Preparing your vinyl by warming it and using sharp, clean scissors helps cut cleanly without damage. Slowly sanding any rough edges highlights professional results and prepares the vinyl for a solid installation. Regularly maintaining your scissors and supporting your vinyl properly saves time and reduces mistakes that might ruin your project.
Maintaining Scissors for Vinyl Cutting Efficiency
Keeping your scissors sharp, clean, and well-maintained lets you cut vinyl smoothly without snagging or tearing. Vinyl material can stick to blades or dull them quickly, so regular care prevents frustration and wasted material. You should sharpen your scissors every few months if you cut vinyl frequently, or as soon as you notice the blades catching or not making clean cuts. Professional sharpening usually costs around $5 to $15 at hardware stores, or you can use a specialized scissor sharpener at home for about $10 to $20.
Cleaning vinyl residue from scissors after each use prevents gummy buildup that dulls the blades and affects cutting quality. Use a lint-free cloth with rubbing alcohol to wipe the blades thoroughly. Warm soapy water works if there is heavy sticky residue, but make sure to dry blades completely to avoid rust. Avoid using abrasive cleaners that can scratch the metal.
- Sharpen scissors every 3 to 6 months or when cuts become uneven
- Wipe blades with rubbing alcohol after each use to remove vinyl residue
- Use mild soap and water for heavy buildup, then dry blades fully
- Store scissors in a dry case or on a magnetic strip away from other tools
- Keep scissors closed when not in use to protect and align blades
- Avoid dropping scissors or using them on materials other than vinyl to maintain sharpness
Proper storage also helps keep scissors in good condition. Storing them in a dry place avoids moisture that can cause rust. Using a protective cover or dedicated scissor pouch prevents damage from other tools. Keeping scissors closed reduces blade misalignment and dulling. Dropping scissors or using them for unintended purposes, like cutting thick cardboard or metal, can bend blades and reduce sharpness much faster.
Clean, sharp blades provide cleaner cuts with less effort. The vinyl’s surface stays smooth and avoids small tears or rough edges, which can make your craft look messy or affect how vinyl flooring fits. Routine maintenance takes just a few minutes but significantly extends the life and performance of your scissors for all your vinyl cutting projects.
Tricks for Cutting Complex Shapes and Corners in Vinyl
Cutting complex shapes and corners in vinyl requires patience and specific techniques to maintain clean, precise edges. Using guides like masking tape, scoring lines before cutting, and making slow, careful cuts help you handle curves and obstacles effectively. After rough cutting, trimming edges ensures a neat finish without damaging the vinyl.
Using Masking Tape as a Cutting Guide
Wrapping masking tape around the vinyl at the cut line helps stabilize the material and prevents it from tearing or fraying, especially on curved or intricate cuts. The tape holds the layers together and offers a visible guide for your scissors.
For instance, tightly roll the vinyl and apply masking tape along the planned cut. This works well when cutting thick or layered vinyl rolls, such as flooring sheets, where a clean edge is important.
- Measure and mark the cutting line on the vinyl surface.
- Apply a strip of masking tape along this line, wrapping around edges if possible.
- Press down the tape firmly to secure it to the vinyl.
- Cut carefully along the edge of the tape to ensure a straight and clean line.
- Once the cut is complete, peel away the masking tape slowly.
- Inspect the cut edge for any rough spots and trim if necessary.
Masking tape not only guides your scissors but also reduces the risk of vinyl stretching or peeling along your cut.
Scoring Before Cutting for Precision
Scoring the vinyl lightly with a utility knife or a sharp blade before cutting with scissors helps achieve more accurate cuts, especially around corners and tight curves. The score line acts as a path to follow and reduces the chance of the scissors slipping.
This method works best for thicker vinyl sheets or flooring with a rigid core, where scissors alone might cause uneven edges. Use a straight edge or template to keep the score consistent.
- Create a template of your desired shape or corner using cardboard or stiff paper.
- Place the template on the vinyl sheet and secure it with tape or weights.
- Use a straight edge to lightly score the cutting line onto the vinyl surface with a sharp blade.
- Remove the template carefully without disturbing the score line.
- Follow the score with your scissors, cutting slowly and precisely along the scored line.
Scoring too deeply can cut through backing layers; keep pressure moderate to only mark the surface.
Slow, Small Cuts for Curves
Making slow, small cuts along a curve or intricate shape gives you greater control over the scissors and reduces mistakes. Instead of trying to cut large sections at once, use short snips to follow the contour closely.
It helps to rotate the vinyl sheet as you work rather than bending the scissors awkwardly. This technique is especially useful when cutting around obstacles like pipes or door frames.
- Start at a point on your marked curve or shape.
- Make short, deliberate snips with the scissors, following the line closely.
- Rotate the vinyl or yourself to maintain a natural cutting angle.
- Pause periodically to check your progress and adjust your path if needed.
- Slowly work through the entire curve or detailed edge for precision.
Rushing curved cuts often leads to jagged edges or accidentally cutting outside your line.
Trimming Edges After Rough Cuts
After you make an initial rough cut around a complex shape, trimming the edges smooths out any unevenness or leftover material. Use sharp scissors or fine-grit sandpaper (around 120 to 300 grit) on vinyl flooring to refine corners and remove burrs. This step is essential to achieve a polished look, especially for visible sections like wall baseboards or decorative vinyl decals.
- Examine the vinyl edges for uneven spots or small tabs sticking out.
- Use sharp scissors to gently trim these irregularities without cutting too far.
- For flooring vinyl, lightly sand rough corners to remove sharp points.
- Wipe the sanding dust off with a dry cloth to keep the surface clean.
- Recheck the fit of the vinyl piece in its intended place and adjust as needed.
Trimming and sanding after cutting improves fit and appearance but avoid over-sanding, which can thin the vinyl.
Step-by-Step Action Plan for Cutting Vinyl with Scissors
Follow these steps to cut vinyl accurately and safely using scissors. Each step helps you check your progress and adjust as needed.
- Before you start: Clean your workspace and gather the right scissors for vinyl. You’ll know you’re ready when your tools and surface are free of dirt and clutter.
- Prepare the vinyl: Lay it flat on the clean surface and smooth out any wrinkles. The vinyl should lie flat without bubbles or folds before cutting.
- Mark your design: Use a fine-tipped marker or a grease pencil to outline your cutting lines. Accurate markings will guide your scissors and keep cuts precise.
- Initial cuts: Start by cutting along straight lines using long, smooth scissor strokes. The vinyl should cut cleanly without snagging or tearing.
- Cut complex shapes: For curves or corners, make small, careful snips close to the marked line. Practice on scrap vinyl to gain control for smooth edges.
- Check your cuts: Hold the vinyl up and inspect edges for smoothness. If you see rough or uneven spots, trim them carefully with the scissors.
- Maintain scissors during work: Clean blade residue and sharpen if needed to keep cuts clean. Blunt blades cause jagged edges and make cutting harder.
- Store tools properly after use: Clean and dry scissors before storing to maintain blade sharpness over time.
Frequently Asked Questions
How to Cut Vinyl with Scissors?
Cut vinyl with sharp scissors, measuring carefully before cutting. For best results, hold the vinyl steady and cut slowly to avoid jagged edges.
How Do I Cut Vinyl?
Use sharp scissors or a hobby knife for clean cuts on vinyl. For larger shapes, heating the vinyl slightly makes it more flexible and easier to cut.
What Are the Best Scissors for Cutting Vinyl?
Use sharp, heavy-duty scissors designed for fabric or crafts. These scissors stay sharp longer and provide cleaner cuts than general-purpose scissors.
Can I Cut Heat Transfer Vinyl with Scissors?
Yes, but cut slowly and precisely to avoid damaging the vinyl’s carrier sheet. Always mirror your design before cutting heat transfer vinyl for correct application.
How Thick Can a Vinyl Cutter Cut?
Vinyl cutters usually handle materials up to 1/16 inch thick. Thicker vinyl may require specialized blades or manual cutting tools like heavy scissors or a hot knife.
How Do I Keep Vinyl from Slipping While Cutting?
Use a cutting mat or a flat, non-slip surface to stabilize vinyl. Holding the material firmly with one hand also helps maintain control during cutting.
Final Thoughts
Cutting vinyl with scissors is a practical skill that improves with the right tools and techniques. Start your next project by preparing your vinyl and workspace carefully; that simple step sets you up for clean, precise cuts every time. Take your time on tricky shapes, and you’ll see better results quickly.