How to Laser Engrave Metal: Complete Guide with Tools, Settings & Safety
How to laser engrave metal depends largely on the type of metal and laser you use. You need a specialized laser to engrave bare metal, like a fiber or infrared laser, or you can use a CO2 laser on metal coated with a marking spray. Preparing the metal surface properly and adjusting the laser’s power, speed, and frequency are important first steps for clean, precise engraving.
Key Takeaways
- Use fiber or infrared lasers for engraving bare metals to achieve deep, clear marks without additional coatings.
- CO2 lasers work on metals only when combined with laser marking spray or on anodized aluminum surfaces.
- Diode lasers offer a budget-friendly option for stainless steel and coated metals but have limited penetration.
- Cleaning and drying metal surfaces before engraving improves laser adhesion and overall engraving quality.
- Start with lower power and slower speed settings, then adjust to avoid overheating or burning the metal.
- Engraving curved metal pieces requires a rotary attachment to ensure consistent laser contact and accurate designs.
How to Laser Engrave Metal Successfully Step by Step

Successful laser engraving on metal demands careful preparation, precise machine setup, and close attention throughout the process. You begin by preparing your design in the laser software, making sure it meets the engraving requirements for the metal type and machine you’re using. Proper metal placement and securing it firmly prevents shifting during engraving, which could ruin your work. Monitoring the laser’s power and speed during the run is critical, especially with harder metals like stainless steel that need more energy to produce clean results.
- Create and upload your design file. Use compatible software with your laser machine to prepare your artwork. Keep lines and details clear and high contrast for best engraving quality. Save the file in the format your machine supports, typically SVG or DXF for vector designs.
- Place and secure the metal object. Position the metal flat on the engraving bed, using clamps or fixtures to prevent any movement. Ensuring the area to be engraved is clean and free of oils or dust will improve the final mark.
- Set the laser parameters. Adjust power, speed, and frequency based on your metal and the effect you want, higher power and slower speeds for deeper engraving, lower power for marking. For stainless steel, expect to use higher settings than for aluminum. Consult your machine manual for recommended ranges.
- Perform a test run on scrap metal. This step helps verify your design placement, machine settings, and how the metal responds before working on the final piece. It reduces waste and ensures quality.
- Start the engraving process. Begin the laser run and monitor progress to catch issues like shifting, insufficient power, or machine errors promptly. Adjust settings if needed between passes for optimal results.
- Inspect the engraved metal. Check for clean lines, consistent depth, and absence of burn marks or discoloration. If the engraving is too shallow or faint, increase power slightly and repeat the process.
- Apply any required finishing. Depending on your metal and design, you may polish the piece or use post-processing techniques to improve contrast or protect the engraving. Follow recommendations specific to your metal type to avoid damage.
Following these detailed steps helps you achieve professional-quality laser engravings on various metal surfaces. Exact settings and post-processing may vary according to the metal alloy, surface finish, and laser type, so adjust carefully and take your time to learn your equipment’s behavior. A fiber laser is recommended for metal engraving projects due to its efficiency and versatility across different metals.
Which Types of Lasers Can Engrave Metal and When to Use Them
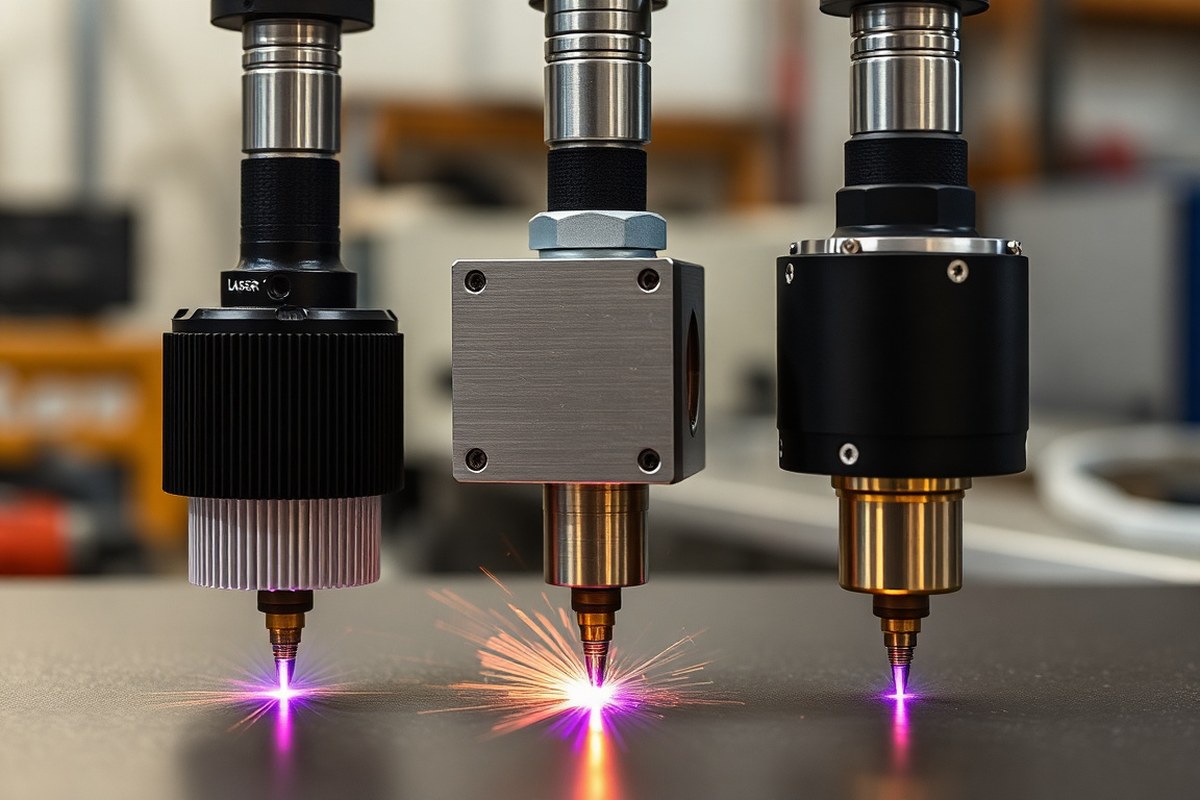
Fiber, CO2, diode, and infrared lasers each offer unique strengths and weaknesses for metal engraving. Choosing the right laser depends on the metal’s surface, color, and whether it is bare or coated. Fiber lasers excel at engraving bare metals like stainless steel, brass, copper, titanium, gold, and silver. These lasers operate efficiently because bare metal absorbs their 1064nm infrared wavelength well, allowing for clean, sharp, and lasting results.
CO2 lasers struggle to engrave bare metal directly because their wavelength tends to reflect off the surface. However, they can engrave coated or anodized metals when used with laser marking sprays or on anodized aluminum. Diode lasers, often more affordable and beginner-friendly, cannot mark bare, reflective metals effectively but work well on anodized, painted, or otherwise coated metals by generating heat oxide marks.
Infrared lasers (typically fiber laser modules with 1064nm wavelength) provide strong power for engraving bare metal directly but require higher investment and experience to operate safely and effectively. Diode lasers usually operate between 5W and 20W power, making them suitable for coated metals rather than bare metal. CO2 lasers work best between 40W and 100W, ideal for coatings but insufficient alone for bare metal. To help decide which laser fits your metal engraving project, consider the following table:
| Laser Type | Bare Metal Engraving | Coated / Anodized Metal Engraving | Typical Power Range | Best For Beginners? |
|---|---|---|---|---|
| Fiber / 1064nm IR | Yes (stainless, brass, copper, titanium, gold, silver) | Yes | 20W, 50W+ | No (Intermediate use) |
| Blue Diode Laser | No (bare, reflective metal) | Yes (anodized, painted, sprayed metal) | 5W, 20W | Yes (coated metals only) |
| CO2 Laser | No (without marking spray) | Yes (with laser marking spray or anodized aluminum) | 40W, 100W | Yes (coated metals only) |
Using a fiber laser gives you direct metal engraving with excellent detail and permanence, but expect a higher cost and learning curve. Diode lasers offer affordable marking of coated metals, excellent for stainless steel flasks with anodized surfaces or painted items. CO2 lasers become viable for metal engraving only if the metal has a protective coating or a spray that reacts to the laser beam.
Never attempt to engrave bare metal with a CO2 or diode laser without coatings or marking compounds, it results in poor marks or no engraving due to light reflection.
For coated metals like anodized aluminum or painted steel, a diode or CO2 laser provides reliable, clean marks at lower cost and power levels. Bare, reflective metals require the absorption efficiency of fiber or infrared lasers for lasting engravings. Matching laser type to metal and surface conditions ensures efficient use of time, power, and equipment investment.
Preparing Metal Surfaces for Clean Laser Engraving
Preparing metal surfaces properly is key for crisp, clear laser engraving results. Clean, smooth, and correctly coated metal ensures the laser light interacts well with the material, preventing faint or uneven marks. Different metals, finishes, and laser types require specific surface preparation steps to achieve the best outcomes.
Cleaning and Degreasing Metal for Laser Engraving
Start by thoroughly cleaning the metal surface to remove oils, dirt, fingerprints, and oxidation. Contaminants can scatter laser light, leading to uneven engraving or poor contrast. Use a degreaser or isopropyl alcohol applied with a lint-free cloth. Wipe the area until it looks visibly clean and dry before engraving. Avoid leaving streaks or moisture behind, as these can interfere with the laser’s precision.
For metals with visible oxidation or rust, lightly polishing the surface or using a mild abrasive to remove the buildup helps restore a uniform base. This is especially important for aluminum, stainless steel, and brass, where the laser’s interaction depends on a consistent surface condition. A clean, dry surface is the foundation for a consistent mark or cut.
Sanding and Surface Roughening Techniques
Sanding can improve laser engraving quality on highly polished or smooth metals. Very shiny surfaces tend to reflect laser light, reducing the amount absorbed and weakening the engraving effect. Using fine-grit sandpaper (around 600 to 800 grit) or a scotch-brite pad gently scuffs the surface. This matte finish helps the laser beam penetrate and interact with the metal rather than bounce off.
When sanding, work evenly across the area to avoid creating low spots or uneven textures. After sanding, clean the dust away with alcohol or a clean cloth. Do not skip cleaning after this step since sanding particles can interfere with laser focus and marking quality.
- Lightly sand polished metals to reduce reflectivity
- Use 600, 800 grit sandpaper or fine abrasive pads
- Apply even pressure to avoid uneven surfaces
- Clean thoroughly after sanding to remove dust and residues
- Skip sanding on powder-coated or anodized surfaces unless recommended
Powder-coated and anodized finishes usually don’t need sanding, as the coating provides a stable base for engraving or marking. Damaging these surfaces could reduce the quality or durability of the mark.
Applying Coatings or Marking Sprays When Required
CO2 lasers do not engrave bare metal directly due to their light wavelength mostly reflecting off metal surfaces. They require a special laser marking spray applied before engraving. These sprays create a dark layer that absorbs the laser beam, allowing it to create a visible image by discoloration or removal of the coating. Spray evenly and let the metal dry for 3 to 5 minutes to ensure a clean, consistent layer.
Fiber lasers and other infrared lasers with wavelengths near 1064nm typically do not need these coatings since metal directly absorbs the laser light. However, for tricky metals or very smooth surfaces, marking sprays can improve contrast and consistency. These sprays usually cost between $20 and $50 per bottle, covering several square feet of surface.
- Use laser marking spray only with CO2 lasers on bare metal
- Spray a thin, even layer and allow to dry for 3 to 5 minutes
- Do not over-spray or allow pooling, which reduces engraving quality
- Test spray compatibility on a small area before full engraving
- Fiber and diode lasers often do not need marking sprays
Following these preparation steps helps ensure visible, repeatable, and high-contrast laser engraving results whether the metal surface is raw, polished, or coated. Skipping cleaning or coating steps can cause faint marks, inconsistent depth, or damage to the material’s finish.
Choosing the Right Laser Settings: Power, Speed, and Frequency
Adjusting power, speed, and frequency settings properly is key to successful metal laser engraving, especially with stainless steel. Start with a high power setting around 100%. Stainless steel needs this because it is dense and reflective, requiring more energy to mark clearly. For speed, begin between 100 and 200 mm/s. Slower speeds allow the laser longer contact time, resulting in deeper or more defined engravings. Frequency should be set between 20 and 30 kHz depending on the desired finish, lower frequencies can produce deeper, more pronounced marks, while higher frequencies enable smoother surface finishes.
Test your settings on scrap pieces of the same metal before engraving your final product. For deeper engraving, keep power high and reduce speed incrementally by 10 to 20 mm/s per test to increase depth without overheating. For surface marking or annealing effects that don’t alter the metal depth, use higher speeds and moderate power to create contrast without cutting into the material. Fine-tuning the frequency also affects quality; lower pulse frequencies produce sharper, well-defined edges but might increase heat-affected zones. Higher frequencies spread out the energy and minimize heat, resulting in cleaner surface marks but shallower engraving.
The following table provides starting points for stainless steel laser engraving. Adjustments depend on your machine and the effect you want.
| Parameter | Deep Engraving | Surface Marking | MOPA Color Engraving |
|---|---|---|---|
| Power | 100% | 60% – 80% | 40% – 60% |
| Speed (mm/s) | 100 – 150 | 180 – 200 | 150 – 180 |
| Frequency (kHz) | 20 – 25 | 25 – 30 | 20 – 30 (varies for color) |
| Passes | Multiple passes | Single pass | Single to multiple passes (for color shading) |
Good results show an even, legible engraving with clean edges and no excessive melting or discoloration. Problems like burning, warping, or poor contrast often come from too high power combined with slow speed or incorrect frequency. Controlling these settings allows you to produce tactile deep engravings, subtle surface marks, or color effects on stainless steel. Always refine your settings by small increments during tests and document them for consistent future use.
Which Metals You Can Laser Engrave and How They Differ
Not all metals respond the same way to laser engraving. Some metals are naturally easier to engrave because their surfaces allow for cleaner markings and better contrast. Coated metals like anodized aluminum or powder-coated steel are especially beginner-friendly because the laser vaporizes the coating, revealing a sharp and clear design underneath without needing high power. Fiber lasers are the ideal choice for engraving raw metals such as stainless steel, brass, and aluminum, as they handle metal’s hardness effectively, producing durable and clear results.
Raw aluminum and brass can be engraved with a fiber laser, but they require more precise settings compared to coated metals. Raw aluminum tends to be harder to engrave with lower contrast outcomes because it lacks a surface coating that absorbs laser energy well. Brass shows a warm tone finish and requires careful adjustment for optimal results. Softer metals like brass and sterling silver generally allow for easier engraving, using less laser power and reducing stress on the equipment.
| Material | Difficulty | Contrast Quality | Recommended Laser | Beginner Rating |
|---|---|---|---|---|
| Anodized Aluminum | Easy | High | Diode / CO₂ | ⭐⭐⭐⭐⭐ |
| Powder-Coated Steel | Easy | High | Diode / CO₂ | ⭐⭐⭐⭐ |
| Stainless Steel (Fiber) | Medium | Medium, High | Fiber | ⭐⭐⭐ |
| Brass | Medium | Warm tone | Fiber | ⭐⭐⭐ |
| Raw Aluminum | Hard | Low | Fiber | ⭐⭐ |
Using a CO₂ laser without a coating on metals like raw aluminum or steel will likely lead to poor engraving results. These lasers are better suited to coated surfaces or non-metal materials. To use a CO₂ laser on uncoated metals, first apply a surface coating such as a specialized marking spray or paint. The coating vaporizes under the laser beam, producing contrast and protecting the underlying metal.
Always test your laser on a scrap piece of the metal to dial in the right power and speed settings before starting a final project.
Fiber lasers outperform CO₂ lasers on most raw metals because they work at wavelengths that metals absorb better. This laser type can engrave quickly and deeply without needing extra coatings. Beginners will find anodized aluminum or powder-coated steel easier to work with as those coatings simplify marking and improve contrast. As you gain experience, you can explore raw and harder metals like brass and stainless steel to produce more refined effects.
Engraving Curved and Cylindrical Metal Objects Using Rotary Attachments
Using a rotary attachment is essential for laser engraving curved or cylindrical metal objects like tumblers and bracelets. This device rotates the object steadily, allowing the laser to mark the entire surface evenly. Without a rotary attachment, engraving curved items would be limited to flat sections, missing the continuous wraparound designs you often want on such metals.
Installing and Calibrating the Rotary Attachment
A rotary attachment consists of a motorized chuck or wheel that holds and spins the curved metal item during engraving. Installation involves mounting it securely to your laser engraving machine and aligning it correctly for precise rotation.
Begin by choosing a rotary attachment compatible with your machine and sized for your objects. For example, RA2 Pro and RA3 rotary attachments fit a range of tumblers and bracelets, and some extend up to 115 × 400 mm. Follow these steps for installation and calibration:
- Power off your laser engraver and detach the standard engraving bed or plate if necessary.
- Attach the rotary unit to the engraving machine’s mounting area using the provided screws or clamps.
- Connect the rotary’s motor cable to the machine’s rotary axis port, if applicable.
- Securely fasten the rotary wheels or chuck, adjusting them to match the diameter of your cylindrical item.
- Power on the machine and open your engraving software; select the rotary attachment option.
- Run the machine’s calibration program to align the rotary axis with the laser’s focal point and engraving software settings.
- Test with a sample piece, checking for uniform rotation and consistent marking across the surface.
Calibration ensures the laser stays in focus over the rotating object and the engraving aligns perfectly, avoiding blurred or distorted designs.
Securing and Positioning Cylindrical Metal Pieces
Properly securing the curved metal is important to maintain consistent contact and correct focal distance throughout engraving. Movement or misalignment can cause uneven or incomplete marks.
Use the rotary’s adjustable wheels or chuck to hold the object firmly without slipping. For irregular shapes like bracelets, select attachments with flexible clamps or supports. Make sure the item sits evenly on the rotary bed so it rotates smoothly without wobbling. Keep these tips in mind:
- Check the object’s diameter and adjust the rotary wheels to grip it snugly but without deforming the item.
- Make sure the curved surface is clean and free of debris to ensure good engraving results.
- Position the item so the area to be engraved faces the laser properly and lies at the correct height for optimal focus.
Uniform contact maintains accurate focal distance between the laser and metal surface. Uneven positioning often leads to inconsistent engraving depth or blurry edges.
Adjusting Laser Settings for Curved Surfaces
Laser parameters for engraving curved metal require fine-tuning to compensate for the changing angle and distance as the object rotates. Objects like tumblers usually have a coated surface that reveals shiny metal once engraved.
Start with settings recommended for your specific laser and metal, adjusting power and speed to avoid burning the coating or under-engraving the metal underneath. For example, medium power with slower speed often works well on stainless steel tumblers to expose the metal beneath a painted layer.
The laser travels around the rotating item, following the design path. The rotary attachment must maintain the correct speed and alignment so the laser marks the metal precisely without distortion. To optimize results:
- Set the rotary speed to match the laser’s marking speed, preventing overlapping or gaps in the engraving.
- Adjust focus height carefully; curved surfaces may require raising or lowering the focal plane by small increments (1-2 mm) to maintain sharpness.
- Use test pieces to refine settings and confirm clean, permanent markings without damage to the metal or coating.
Well-adjusted settings will create crisp, detailed engravings that follow the curve evenly, with high durability as the laser alters the metal surface permanently.
Safety Precautions When Laser Engraving Metal
Laser engraving metal requires strict safety measures to protect your eyes and skin, control hazardous fumes, and manage the risks of laser reflections and fire. You need properly rated protective gear, good ventilation or fume extraction, and special care when working with highly reflective metals to prevent accidents and damage.
Wearing Proper Eye and Skin Protection
Always wear laser safety glasses that match the wavelength of your laser. Using the wrong glasses can leave your eyes vulnerable to damage from invisible or intense laser light. Protective gloves and clothing help shield your skin from burns and metal shards. Here’s what you need for effective personal protection:
- Laser safety glasses rated specifically for your laser’s wavelength (e.g., 10.6 µm for CO2 lasers or 1.06 µm for fiber lasers)
- Heat-resistant gloves to handle hot metal pieces after engraving
- Long sleeves and non-flammable clothing to protect exposed skin
- Closed-toe shoes to protect feet from falling metal bits
Failing to wear proper protection can result in eye injuries, burns, and cuts. Always inspect your protective gear for damage and replace it as necessary to maintain safety standards.
Ensuring Adequate Ventilation and Fume Extraction
Laser engraving metal releases smoke, metal vapors, and other hazardous fumes. You need a ventilation or fume extraction system designed to remove these contaminants effectively. Without this, toxic fumes can accumulate and pose health risks over time. A good ventilation setup includes:
- Exhaust fans or dedicated fume extractors positioned close to the laser engraving area
- High-efficiency particulate air (HEPA) filters combined with activated carbon filters to capture fumes and odors
- Regularly maintained ductwork to prevent blockage or buildup
- Ventilation that exchanges the air in the workspace at least 6 to 10 times per hour
Always operate your laser engraving machine in a well-ventilated area or use a certified fume extractor to meet local safety codes. Monitor the air quality when working for extended periods and take breaks to reduce exposure.
Handling Reflective Metals Safely
Highly reflective metals such as aluminum, copper, and polished stainless steel can reflect the laser beam, which may harm your machine or cause fire hazards. Use laser settings appropriate to the metal type to minimize reflection, and consider applying a coating or engraving spray to dull the surface before engraving. To keep reflections under control, follow these tips:
- Use lower power and slower speeds initially to test how the metal reacts to the laser
- Apply a thin layer of masking tape, heat-resistant engraving spray, or laser marking fluid to reduce reflectivity
- Position a beam stop behind or under the metal to capture stray laser light
- Keep a fire extinguisher nearby to respond quickly to possible ignition from reflections or hot metal pieces
- Handle freshly engraved metal carefully since cut edges may be sharp
Ignoring reflection risks can damage the laser’s optics and create serious safety hazards. Adjust your approach based on the metal’s reflectivity, surface finish, and laser type for the safest outcome.
Common Mistakes and How to Fix Them in Metal Laser Engraving
Uneven or shallow engraving often results from incorrect laser focus. When the laser beam isn’t sharply focused on the metal surface, the mark spreads out, leading to a blurry design with inconsistent depth. To fix this, adjust the lens height according to your laser’s manual, checking focus on a scrap piece before moving to the final item.
Engravings that are too light often mean the laser power is too low or the speed is too fast. Increase power in small increments, about 5 to 10 percent at a time, and slow down the speed slightly to give the laser more time to etch the metal. For deeper engraving, use a laser capable of higher wattage, since diode lasers typically only produce surface marks on metals like brass and stainless steel.
Burn marks and discoloration happen when the laser’s power is too high or the metal surface has dirt, oil, or other contaminants. These spots absorb more heat, causing unwanted burns and color changes. Clean the metal thoroughly with isopropyl alcohol before engraving, and reduce laser power or increase speed if the discoloration persists. Using air assist also helps keep the metal cool and blow away debris, minimizing burn marks.
- Check and readjust laser focus regularly to maintain sharp engraving.
- Test on scrap metal to find the right balance of power and speed.
- Clean metal surfaces thoroughly before starting to avoid burns and discoloration.
- Use higher-powered lasers for deep engraving; diode lasers suit surface marking only.
- Enable air assist or use external cooling to prevent overheating and char.
- Avoid using overpowered settings on thin metals to prevent warping or melting.
Always test settings on a scrap piece first to avoid wasting materials and damaging expensive metal parts.
Uneven results often show where the laser moves faster or slower due to a design setting or machine issue. Double-check your software’s speed controls and make sure the metal is securely clamped to prevent shifting. Consistent laser engraving requires steady motion coupled with the right settings for the metal type and thickness.
Design Tips and File Preparation for Crisp Metal Engravings
Use vector file formats like SVG, AI, or DXF for laser engraving metal. These formats keep your artwork scalable and precise, which is key for detailed work. Raster files such as BMP, PNG, or JPEG can work but often lose sharpness when resized and may produce lower quality engraving results. Vector files ensure the laser follows clean lines that translate directly into crisp engravings on metal surfaces.
Format your design by simplifying it and using high contrast elements. Thicker lines, usually no thinner than 0.001 inches (0.025 mm), help prevent the laser from missing detail or causing inconsistent engraving. Keep text sizes above 6 points to maintain legibility after engraving. Avoid very fine details, gradients, or complex shading, which don’t translate well on metal and can blur during etching.
- Use vector formats like SVG or DXF for sharpness.
- Keep lines at least 0.001 inches thick to avoid breaks.
- Avoid gradients and fine shading; use solid fills instead.
- Choose text size larger than 6 points for clarity.
- Set artwork color to black on a white background for best contrast.
- Remove any unnecessary small elements that could clutter the engraving.
- Place your design accurately on the canvas to match engraving position on the metal.
Design elements to avoid include thin, fragmented lines and overly complex details. These can cause unwanted gaps or shallow marks because the laser might not vaporize the metal evenly at such a fine scale. Avoid overlapping shapes and ensure paths are closed to prevent engraving errors. Simplify your artwork for metal engraving by focusing on bold, clear shapes that stand out distinctly once etched.
To prepare files, set your software to output in a vector format at 300 dpi or higher if raster layers are included. Use a consistent stroke color, preferably black, so the laser software can easily recognize the engraving areas. Save older designs as separate layers or files so you can adjust specific parts without redoing the entire artwork. For precise placement, measure the metal piece and match the workspace size in your design program. This reduces guessing during setup and avoids material waste.
How Surface Finish Affects Laser Engraving Results on Metal
Polishing metal before laser engraving can affect the final result, but it doesn’t always improve it. A highly polished surface reflects the laser beam, reducing the energy absorbed by the metal and potentially leading to weaker or uneven engravings. For example, polished stainless steel may require higher laser power or slower speeds to achieve good contrast. Rougher or matte finishes absorb laser energy better, often creating clearer and more consistent engravings. This means a polished finish could hinder engraving unless you adjust your laser settings carefully.
Anodized metal offers one of the best contrasts for laser engraving. Since the laser only needs to remove the thin dyed oxide layer on the surface, low to mid-power diode lasers can produce crisp, high-contrast results quickly. This is why anodized aluminum tags, cards, and tumblers are widely popular. The laser vaporizes just the anodized coating without damaging the underlying metal, creating clear, dark markings against the colored background. If you work with anodized metal, make sure the surface is clean and free from oils or dust to ensure uniform engraving.
Powder-coated metals behave differently under laser engraving. The laser vaporizes the powder coating, exposing the bare metal underneath. This gives sharp contrast between the colored coating and the shiny or matte metal below. Powder coating is often preferred when you want to add durable, colorful protection to a steel or aluminum part and then customize it with a laser-engraved design. It is especially useful for products that need weather resistance or extra scratch protection. When using powder-coated metal, secure the piece firmly to prevent vibrations during engraving, which can cause uneven edges.
Choosing the right surface finish depends on the type of metal and the look you want. Polished surfaces might require more trial and error to dial in your laser’s power and speed, especially on hard metals like stainless steel. Anodized finishes are excellent for high-contrast, low-effort engraving with entry-level lasers. Powder-coated metals provide durable, colorful bases that engrave well but may need slightly higher power settings. Taking the time to clean and securely hold your metal piece before engraving will help achieve crisp, repeatable results regardless of the finish.
Maintenance and Care for Metal Laser Engraving Machines
Keeping your metal laser engraving machine well-maintained ensures consistent performance and extends its operating life. Clean the optics and lenses at least once a week if you use your machine regularly. Dust, smoke, and metal particles can build up quickly during engraving, reducing the laser’s power and clarity. Use a specialized lens cleaning solution and a lint-free cloth or lens tissue. Gently wipe in a circular motion, avoiding harsh pressure that can scratch delicate coatings. Regular cleaning prevents distortion in your engravings and costly lens replacements.
Lubricate moving parts such as rails and bearings every 40 to 50 hours of operation. Use a light machine oil or grease recommended by your machine’s manufacturer. Avoid over-lubricating since excess oil can attract dust and debris, leading to mechanical wear. Check your machine’s belts and pulleys monthly for signs of wear or slackness and replace any that appear cracked or damaged. Proper tension and alignment avoid skipping steps or vibrations that blur engraving details.
- Clean optics and lenses weekly using lens cleaner and lint-free cloth
- Lubricate rails, bearings, and linear guides every 40, 50 hours
- Inspect belts and pulleys for damage or slack monthly and replace as needed
- Empty exhaust and air filters regularly to maintain airflow and smoke extraction
- Check electrical connections periodically to ensure secure contacts
- Run diagnostic tests or calibration routines as advised in your user manual
Common mechanical problems include unusual noises, misalignment of the laser head, or inconsistent engraving depth. Troubleshoot by first cleaning and lubricating the machine, tightening loose screws, and recalibrating the system. For example, if you notice uneven engraving depth, check the laser focusing lens for cleanliness and adjust the focal distance according to manufacturer instructions. Mechanical noises often signal worn bearings or belts requiring replacement. Keep spare belts and cleaning supplies on hand to minimize downtime.
Always switch off and unplug your laser engraver before performing any maintenance to avoid electrical shock or damaging sensitive components.
Maintaining a detailed log of your cleaning, lubrication, and part replacements helps track when the next service is due and identifies recurring issues early. Some high-end machines might offer automatic notifications for maintenance, simplifying upkeep. Investing time in regular maintenance costs little compared to replacing expensive lenses or repairing motors. A well-kept laser engraver delivers sharper, more precise metal engravings for your projects or small business production.
Step-by-Step Action Plan for Starting Metal Laser Engraving
Follow this plan to set up your metal laser engraving projects and achieve clean, detailed results efficiently.
- Before you start: Select the metal type and clean the surface with isopropyl alcohol to remove dirt or oils. You’ll know it’s ready when the metal looks uniformly clean and dry.
- Day 1: Choose the laser type based on the metal, fiber lasers for stainless steel, CO2 lasers with marking sprays for coated aluminum. Confirm the laser model settings match your material’s focus and wavelength.
- Day 2: Configure your laser’s power, speed, and frequency using recommended settings for your metal, adjusting on test pieces until you see crisp, legible marks without burning or melting.
- Week 1: Prepare your design file in vector format, clean paths, and simplify details to avoid engraving errors. Load the file and run a preview to ensure alignment on the metal surface.
- Week 2: Attach a rotary device if engraving cylindrical objects, and practice positioning the metal for even engraving. Test on scrap metal until the engraving depth is consistent around the curve.
- After 2 weeks: Develop a routine for machine maintenance, including lens cleaning and lubrication, to maintain quality engraving results and extend equipment life.
- Ongoing: Monitor safety measures continuously, wear protective eyewear, ensure proper ventilation, and handle materials according to guidelines. Address any engraving flaws by rechecking settings or surface cleanliness.
Frequently Asked Questions
Can I Laser Engrave Metal with a CO2 Laser Alone?
A standard CO2 laser cannot engrave bare metal on its own. It only affects metal surfaces that have coatings or have been treated with specific sprays intended for laser marking.
Is a Diode Laser Good for Metal Engraving?
Yes, diode lasers can engrave stainless steel and some coated metals. They are a more affordable option but typically less powerful than fiber lasers for metal.
Do I Need Different Lasers for Metal and Non-Metal Materials?
Many users combine a fiber laser for metal and a CO2 laser for wood or acrylic. Some machines integrate both types, or you may need two separate engravers.
How Does the Laser Type Affect Metal Engraving Quality?
Fiber lasers are best because metal absorbs their light efficiently, producing clean, sharp results. Other lasers like CO2 or diode have limits on the metals they can engrave well.
Can I Use a Laser to Engrave Anodized Aluminum?
Yes, a CO2 laser can work on anodized aluminum since the coating helps the laser mark the surface cleanly. Plain aluminum requires a fiber laser instead.
Should I Get a Fiber Laser If I Only Want to Engrave Metal?
Yes, a fiber laser is the ideal choice for serious metal engraving projects, offering speed, detail, and durability. They are built to handle metal better than other laser types.
Final Thoughts
Mastering metal laser engraving takes patience and the right technique, but with consistent effort, you can produce sharp, professional-quality marks on a variety of metals. Start by testing settings on scrap material before moving to final products. Take the next step by setting up your laser environment for safe and effective work today.