Vertical vs Horizontal House Numbers: How to Choose for Best Visibility & Style
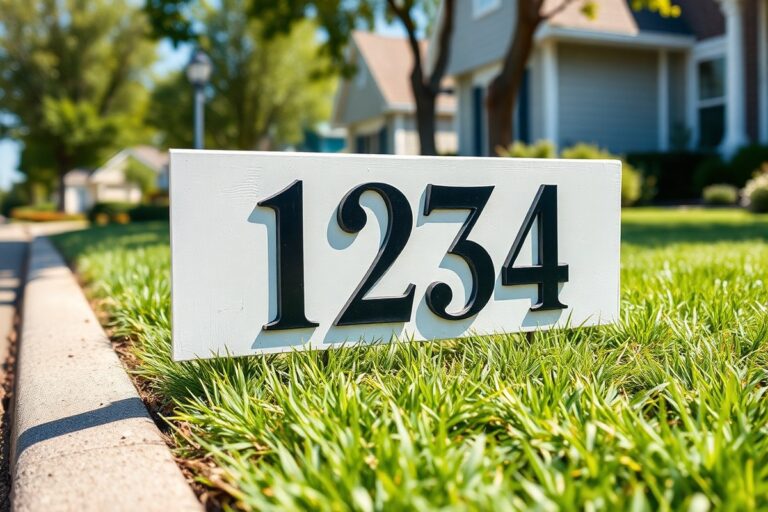
Choosing between vertical vs horizontal house numbers depends on your home’s style, the available mounting space, and visibility needs. Horizontal numbers suit wider spaces and offer easy reading at a glance, while vertical numbers work well for narrow spots and can add a modern touch. Start by measuring your space carefully and ensuring each digit is at least 4 to 6 inches tall for optimal readability.
Key Takeaways
- For house numbers to be readable from 50 feet, urban homes require digits that are at least 4 inches tall, while suburban homes need numbers between 6 and 8 inches in height.
- Vertical numbers must have tighter spacing, 20 to 30 percent less, between digits than horizontal layouts for balanced appearance.
- Place numbers between 4 and 5 feet above ground to align with typical eye-level for best visibility from the street.
- Numbers shorter than 4 inches do not meet IFC 505.1 fire safety compliance, regardless of vertical stacking height.
- Choose contrasting colors from the background to improve visibility during day and night conditions, as recommended by local fire departments.
- Use a digital level when installing horizontal numbers to keep them within 0.5 degrees of perfectly horizontal.
Key Differences Between Vertical and Horizontal House Numbers
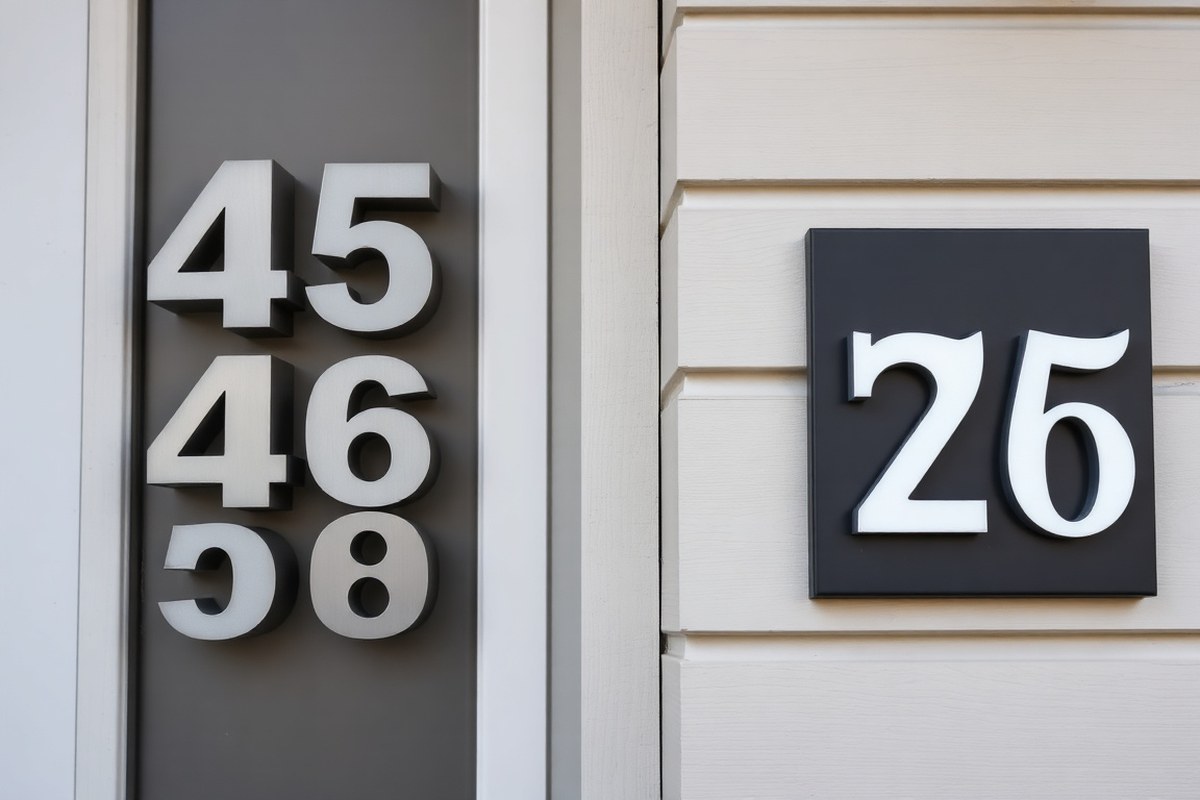
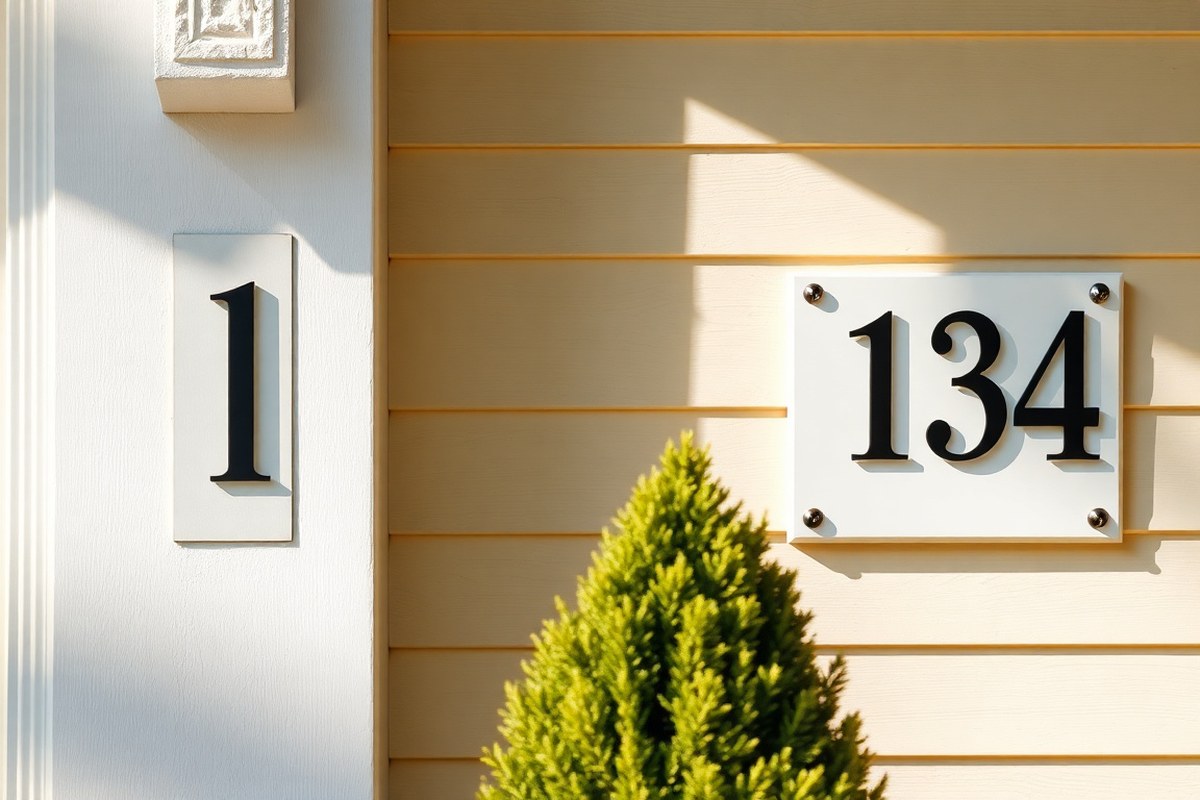
The key difference between vertical and horizontal house numbers lies in their physical layout and typical use. Horizontal numbers arrange digits side-by-side, spreading out left to right, while vertical numbers stack each digit on top of the other in a straight column. This distinction affects size, spacing, and where each style fits best on a home’s exterior.
Horizontal house numbers require a wider surface because each digit is placed next to the previous one. The spacing between digits horizontally needs to be enough for quick readability, usually a gap close to the width of a digit. This layout suits wide, flat areas such as garage walls, mailbox faces, or broad fence rails. It works well with 2 to 6 digits, making it ideal for standard address numbers. Horizontal numbers follow the familiar left-to-right reading pattern, which usually translates into the fastest recognition.
Vertical house numbers are stacked tightly in a column, which conserves horizontal space but demands more vertical clearance. Vertical gaps generally need to be 20 to 30 percent tighter than the spacing used between horizontally arranged numbers to maintain legibility. This orientation fits narrow spots like door frames, slim siding panels, posts, or entry pillars where horizontal space is limited. However, vertical layouts perform best with 2 to 4 digits; longer numbers can become visually cluttered and harder to read quickly.
Many designers pick vertical numbers for modern residential homes or architectural styles because the stacked format complements lines and columns common in contemporary designs. Vertical numbers also avoid distortion when mounted on round columns or pillars, where horizontal numbers might curve away from the viewer’s line of sight. By contrast, horizontal numbers deliver a classic, universal style that suits a broader range of home exteriors, including traditional and symmetrical facades.
Street address visibility often determines which format to use. Horizontal numbers offer a quick left-to-right reading speed, advantageous for drivers or emergency responders needing rapid identification. Vertical numbers might slow reading since the eye moves top to bottom. However, when mounted on narrow surfaces or vertical features, they can be easier to place neatly and maintain code compliance, though each digit still needs to be large enough to meet local fire or building codes.
Typical installation techniques also differ. Horizontal numbers may require special drilling tools like a self-centering Vix bit when mounted on fiber cement siding with standoffs, aligning precisely to the post threads. Vertical numbers usually need careful vertical alignment but less horizontal measurement complexity. Understanding the size of digits and spacing helps prevent common problems like overcrowded numbers or awkward visual breaks that reduce legibility.
Choosing between vertical and horizontal house numbers comes down to matching the number format with your home’s surface constraints, style, and the number of digits involved. Horizontal numbers generally fit wider spaces and longer addresses, while vertical numbers excel in narrow locations with shorter digit counts. Paying attention to exact size, spacing, and mounting surface ensures the numbers remain readable and compliant with safety guidelines.
Visibility and Legibility: Which Orientation Works Best?

Horizontal house numbers generally offer better visibility from the street during the day, especially when viewed head-on. Their wider layout makes them easier for drivers and passersby to scan quickly, which is why emergency responders often prefer this orientation. Numbers that are at least 4 inches tall with a minimum 0.5-inch stroke width provide good legibility at typical street distances up to about 30 feet. This sizing rule helps ensure readability without forcing the numbers to be so large that they dominate the home’s facade.
Vertical house numbers perform better when the viewing angle shifts away from direct front-on perspectives, such as on homes located at corners or on curved streets. Their stacked design also fits well on narrow surfaces like posts or door frames, helping keep them visible when horizontal space is limited. Each digit must maintain that same minimum height and stroke width independently to remain clear. For vertical layouts, placing the numbers closer to the street may improve legibility, since the profile is naturally narrower and can be harder to spot from a distance.
Night-time legibility depends heavily on lighting and contrast. Numbers painted or mounted in a light-reflective or contrasting color against their background stay easier to read in twilight or darkness. Adding backlit or LED-lit house numbers improve nighttime visibility greatly. Positioning numbers about 4 to 5 feet above the ground keeps them within the average driver’s and pedestrian’s eye level, improving both day and night legibility by avoiding taller or tucked-away spots that create shadows or glare.
When considering viewing angles, horizontal numbers work best directly facing the street. Their flat orientation can lose clarity if wrapped around curved surfaces, which causes parts to face away from viewers. Vertical numbers are better suited to side angles, which makes them a smart choice on entryway columns or gate posts. To ensure fast readability speed, spacing should avoid crowding the digits. Cramped layouts reduce how quickly someone can recognize the number, especially while driving.
Regularly check that landscaping or decorations do not block any part of your house numbers, especially with vertical layouts where gaps easily collect debris.
How Fire and Emergency Response Codes Influence Number Choices
Emergency response standards like IFC Section 505.1 define specific size, position, and color contrast requirements for house numbers to help first responders locate addresses fast. Each digit needs a minimum height of 4 inches and a stroke thickness of at least 0.5 inches to meet the rules. Vertical stacks only comply when each digit in the stack meets these measurements on its own. Using smaller digits in a vertical arrangement results in noncompliance and can create safety risks.
Good color contrast between house numbers and their background is critical for night visibility. Digits must reflect enough light, with vertical numbers requiring at least 50 cd/lux per square meter of retroreflectance on each figure. Horizontal numbers tend to maintain their size better without shrinking digits to fit vertical space limits. Because of this, fire codes often favor horizontal layouts since they can be read faster from vehicles in motion.
The recommended mounting height for house numbers generally ranges from 3 to 5 feet above ground, according to fire safety codes. This height balances visibility from the street and reduces obstructions for emergency crews reaching the property. Numbers set horizontally can spread wider at this height, while vertical stacks grow upward, sometimes needing poles or taller surfaces for proper display.
Spacing between digits also follows strict guidelines to prevent crowding or confusion. These measurements vary depending on digit size and orientation. Using a calibrated digital vernier caliper is recommended to verify spacing with precision down to 0.01 mm. The following table summarizes the minimum digit heights and required gaps between numbers for horizontal and vertical installations according to IFC standards:
| Digit Size | Recommended Gap Between Horizontal Digits | Minimum Gap Horizontal | Recommended Gap Between Vertical (Stacked) Digits | Minimum Gap Vertical |
|---|---|---|---|---|
| 3 to 4 inches tall | 0.5 inch | 0.25 inch | 0.5 inch | 0.375 inch |
| 5 to 6 inches tall | 0.75 inch | 0.5 inch | 0.625 inch | 0.5 inch |
| 7 to 9 inches tall | 1 inch | 0.75 inch | 0.75 inch | 0.625 inch |
| 10 inches or taller | 1.25 to 1.5 inches | 1 inch | 1 inch | 0.75 inch |
Maintaining these gap sizes helps digits stay distinct and readable from various angles and distances. Try to select the largest digit size you can fit while preserving at least the minimum gaps. For a 5-digit vertical stack, this might mean very large digits requiring a much taller mounting surface, or else digits smaller than 4 inches that fail fire code compliance. Horizontal house numbers avoid this tradeoff by laying digits side by side and keep full size without forcing tight vertical stacking.
When measuring installation height or digit gaps, use tools like a standard tape measure or a digital vernier caliper for precision. Always check local jurisdiction codes as they can require digits 6 inches or taller for homes set back more than 50 feet from the street. Color and placement matters too, so pick reflective finishes tested for UV durability to keep numbers visible year-round. Following these exact guidelines helps prevent delays in emergency response and keeps your home safer.
When to Choose Vertical House Numbers: Situations and Styles
Vertical house numbers suit narrow spaces and tall, slim architectural features where horizontal numbers would either not fit well or appear disproportionate. They offer efficient use of limited mounting areas like posts or facades with column strips and complement modern or mid-century styles especially well. Vertical orientation also works best where the viewer’s line of sight or street approach favors a stacked layout for clearer identification.
Narrow Mounting Locations
Vertical numbers excel in narrow spaces such as slim siding strips, metal doors, or column posts where horizontal arrangements lack room. They fit compactly without crowding, making them ideal for narrow entryways or small porch pillars. For example, many mid-century modern homes use vertical numbers mounted with floating standoffs on slender columns, maintaining clarity while respecting spatial constraints.
Mount vertical numbers so they align centrally along the narrow surface to avoid awkward off-center balance. Using numbers 4 to 6 inches tall balances visibility without overwhelming the mounting area. Most vertical sets come with hidden mounting hardware and spacers that keep the numbers about half an inch from the surface, improving shadow contrast for legibility.
- Narrow foyer or slim siding panels
- Metal or narrow entry doors
- Posts or column faces especially tall and slim
- Small porch pillars or brick columns with limited width
- Spaces too tight for a horizontal row of numbers
Choosing vertical numbers in these conditions optimizes use of limited space, keeping the numbers readable without cluttering the façade.
Modern and Tall Architectural Styles
Homes with tall, narrow architectural details like mid-century modern facades or column posts benefit from vertical numbers to preserve proportional balance. Vertical orientation complements clean lines and elongated shapes common in modern design without diminishing the house numbers’ presence. Brushed brass or matte black steel vertical numbers mounted on a column strip offer a sleek, intentional look.
Mid-century style favors vertical floating mounts that create a subtle depth effect, which horizontal orientation cannot replicate on thin columns or strips. Vertical numbers that read top to bottom align naturally with tall features, drawing the eye upward to emphasize architectural height. Choosing vertical numbers for ranch or Craftsman styles is less common but can be acceptable on narrow stone columns or slim door frames.
Street and Viewer Angle Advantages
Vertical house numbers perform well on round columns or posts facing the street directly because they wrap naturally around the surface, making the numbers readable from multiple angles. They are also effective where homes sit on narrow or steep lots where the approach is from directly in front or the side along a column. However, from a corner view or angled street stance, horizontal numbers tend to remain more legible as stacked vertical digits may appear edge-on and harder to scan quickly.
For homes with narrow streets or angled approaches, placing vertical numbers on a post visible from the driveway or sidewalk ensures easy spotting by visitors and emergency responders. The stacked layout lets the numbers stand out without requiring a wide mounting surface, helpful where a horizontal sign would extend beyond the sightline or look awkward.
- Round columns wrapping numbers for natural sightline
- Direct frontal street views on narrow posts
- Slopes or narrow lots where side approach is limited
- Locations where horizontal numbers would appear cramped or out of place
- Posts near driveways or walkways for pedestrian visibility
In contrast, avoid vertical numbers where the main view comes from an angle off to the side or a vehicle passes at speed, as horizontal numbers maintain legibility better under those conditions.
Best Cases for Horizontal House Numbers and Their Benefits
Horizontal house numbers work best when installed on broad, flat surfaces where their extended layout improve visibility and balance. They are ideal for homes with wide facades, near driveways, and in traditional architectural styles where a grounded, stable look is desired. Placing house numbers horizontally helps people see the entire address quickly from a straight-on viewpoint, reducing confusion for visitors and emergency responders.
Wide Entryways and Garage Mounting
Wide entryways and large garages offer a perfect backdrop for horizontal house numbers. These spaces have enough room to display numbers side by side, making them easier to read at a glance. Mounting numbers above a garage door or on a broad front wall near the driveway helps guide visitors precisely where to stop. For homes with long driveways or large lots, placing the numbers near the driveway entrance on a post or mailbox can supplement the main horizontal display, improving overall address visibility from the street.
- Mount numbers horizontally on wide garage facades for better legibility
- Install near driveway entrances to assist visitors arriving by car
- Use numbers that contrast with the background for easy reading
- Center the numbers above garage doors to create visual balance
- Choose weather-resistant materials to prevent fading outdoors
Avoid placing numbers where porch furniture or plants can block them, as this decreases visibility significantly.
Traditional and Colonial Style Homes
Horizontal numbers complement traditional and colonial-style homes well. These designs often feature wide, horizontal lines and symmetrical facades where a horizontal number layout feels natural and stable. Placing numbers in a straight line below the porch roof or between windows maintains architectural harmony.
Flat, wide walls on ranch-style homes or colonial fronts benefit from horizontal numbers that span a measured space to create an anchored look. Using classic fonts and durable materials also supports the timeless style these homes convey, while keeping your address easy to spot.
Direct Front Street Visibility
Horizontal placement works best when the house faces the street directly, allowing passersby and emergency services to read the numbers quickly. A straight-on viewing angle reduces distortion and shadowing that can happen with vertical layouts on narrow surfaces. When the numbers stretch horizontally, each digit is spaced comfortably apart, speeding recognition.
To maximize this effect, place the numbers approximately 4 to 6 feet above ground level on a visible area free from obstructions. Contrast the numbers against the background color; for example, white or metallic numbers on dark wood or brick show clearly even in low light. This makes spotting the home easier in varying conditions.
Step-by-Step Installation for Vertical House Numbers
Vertical house numbers require careful alignment and spacing to ensure they are readable, comply with local codes, and complement your home’s design. Measuring accurately, marking a straight vertical line, and using the right anchors for your wall type makes installation secure and precise. Sealing the numbers after mounting protects against weather and moisture damage, especially on materials like aluminum or steel.
Marking a True Vertical Line
Select the location for the vertical number arrangement, often placing it beside features like a porch post or door frame to maintain a balanced design. Employ tools such as a laser level or a long plumb bob to draw a straight vertical guideline on the mounting surface. A digital magnetic plumb bob accurate to 0.1 degrees is ideal for use on painted concrete columns. This ensures the number column is precisely aligned, which is important for visual appeal and readability.
Confirm the surface is clean and dry before marking. Use a pencil or painter’s tape to lightly mark the vertical line without damaging the surface. Avoid relying solely on visual judgement; small deviations can make the stack look crooked from a distance.
Measuring Total Stack Height and Spacing
Calculate the total height of your vertical stack by multiplying the height of one digit by the number of digits, then add the gaps between them. For example, if each digit is 6 inches tall and the gap between digits is 1 inch, a four-digit number has this total height: (6 × 4) + (1 × 3) = 27 inches tall. This measurement does not count toward local height compliance but ensures even spacing.
Choose spacing that balances readability and style, usually 0.5 to 1 inch between digits. Keep the stack at an easily visible height, typically 48 to 60 inches from the ground to the bottom of the lowest digit works well for most entryways.
Use a tape measure and level to mark small horizontal tick marks at the top and bottom edge of where each digit will mount along the vertical line. Double-check spacing and alignment before drilling. Proper spacing avoids crowding and improve visibility.
Drilling, Anchoring, and Sealing
Different wall materials call for specific tools and anchors. For brick or stone, use a masonry bit and sleeve anchors. For drywall or plywood backing, plastic anchors or screws may suffice. Powder-coated steel numbers need medium-strength anchors; cast bronze, being heavier, requires heavy-duty anchors rated for 6 to 14 ounces per digit. Light materials like acrylic or brushed aluminum use smaller anchors to avoid surface damage.
Seal behind and around the numbers after installation with a clear silicone caulk to prevent moisture intrusion and oxidation, especially with aluminum and steel numbers. Avoid visible caulking on the front face for clean aesthetics. Steps for Installing Vertical House Numbers:
- Mark your true vertical line on the mounting surface using a laser level or plumb bob.
- Measure and mark individual digit positions along the line, factoring in digit height and spacing.
- Check alignment again with a digital level, ensuring the line is within 0.5 degrees of vertical.
- Select appropriate drill bits and anchors based on wall material and number weight.
- Drill pilot holes at marked positions and insert anchors as needed.
- Attach each number securely with screws, starting from the bottom digit and moving up.
- Seal around the back edges of each number with clear silicone caulk to prevent moisture damage.
- Wipe away excess caulk and clean the numbers and surrounding wall surface.
Horizontal House Number Installation: Best Practices
Properly installing horizontal house numbers ensures clear visibility and a polished appearance. Consistent spacing and alignment avoid a cluttered or uneven look. Using a template helps maintain even distances between digits and keeps the entire sequence level. Selecting the right anchors based on your mounting surface keeps numbers secure, while weatherproofing prevents rust and fading over time.
Begin by measuring the available space where the numbers will go. Lay out a horizontal line that fits the full sequence comfortably, allowing about 1 to 2 inches between each digit for readability. Templates made from cardboard or plastic simplify marking drill holes exactly where screws should go. Align the template carefully on the wall or siding, using a bubble level to avoid slanting.
Use a drill with a bit slightly smaller than your mounting screws to create precise pilot holes. This helps prevent splitting wood or cracking masonry. Anchors must match the surface type: plastic anchors for drywall, masonry anchors for brick or stone, and screws into studs or solid wood. Weatherproofing includes cleaning the surface beforehand and choosing rust-resistant screws like stainless steel or brass.
- Measure and mark: Determine the overall length of the number sequence, leaving 1 to 2 inches between each number. Use a tape measure to mark start and end points along a horizontal line.
- Position the template: Place a cardboard or plastic template with pre-drilled holes along the measured line. Align it using a bubble level to ensure the numbers will be perfectly horizontal.
- Drill pilot holes: With a drill bit one size smaller than your screws, drill holes at each template mark. This reduces risk of splitting wood or cracking siding.
- Insert anchors: Match anchors to the surface type: plastic anchors for drywall, masonry anchors for brick or concrete, or screw directly into studs for wood surfaces.
- Attach numbers: Position each number over its pilot hole and fasten with rust-resistant screws. Tighten just enough to hold firmly without deforming the number or wall.
- Apply sealant: To prevent moisture damage, apply a clear silicone sealant around each screw head and along the edges of the numbers. This helps block water infiltration.
- Inspect alignment: Step back and visually confirm the numbers are level and equally spaced. Make minor adjustments before the silicone fully cures (usually 24 hours).
Following these steps usually takes less than an hour for a standard set of four or five numbers. Quality installation improves curb appeal and guides visitors or emergency responders effectively. Skipping proper alignment or using incorrect anchors often results in loose numbers or uneven display, which can diminish your home’s exterior appearance.
Common Mistakes to Avoid with House Number Orientation and Installation
One common error homeowners make when placing house numbers is choosing an improper size. Numbers that are too small or too large can harm visibility from the street. For clear identification, numbers should generally be between 4 and 6 inches tall; this size balances legibility with aesthetics and complies with many local codes. Numbers that seem cramped or too large should be resized based on the viewing distance, typically with each digit at least one inch tall for every 30 feet of visibility.
Poor spacing between numbers also reduces readability. Spaces that are too tight cause digits to blend together, while excessively wide gaps make the sequence hard to read quickly. A good rule is to separate digits by about 0.5 to 1 inch. Keep the spacing consistent across all digits to maintain alignment and visual flow.
- Ignoring local building or fire codes for number height and placement
- Mounting numbers crooked or tilted, leading to awkward viewing angles
- Using reflective or glossy finishes that produce glare and reduce legibility
- Placing numbers where shadows fall, decreasing contrast
- Failing to clean surfaces before installation, preventing strong adhesion
- Installing numbers on uneven or textured siding without proper backing
- Neglecting to use mounting hardware suited for the material or weight
Use a level tool during installation to ensure numbers mount straight and align horizontally or vertically as intended.
Crooked mounting happens when homeowners skip verifying alignment or rush the installation. To fix skewed numbers, remove them carefully and reposition using a bubble level or laser level for precision. Also mark positions with pencil outlines before final attachment. When numbers tilt forward or backward, check that the mounting hardware matches the wall material and enables the numbers to sit flat.
Code mistakes typically occur when numbers are too low or placed behind visual obstructions like plants. Most fire codes require house numbers be visible from the street or driveway during day and night. Installing reflective numbers or adding dedicated lighting can improve visibility in low light. Always consult local fire or building codes to confirm minimum size, height above ground (usually between 4 and 7 feet), and placement requirements. This prevents delays or reinstallation costs.
Proper visibility also depends on contrast between number color and background. Select colors that stand out clearly; dark numbers on light siding or vice versa work best. Avoid complex backgrounds like patterned siding or brick that can reduce clarity.
Step-by-Step Action Plan for Choosing and Installing House Numbers
Follow this plan to select the right orientation and install your house numbers for maximum visibility and style.
- Before you start: Check local fire and emergency codes to know if vertical or horizontal numbers are required or preferred. Confirm compliance to avoid future issues.
- Day 1: Assess your home’s architectural style and the space near your entrance or mailbox. Decide if vertical or horizontal numbers will complement the design and fit the available area.
- Day 2: Choose a size and font that is legible from street level. Test visibility by viewing mock-ups or printed samples from the street during daylight and at night.
- Day 3: Gather tools and materials. For vertical numbers, prepare spacing guides; for horizontal, ensure even alignment. Using a level and measuring tape will improve accuracy.
- Day 4: Install the house numbers following the chosen orientation. Securely fasten each digit with appropriate anchors or screws to withstand weather and wear.
- Day 5: Check visibility during different times of day and adjust lighting if needed to improve legibility without glare.
- Week 2: Inspect the installation for any loosening or damage. Tighten fixtures and clean numbers to maintain clear visibility.
Frequently Asked Questions
What Should I Consider Before Choosing Vertical Versus Horizontal House Numbers?
Consider your home’s architectural features and where numbers fit best. Vertical numbers work well on narrow spaces; horizontal ones suit wider facades. Evaluate visibility and emergency code requirements for your area to ensure compliance and quick identification.
Can Vertical House Numbers Fit on Narrow Surfaces Better Than Horizontal Ones?
Vertical house numbers work best on narrow spaces like slim columns, posts, or door frames since they use the vertical area instead of horizontal space, keeping the numbers clear without cluttering the surface.
Do Horizontal House Numbers Improve Curb Appeal More Than Vertical Numbers?
Horizontal numbers often provide a balanced, modern look on wide, flat surfaces like siding or garage doors. They align well with architectural lines, improving overall home aesthetics and visibility from the street.
Is There a Standard Size for Vertical House Number Digits to Meet Safety Codes?
Digits shorter than four inches vertically stacked may not comply with IFC 505.1 regulations. Make sure individual numbers meet local codes for emergency response visibility and safety rather than just overall stack height.
How Can I Install House Numbers on Fiber Cement Siding Without Damage?
Use floating standoffs with a self-centering Vix bit to drill pilot holes carefully. This method prevents cracking the siding and allows secure, level mounting of numbers, especially for horizontal layouts.
Do Emergency Responders Have a Preference Between Vertical and Horizontal House Numbers?
Their priority is quick and clear visibility. Orientation matters less than number size, contrast, and placement in well-lit, unobstructed locations. Ensure compliance with fire codes for size and reflectivity.
Wrapping Up
Choosing between vertical and horizontal house numbers depends on your home’s style, space, and local regulations. Select the option that offers the best visibility and complements your exterior design. Start by confirming local requirements and assessing your home’s layout to make a well-informed decision today.