
Wooden Sign Ideas: A Complete Guide to Creative DIY Projects
Wooden sign ideas offer a simple way to add personality and style to any room or outdoor space. Creating your own sign means you can match your exact taste using different wood types, paints, and finishes. Start with a smooth, flat wood surface to make painting or engraving easier and your design clearer.
Key Takeaways
- Choose affordable wood like pine or repurposed boards for budget-friendly wooden signs.
- Prepare wood surfaces by sanding and applying a primer or sealer to ensure long-lasting paint adhesion.
- Experiment with typography styles to create rustic farmhouse or modern minimalist wooden signs.
- Use stencils or vinyl lettering for precise text and intricate designs without freehand painting.
- Apply outdoor sealants to protect your wooden signs from weather damage and fading.
- Consider wood burning tools for detailed, textured designs that bring depth to your sign.
Creative Wooden Sign Ideas for Every Style
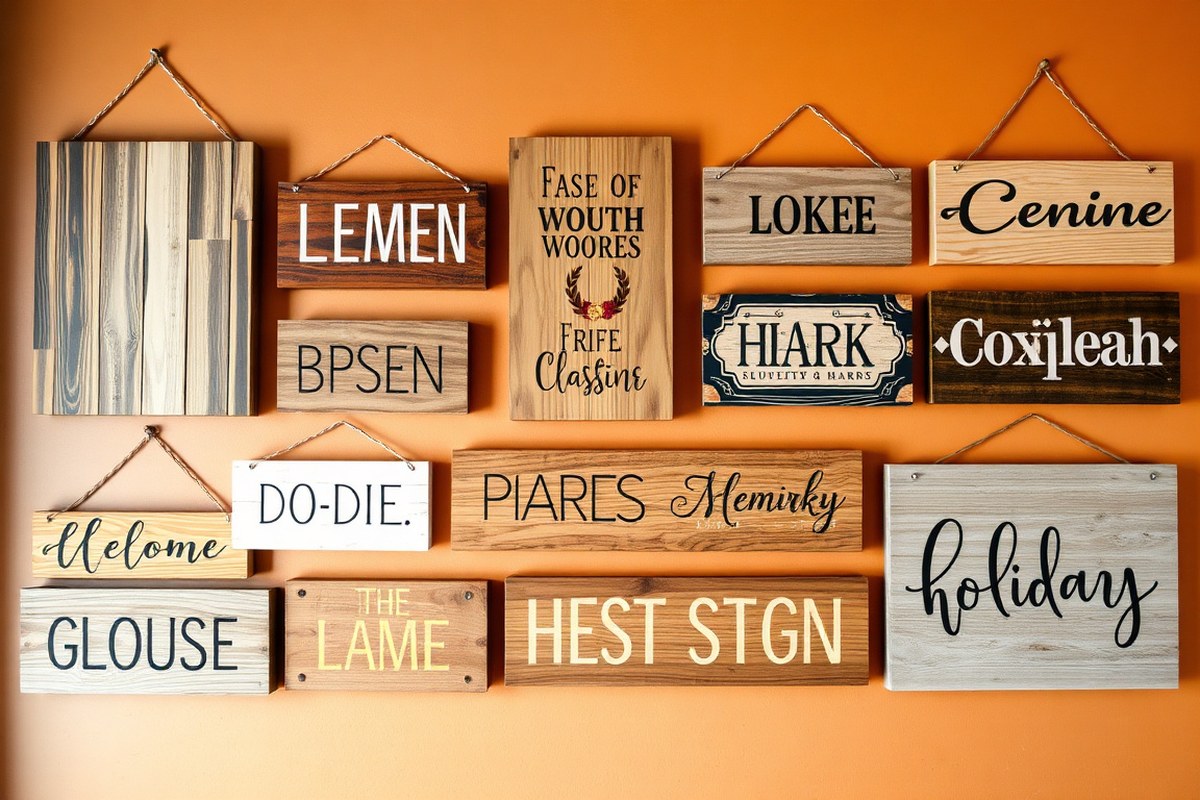
Wooden signs can match nearly any style or theme, making them perfect for all kinds of home decor and craft projects. Popular options range from rustic farmhouse signs that use distressed wood and simple painted letters to sleek modern designs with clean lines and minimalist fonts. Garden-themed signs often include floral or botanical motifs, while nautical styles bring in ocean colors and beach-inspired messages. Choosing the style depends on what fits your space and expresses your personality.
Selecting a message or design involves thinking about the sign’s purpose. For example, welcome signs suit entryways and can feature friendly greetings or family names. Inspirational quotes work well in living areas or offices, adding motivation and charm. Seasonal or holiday-themed signs offer an easy way to update your decor throughout the year with specific motifs like pumpkins for fall or snowflakes for winter.
Certain occasions call for unique wooden signs. Wedding signs can direct guests or display the couple’s names and date, often incorporating elegant fonts and soft colors. Birthday celebrations might feature custom messages or age milestones with fun shapes and bright paint. Garden signs not only decorate but also label plant types or outline garden rules, usually sealed with waterproof finishes to endure weather.
- Rustic farmhouse signs with hand-painted lettering for a cozy, timeless look
- Modern minimalist signs using sleek fonts on smooth, stained wood
- Garden signs featuring botanical graphics and waterproof coatings for outdoor durability
- Seasonal and holiday signs with interchangeable messages using chalkboard paint
- Nautical-themed signs incorporating ocean colors and seaside phrases
- Monogram signs on reclaimed wood, perfect as kitchen or entryway decor
- Personalized wedding or event signs with custom names and dates
To create a sign that fits your style, start by picking the wood that complements your design, a rough, weathered board suits rustic themes, while polished plywood supports modern aesthetics. Next, decide on the message and font that convey the theme clearly and attractively. For occasions, consider the context: a garden sign must resist rain and sun, so finish it with a suitable outdoor sealant, whereas a wedding sign can focus on elegance and delicacy. Personal touches like hand-painted details or a string art overlay add uniqueness and help your wooden sign stand out.
Choosing the Best Wood for Your Sign

Choosing the right wood depends on where your sign will be displayed, your budget, and how detailed your paint or finish work will be. For outdoor signs, durability and weather resistance are key. Indoor signs offer more flexibility since moisture and sun exposure are minimal. Softwoods like pine cost less and are easy to paint, but they dent and weather faster outdoors. Hardwoods such as cedar or redwood last longer outside and provide a smooth surface for painting or engraving. Reclaimed or scrap wood is an affordable and eco-friendly option, but you must inspect it for nails, rot, and pests before use to avoid safety risks and ensure a smooth finish.
| Wood Type | Cost (per 12″x12″ board) | Durability | Painting/Finishing | Indoor/Outdoor Suitability |
|---|---|---|---|---|
| Pine | $5, 10 | Low to Moderate, dents easily | Absorbs paint well, may need primer | Indoor preferred; outdoor with sealant |
| Cedar | $15, 25 | High, naturally weather-resistant | Smooth surface; holds stain and paint nicely | Good for both indoor and outdoor |
| Redwood | $20, 30 | High, resists rot and insects | Easy to stain or paint | Best choice for outdoor signs |
| Reclaimed/Scrap Wood | Free to Low | Varies; inspect carefully | May require extra prep; uneven surfaces can add charm | Indoor recommended unless thoroughly treated |
The wood’s texture influences how paint adheres and how bold your sign’s details appear. Smooth woods allow crisp strokes and clear edging for lettering. Rough or slatted wood can hide brush strokes and add rustic character but might blur detailed designs. Always apply a primer or sanding sealer before painting on softwoods to prevent blotching.
Before painting reclaimed wood, remove any old nails and sand thoroughly to avoid uneven surfaces and hazards.
Using scrap wood means extra prep work but can reduce costs significantly. After choosing wood, sand it well and clean the dust off before painting or staining. This step ensures paint sticks properly and makes your sign last longer. For outdoor signs, finish with a weatherproof sealant to protect colors and prevent warping over time.
Essential Tools and Materials for Wooden Signs
Making wooden signs requires specific tools and materials based on your project type, whether painting, wood burning, or using vinyl stencils. Knowing exactly what to use and how to apply these supplies makes your finished sign look professional and ensures durability. Your toolkit ranges from basic hand tools and paints to specialized engravers and sealants.
Essential Tools for Measuring, Cutting, and Preparing Wood
Accurate measurements and clean cuts start with a good tape measure and a pencil for marking. A miter saw or circular saw is ideal for cutting boards to size, each costing around $50 to $150 depending on quality. Sanding is key to creating a smooth surface, so a sanding block for beginners or a random orbital sander for larger projects is useful. Sanding prevents paint or stain from absorbing unevenly, which causes blotches. For precise edges and small areas, fine-grit sandpaper (220-grit) works best. Having a clamp to hold your wood while working increases accuracy and safety.
Paints and Brushes for Different Sign Styles
Acrylic paint is a favourite for wooden signs as it dries quickly, adheres well, and offers vibrant colours. Expect to pay $5 to $15 per color bottle. Use synthetic bristle brushes to avoid shedding and get smooth lines. For larger signs, foam brushes or rollers cover big areas evenly. When working with vinyl stencils, lighter paint applications prevent bleeding under the stencil.
Outdoor signs need paint with UV protection or an added sealant layer to avoid fading. If you prefer a rustic look, consider chalk paint, which creates a matte finish but must be sealed with wax or polycrylic to resist wear. Always paint in thin layers and let each dry for 20 to 30 minutes between coats to avoid cracking or peeling.
Tools and Materials for Wood Burning and Engraving
Wood burning, also called pyrography, requires an electric wood burning tool with adjustable temperature settings. These cost between $20 and $50. Choose fine tips for detail work and broader tips for shading. Before burning, lightly sand the wood and test on scrap pieces to get the right heat and speed to avoid scorching the wood too deeply.
Engraving machines or hand-held rotary tools work well for precise designs and lettering. Engravers with diamond or carbide bits start around $60. They provide clean cuts below the surface, giving a professional engraved look without paint. When engraving, work slowly and steadily to keep lines smooth and consistent.
Vinyl and Stencil Supplies for Crisp Lettering
Vinyl signs require a cutting machine like a Cricut, Silhouette, or a pre-cut vinyl sheet, along with transfer tape to apply the vinyl to wood smoothly. A scraper tool helps remove air bubbles and secure vinyl edges. White or coloured adhesive vinyl starts near $10 per sheet and lasts long outdoors if sealed. Printable stencil paper allows you to create detailed designs with paint that won’t bleed easily.
Before applying vinyl or stencils, clean and dry the wood surface thoroughly. A light sanding with 220-grit paper improves adhesion. Peel the vinyl backing carefully and position it on the wood. Use the scraper tool to press firmly from the centre outward. After removing the transfer tape, paint over stencils in thin coats.
Protective Finishes and Sealants for Longevity
Sealing your wooden sign preserves its look and protects it from moisture and sun damage. Polyurethane is a common choice, available in gloss, satin, or matte finishes. Exterior-grade polyurethane with UV blockers costs around $10 to $20 per quart and is ideal for outdoor signs. Apply two to three thin coats with a clean brush, letting each coat dry for at least two hours in a dust-free space.
For natural wood enhancement, wood stains add colour while showing the grain. After staining, always seal with a clear finish. Spar varnish offers superior water resistance for outdoor signs but requires longer drying times up to 24 hours. Avoid brushing on thick layers to prevent runs or bubbles.
- Tape measure and pencil for accurate layout
- Miter or circular saw for clean cuts
- Sanding block or orbital sander with 220-grit paper
- Acrylic or chalk paint with synthetic brushes
- Electric wood burning tool or rotary engraver for detail
- Vinyl sheets, cutting machine, transfer tape, and scraper tool
- Exterior polyurethane or spar varnish for protection
Designing Your Wooden Sign: Layouts and Fonts
Choosing the right fonts, spacing, and layout will make your wooden sign clear, attractive, and suited to your space. The design impacts how easily people read the sign and how well it fits your style. Preparing your artwork carefully ensures smooth transfer to the wood, whether you use paint, vinyl, or other methods.
Popular Fonts for Wooden Signs
Simple, clean fonts generally work best for wooden signs, especially when viewed from a distance. Sans-serif fonts like Arial or Futura offer clarity, while serif fonts such as Times New Roman add a bit of traditional charm. Script fonts can add personality but use them sparingly and avoid overly ornate styles that get hard to read.
For a rustic or vintage look, fonts that mimic hand lettering or distressed typefaces work well. When selecting fonts, pick no more than two different styles to avoid clutter. The size matters too: letters should be at least 1 inch tall per 8 feet of viewing distance. For example, if the sign will be seen from 16 feet away, aim for letters at least 2 inches tall.
Different wood types and textures can affect font choices. On rough wood, bolder, simpler fonts maintain legibility better than thin, detailed fonts. Contrast between font color and wood background also helps; dark fonts on light wood or vice versa improve visibility.
Basic Layout Principles
Start by sketching your sign on paper or digitally, blocking out where text and images go. Centering your design is common, but asymmetric layouts can add visual interest if balanced. Leave enough margin space around the edges, at least 1 to 2 inches, to prevent the design from feeling cramped or getting cut off during transfer or framing.
Maintain consistent spacing between letters and words. Crowded text is hard to read, while too much space wastes valuable sign area. Use guides or grids to align elements neatly. For multi-line text, stack shorter lines to avoid wide gaps and maintain a cohesive appearance.
Consider how viewers will approach or stand relative to your sign. Position important words or images at eye level or within the main focal point. Use size variation to emphasize key elements; for instance, larger fonts for a headline and smaller for details. Avoid overcrowding by keeping the total text to a manageable amount, 4 to 6 short words for small signs or 10 to 15 words for larger pieces.
Design Prep Tools and Resources
Digital design software like Canva or Adobe Illustrator helps lay out your sign precisely. Set the canvas size to match your wood surface dimensions. Use vector files (SVG or PDF) for sharp lines that scale without loss. If working by hand, draw your design on tracing paper or use carbon paper to transfer onto the wood.
Printing your design on regular paper at actual size allows you to check spacing and alignment by taping the printout to the wood. For designs with vinyl, cutting machines like Cricut or Silhouette read digital files and produce clean vinyl decals ready for application. Make sure to mirror text when cutting vinyl for transfer.
Preparing hand-drawn designs for transfer means using transfer paper or lightly sanding and sketching the outline with pencil. For transferring paint, stencil the design with adhesive vinyl or use a projector to trace directly on the wood. Testing your design on scrap wood first helps catch mistakes and adjust spacing before working on the final piece.
Painting Techniques for Beautiful Wood Signs
Using the right painting techniques can bring your wooden sign to life with sharp details and lasting beauty. For the smoothest finish, water-based acrylic paints work best on wood. They dry fast, resist cracking, and clean up easily with soap and water. Choose synthetic brushes with firm bristles for precise lines, or use foam brushes for smooth, even coats. Avoid oil-based paints unless you want a glossy, vintage effect but plan on longer drying times.
Stenciling is an effective way to get clean, repeatable patterns on your sign. Secure your stencil firmly to avoid paint bleeding under the edges. Dab paint with a small stencil brush or sponge lightly instead of brushing back and forth. This prevents the paint from seeping under and blurring your design. Ombre painting involves blending two or more colors gradually. Start with your lightest shade and use a damp brush to softly blend into the next darker shade. Repeat with clean brushes to create smooth transitions.
Freehand painting lets you add personal touches or lettering with a steady hand. Use fine detail brushes, and thin your paint slightly with water for better control. Creating a weathered paint look requires painting the sign, then lightly sanding edges and random spots to reveal the wood underneath. This adds rustic charm and depth. To protect your finished sign, apply a clear sealant. Outdoor signs benefit from a water-resistant polyurethane or spar varnish, while indoor signs do well with a matte or satin acrylic sealer. Follow these steps to paint and seal your wooden sign:
- Prepare the surface: Sand your wood smooth using 120-to-220 grit sandpaper and wipe off dust with a tack cloth.
- Apply a primer: Use an acrylic wood primer to create an even base and ensure paint adheres well. Let dry completely (about 1 hour).
- Use your chosen painting technique: For stencils, tape in place and dab paint lightly. For ombre, blend colors wet-on-wet with a clean, damp brush. Freehand with thin, smooth layers for clarity. For weathered paint, fully cover then distress after drying with sanding.
- Allow paint to dry: Let each layer dry at least 1 to 2 hours to avoid smudging.
- Apply details or second colors: Add lettering, designs, or highlights after base paint dries.
- Seal your sign: Brush on two coats of clear acrylic sealer, letting each coat dry for 2 to 4 hours. Use outdoor-rated sealer for signs exposed to weather.
- Let the sealant cure: Give your sign a full 24 hours before handling or hanging to ensure lasting protection.
Test your stencil and paint on scrap wood before applying to your sign to avoid unwanted bleeding or color mistakes.
Wood Burning and Engraving Options
Pyrography, or wood burning, involves using a heated pen-like tool to create designs by burning the wood’s surface. This method can produce detailed, textured images or text with a rustic, handcrafted look. The equipment ranges from basic wood burning pens, which cost about $20 to $50, to more advanced kits with adjustable tips and temperature control. Beginners can start with a simple, single-tip tool and practice on scrap wood until they achieve smooth, consistent lines.
Practicing is key before working on your final wooden sign. Use softwoods like pine or basswood, which burn more evenly, to get comfortable with holding the tool steadily and controlling the heat. Start by tracing simple designs with a pencil, then slowly follow your lines with the heated tip. Keep a consistent pressure to avoid uneven burns. Sliding the tip gently over the wood generally takes about one to three seconds per pass, but temperature varies between 600°F and 900°F, too hot can cause scorch marks, while too cool may not leave a clear line. Work in a well-ventilated area to avoid inhaling smoke or fumes.
Engraving tools are useful alternatives or add-ons that allow you to carve into the wood instead of burning it. These tools often come with bits for cutting and etching and give a bolder, more tactile result than pyrography alone. Prices for professional engraving kits start around $60. Combining engraving with wood burning can add depth and contrast to your sign. For example, burn outlines with the pyrography pen, then use an engraving bit to carve fills or patterns for a striking effect.
To keep edges clean and avoid smudging, work in sections and let each part cool before continuing. Avoid rushing, as uneven heat or pressure will result in blotchy or patchy areas. Protect your work surface and fingers with heat-resistant gloves, and always unplug the tool when adjusting tips or taking breaks. For beginners, tracing letters or images using transfer paper can ensure accuracy without freehand errors.
Different wood types affect the final look. Hardwoods require a higher temperature and slower burning to reveal detail but offer a finer grain for crisp lines. Softwoods burn quickly but can char easily, which suits rustic signs. You can experiment with shading by varying the tool’s speed and pressure, creating light and dark tones. Pyrography adds a natural, warm vibe to your woodworking projects, giving signs a custom feel without needing paint or stains.
Applying Vinyl and Stencils to Wood Signs
Applying vinyl lettering and stencils to wooden signs offers two popular ways to customize your project. Vinyl letters provide a clean, professional look with crisp edges, while stencils allow for more creativity and can be used repeatedly. Your choice depends on the tools you have, the design complexity, and how permanent you want the lettering to be.
Vinyl lettering usually comes as pre-cut adhesive decals. It’s ideal for beginners and those seeking easy, precise application without needing to paint freehand. Stencils require paint and a little more manual effort, but they let you layer colors or create textured effects. Stencils can be made at home with cutting machines like Cricut or Silhouette or purchased ready-made.
Both methods need some preparation to get the best result. Preparing the wood surface by sanding it smooth and cleaning off dust ensures good adhesion and prevents bleeding under stencils. Mistakes with vinyl can be fixed by carefully peeling off and repositioning the letters within minutes. Stencil errors require wiping off wet paint quickly or sanding and repainting once dry. Follow these steps for a precise and successful application:
- Prepare your wood sign surface. Sand the wood until it feels smooth, then wipe it clean with a damp cloth to remove dust and allow it to dry completely.
- Choose your letter style and material. Purchase vinyl letters pre-cut to your design or select stencils that match your desired font and size.
- Position the vinyl or stencil. For vinyl, peel off the backing and align each letter on the wood. For stencils, tape them securely to prevent paint bleed or movement.
- Apply your medium carefully. Press the vinyl firmly starting from one side to avoid bubbles or wrinkles. For stencils, use a small brush or sponge to dab paint gently to avoid bleeding under edges.
- Remove vinyl or stencil once application is dry or set. Vinyl can stay in place immediately after pressing down; remove transfer tape slowly at a sharp angle. Wait for stencil paint to dry fully (usually 30 minutes to 1 hour) before peeling off the stencil.
- Fix errors quickly. Lift misapplied vinyl carefully within 5 minutes, reposition or replace pieces. For stencils, wipe wet paint mistakes immediately with a damp cloth or, if dry, sand lightly and repaint.
- Seal your finished sign. Apply a clear, water-based sealer over vinyl or stencil paint to protect your work and extend the sign’s life, especially for outdoor use.
Vinyl lettering can cost about $10 to $30 for sheets or pre-cut decals, while stencils vary widely in price from a few dollars for simple designs to $20 or more for intricate or custom-made options. Stencils need paint, brushes, and tape, whereas vinyl application mainly requires a flat surface and patience to align letters smoothly.
Choosing vinyl saves time and gives sharp edges, perfect for modern signs. Stencils work well for rustic or layered paint effects but require steadier hands and longer drying times. Vinyl is easier to remove or replace, while stencils can be reused but are less forgiving to mistakes.
Creating Rustic vs Modern Wooden Signs
Rustic and modern wooden signs differ mainly in texture, paint finish, and assembly techniques. Rustic signs highlight wood’s natural grain and texture, often featuring distressed surfaces and imperfections that create warmth and charm. In contrast, modern signs favour clean, smooth finishes, sharp edges, and minimalistic paint applications to achieve a sleek look.
Creating a rustic sign usually involves using softer or reclaimed woods like 2×4’s or pallet wood. These boards are often left rough or lightly sanded before applying paint. Distressing the paint with sanding or lightly hammering nails gives the sign character, adding a countryside feel. Simple stencils and acrylic paints work well for adding designs informally over the wood.
Modern signs require more precise preparation. Wood is finely sanded and primed, sometimes using white spray paint as a base. The lettering or graphics are applied sharply using vinyl stencils or clean hand painting techniques. Sanding lightly to remove paint edges after layering can help sharpen the design. Frames are squared and finished to maintain the minimalist aesthetic.
The differences in these styles reflect the intended ambience they evoke: rustic signs invite comfort and storytelling, while modern signs offer clarity and contemporary flair. Both techniques use basic materials like wood and acrylic paint, but the finishing steps and attention to detail vary significantly.
| Feature | Rustic Wooden Sign | Modern Wooden Sign |
|---|---|---|
| Wood Type | Reclaimed or rough-cut boards (e.g., 2×4’s, pallet wood) | Fine grain hardwood or softwood, carefully sanded |
| Surface Preparation | Light sanding; visible imperfections retained | Thorough sanding and priming, smooth surface |
| Paint Application | Acrylic paint applied with brushes and stencils, distressed by sanding | Clean coats using spray paint or vinyl stencils for sharp edges |
| Distressing | Sanding paint edges or gentle hammering to age wood | Minimal to no distressing; focus on crisp details |
| Finish | Matte or natural, highlighting grain and texture | Matte or semi-gloss, smooth and polished |
| Framing | Simple, possibly rough frame mimicking barn style | Clean, square edges with precise joinery |
Aging wood for a rustic look works best with a light sanding after paint dries and optional tools like wire brushes or hammers to add texture. Using scrap wood lets you experiment without worry. For modern signs, prepare with fine grit sandpaper (220-grit) and apply a white base using spray paint to evenly cover grain, ensuring any lettering applied later stands out crisply.
Using simple scrap wood for rustic signs allows mistakes without wasting expensive materials, while modern signs require precise sanding and priming to avoid uneven paint or rough spots.
Framing and Mounting Your Wooden Sign
Choosing the right frame size and wood type can protect your wooden sign and add a polished look to your project. Frames made from 2×2 pine or cedar strips usually work well because they are sturdy yet easy to cut. Opt for a frame thickness that matches or slightly exceeds the thickness of your sign to create a flush, balanced border. For example, if your plywood sign is 3/4 inch thick, 2×2 framing pieces measuring roughly 1.5 inches square provide a solid edge and structure.
How you mount your sign will depend on its size and where you plan to display it. Small signs under 12 inches wide can be hung with adhesive strip hangers or D-ring hooks attached with small screws. Larger signs, especially those over 24 inches, require sturdier mounting hardware such as heavy-duty sawtooth hangers, French cleats, or keyhole slots recessed into the back. Aligning your hardware evenly and pre-drilling holes helps prevent wood splitting.
Adding finish touches like sanding the frame edges smooth, staining or painting the wood, then sealing with a clear polyurethane or exterior-grade varnish improve both appearance and durability. This also helps resist moisture and UV damage, which is important for outdoor signs. Avoid clamping or nailing frames too tightly; wood expands and contracts with changes in humidity.
- Cut frame strips to match the perimeter of your sign using 2×2 pine or cedar pieces. Miter the corners at 45 degrees for a clean joint or butt-cut edges for rustic style.
- Sand all frame pieces smooth, focusing on edges and corners to prevent splinters and ensure a snug fit around your sign.
- Assemble the frame by applying wood glue to the edges and securing with 1-inch finishing nails or staples around the sign’s perimeter. Use clamps if available to hold the frame tightly while drying.
- Allow glue to dry according to product instructions, generally 30 minutes to an hour for basic wood glue.
- Attach hanging hardware appropriate for your sign size. For large signs, screw two D-rings about one-third down from the top on each side, or mount a French cleat along the back horizontally.
- Apply your finish such as stain or paint to the frame if desired. Wait until this layer dries, then seal with at least two coats of polyurethane or outdoor varnish, drying 2-4 hours between coats.
- Mount your sign securely on the wall with screws or hooks that can support the sign’s weight, checking stability before letting go.
Proper framing improve the sign’s durability. Poorly attached frames can warp or come loose over time, especially outdoors. A securely mounted sign remains straight and safe from wind or accidental bumps. Cost for materials like pine framing strips, finishing nails, and clear sealant usually ranges from $15 to $30, depending on size, making framing an affordable step to a lasting wooden sign.
Personalizing Wooden Signs with Quotes and Images
Personalizing wooden signs with quotes, names, and images allows you to create a unique piece that reflects your style and sentiment. Choosing meaningful phrases and images that resonate with you or your space makes the sign more impactful. Sharp, readable lettering and well-placed graphics ensure the design catches the eye and feels balanced.
Choosing Quotes and Messages
Select quotes or messages that fit the purpose and mood of your space. For example, welcome signs benefit from friendly phrases like “Home Sweet Home” or “Gather Here,” which instantly create a warm atmosphere. In personal areas such as bathrooms or workshops, short, relevant sayings or names add character and charm. Keep your text concise to maintain readability, especially on smaller signs where lengthy messages can look crowded. Consider the font style when picking your quote, as simple fonts improve legibility for long phrases, while cursive fonts can add elegance to shorter words or names.
When choosing images, think about the style you want to convey, rustic signs pair well with simple botanical sketches or vintage icons, while modern signs suit clean, geometric shapes. Matching the theme of your quote with the imagery strengthens the overall message and ties the visual elements together.
Image Transfer Techniques
Transferring designs onto wood gives you clean outlines to work from and improves final detail. One reliable method uses graphite transfer paper placed between your printed design and the wood. Trace your design with a pencil, pressing firmly to imprint the graphite onto the surface. This technique works well for both text and images, creating sharp, readable lines without requiring advanced tools. Pencil shading the back of your printed design thoroughly and tracing the front also transfers graphite to the wood, but this can be less precise for intricate details.
For a smoother transfer, ensure the wood surface is lightly sanded to remove roughness without making it glossy. Avoid thick or highly textured woods, as these can interfere with the transfer’s clarity. Transfer paper typically costs around $5 to $10 per pack and can be found at craft stores. This method is effective for medium to large signs where accuracy in lettering and images matters most.
Alternatively, vinyl cutting machines produce precise stencils by cutting your desired text and images from adhesive vinyl. Applying these stencils to wood allows for clean painting edges and repeated use. This method requires investment in a machine and materials but delivers crisp lettering and complex designs that are difficult to achieve freehand.
Combining Text with Graphics
Balancing words and images on your wooden sign involves thoughtful spacing and sizing. Position the text so it has room to breathe, with images either framing the words or placed above or below. Avoid overcrowding the design by maintaining consistent margins and aligning elements along horizontal or vertical axes. For example, place a small graphic in one corner to complement a centered quote, or use symmetrical images on either side of a name for a balanced look.
Consider using contrasting colors between text and images to help each element stand out. If your lettering is dark, lighter images or painted outlines can add dimension without competing visually. Testing your layout with paper cutouts helps you see how the text and graphics interact before committing to painting or burning.
When combining text with images on intricate backgrounds like stained or textured wood, keep designs simple and bold to maintain legibility. Layering paint in thin coats can achieve sharp edges on both text and graphics. Planning your color palette and style beforehand ensures a cohesive final product that feels harmonious and inviting.
Protecting Outdoor Wooden Signs for Longevity
Protecting wooden signs that live outdoors requires applying the right sealants and coatings to shield the wood from moisture, UV rays, and temperature swings. Clear sealants designed for exterior use act as a barrier against rain and humidity, while UV-resistant paints add color and further protect the surface from fading or cracking. Regular maintenance, including resealing and cleaning, keeps signs looking sharp and prolongs their lifespan.
A popular choice is an exterior-grade polyurethane or spar varnish, which is formulated to withstand weather changes without yellowing or peeling. Apply at least two coats with a synthetic brush, allowing 4 to 6 hours drying between each. For painted signs, seal over the dried paint with two coats of clear varnish to lock in color. Total cost for quality sealant ranges from $10 to $20 per quart, enough for multiple signs.
Maintenance is essential. Check your wooden signs at least once a year. Clean with a soft brush and mild soap solution, then inspect for cracking or peeling finish. Scrape off any loose sealant spots, sand lightly, and apply a fresh coat. Signs in harsh climates, where there’s heavy rain, intense sun, or freezing temperatures, might need resealing every 6 to 9 months.
- Choose sealants labeled for outdoor use and UV protection.
- Apply sealant when the weather is dry with temperatures between 50°F and 85°F.
- Use a high-quality brush for smooth, even coats.
- Allow proper drying time between coats to avoid tacky surfaces.
- Inspect signs annually for wear or damage.
- Clean signs gently without harsh chemicals before resealing.
- Consider covering or storing signs during extreme weather seasons.
Cost-effectively extending the life of outdoor wooden signs depends on how well you prepare and protect them from the start. Avoid skipping sealants or cutting corners on application, signs exposed to rain and sun without protection can last only a season or two. Spending less than $30 on sealant and dedicating a couple of hours to proper application can ensure your sign withstands multiple seasons safely.
Please don’t apply sealant on damp wood or just after rain; moisture traps cause peeling and wood damage.
Common Mistakes in Wood Sign Making and How to Fix Them
Paint bleeding often happens when the wood surface isn’t sealed or smooth enough. Unsealed wood absorbs paint unevenly, causing colors to spread beyond your design edges. To prevent this, start by sanding the wood with 120 to 220 grit sandpaper until the surface feels smooth and even. Follow up with a wood primer designed for your paint type. This creates a barrier that controls paint absorption and sharpens design lines.
Uneven finishes usually come from applying paint too thickly or letting layers dry inconsistently. Use thin, even coats and let each layer dry completely, typically 1 to 2 hours depending on the paint, before adding the next. Avoid brushing over semi-dry paint as this can leave streaks or bubbles. Using a high-quality brush or foam applicator also helps you get a more uniform finish.
Design errors such as crooked text, smudges, or mismatched spacing can often be fixed carefully without ruining the sign. Gently sanding off mistakes with fine sandpaper and touching up with matching paint can work well. Small paint smudges are best removed by dabbling them lightly with a damp cloth once the paint is dry, but don’t scrub to avoid damaging the wood below.
To properly prepare wood and avoid paint peeling, proper drying and sealing are essential. Wood with high moisture content can cause paint layers to lift or bubble over time. Let your wood dry completely for at least 24 to 48 hours in a warm, dry space before painting. Apply at least one coat of primer or wood sealer, especially on softwoods like pine or cedar which tend to absorb moisture more.
- Smooth wood with 120-220 grit sandpaper before painting
- Apply a wood primer for better paint adhesion and sharp edges
- Use thin paint layers with drying times of 1-2 hours between coats
- Fix design errors by light sanding and delicate touch-ups
- Allow wood to dry 24-48 hours before painting to prevent peeling
- Choose high-quality brushes or foam applicators for uniform paint
- Remove small smudges gently after paint fully dries
Following these steps takes time and patience, but costs are low; basic sandpaper costs under $10, a small primer can be $10-$20, and quality brushes are around $8-$15 each. The effort produces crisp lines, even colors, and lasting paint finishes. Avoid rushing steps or skipping primer, as these lead to common frustrations like bleeding paint and peeling surfaces that can waste your materials and time.
Step-by-Step Action Plan for Crafting Your Wooden Sign
Follow these steps to create a personalized wooden sign that fits your style and purpose.
- Before You Start: Select your wood type and gather tools based on your design plans to ensure smooth crafting.
- Day 1: Plan the layout, including text and images, using sketches or digital templates to guide your work.
- Day 2: Prepare the wood by sanding and cleaning. Proper prep leads to better paint or stain adhesion.
- Day 3: Apply your preferred technique, painting, wood burning, or vinyl stenciling, and check for even coverage or clean lines.
- Day 4: Add protective finishes like sealant or varnish, especially for outdoor signs, to prevent weather damage.
- Day 5: Let the sign dry thoroughly. A well-dried sign will have a durable finish and avoid peeling.
- Week 2: Install mounting hardware and place your sign. Confirm it is secure and displayed clearly in your chosen location.
Frequently Asked Questions
What Are Some Simple Wooden Sign Projects for Beginners?
One of the easiest wooden sign ideas involves using pre-cut wood and simple painting techniques. Start with a basic design, such as a welcome sign, to build your confidence and get comfortable with tools and materials.
How Can I Make a Wooden Sign Suitable for Outdoor Use?
Use weather-resistant wood like cedar or redwood and apply a clear sealant or outdoor paint to protect your sign. These steps help prevent damage from moisture and sun exposure, extending your sign’s lifespan.
What’s the Best Way to Add Personal Quotes or Images to Wooden Signs?
Adding quotes or images works well with stencils, vinyl decals, or hand-painting. Vinyl decals offer a clean look without requiring advanced painting skills, making personalization easier for beginners.
How Do I Create a Rustic Look on a Wooden Sign?
To make a rustic wooden sign, use distressed wood and rough painting techniques. Sand edges and apply stain or paint unevenly to give it a weathered, vintage appearance that fits farmhouse or countryside decor.
What Size Should a Wooden Sign Be for Indoor Decoration?
Indoor wooden signs typically range from 12×6 to 24×12 inches, depending on your wall space. Choose a size that balances visibility without overpowering your room’s decor.
Can I Reuse Scrap Wood for Making Wooden Signs?
Yes, scrap wood can be reused for wooden signs and adds a unique look. Just clean it thoroughly, sand down rough areas, and check for nails or damage before starting your project.
Key Points to Remember
Wooden signs let you showcase your creativity and add a personal touch to any space or gift. Start with a clear plan, choose materials thoughtfully, and take your time with each step for best results. Pick a project from your list and begin today, your perfect wooden sign is within reach.