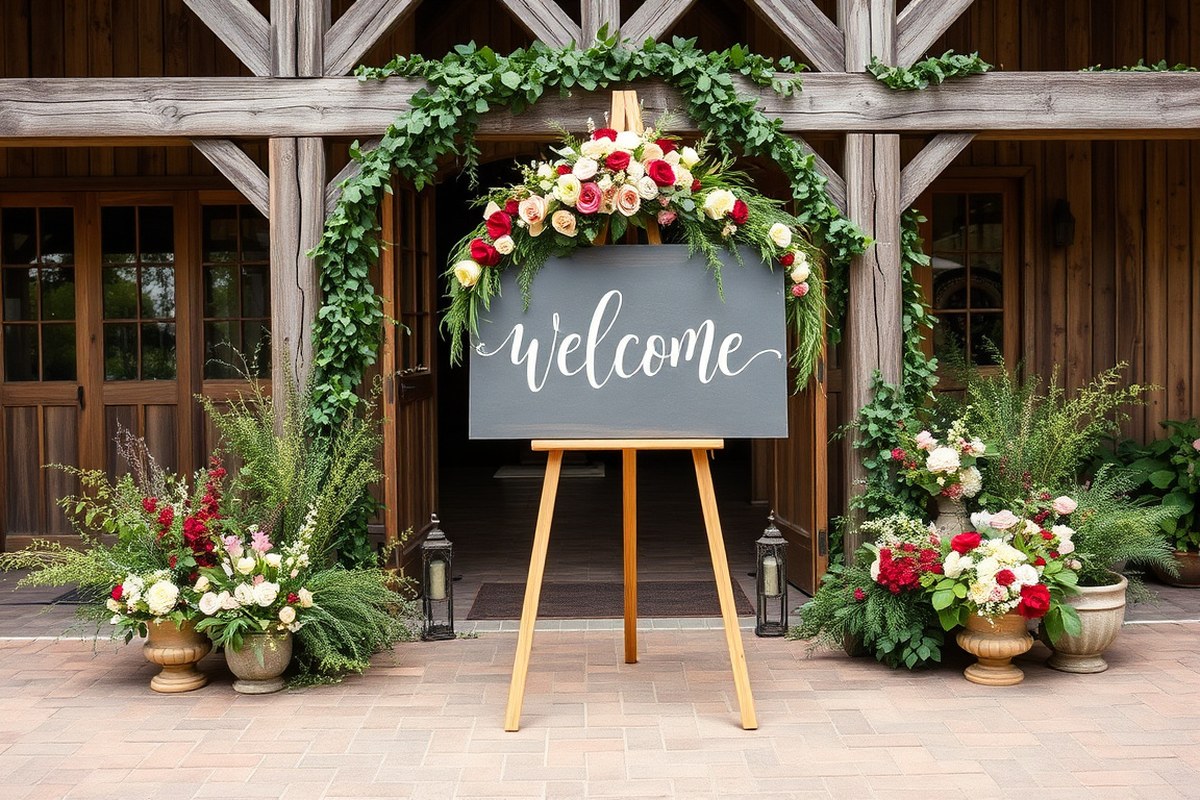
Wedding Sign Ideas: 12 Essential Types and Creative Inspirations
Wedding sign ideas can make your day smoother by guiding guests and adding personalized touches throughout your venue. Choose clear, readable signs so guests easily find their way and feel welcomed. Start with essential signs like welcome boards and directional markers near entrances to set the right tone and flow.
Key Takeaways
- Use a large welcome sign with simple wording, readable from at least 10 feet away, to greet guests clearly.
- Essential signs include welcome boards, directional markers, and seating charts to avoid guest confusion.
- Consider budget-friendly materials such as posters or vinyl banners for affordable, effective signage.
- Match your sign style to your wedding theme, whether modern, rustic, or vintage, for cohesive decor.
- Include personal touches in signs, like a love story timeline, to create memorable details.
- Diversify sign materials, wood, acrylic, chalkboard, to balance style, durability, and cost.
1. What Are Wedding Signs and Why Use Them?
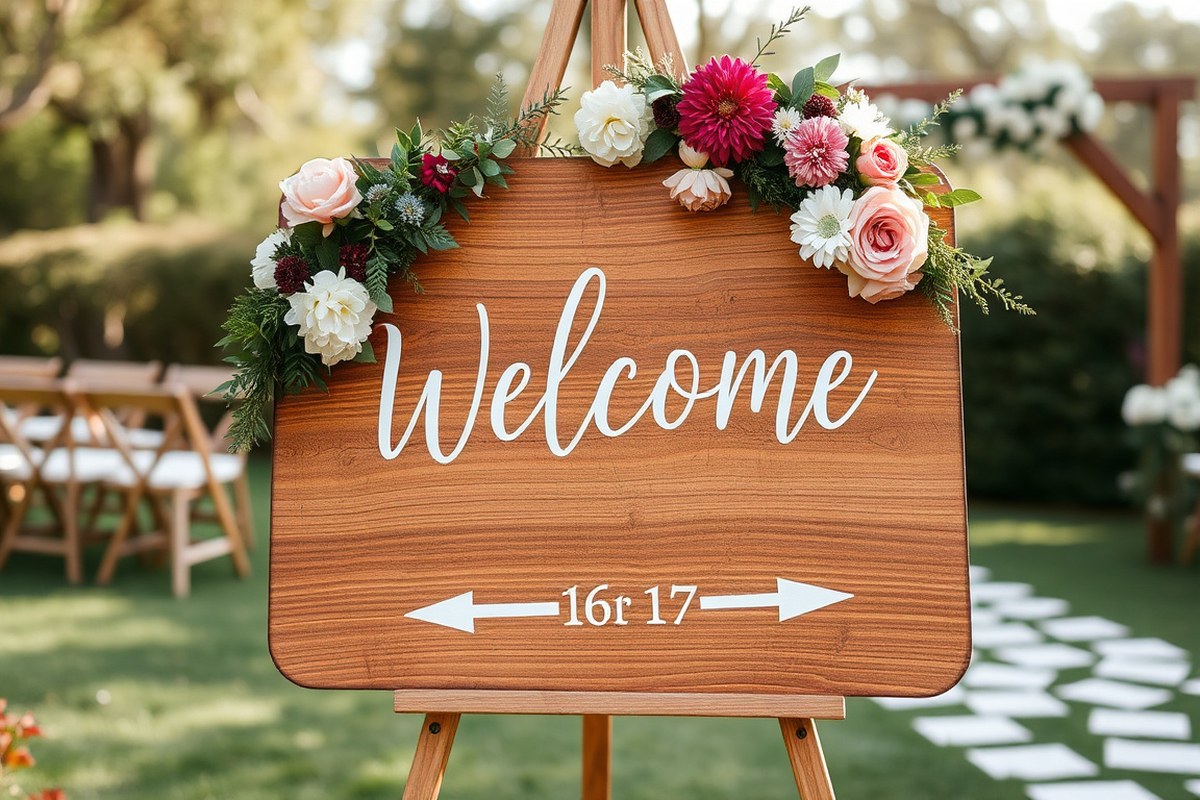
Wedding signs are printed or crafted displays that provide essential information, directions, or decorative elements during your wedding day. Their functions vary widely, including welcoming guests, directing them through multiple spaces, showing seating assignments, and informing guests about menus or activities. These signs work both practically and stylistically to create a smoother flow and add a personal touch to your celebration.
Using wedding signs serves important roles beyond decoration. Welcome signs greet your guests, setting the tone and making them feel invited. Directional signs prevent confusion at venues with several rooms or outdoor layouts by clearly pointing guests toward ceremony areas, restrooms, or reception spaces. Seating charts and table numbers are especially helpful if you plan assigned seating, guiding guests to their correct seats without delays or frustration. Cards and gifts signs, or guest book instructions, remove uncertainty about where to put items, keeping your event organized.
Wedding signs improve guest experience by eliminating guesswork and bottlenecks, letting your attendees relax and enjoy the day. For instance, directional signs positioned at every junction where guests might hesitate ensure no one gets lost. Recommended sizes vary, with a visible welcome sign often 18 inches by 24 inches or larger, while directional signs work well at 11 by 14 inches minimum. Positioning is key: place welcome signs where guests first arrive and directional signs at every decision point they might face.
The types and uses of wedding signs can fit your style, venue, and budget. Collaborative welcome signs can include input from friends or family and become a cherished feature. Interactive seating charts can be displayed on mirrors, boards, or digital screens, combining functionality with engagement. Creative menu and bar signs improve your tablescape and inform guests about available food and drinks. Signage integrated into photo-op backdrops adds a fun element for memories and social sharing. Materials range from posters starting around $6, vinyl banners near $7 for outdoors, to soft fabric signs perfect for vintage or garden settings.
For achieving good results, start by identifying key locations where signage is necessary: entrances, intersections, dining areas, and gift tables. Choose clearly legible fonts and contrasting colors for readability at various lighting conditions. Include only essential information to avoid overwhelming guests. A straightforward welcome sign script could say, “Welcome to the wedding of [Your Names], Thank you for celebrating with us!” followed by event timing or a hashtag for social media.
Some pitfalls can include too few signs causing confusion or using signs that are too small to read comfortably. Overloading signs with information may overwhelm or slow guests down. Also, not considering your venue’s lighting or backdrop can reduce visibility and impact. When you get your signs printed, companies like VistaPrint often provide quality options to bring your design to life reliably without high costs.
2. Essential vs Optional Wedding Signs: What Do You Really Need?
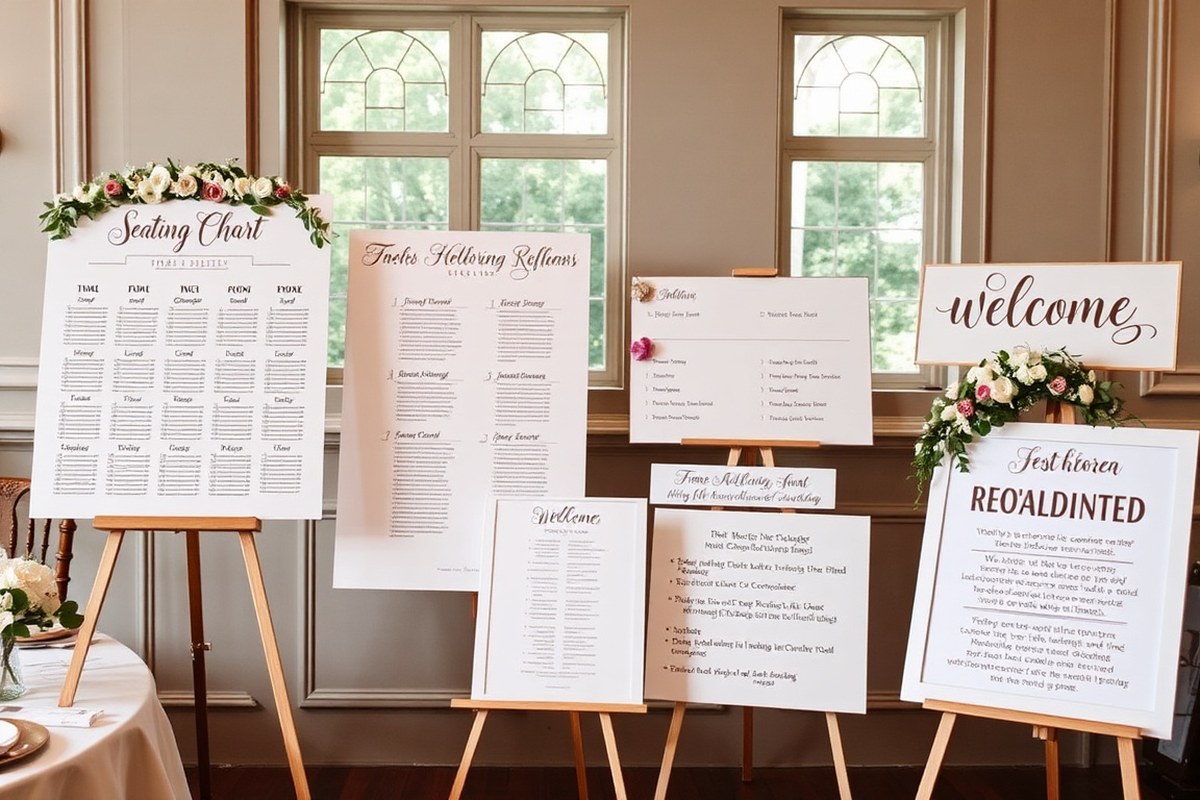
Welcome signs, directional signs, seating charts, and wedding programs or timelines are the essential signs that every wedding needs. A welcome sign sets the tone and shows guests they have arrived at the right place. Place this at the venue entrance, ideally near parking or the main door, so guests see it as they arrive. Directional signs guide guests to the ceremony, reception, restrooms, and parking. These signs go at key decision points along paths and intersections to keep guests from wandering or getting lost.
The seating chart sign is a reception staple, answering the common question, “Where do I sit?” This sign should be clearly visible near the entrance to the reception area adjacent to or near the guestbook table. A wedding program or timeline that outlines the day’s events helps guests know what to expect and when. Place this either at guest tables or on a dedicated information table in the reception or ceremony area.
Optional signs depend on your venue, guest count, and personal style. Outdoor, large, or multi-room venues usually require more signage for smooth navigation. Meanwhile, small venue weddings with fewer guests might only need the essentials. Optional signs include bar menus, gift or card drop-off signs, restroom indicators, social media or hashtag signs, and any personalized signs that highlight your theme or story.
- Welcome Sign: At the venue entrance for first impression and arrival confirmation.
- Directional Signs: On paths leading to the ceremony, reception, parking, and restrooms.
- Seating Chart Sign: Where guests enter the reception to check their seats.
- Program/Timeline Sign: At tables inside the ceremony or reception spaces.
- Optional Bar/Menu Signs: Near drink stations for clarity and style.
- Gift/Card Drop-off Sign: At designated gift tables to avoid confusion.
- Social Media or Hashtag Sign: At reception tables or photo areas for guest participation.
The number of guests also impacts signage needs; weddings with 100 or more guests typically require multiple directional signs between ceremony and reception areas. Smaller weddings under 50 guests might need just one or two. For example, at a multi-location venue, directional signs every 30 to 50 feet prevent bottlenecks and confusion. Signs should be clear, consistent in style, and placed at eye level for easy reading.
Avoid overloading your wedding space with too many signs; too much signage can confuse guests rather than help them.
Effective signs cost varies depending on materials, from basic printed posters for $10-20 each to custom wood or acrylic signs costing $50-150 or more. Renting or DIYing signs can reduce costs. Good signage improves guest flow, reduces questions, and adds to your wedding’s aesthetic, so prioritize clear, functional signs that fit your budget and venue. Consider vintage windows or upcycled art easels as unique but functional options that double as decor.
3. How Many Wedding Signs Should You Have?
The appropriate number of wedding signs depends largely on your venue’s layout and the flow of your guests. Start with at least one welcome sign placed at the main entrance. This should be a large, clear sign, around 18″ by 24″, to make a strong first impression and orient guests immediately as they arrive. When your venue offers several entry points or includes a wide outdoor area, adding one extra sign at a secondary entrance is a good idea. Having more than one identical welcome sign is usually unnecessary and can confuse guests or clutter your décor.
Directional signs are important in venues where guests may need guidance to find the ceremony area, reception hall, restrooms, parking, or shuttle pick-up spots. For most weddings, plan on two to three well-placed directional signs. Place them at key decision points, such as forked paths or large intersections within the venue. The size of directional signs can be smaller, but they should be easily visible from a few feet away to prevent guests from wandering. Venues that are smaller and easy to navigate require fewer directional signs; larger or more intricate venues should use more signs to guide guests properly.
Seating charts and table number signs must correspond to the number of guests and tables. For seated dinners with assigned seats, one large seating chart at the entrance to the reception is typical. This chart should be at least 24″ by 36″ to ensure readability, especially for weddings with over 100 guests. In larger venues or when guests arrive from different directions, using two smaller seating charts near separate entrances can ease congestion and help guests find their seats faster. Table numbers should be present on every table, usually as small but clear signs around 4″ by 6″. Coordinate the design and colors with other signage to maintain a cohesive look.
Presence of additional signs depends on the complexity of your event spaces. For example, if you have a distinct cards and gifts table, a small sign helps direct guests. Similarly, bar and menu signs clarify options and reduce confusion. Each sign should convey only essential information to avoid overwhelming guests.
Consider a simple decision rule: for every distinct guest zone or transition point that isn’t immediately obvious, a sign is necessary. For a small indoor venue with one primary entrance and straightforward flow, 3 to 5 signs often suffice: one welcome, one seating chart, 2 to 3 directional or informational signs, and table numbers on each table. For larger or multi-level venues, double that number to cover all necessary points without causing crowding or distraction.
Costs for signs vary widely depending on materials and size, starting from as low as $14 for simple paper or acrylic signs. Investing in a striking welcome sign or seating chart balances cost against guest convenience. Poorly placed or too many signs can confuse guests or clutter your aesthetic. Avoid repeating the same information on multiple signs unless needed at different entrances or transition areas. Taking time to map your venue and guest flow ahead of time helps you place just the right number of signs for a smooth and welcoming wedding experience.
4. Creative Welcome Sign Ideas for Every Wedding Style
Welcome signs can match any wedding style and set the tone as guests arrive. Picking the right material and design helps express your theme clearly, whether it’s rustic charm, modern simplicity, or elegant florals. Personalizing the sign with names, dates, or creative wording makes it feel inviting and unique to your celebration.
Rustic and Farmhouse Welcome Signs
Wooden signs are a top choice for rustic-themed weddings, fitting perfectly at venues like barns, vineyards, or farms. Reclaimed wood or pallet boards add character with their natural texture and can be left unpainted for an authentic, worn look. White or cream lettering painted on dark wood offers good contrast for readability from about 10 feet, which is ideal for outdoor entrances. Adding string lights, greenery, or small floral touches helps integrate the sign into your decor.
Other creative rustic ideas include using a small wooden fence panel as a welcome sign or a chalkboard framed with twine and rustic wood. Popular phrases like “Welcome to our beginning” or “Happily ever after starts here” keep the tone warm and personal. These signs typically cost $50 to $150 if purchased ready-made, with DIY options dropping costs to $20, $40 using pallet wood and paint.
Modern and Minimalist Designs
For contemporary weddings, acrylic signs are popular because of their sleek, transparent quality that complements minimalist aesthetics. Clear or frosted acrylic paired with neutral color vinyl text (black, white, or gold) creates a clean, elegant look. Fonts that are simple and modern keep the design uncluttered. You can accent the sign with subtle watercolor designs or a small floral arrangement in one corner to add softness without overwhelming the minimalist style.
Lucite and glass signs also work well for modern themes and can be mounted on easels or metallic frames to add structure. Many take less than a week to order online, with prices typically between $75 and $200 depending on size and customization. Simple wording such as “Welcome to our wedding” or just the couple’s names and date focuses attention and reinforces the event’s style.
Elegant and Floral Arrangements
Adding florals to welcome signs creates a romantic and timeless feel, perfect for garden or classic weddings. Pairing a wooden or acrylic base with fresh flowers or high-quality silk blooms around the edges softens the look and matches table centerpieces or bouquets. Neutral color palettes like blush, cream, and greenery keep the sign from feeling too busy.
White or cream painted signs accented with soft pink or lavender watercolor backgrounds invite guests gently. Consider placing a floral arrangement at the sign’s base or hanging a floral garland from the top. Renting or buying faux flowers for $30, $60 saves on timing and availability concerns with fresh florals.
DIY and Budget-Friendly Options
Creating your own welcome sign saves money and adds personal charm. Pallet wood is inexpensive and widely available for rustic-style projects. A simple design with painted calligraphy or vinyl decals can be completed in a few hours. Chalkboards offer flexibility: write your message with chalk markers and erase for adjustments. A fabric banner with hand-painted or printed text also works well hung at the venue entrance. Here are some budget-friendly materials and tips for DIY signs:
- Reclaimed pallet wood or wooden crates as sign bases
- Chalkboard paint and markers for customizable writing
- Vinyl lettering sheets for easy application
- Fabric or burlap banners with stenciled or hand-painted text
- Simple floral accents from craft stores or home gardens
- String lights or fairy lights for soft evening lighting
- Clear contact paper to protect your message from weather
Create a layout sketch before starting, use stencils for crisp lettering, and test lettering placement on scrap wood or fabric. Spending $10 to $50 on materials keeps costs low, and your sign can double as a memorable keepsake.
5. How to Design Clear Directional Signs That Guide Guests Smoothly
Effective directional signs help your guests move smoothly between ceremony, cocktail hour, reception, and other key areas without confusion. Clear wording, consistent styling, and smart placement work together to keep everyone on track while improving your wedding’s look.
Key Information to Include
Directional signs should clearly tell guests where to go using simple phrases like “Ceremony This Way,” “Reception Ahead,” or “Restrooms →.” Avoid cluttering signs with too much text; focus on key destinations first such as parking, ceremony site, reception area, and restroom locations. Including icons like arrows, a small map, or pictograms can improve understanding, especially for guests who speak different languages or have visual impairments. Adding the event’s date or your names isn’t necessary here, but it can tie into your design if space allows.
Include details only essential to navigation and keep lettering large enough to read from a distance. Letter height should ideally be at least 2 to 3 inches for signs viewed 10 to 15 feet away. Use high-contrast colors to ensure readability (for example, white text on a dark background or black on cream).
Styling to Match Wedding Theme
Use fonts and decorations that blend with your wedding’s overall style. Script fonts can suit romantic or vintage weddings but may reduce legibility if overused. Sans-serif fonts with clean lines work well for modern or rustic themes. Limit the number of fonts to two at most for consistency.
Incorporate visual elements like floral illustrations, foliage, or geometric borders matching your décor palette. If you’re having a beach wedding, use tropical motifs like palm leaves or shells on your directional signs. For a formal event, consider elegant script paired with metallic accents or calligraphy ink. Use materials that reflect the setting, wood or chalkboard for rustic venues, acrylic or metal for contemporary spaces. Lighting enhancements, such as subtle spotlights or string lights around the signframe, improve visibility and highlight your theme during evening hours.
Strategic Placement for Guest Flow
Place directional signs at key decision points guests encounter along their route. Main entrances, parking areas, crossroads between ceremony and reception sites, and restroom entrances are prime spots. Signs should stand at eye level, about 4 to 5 feet high, for quick visual recognition.
Use multiple signs in complex or large venues to reassure guests they’re on the right path. Avoid placing signs where they might be blocked by plants, furniture, or crowds. Ensure there is clear space around each sign so guests can pause briefly without blocking traffic. Follow a basic design and placement process to create effective directional signage:
- Identify all key areas guests need to find, including ceremony, reception, parking, restrooms, and any special activity spots.
- Determine the most logical route guests will take between areas.
- Write short, clear text for each directional sign using simple instructions and arrows.
- Choose fonts and decorative accents consistent with your wedding theme to reinforce your visual identity.
- Select materials suitable for the venue, considering weather exposure if outdoors.
- Place signs at entrance points and key intersections along guest paths at eye level (4, 5 feet high).
- Check sightlines and lighting conditions to ensure signs are easily seen throughout the event.
- Walk your route as a guest to confirm all signs are helpful and understandable.
Test your directional signs from a distance and in different lighting before the event to confirm readability and placement effectiveness.
Using Materials Suitable for Outdoors
Outdoor directional signs must withstand wind, sunlight, and possibly rain without fading or falling. Durable materials like weatherproof acrylic, sealed or painted wood, or laminated cardstock on stakes work well. Avoid paper or chalkboard signage unless placed under a tent or covered area.
For signs exposed to sunlight, use UV-protective coatings or inks to prevent color fading. Stakes or weighted bases will keep freestanding signs stable on uneven or windy terrain. Signs placed outdoors often cost more due to these durability factors but improve reliability and reduce last-minute replacements. Consider renting or buying smaller LED lights if your wedding continues after sunset to guarantee your directional signs remain fully visible for guests.
6. Unique Seating Chart Sign Ideas to Help Guests Find Their Spot
Seating chart signs help guests find their assigned spots efficiently while adding style to your wedding décor. Using creative and functional designs keeps guests engaged and makes the seating process smooth. Choosing the right materials, design, and location ensures your seating display complements your theme and avoids confusion.
Traditional Mounted Seating Charts
Large mounted seating charts are classic options that clearly list guest names and table assignments. They typically use foam board, poster board, or sturdy cardboard, framed or unframed. Mount yours on an easel or attach to a wall near the entrance for easy viewing as guests arrive.
Consider using a clean, readable font sized at least 24 points so guests can see names from a distance. You can match the chart’s colours and design to your wedding theme for a coordinated look. Prices range from $20 for DIY supplies to around $100 for printed and professionally framed charts.
Proper placement at the venue entrance is important to prevent guest bottlenecks. Avoid placing seating charts too close to other signs or décor that compete for attention.
Upcycled Frames and Windows
Using vintage or upcycled window panes and picture frames transforms seating charts into artful displays. Write or paint guest names and tables directly onto glass with waterproof markers or attach printed cards inside each window pane segment.
This style fits well with rustic or vintage-themed weddings. Window displays typically measure 24 by 36 inches or larger and can be positioned on an easel or hung near the entrance.
- Clean glass with rubbing alcohol before writing or sticking cards
- Use decorative fonts or calligraphy for elegance
- Add small floral or greenery accents around the frame
- Include a clear title like “Find Your Seat” at the top
- Ensure lighting is sufficient to avoid glare on glass
Costs depend on the frame’s source; thrift stores often offer affordable vintage options for $10 to $50, while custom frames can exceed $150.
Fabric and Textile Seating Displays
Display seating information on fabric such as canvas, burlap, or linen for a textured, soft appearance that suits boho or garden weddings. Letters can be sewn, embroidered, or printed. You can also attach seating cards with clips or safety pins to a fabric backdrop or banner.
Hanging a large fabric seating chart near the entrance creates an inviting focal point, especially outdoors where wind may affect paper signs. Fabric charts are reusable and withstand varying weather better than paper.
- Choose fabric that complements your colour palette
- Use iron-on letters or painted stencils for DIY personalization
- Add tassels or fringe trim for extra detail
- Mount fabric on a sturdy rod or frame to keep it taut
- Place near seating or bar areas for easy guest reference
Interactive Photo and Polaroid Boards
Interactive seating charts engage guests by incorporating photos, especially Polaroids of tables or group members. Arrange photos on a board or string them with clips to display seating assignments visually and personally.
This approach allows guests to connect names to faces, easing social introductions. Adding a short note or fun fact about each table encourages interaction. Include instructions on how guests can take Polaroids or leave notes in nearby guest books to add to the experience.
- Use a cork board, wire grid, or large frame to hold photos
- Provide instant cameras or encourage phone photos
- Label each photo clearly with table numbers and names
- Position boards where guests gather, such as near the entrance or lounge
- Ensure lighting is bright enough for reading and picture clarity
7. Bar and Menu Signs That Impress and Inform Guests
Bar and menu signs help guests easily navigate your reception and understand their drink and food options. Including clear details is essential. List the names of cocktails, beers, wines, and non-alcoholic options on a bar sign. Keep the menu sign concise by highlighting main dishes, sides, and any dietary notes like gluten-free or vegetarian. Adding witty remarks or a theme-related phrase can make these signs more engaging, such as “Sip Happens” for a fun bar sign or “Fuel Up, Lovebirds” for the menu.
Matching these signs with your wedding’s overall look involves coordinating fonts, colors, and materials. For a rustic wedding, wood signs with white or gold calligraphy work well. A modern wedding lends itself to acrylic or glass signs with clean sans-serif fonts and geometric accents. Use decorative touches like floral borders, greenery garlands, or metallic frames to integrate the signs into your décor smooth. Position the signs within or near floral arrangements or greenery installations not only for aesthetic appeal but also to create immersive signage that doubles as photo opportunities.
Design for text clarity by choosing fonts that are easy to read from about 3 to 6 feet away. Avoid overly elaborate scripts for the main details; use them instead for titles or accents. Use contrasting colors between text and background, such as black letters on a white board or white letters on dark acrylic. Keep text spacing comfortable and use size hierarchy, larger text for headings like “Bar Menu” and smaller text for drink options.
Popular bar sign styles include hand-lettered wooden boards, printed acrylic panels with geometric shapes, and chalkboard menus with hand-drawn illustrations. Menu signs often appear as tri-fold table displays or upright boards near dining areas. Creating a tri-fold tabletop sign yourself can cost under $25 with basic cardstock and markers, while professionally printed acrylic signs may range from $75 to $150 depending on size and custom details.
Adding bar and menu signs creates smoother flow at the reception, reducing confusion and making guests feel welcomed and informed. These signs serve a dual role as decorative elements that reinforce your wedding style. Photogenic signs with attractive design and surrounding decor encourage guests to snap pictures, helping capture memories and even boosting social media sharing if paired with a photo sharing sign elsewhere. Consider these signs an investment in both functionality and atmosphere, with flexibility across different wedding sizes and styles so you can tailor their look and information exactly how you need.
8. Comparing Wedding Sign Materials: Wood, Acrylic, Chalkboard and More
Choosing the right material for your wedding signs depends on where you’ll display them, your budget, and the look you want to achieve. Outdoor weddings require sturdy options like wood, acrylic, or metal because they resist weather better. Indoor signs can be lighter and more delicate, such as foam board or paper, which are easier to handle and customize. Style also guides your choice: wood suits rustic or outdoor themes well, while acrylic offers a modern, polished feel. Soft fabrics add romantic, textured charm.
| Material | Cost Range | Durability | Style Suitability | Ease of Customization |
|---|---|---|---|---|
| Wood | $30 – $100+ | High (good for outdoor) | Rustic, Outdoor, Boho | Moderate (paint, engrave, stain) |
| Acrylic | $27 – $120+ | High (weather-resistant) | Modern, Minimalist, Elegant | High (print, vinyl, paint) |
| Chalkboard | $20 – $60 | Medium (best indoor; smudges outdoors) | Vintage, Casual, Rustic | High (chalk or chalk markers) |
| Foam Board / Paper | $5 – $30 | Low (indoor use only) | Any, especially DIY or budget | Very High (print, paint, write) |
| Fabric | $15 – $50 | Low to Medium (best indoors) | Romantic, Soft, Boho | Moderate (paint, embroidery) |
Wood is a popular choice for outdoor weddings because it naturally withstands some moisture and wind. You can paint or stain it, and it pairs well with floral decorations or string lights, creating a warm, organic look. Acrylic signs tend to cost more but give a sleek, clear or frosted look that suits modern or upscale themes. They’re less absorbent than wood and won’t warp in humid weather. Chalkboards add vintage charm but are better indoors or under tents, since rain or breeze can ruin the lettering.
Foam board and paper offer the lowest costs and highest customization ease. Printing directly or adding hand-painted details is simple, perfect for indoor venues where weather is not a concern. Fabric signs bring a softer touch to ceremony backdrops or photo booths but don’t hold up well if exposed to wind or rain for long periods.
Tip: Choose materials based on your venue’s conditions first, weather can damage signs quickly outdoors, so prioritize durable materials or protect your signs with coverings.
9. DIY Wedding Signs: Easy Projects You Can Make Yourself
Simple DIY wedding signs can add a personal touch without requiring advanced skills or expensive tools. Popular beginner projects include wooden signs, chalkboard signs, and fabric banners, each offers an easy way to showcase your creativity and match your wedding theme.
Wooden signs bring rustic charm and durability. You’ll need a smooth wood panel (around 12 by 18 inches), sandpaper, acrylic paints or paint markers, painter’s tape for clean lines, and stencils or your own lettering. For chalkboard signs, get a pre-made chalkboard or create one by painting a smooth board with chalkboard paint and gather chalk markers or regular chalk. Fabric banners work well for softer looks; choose cotton or canvas fabric, fabric paint or markers, a wooden dowel, and string for hanging.
Personalizing these signs starts with deciding on your message, font style, and color scheme. Using stencils or templates helps keep text clear and consistent. Budget-friendly decorations like faux greenery, washi tape, or small LED lights can improve the signs without adding much cost. Expect to spend around $10 to $30 per project depending on materials you have on hand versus needing to buy.
Follow this step-by-step plan to create a basic wooden wedding sign as an example. The same approach applies to chalkboard and fabric signs, adjusting materials where noted.
- Prepare the surface: Lightly sand your wood panel to smooth out rough spots for better paint adhesion. Wipe away dust with a damp cloth.
- Plan your design: Choose your wording and layout. Sketch on paper or print out your text to use as a stencil.
- Transfer the design: Use painter’s tape to outline letters, or place your stencil on the wood and trace lightly with pencil.
- Paint your sign: Carefully fill in letters with acrylic paint or paint markers. Apply 1-2 coats, allowing 30 minutes to dry between layers.
- Add decorations: Attach faux greenery around edges with hot glue or apply washi tape borders for flair.
- Seal your work: Spray with a clear acrylic sealer to protect paint from smudging or moisture.
- Attach hanging hardware: Screw eye hooks into back corners and tie twine or wire for easy display.
For chalkboard signs, substitute the paint step with writing your message using chalk markers, which provide bold colors and erase cleanly if you need corrections. Fabric banners require painting letters on fabric and letting dry 24 hours before hanging on a dowel rod.
Avoid common issues like smudged paint by waiting fully for drying times and testing your markers or paint on scrap materials first. Take your time with lettering to prevent rushed or uneven results. Creating your own sign lets you tailor every detail to your wedding’s tone and ensures the finished product feels truly special to you.
10. Incorporating Personal Love Story Elements in Your Signs
Incorporating personal love story elements into your wedding signs creates a meaningful connection that resonates with your guests. Including milestones such as “Met Here,” “Our First Kiss,” or “Saying ‘I Do’ Right Here” not only tells the story of your relationship but also guides guests through your journey together. These personalized details make your signage more than just functional; they become part of your celebration’s emotional mix.
Balancing storytelling with clarity requires choosing signs that serve both purposes. Welcome signs, directional signs, and seating charts offer ideal spaces to weave in narrative without overwhelming the message. For example, a welcome sign could feature a brief timeline of your love story at the bottom or along the side while still clearly greeting the guests. Keep the main message large and easy to read, with any personal notes in smaller, complementary text to maintain legibility.
When personalizing signs, focus on concise, heartfelt phrases that fit the sign’s size and purpose. A great script template for a welcome sign might read: “Welcome to our Wedding. From a chance meeting on [Date] to this unforgettable day, we’re so glad you’re here to celebrate with us.” Directional signs can incorporate fun notes like “Dance Floor Ahead, Where Our First Dance Happened” or “Cocktail Hour, Inspired by Our Favorite Spot.”
To add a creative touch, consider including a brief timeline on a sign near the entrance to your venue. For example, start with “Our Story” at the top, then list key moments like “First Date, March 15, 2018,” “Engaged, July 10, 2022,” and “Happily Ever After, [Wedding Date].” Keep this section visually distinct using fonts or colors that match your wedding theme but don’t compete with directional or informational text.
Meaningful quotes can also deepen the emotional impact of your signs. Choose short, relevant quotes about love or commitment, such as “Love is the greatest adventure” or “Two hearts, one journey.” Paint or print these on smaller signs placed on tables or near activity areas to create moments of reflection without confusing guests. Ensure the fonts remain readable from a comfortable distance, typically around 3 to 6 feet, depending on the sign’s placement.
Personalization doesn’t have to be costly or time-consuming. DIY signs allow you to infuse your creativity and relationship history while saving money, often under $50 for materials like wood, chalkboard paint, vinyl, or fairy lights. Adding small decorations such as vines, balloon installations, or fairy lights can improve the look without overwhelming the message. For evening weddings, soft lighting around personalized signs improves visibility and adds ambiance.
Keep in mind that adding too much narrative can clutter signs and confuse guests. Avoid long paragraphs or excessive dates; focus instead on key moments and brief phrases that invite curiosity and connection. This approach keeps guests informed and engaged without compromising ease of navigation during your event.
11. Best Practices for Displaying and Placing Wedding Signs
Choosing the right stands and frames for your wedding signs ensures they catch attention while fitting your wedding’s style. Copper pipe stands provide a modern, trendy look and usually range from $20 to $50 each. They’re durable and give a sleek metallic finish that complements urban or industrial decor. For a simpler, budget-friendly choice, clear plastic sign holders or basic easels are easy to find for under $15 and let your printed signs shine without distraction.
Sign size should match your venue’s scale. Large ballrooms or outdoor gardens call for bigger signs, around 18 by 24 inches or larger, to keep text legible from a distance of 10 feet or more. Smaller, cozier spaces work best with signs around 11 by 14 inches to avoid overwhelming the setting. Always test readability by stepping back to the typical guest vantage point before finalizing your size.
Placement timing and coordination impact both flow and aesthetic. Position directional signs at natural decision points like parking lot exits or hallway intersections. Welcome signs do well near the entrance where guests first arrive. To integrate signs visually with your venue’s decor, use frames or stands in colors that match your palette, wooden frames or easels pair beautifully with rustic themes, while gold or silver metallic holders suit classic or glam weddings.
- Use wooden easels for rustic or vintage weddings to add warmth and texture.
- Copper pipe holders fit modern, minimalist styles, offering a clean metallic finish.
- Clear acrylic frames keep focus on the sign content, ideal for contemporary or sleek weddings.
- Floor standing frames work best near entrances or larger open spaces for easy viewing.
- Tabletop frames suit bars, menus, or programs displayed on counters or reception tables.
- Attach signs to existing structures like fences or railings to save space and add charm.
- Consult your planner for flow considerations, ensuring signs guide guests smoothly without crowding.
Place signs where guests naturally pause or look first, avoiding cluttered spots that might hide your message.
Coordinate your signage style with floral arrangements or fabric drapes nearby by choosing materials and colors that complement rather than clash. For outdoor events, consider weighted or anchored stands to prevent signs from tipping in wind. Testing sign placement during venue walkthroughs helps identify potential visibility issues and ensures guests won’t miss important directions or information.
12. Affordable and Sustainable Alternatives for Wedding Signage
Using budget-friendly and eco-conscious wedding signs can make a big difference in both your wedding expenses and environmental footprint. Materials like reclaimed wood, old frames, or chalkboards kept from previous events offer a sustainable, low-cost solution. These items often cost under $20 when sourced from thrift stores or garage sales, compared to $50 or more for brand-new signs made from typical wedding materials like acrylic or custom wood. Upcycling old signs by repainting or adding new lettering refreshes their look, keeping costs down while reducing waste.
Renting signage is another cost-effective, environmentally friendly option. Many event rental companies offer a range of signs, including welcome boards, seating charts, and menu displays. Rental prices often run between $15 and $40 per sign, which is considerably less than purchasing custom pieces that might only be used once. Renting also lowers the demand for new materials, which cuts down production emissions and waste. This is ideal if you want professionally made signs without the lasting impact or clutter.
DIY projects using recycled materials save money and add a personalized touch. For instance, you can create directional signs from scrap wood or repurpose old mirrors and windows as message boards. Use water-based paints and chalk markers to keep the process eco-friendly. These methods not only minimize costs, often spending $10 to $30 on supplies, but also give you control over the design. However, you should start early since creating clear, weather-resistant signs can take several hours and multiple coats of paint or sealant. Signs that aren’t durable or legible can confuse guests and detract from your event experience.
Careful material choice ensures signs remain attractive and functional throughout the day. Wood and chalkboard signs can handle outdoor settings better than paper or lightweight cardstock, which may curl or fade with moisture and heat. Combining used or rented signs with quality finishes extends their lifespan during the event. For example, applying a clear sealant to a wooden sign prevents warping, while laminated paper signs resist spills. This attention to detail balances affordability with durability, so your signs look polished without extra spending.
Many online marketplaces and local community groups are good spots to find affordable, secondhand wedding signage. Facebook Marketplace, Etsy’s vintage section, and local thrift shops frequently list signs priced at $10 to $30 that fit a wedding theme. Always inspect items thoroughly for damage and consider whether you can easily customize them to match your decor. Avoid signs that require costly restoration or may not withstand outdoor use, as this will raise your total cost and add stress close to the wedding.
Step-by-Step Action Plan for Your Wedding Signs
Use this action plan to organize your wedding signs for a smooth, stylish, and stress-free setup that fits your budget and theme.
- 4, 6 Months Before: Choose the types of signs you need based on your venue and guest count. Confirm essentials like welcome and directional signs, then check if you want extras like menu or seating chart signs. This ensures you order or make the right amount.
- 3 Months Before: Decide on materials that fit your style and budget, wood, acrylic, or chalkboard. Order custom signs or gather supplies for DIY projects so you have plenty of time for adjustments.
- 2 Months Before: Start designing your signs or drafting text that includes clear directions and personal touches. Share drafts with your planner or venue coordinators to confirm wording and placement.
- 6 Weeks Before: Begin DIY projects or approve proofs from vendors. Make sure to review the durability and legibility of your signs under different lighting conditions to avoid surprises on the wedding day.
- 1 Month Before: Finalize and print or complete hand-lettering of signs. Start practicing setup with mock placements, noting which signs look best where and adjust sizes or stands if needed.
- 2 Weeks Before: Pack all signs with mounting supplies and a setup checklist. Label each sign with its intended location to guide helpers on the wedding day.
- Wedding Day: Assign a trusted person or your planner to place signs as guests arrive. Check visibility and sturdiness once placed, making small adjustments for wind or lighting if needed.
Frequently Asked Questions
What Are Some Interactive Wedding Sign Ideas to Engage Guests?
Interactive wedding signs include seating charts guests can update or message boards for advice. These create fun moments and keep guests involved in the celebration.
How Can Wedding Signs Reflect the Couple’s Love Story?
Use signs with personalized milestones, quotes, or photos. Incorporating these elements makes the signs meaningful and unique to you.
What Are Some Creative Schedule Sign Ideas for Wedding Days?
Schedule signs with playful fonts and icons keep guests informed and entertained. They help everyone know what’s happening next without confusion.
Can Wedding Signs Double as Photo Backdrops?
Yes, large signs or boards with decorative designs can serve as photo backdrops. This adds style and gives guests memorable photo opportunities.
How Do I Choose the Best Location for Each Wedding Sign?
Place signs where guests naturally pause, like entrances and near seating areas. Visibility ensures signs guide guests smoothly without needing extra help.
What Style of Lettering Works Best for Wedding Signs?
Clear, readable fonts with decorative touches suit most weddings. Avoid overly fancy fonts that can confuse onlookers, especially for directional signs.
Final Thoughts
Well-designed wedding signs solve common guest questions and add a personal touch to your celebration. Start by choosing the essential signs that fit your venue and style, then focus on clear designs and easy-to-follow placements. Grab your supplies or place your orders now so you can enjoy the process and have everything ready well before the big day.