How to Make Wood Pallet Signs: Step-by-Step Guide with Pro Tips
Learning how to make wood pallet signs is simple with the right materials and steps. Start by selecting sturdy pallet wood, removing nails safely, and sanding the boards for a smooth surface. Proper preparation ensures your sign lasts longer and looks professional.
Key Takeaways
- Choose pallet wood at least ½ inch thick to ensure durability for your sign.
- Remove all nails carefully to prevent damage to tools and injury.
- Sand boards thoroughly to create a smooth surface for painting or staining.
- Use wood with moisture content below 15% for outdoor signs to avoid warping.
- Incorporate 3D elements like raised letters or objects to add visual interest.
- Wood glue can be sufficient for assembly, but screws offer extra strength.
What Materials and Tools Are Needed for Wood Pallet Signs?
To make wood pallet signs, start by gathering the right materials and tools to ensure a smooth and successful project. Essential materials include pallet wood, which is often made of pine or other softwoods that are easy to work with and take paint well. Using 1×4 pine boards or reclaimed pallet slats provides a good balance between sturdiness and a rustic look.
Paint choice affects the final appearance and durability of your sign. Acrylic paint and chalk paint are recommended because they adhere well to wood surfaces and offer vibrant, lasting colors. Chalk paint also produces a matte finish that fits perfectly with rustic and farmhouse styles. Optionally, you can use a wood stain to bring out the natural grain of the pallet wood before painting or to create a weathered effect.
Tools make assembling and customizing easier. A hammer and pry bar will help dismantle pallets carefully without damaging the wood. For assembling your sign, a drill with bits for wood screws is more effective and safer than nails. Sandpaper or an electric sander smooths edges and surfaces to prepare the wood for paint or stain. Having a tape measure and pencil helps with accuracy, especially when you plan your design layout.
- Pallet wood or 1×4 pine boards for the base
- Acrylic or chalk paint for color and design
- Wood stain (optional) for improving wood texture
- Drill and wood screws for assembling the sign
- Hammer and pry bar for pallet dismantling
- Sandpaper or electric sander to smooth surfaces
- Tape measure and pencil for measuring and marking
Costs for materials vary. Pallet wood can often be found free or low cost, while 1×4 pine boards may run $2 to $5 per board at hardware stores. Paint can cost $5 to $15 per small bottle or container, depending on brand and quantity. Tools like drills or sanders may require an initial investment if you don’t already own them, ranging from $25 for basic drills to $50 or more for affordable sanders. High-quality tools can make the work easier and faster but are not necessary for beginners.
Good results come when you prepare your wood well, remove splinters, and choose paint that resists chipping. Avoid using spray paint or oil-based paints indoors unless working in a well-ventilated area and wearing appropriate safety gear. Make sure the wood is dry before applying paint or stain to avoid peeling or blotching later. Using screws rather than nails provides a sturdier structure and allows adjustments if needed during assembly.
How to Safely Dismantle and Prepare Pallet Wood for Signs
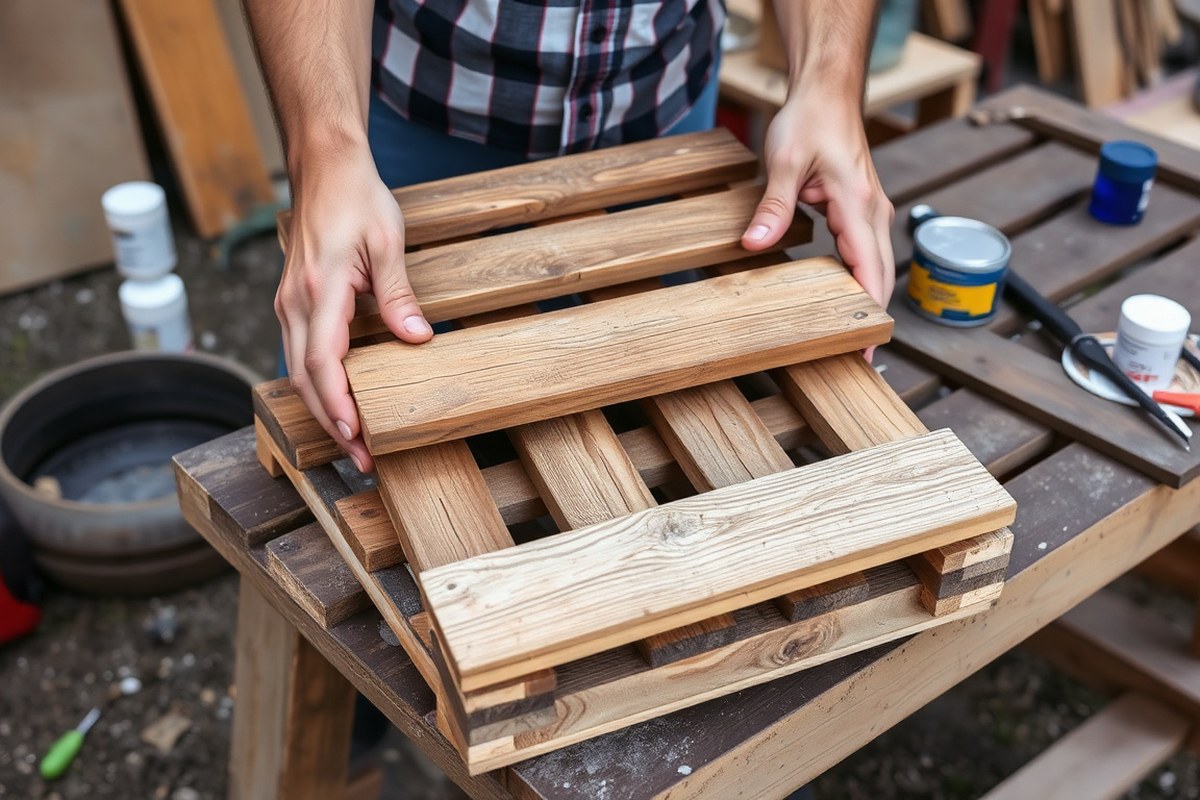
Removing pallets safely and preparing the wood properly ensures your pallet signs look great and last longer. Remove nails carefully to avoid wood damage, use protective gear to prevent injury, and clean and inspect the wood before painting. These steps help you work efficiently and achieve a smooth surface for your design.
Essential Safety Gear and Precautions
Wear sturdy gloves to protect your hands from splinters and sharp nails, and safety glasses to guard your eyes from flying debris during dismantling. Closed-toe shoes can shield your feet from dropped tools or heavy pallets. Consider a dust mask, especially when sanding dusty or aged wood, to avoid inhaling particles. Work in a well-ventilated area and keep tools sharp and in good condition to prevent slips and accidents.
Handling pallets may expose you to old nails, staples, or rough edges that can cause injury. Take care to position yourself securely and use tools properly to avoid muscle strain or mishaps. Check pallets first for any signs of chemical treatments or mold, which may require additional protective measures or different wood choices.
Step-by-Step Pallet Disassembly Process
Carefully dismantling pallets preserves the wood for your signs. Improper removal of nails can split or crack the wood, so take your time and use the right tools.
- Place the pallet on a sturdy work surface or saw horses to stabilize it.
- Use a hammer claw or pry bar to gently lift the nails from the wood. Start with the outer boards to access the inner pieces.
- Work steadily along the nail line, rocking the pry bar back and forth to loosen nails without splitting the wood.
- Remove nails fully with a pair of pliers or a nail puller once loosened.
- Repeat for all boards until the pallet is dismantled into usable planks.
- Trim any rough or uneven edges with a saw or sander for a clean finish.
Using a pry bar slowly and steadily removes nails with less damage than forcing them out quickly.
Wood Cleaning and Moisture Checking Techniques
Wood pallets often contain dirt, stains, or moisture that affect paint adhesion and durability. Start by brushing off loose debris and dirt with a stiff brush. Then wipe the boards with a damp cloth and let them dry completely for 24 to 48 hours in a dry, shaded area. Avoid direct sunlight, which can warp thin boards.
Check moisture levels by pressing wood against your cheek or using a moisture meter if available. A moisture content below 15% is ideal for painting; higher moisture risks peeling or bubbling paint. Sand the surface lightly with 120- to 150-grit sandpaper to smooth rough patches and open the grain for better paint absorption. Remove all dust afterward with a tack cloth.
If the wood feels cold or damp after drying, wait longer before painting to prevent finish issues.
How to Customize Your Wood Pallet Sign Design
Customizing your wood pallet sign brings personality and style to your space while letting you express creativity. Various decorating techniques let you personalize each project, from how you paint and stencil to adding three-dimensional decorations. Planning the layout and choosing the right colors helps your design stand out and fit your décor.
Painting, Stenciling, and Staining Options
You have several ways to finish your wood pallet sign, depending on the look you want and where the sign will hang. Painting with acrylic or outdoor paint provides solid, vibrant color and durability if your sign faces weather. Start by sanding and cleaning the pallet surface, then apply a base coat of your chosen color, like a tropical turquoise or matte pink. Let this dry completely, which usually takes 1 to 2 hours at room temperature, before adding stenciled letters or designs on top. For stenciling, use painter’s tape to secure the stencil, then dab the paint on with a sponge brush for crisp edges.
Staining works well if you prefer a rustic or natural wood appearance. Using a cloth or brush, apply a wood stain evenly and wipe off excess to highlight the wood grain. This process takes about 15 to 30 minutes per coat, with drying times varying by brand but usually around 4 to 6 hours. After staining, you can seal the surface with lacquer or polyurethane for protection, especially on outdoor signs.
Some sign makers combine both methods: stain the wood to deepen color and grain, then add painted stenciled lettering for contrast. Layering paints or using chalkboard paint over a colored base allows you to write custom messages that you can change over time. Whichever option you choose, avoid thick paint layers that can peel or crack and pick weather-resistant products for outdoor use, which might add $10 to $20 to your material cost.
Adding 3D Elements and Mixed Media
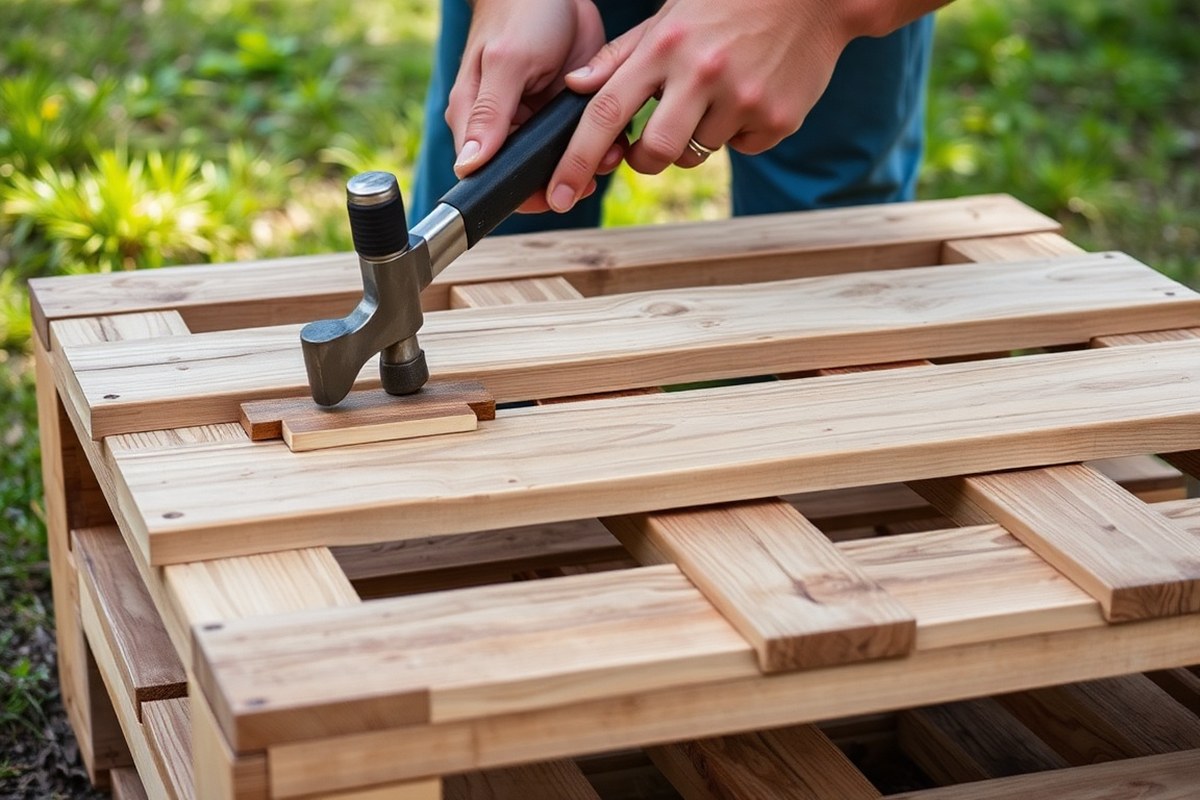
Improve your wood pallet sign with three-dimensional touches or mixed materials for a unique look. Attach small wood cutouts, metal accents, or decorative nails using wood glue or finishing nails. For example, letters cut from thin plywood can be glued in place to stand out. Adding fabric, burlap ribbons, or small greenery like faux eucalyptus also brings texture without damaging wood.
Another approach involves layering multiple pieces of pallet wood with different colors or finishes to create a shadowed effect. Use spacers or small blocks behind top layers to add depth. Keep in mind that adding 3D elements increases the weight of the sign and may need sturdier hanging hardware. The extra materials might cost between $5 and $15, depending on what you choose.
Be cautious with bulky items if your pallets were not built to support heavy weight. Small embellishments secured firmly will last longer, especially outdoors. Test adhesives and fasteners on scrap wood first to avoid damage.
Design Layout and Color Coordination Tips
Planning your design layout before you start saves time and ensures your sign looks balanced. Sketch your design on paper or use a digital template that represents your pallet’s size. Use a pencil to lightly mark guidelines or text placement directly on the wood, then erase after painting. Centers and margins of about 1 to 2 inches work well to keep text readable and visually pleasing.
Choose colors considering contrast and harmony with your walls or outdoor setting. Use color wheels or online palette tools to select schemes that pop, like complementary or analogous colors. For example, pairing turquoise with coral for summer-themed signs creates energy, while dark stains with cream or white paint suit rustic or farmhouse styles.
Try to limit the palette to two or three colors to avoid clutter. When painting letters, consider using a different shade or brightness level than the background for legibility. Take time to dry between coats and check your work in natural light to see how colors read before sealing or adding extra layers.
Best Assembly Methods to Build Your Pallet Wood Sign
Choosing the right fastening method for your wood pallet sign affects its durability and appearance. Nails, screws, and wood glue each have advantages and drawbacks depending on the thickness of pallet wood, the number of planks, and whether you want the sign to last outdoors or indoors. Using a combination of methods often provides the best stability and prevents issues like warping or splitting.
Nails are quick to install and inexpensive, but they can loosen over time, especially if the wood is thin or exposed to moisture. Screws offer stronger holding power and reduce the chance of pieces pulling apart, but you need to pilot-drill holes to avoid splitting the wood, especially under ¾ inch thickness. Wood glue adds extra bonding strength but requires drying time and works best when clamping is possible.
| Fastening Method | Best Use | Pros | Cons | Cost | How-to Tips |
|---|---|---|---|---|---|
| Nails | Single planks or quick assembly | Fast, inexpensive | Can loosen, less holding power | $5-$10 per box | Use small finishing nails; nail at angles for extra grip |
| Screws | Multiple planks, thicker wood | Strong hold, resists loosening | Requires pilot holes; time-consuming | $8-$15 per box | Pre-drill holes to avoid splitting; countersink screws to avoid surface damage |
| Wood Glue | Thin wood, multiple planks with clamps | Improves bond; no metal visible | Needs drying time; less effective alone | $6-$12 per bottle | Apply liberally, clamp planks for 30+ minutes until set |
| Combination (Glue + Screws/Nails) | Best overall stability | Strong, durable, less warping | Longer assembly time | $15-$25 total | Glue planks then secure from back with screws or nails once glue is tacky |
To avoid warping and splitting, start with pallet wood that is dry and flat. When your project includes multiple narrow planks, glue them edge to edge, then secure them from the back. Clamping during glue drying, at least for 30 minutes, helps create an even surface. Use screws on the backside, as they hold better than nails and reduce surface damage. Avoid screwing close to edges or ends to prevent splitting; maintain about a ½ inch margin.
Adding a frame or backing board greatly improves stability and longevity. For example, attaching 1×2-inch wood strips behind your pallet sign, fixed with screws or nails, keeps the planks flat and prevents twisting. This approach also makes hanging easier, as you can secure mounting hardware to the frame. When your wood pieces are too thin for screws, use more generous wood glue combined with backing strips.
Step-by-Step Process to Make a Wood Pallet Sign
Making a wood pallet sign involves clear, simple steps from preparing your wood to applying the final protective finish. Expect the whole process to take a few hours, including drying time between painting and sealing. Following the right order helps ensure a durable, attractive sign that reflects your design.
Cutting and Sizing Pallet Boards
Start by cutting the pallet boards to your desired dimensions, usually around 3 feet long and 2 feet wide. This step ensures you have a uniform surface to work on. Use a saw to trim rough edges and remove any remaining nails or staples. Taking time to sand the boards after cutting smooths the surface for painting and lettering, preventing splinters and uneven paint absorption.
- Remove nails or staples from the pallet boards using a claw hammer or pry bar.
- Cut the boards to your chosen size, typically 36 inches long and 24 inches wide.
- Sand the entire surface and edges with medium-grit sandpaper (around 120 grit) for smoothness.
- Wipe the boards with a damp cloth to clean off dust and debris.
Wear protective gloves and a dust mask while cutting and sanding to avoid injury and inhaling wood dust.
Painting Background and Applying Lettering
Painting the background first creates a base that makes the lettering stand out. Choose paint suitable for wood, such as acrylic or outdoor latex if your sign will be outside. Allow the paint to dry completely, which might take 1 to 2 hours depending on temperature and humidity. Apply your lettering next, either with stencils, vinyl decals, or hand-painting, making sure the paint does not smudge.
- Apply one or two coats of paint to the sign’s background; let it dry for 1 to 2 hours between coats.
- Lightly sand the painted surface with fine-grit sandpaper (220 grit) if needed for smoothness.
- Use stencils or vinyl letters to apply your message carefully, painting over them with a small brush.
- Allow the lettering paint to dry fully for at least 30 minutes before handling.
Avoid painting in direct sunlight or high humidity; both can cause paint to dry unevenly or peel.
Sealing and Finishing the Sign
Sealing protects your wood sign from moisture, dirt, and fading. Use a clear outdoor polyurethane or a water-based sealant. Apply two to three thin coats, letting each dry for 1 to 3 hours. After the final coat, allow the sign to cure for 24 hours before hanging. Proper sealing extends your sign’s life, especially if it’s displayed outdoors.
- Brush on the first thin coat of clear sealant evenly over the entire sign.
- Let it dry for 1 to 3 hours before lightly sanding with 220 grit sandpaper.
- Apply a second coat and repeat drying and sanding if applying a third coat.
- Let the sign fully cure for 24 hours before use or hanging.
Use a well-ventilated workspace and follow all product instructions on sealant containers to ensure safety and best results.
How to Hang and Display Your Finished Wood Pallet Sign
Heavy wood pallet signs need strong hanging hardware that can support their weight safely. D-ring hangers attached to the back of the sign and heavy-duty picture wire are good choices for indoor use. For extra stability, secure two D-rings about two-thirds down from the top edge on each side of the sign. This helps distribute the weight evenly and prevents the sign from sagging or tipping. Use wall anchors rated for at least 50 pounds if you’re hanging on drywall, or select sturdy screws for wood studs.
Outdoor display of pallet signs requires additional protection from weather and moisture. Signs made from untreated or lightly finished wood will absorb rain and humidity, causing warping or rot. To avoid damage, apply a clear waterproof sealant or outdoor wood varnish before mounting. Choose hardware resistant to rust, such as stainless steel or galvanized screws and hooks. Hanging the sign under an eave or porch roof reduces direct exposure to rain and sunlight, extending its life.
- Use D-ring hangers with heavy-duty picture wire for indoor walls
- Install proper wall anchors or screws based on wall type
- Apply waterproof sealant to outdoor signs before hanging
- Choose rust-proof hardware for outdoor mounting
- Protect signs under sheltered areas to prevent weather damage
- Check weight limits on all hardware to avoid accidents
- Regularly inspect hanging hardware and sign condition, especially outdoors
To hang your sign, first measure the wall space to ensure proper placement. Mark the spots for your screws or hooks at the exact height you want the sign to hang. Use a level to confirm even alignment. When attaching hardware to a pallet sign, screw into the thicker pallet backing instead of thinner slats to prevent splitting. For outdoor signs, reapply sealant every year or after severe weather to keep the wood protected.
Heavy signs that aren’t hung securely can fall and cause injury or wall damage. Overloading anchors or choosing flimsy hooks increases risk. Using hardware rated for more than the weight of your pallet sign provides a safety buffer. Weighing your finished sign on a scale before purchase or mounting hardware selection confirms you pick a suitable option. Avoid hanging pallet signs above beds or seats where impact could cause harm if they fall.
Common Problems and How to Fix Them When Making Pallet Signs
Warping in pallet wood happens mainly because of uneven moisture content or exposure to fluctuations in humidity and temperature. Thin pallet slats, especially those less than ½ inch thick, tend to warp more easily. To prevent this, choose wood that has been dried thoroughly and store it flat in a dry place before you start your project. Sealing the wood with a clear stain after sanding will also help maintain its shape by reducing moisture absorption.
Peeling paint or faded lettering usually occurs because of poor surface preparation or exposure to outdoor elements. Before painting your design or stenciling letters, lightly sand the surface to remove dirt and old finishes. Use a primer designed for wood to promote better paint adhesion. If your paint starts peeling, sand off the loose flakes, apply the primer again, and repaint. For faded letters, applying a clear coat over your finished sign will protect the paint and reduce fading from sunlight.
Splinters, holes, and uneven surfaces are common due to the rough nature of pallet wood. These imperfections can make painting and lettering difficult and affect the final look. Start by sanding the entire surface with medium-grit sandpaper (about 120 grit) to smooth rough patches. For noticeable holes or deep gouges, use wood filler suitable for outdoor furniture if your sign will be outside, or an indoor wood filler if it’s for decoration inside. Apply the filler with a putty knife, let it dry according to the manufacturer’s instructions (usually several hours), then sand smooth. Regular sanding also helps reduce splinter risks, making the pallet safer to handle and ready for paint.
When assembling your sign, avoid forcing screws through damaged or overly thin wood as that can cause cracking or further warping. Using pocket holes to attach the slats from behind distributes stress evenly and keeps the front clean. Make sure each slat is firmly secured without overtightening screws. This method supports the wood well and helps the assembled sign stay flat over time.
After completing repairs and assembly, check your work by running your hand over the surface to spot any remaining roughness or missed spots. Good results show a flat, smooth surface with vibrant paint that resists chipping. Signs that still have peeling paint, loose slats, or warped boards will need more work to last and look good.
Where to Find Affordable or Free Pallets and Wood Supplies
Finding quality pallet wood without spending much money is perfectly doable with some effort. Many local businesses, warehouses, and stores receive shipments on pallets and discard or recycle them soon after. These pallets tend to be sturdy and ready for projects like wood pallet signs. Start by asking managers or delivery personnel if you can take unused pallets; often they’ll give them away for free or sell them for a few dollars.
Before taking a pallet, inspect it carefully to ensure it’s safe and suitable for crafting. Look for pallets stamped with “HT” (heat-treated) rather than “MB” (methyl bromide), as the latter involves toxic chemicals not safe for indoor projects. Also, watch for signs of damage: avoid pallets with broken boards, cracks, or excessive warping. Pallets exposed to chemicals, heavy oils, or moisture can harbor stains, odors, or rot, which ruin the wood quality.
Not all pallets work well for wood pallet signs. Some pallets are made from low-grade wood or composites that may splinter or fail after sanding. Wooden pallets vary by intended use, so choosing healthy, all-wood pallets with hardwood like oak or pine is ideal. Softwood or mixed materials might need extra preparation, including additional sanding or sealing. Here’s a quick checklist to help you pick good pallet wood for signs:
- Look for “HT” stamp for heat-treated, safer wood
- Check for solid, uncracked boards without splintering
- Avoid pallets with chemical stains, mold, or strong odors
- Confirm wood species if possible; pine and oak are good choices
- Choose pallets without nails sticking out or missing boards
- Get permission from property owners before taking pallets
- Consider the size, one pallet can yield enough wood for multiple signs
Low-cost wood supply often depends on your location and willingness to search. Besides local businesses, recycling centres or wood waste drop-offs sometimes have pallets available at no charge. Online community boards, like Freecycle or Craigslist, often list people giving away pallets that are already disassembled or ready to use. Keep in mind, transportation matters; ensure you have a vehicle large enough to carry the pallets home safely.
Always wear gloves and eye protection when handling pallets to avoid splinters and nails during dismantling.
Scrap wood remnants from pallet projects can extend your materials supply, making your woodworking more affordable. Calculating the wood amount you’ll need before gathering pallets helps avoid excess and waste. One standard pallet can provide around 30 to 50 board feet of wood, enough for several small to medium signs depending on your design dimensions.
Step-by-Step Action Plan
Follow these steps in order to create your wood pallet sign efficiently and safely. Each step tells you what to do and how to confirm you’ve done it right.
- Before you start: Gather all the necessary tools and materials, including a safe workspace. Verify you have pallet wood, paint or stain, sandpaper, nails or screws, a hammer or drill, and protective gear.
- Day 1: Dismantle the pallet wood carefully using a crowbar or hammer. Check that the boards remove cleanly without splitting or cracking.
- Day 2: Sand the pallet wood boards thoroughly to remove splinters and rough areas. Run your hand over the wood to ensure a smooth surface.
- Day 3: Customize your design by sketching or transferring your text or image onto the wood. Make sure the layout fits within your sign dimensions.
- Day 4: Paint or stain your wood boards following your design. Allow adequate drying time indicated on the product’s label.
- Day 5: Assemble the sign by securing the boards together with nails or screws and a backing support if needed. The sign should feel solid and not wobble.
- Day 6: Attach hanging hardware appropriate for your sign’s size and weight. Test by gently lifting the sign to confirm it’s secure.
- Day 7: Hang your wood pallet sign in the intended location, checking that it sits level and is clearly visible.
Frequently Asked Questions
Can I Use Reclaimed Pallet Wood for Outdoor Signs?
Yes, reclaimed pallet wood can work outdoors but treat it with a water-resistant sealant. This prevents warping and helps maintain the sign’s appearance despite weather exposure.
What Paint Types Work Best on Wood Pallet Signs?
Acrylic paint and chalk paint are best for pallet wood signs as they stick well. They provide good coverage and durability, especially on rough, uneven wood surfaces.
How Can I Create 3D Elements for My Pallet Sign?
Use extra pieces of pallet wood or craft foam to add raised designs or letters. Attach them securely with wood glue or small nails for a standout effect.
What’s the Best Way to Age a Pallet Wood Sign for a Rustic Look?
Sand the edges lightly and apply a diluted stain or watered-down paint. This creates a weathered appearance without damaging the wood.
Are There Size Limits for Making Wood Pallet Signs?
No strict limits exist; signs can be small or large based on your wood pieces. Larger signs require sturdy support and may take longer to build.
Can I Use a Stencil for Lettering on a Pallet Sign?
Yes, stencils provide clean, precise letters and help avoid freehand mistakes. Secure them firmly to prevent paint bleeding.
Wrapping Up
Making a wood pallet sign involves careful preparation, design, and assembly to get a sturdy and attractive result. Take your time sanding and customizing, because these steps shape the final look. Start by selecting your wood and tools right now to begin your project on solid footing.