How to Make a Vinyl Banner: Complete DIY Guide with Expert Tips
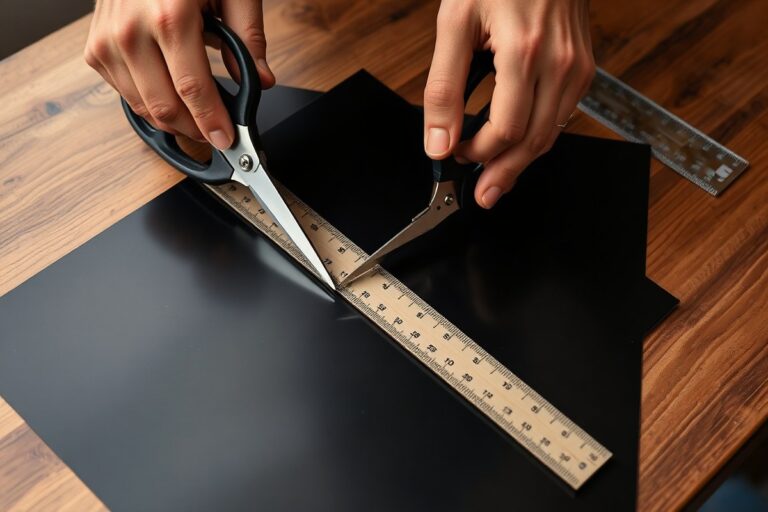
How to make a vinyl banner starts with choosing the right vinyl type based on your event needs and display location. Use 13 oz. Vinyl for lightweight, cost-effective, single-sided banners ideal for parades, or 18 oz. Vinyl for heavy-duty, double-sided printing. Begin with cutting the vinyl cloth to size and marking grommet holes every 2 to 3 feet along the top edge for secure hanging.
Key Takeaways
- Use 13 oz. Vinyl for parade banners to balance durability and ease of carrying over time.
- Select 18 oz. Vinyl when you need a heavy-duty banner printed on both sides for maximum visibility.
- Cut your vinyl cloth to a manageable size, such as a 3-by-4-foot piece, for easier handling and printing.
- Mark holes with scissors every 2 to 3 feet along the top edge to prepare for grommet placement.
- Single-sided printing on 13 oz. Vinyl is a budget-friendly way to display your message clearly from one side.
- Consider professional design services starting around $30 to create impactful visuals for your banner.
How to Make a Vinyl Banner Step-by-Step

Making a vinyl banner involves careful planning and execution to ensure durability and visual impact. Start by selecting the right vinyl weight for your purpose: 18 oz. Vinyl suits double-sided printing and heavy-duty use, while 13 oz. Vinyl works well for cost-effective, single-sided parade banners.
Design your banner using professional templates or design software that allows you to customize easily. Ensure your artwork matches the finished size and resolution requirements of the printer to avoid pixelation or cropping issues. After finalizing your design, prepare your file in the correct format for printing. Printing requires access to a commercial-grade vinyl printer if you choose to do it yourself; many small businesses opt to order from specialized banner services to save on equipment costs and enjoy a longer-lasting finish.
After printing, add finishing touches like grommets spaced every 2 to 3 feet along the edges for secure hanging. Reinforce edges by folding over and heat-sealing or sewing to prevent tearing especially in windy conditions.
- Cut the vinyl: Measure and cut your vinyl sheet to the exact dimensions of your banner, allowing an extra inch on all sides for hemming.
- Design your banner: Use a program or template designed for vinyl printing, keeping your graphics and text within safe margins to avoid trimming mistakes.
- Print the banner: Use a wide-format printer compatible with vinyl media. For heavy-duty banners, print on 18 oz. Vinyl which can hold vibrant colors on both sides.
- Trim the edges: After printing, trim excess material carefully to ensure clean straight edges.
- Add hems: Fold the edges inward about 1 inch and heat-seal or sew to create reinforced hems that prevent fraying.
- Install grommets: Punch holes every 2 to 3 feet along the edges and attach metal grommets for hanging. Use a grommet kit compatible with vinyl thickness.
- Apply finishing touches: Add pole pockets if needed by folding and sealing larger edges, allowing easy mounting on banner stands or poles.
- Inspect your banner: Check for printing clarity, secure hems, and properly aligned grommets before displaying.
Choosing the Right Vinyl and Materials

Choosing the right vinyl material and thickness depends on where you’ll use the banner and how durable it needs to be. Lighter vinyl like 13 oz. Works well for portable indoor and outdoor use, while heavier 18 oz. Vinyl is better for permanent or heavy-duty outdoor signs. Finishing materials like grommets and pole pockets protect the banner and make installation easier.
Types of Vinyl Materials
Vinyl banners usually come in smooth or mesh varieties. Smooth vinyl is the standard option, offering a solid surface that works for most printing needs and environments. Mesh vinyl is designed for windy outdoor locations because its small holes reduce wind resistance, but it’s less vibrant visually.
For typical event or business banners, the most common choice is smooth vinyl. This material is durable and offers high-quality print surfaces that highlight your design clearly. Oil or vinyl cloth can also be bought by the yard at craft or fabric stores if you want to make banners by hand, but pre-made vinyl banners provide stronger durability and weather resistance.
Thickness and Weight Options
Vinyl thickness is measured in ounces per square yard, with 13 oz. And 18 oz. Being common weights. The thickness impacts durability, wind resistance, weight, and ease of handling. Most single-sided banners use 13 oz. Vinyl, which balances weight and toughness well. It is light enough to carry around and resist heat and wind.
For heavier applications like street banners or signs mounted on poles exposed to strong wind and rain, choose 18 oz. Vinyl. It’s thicker and more durable but less portable and slightly more expensive. Use this when you want your banner to last longer outdoors or withstand rough weather.
Consider what you need based on use and location. A banner indoors or in a sheltered area does not require 18 oz., but if the banner is doubling-sided or exposed to harsh elements, 18 oz. Is a safer choice.
| Feature | 13 oz. Vinyl | 18 oz. Vinyl |
|---|---|---|
| Weight | Lightweight, easy to handle | Heavier, more durable |
| Durability | Good for short to medium-term outdoor use | Better for long-term and harsh weather |
| Use Case | Indoor, events, portable outdoor banners | Outdoor pole banners, street signage |
| Price | Lower cost per square yard | Higher cost, more material |
| Wind Resistance | Moderate, can be damaged in high wind | High, withstands strong winds better |
This table summarizes how 13 oz. And 18 oz. Vinyl compare in features relevant to your project. Your choice should depend on where and how long the banner will be used, plus the budget and handling preferences.
Essential Finishing Supplies
To protect your vinyl banner and enable secure hanging, add finishing materials like grommets, pole pockets, and reinforced edges. Grommets are metal rings placed every 18 to 24 inches along the edges. They prevent tearing and provide sturdy points to tie ropes or hooks for hanging.
Pole pockets create a loop at the edge of the banner to slide a support pole through. Use these when mounting banners on stands or frames to keep the banner stretched and stable. Note that choosing pole pockets can limit some other finishing options, so decide early based on your display needs.
Reinforced edges strengthen the banner border, especially if your banner will face strong wind or frequent movement. This finishing step adds durability and extends banner life.
Tip: Space grommets evenly every 18 to 24 inches to avoid stress points and prolong the banner’s life.
Designing an Effective Vinyl Banner
Start by determining the exact dimensions of your vinyl banner so your design fits perfectly without distortion or wasted space. Use a graphic design program to set the banner size before adding any text or images. Keep your layout simple to grab attention quickly; too many design elements or excessive text can overwhelm viewers and reduce clarity.
Your message should be the focal point. Use a clear, concise headline at the top or center with the largest font size, ideally between 150 to 300 points depending on the banner size. Supporting text should be smaller but still legible from a distance, around 72 to 150 points. Employ visual hierarchy by varying font sizes and weights to guide the viewer’s eye naturally from the most important information to the least.
Choose fonts carefully to maximize readability. Sans-serif fonts like Arial, Helvetica, or Futura work well because they keep letters distinct, which helps when reading from a distance or quickly while moving. Avoid script, decorative, or thin fonts that can blur or become hard to read on large vinyl banners.
Color choice affects visibility more than you might expect. Use high-contrast combinations such as dark text on a light background or white text on a dark background. When your brand colors are soft or light, pick bolder versions of those same hues to maintain contrast. Avoid using similar tones for text and background since low contrast reduces visibility in bright light or from afar.
Place key images or logos near your headline or main message to reinforce branding but avoid cluttering the space. Make sure there is enough white or empty space around text and images to help each element stand out and improve overall readability. A common approach is to align text to the left or center and keep margins of at least 2 to 3 inches on all sides of the banner to prevent trimming issues.
Online design platforms often provide templates tailored for different banner types, including advertising, storefront branding, or event signage. Starting with these templates ensures your layout respects proven design principles. They typically already balance text size, image placement, and spacing for visibility. Options exist from free tools to paid services starting around $30 for professional custom designs.
A checklist for your design process: choose correct banner size; select bold, legible fonts; limit text to essential information only; use strong color contrasts; include ample white space; position logos and images near key text; and preview your design at actual size on screen to check readability. Following these steps increases the chance your vinyl banner will catch attention and communicate clearly from both close up and across a busy setting.
Preparing Your Design File for Printing
For a vinyl banner to print clearly and look professional, your design file must meet specific requirements for format, resolution, bleed, and color mode. These settings ensure the print matches your vision and that no important details get cut off. Preparing the file correctly also streamlines sending it to your printer without delays or extra charges.
Selecting the Right File Format
Using a file format accepted by most printing companies is essential. Common options include PDF, TIFF, EPS, and high-resolution PNG or JPEG files. PDF is often preferred because it preserves vector graphics and fonts, ensuring sharp text and images at any size. TIFF files are useful for high-quality raster images without compression artifacts. Avoid using low-resolution JPEGs or files with embedded color profiles that printers might not recognize.
Vector formats like AI or EPS allow infinite resizing without loss of quality and are ideal for logos and fonts. Use the highest export quality available in your design software when working with raster images. Keep in mind that some printers require flattened files, so check their specifications before submitting your design.
Setting Resolution and Bleed
Resolution determines how clear your printed banner will be. For vinyl banners, a minimum of 150 dots per inch (DPI) at the actual banner size is usually sufficient. Higher resolutions, like 300 DPI, improve detail but create larger files and may require more powerful computers to handle. When preparing your file, set the canvas size to match the banner’s final dimensions, including extra space for bleed.
Adding bleed means extending your design slightly beyond the banner’s cut line, usually by 0.125 to 0.25 inches on each side. This prevents unprinted edges if the cutter shifts slightly during finishing. Crop marks are small lines placed just outside the bleed area to guide the printer on where to trim. Many design programs have options to add bleed and crop marks automatically during export. Always confirm with your printer the exact bleed size they require.
Submitting Your Design to Printers
Before sending your file, convert all text to outlines or paths to avoid font substitution, and embed any linked images or graphics in the design file. Check colors by working in the CMYK color mode since vinyl printing uses cyan, magenta, yellow, and black inks. RGB colors from screens can shift in printing, so proof your design in CMYK or request a printed proof from the printer.
Many printers accept file uploads through their websites, email, or file transfer services. Make sure your files are named clearly and include details like banner size and quantity in your message. Confirm the printer’s preferred file specifications and inquire whether they offer a proofing process. A digital or physical proof lets you catch errors or color mismatches before the full print run.
- Use PDF or TIFF format at 150 to 300 DPI resolution
- Set canvas size to final banner dimensions plus 0.125, 0.25 inch bleed
- Add crop marks outside the bleed for cutting guides
- Convert fonts to outlines to avoid font issues
- Work in CMYK color mode and request a proof if possible
- Embed or include all linked images and graphics
- Follow your printer’s file submission guidelines exactly
Taking these steps improves your chances of a clean, accurate print without costly delays. When you lack confidence in preparing files, some print shops provide paid design services to manage the process for you.
Finishing the Banner: Grommets, Edges, and Pole Pockets
To reinforce your vinyl banner edges, install grommets, and add pole pockets, you’ll need a few tools and specific steps. Proper finishing protects your banner from tearing and makes hanging easier. Choose between heat welding or stitching for edges, add metal grommets for secure mounting, and use pole pockets for pole displays.
Tools for Installing Grommets
Grommets give your banner strong anchor points to hang it safely. You’ll need a grommet kit, which usually includes the grommets, a hole punch, and a setting tool. A heavy-duty hole punch designed for vinyl is important to make clean holes without damaging the banner. A hammer or a grommet press is required to secure the metal grommets in place. Also, having a tape measure, marker, and flat work surface helps with precise placement.
Heat Welding vs Stitching Edges
Reinforcing edges prevents fraying and tearing under tension. Heat welding seals the vinyl edges by melting layers together, creating a waterproof and smooth finish. This method is fast and works well for most banners, especially when you want an even, neat appearance. Stitching involves sewing a folded hem along the edges, adding extra mechanical strength but less weather resistance. Use heavy-duty polyester thread for outdoor durability.
Heat welding suits banners exposed to rain or moisture because it blocks water entry at the seams. Stitching fits banners needing extra toughness against wind stress or when you’ll add pole pockets inside the hem. Outdoor banners generally benefit from combining these methods, but heat welding alone is often sufficient for small to medium banners.
Creating and Using Pole Pockets
Pole pockets are tubes sewn or welded into the top or bottom edges of the banner to slide poles through for mounting. They provide a clean look and keep banners taut without visible grommets or rope. Three-inch-wide pockets are common, allowing standard banner poles to fit easily. Use pole pockets when displaying banners between two poles or hanging vertically in gyms and parades.
To make pole pockets, fold the banner edge inward about 3 inches and secure it by stitching or heat welding. Insert the pole through the pocket, then mount the pole onto the display frame or hooks. You can add pole pockets on the top and bottom or only the top depending on how you want the banner to hang or if you need it to roll up tightly.
- Measure and mark where you want to place grommets, evenly spacing them about every 2 to 3 feet along all edges to prevent sagging.
- Lay the banner flat on a sturdy, clean surface to avoid wrinkles during installation.
- Use a heavy-duty hole punch to create holes at the marked grommet spots.
- Place one half of the metal grommet on the front side of the hole and the other half on the back, aligning them precisely.
- Use the grommet setting tool and hammer or grommet press to firmly clamp the grommet halves together until secure.
- Fold the edges inward 1 to 3 inches and heat weld or stitch to reinforce the banner edges and prevent tearing from tension.
- If adding pole pockets, fold the top or bottom edge inward about 3 inches and secure with stitching or heat welding to create tubular pockets for poles.
- Check all reinforcements for durability before hanging your banner outdoors or in high-traffic areas.
Keep in mind: Too few grommets can cause the banner to sag or tear, while placing them too close to the edge can weaken the vinyl, so balance spacing carefully.
Methods to Print Your Vinyl Banner
Printing a vinyl banner at home is possible but often limited by the size and quality of typical inkjet or laser printers. Most home printers cannot handle large vinyl sheets directly nor produce the vibrant, weather-resistant inks required for outdoor durability. Instead, you might print a banner in smaller sections and assemble them, but this takes time and may result in visible join lines and reduced visual appeal. Costs for home printing mainly involve buying printable vinyl sheets, which range around $10 to $30 per sheet depending on size and brand, and replacing ink cartridges frequently, which can add up if your printer uses expensive or specialty inks designed for vinyl.
Professional commercial printing services use large-format printers capable of producing sharp, full-color images that are UV-resistant and waterproof. These printers handle wide rolls of vinyl, allowing smooth prints for banners several feet wide and long. Using commercial printing guarantees consistent color quality, longevity, and strong outdoor performance. Expect prices varying based on size, design complexity, and material. For example, a 3-foot by 6-foot banner typically costs $50 to $150 through local print shops. Turnaround times are usually one to three business days, though rush services might be available at extra cost. Professional services often include finishing options like reinforced edges, grommets, and pole pockets for mounting your banner securely.
Online professional printing services combine the convenience of uploading your design from home with the benefits of commercial-grade equipment. These platforms often offer design templates and tools that let you preview your banner before ordering. They deliver banners right to your door, usually within five to seven business days depending on shipping speed. Prices online tend to be competitive due to large volume production, and you may find deals for bulk orders or seasonal discounts. When choosing an online printer, look for clear specifications about material Type (13 oz PVC is common), print resolution (at least 720 dpi recommended), and whether they include finishing options. Also, check customer reviews to confirm print quality and customer service reliability.
Choosing how to print your vinyl banner depends on your budget, deadline, and quality needs. For low-cost, small banners or quick test prints, home printing might work but expect compromises. For best results, professional printing services provide durable, clear, and weather-resistant banners suitable for all kinds of events and marketing. Ordering online is a good middle ground if you cannot visit a print shop and want the banner delivered ready to use. When preparing files, ensure your resolution matches printer requirements, use CMYK color mode, and save in a supported format like PDF or TIFF to avoid color shifts or pixelation. Ultimately, your choice should balance cost, convenience, and the professional image you want your banner to convey.
How to Hang and Display Your Vinyl Banner Securely
To hang a vinyl banner outdoors securely, you need the right hardware and proper placement. Metal grommets are essential because they provide sturdy anchor points for attaching ropes, zip ties, or bungee cords. These accessories prevent the banner from tearing or sagging under tension. Pole pockets are another option, especially when you want to keep the banner taut and reduce wind flapping. Insert wooden dowels or poles into these pockets along the edges to add rigidity and minimize movement.
You’ll want to consider common issues like wind damage. Vinyl banners can resist water and UV rays, but strong winds can strain the material and mounting points. Using grommets combined with pole pockets helps distribute tension evenly. Avoid welding the hem if you plan to include pole pockets, since that method doesn’t work with the extra fabric needed for the pockets. For really windy locations, securing the banner at multiple grommet points is better than just the corners.
Where you place the banner affects visibility and durability. Position banners where they catch natural sight lines, near entrances, along busy walkways, or above event stages. Avoid placing them where they will get excessive wear, such as direct contact with sharp corners or where foot traffic can catch or damage the edges. Choose a location that allows you to tighten the banner without twisting or bowing the material.
- Metal grommets spaced every 18 to 24 inches
- Ropes, zip ties, or bungee cords for attachment
- Wooden dowels or poles for inserting in pole pockets
- Measuring tape to ensure even spacing and proper tension
- Scissors or cutters for trimming attachment materials
- Ladder or step stool for high hanging points
- Optional: Velcro strips for lighter indoor placement
When installing, start by attaching the top grommets first and gently pull the banner taut before securing the sides and bottom. This prevents wrinkles and sagging. Check the tension periodically, especially after wind or bad weather. Avoid excessive stretching to prevent stress on the vinyl. If the banner is large, you might need help holding it steady during installation. For accuracy, mark your hanging points on the wall or poles ahead of time.
Common mistakes include using too few grommets, which leads to sagging or tearing, and ignoring wind conditions that cause accelerated wear. Not using pole pockets when marching or placing banners in windy areas causes excessive flapping and shortens banner life. Lastly, hanging banners in poorly visible spots wastes the impact of your design, so evaluate foot and vehicle traffic patterns before choosing where to mount it.
Common Mistakes and How to Avoid Them
Many common mistakes in vinyl banner projects stem from avoidable design, printing, and handling issues. Poor design choices like overcrowded text or small font size reduce banner readability, especially at a distance. Use bold fonts with at least 2-inch height for main messages to ensure visibility. Avoid too many colors or detailed graphics that can distract from your message or cause print inaccuracies.
Choosing the right materials is another key factor. Thin vinyl or cheap inks can degrade quickly outdoors or tear during installation. Opt for a banner material at least 13 oz per square yard, which balances durability and flexibility, and use UV-resistant inks to prevent fading under sunlight. Expect these materials to cost more but extend the banner’s life significantly.
Printing errors often arise from low-resolution files or improper colour settings. Ensure your design is at least 150-300 dpi at full size and use CMYK color space for accurate printing. Proofing a small section before printing the entire banner can save time and money by catching errors early.
- Design with clear, legible fonts; minimum font height 2 inches
- Limit colors to 3-4 for clarity and accurate printing
- Use vinyl with at least 13 oz weight for durability
- Choose UV-resistant inks for outdoor banners
- Prepare files at 150-300 dpi and CMYK color mode
- Handle banners gently; avoid folding to prevent creases
- Install with evenly spaced grommets to reduce stress points
Improper handling and hanging can quickly damage your banner. Folding vinyl creates permanent creases, so roll it onto a tube for storage and transport. Use grommets spaced 12 to 18 inches apart to distribute tension evenly during hanging and prevent tearing. Check hanging hardware and replace any rusted or bent hooks to avoid accidental damage. Reinforcing corners with additional patches can also improve lifespan.
Always roll your vinyl banner with the print side out to protect the design and prevent cracking during storage and transport.
Step-by-Step Action Plan for Making Your Vinyl Banner
Follow these steps to create your vinyl banner from start to finish, ensuring a polished and durable result.
- Before you start: Choose high-quality vinyl and compatible materials suited for your display environment. Confirm the vinyl thickness and finish meet your needs to avoid durability issues.
- Day 1: Design your banner using software that matches your printing method. Save your file in a high-resolution format and double-check the dimensions and colors to ensure accuracy.
- Day 2: Prepare your design file according to printer specifications, including bleeds and safe zones. Upload or send your file for printing and verify proof approval before production begins.
- After printing: Inspect the printed banner for color accuracy and print quality. Measure the final product to ensure it matches your design dimensions.
- Day 3: Add finishing touches such as hemming edges, installing grommets, or sewing pole pockets. Check each attachment for strength and spacing to ensure secure hanging.
- Day 4: Hang your banner using appropriate hardware like ropes, bungee cords, or banner stands. Test stability in the display environment to confirm it withstands wind or movement.
- After display: Store your banner rolled and protected from sunlight and moisture to extend its lifespan. Inspect for damage after each use and repair as needed before the next display.
Frequently Asked Questions
What Type of Vinyl Is Best for Outdoor Use?
Heavier vinyl, like 13 oz. Material, holds up better outdoors, especially in wind. It is durable and prevents tearing, making it ideal for long-term outdoor display.
Can I Make a Vinyl Banner Without Graphic Design Software?
Yes, many online platforms offer easy-to-use banner templates you can customize. This allows you to create professional-looking designs without advanced software skills.
How Do I Prevent My Vinyl Banner from Fading?
Use UV-resistant inks and materials designed for outdoor durability. This helps maintain vibrant colors even with prolonged sun exposure.
What Size Should I Make My Vinyl Banner?
Choose a size that fits your display location and viewing distance. Common sizes range from 2×4 feet up to 4×8 feet, but custom dimensions work too.
Can I Reuse My Vinyl Banner?
Yes, vinyl banners are durable enough for multiple uses if stored properly. Make sure to clean and dry them before rolling tightly to avoid creases.
Is It Possible to Make a Double-Sided Vinyl Banner?
Yes, double-sided banners print on two vinyl sheets sewn or welded together. Make sure your design accounts for mirror image or reversals.
Wrapping Up
You can create a professional-looking vinyl banner by carefully selecting materials, designing with precision, and finishing with durable hardware. Start by drafting your design now using software that fits your skill level and prepares files that meet printer requirements. This practical approach will have your banner ready for printing and display without delays.