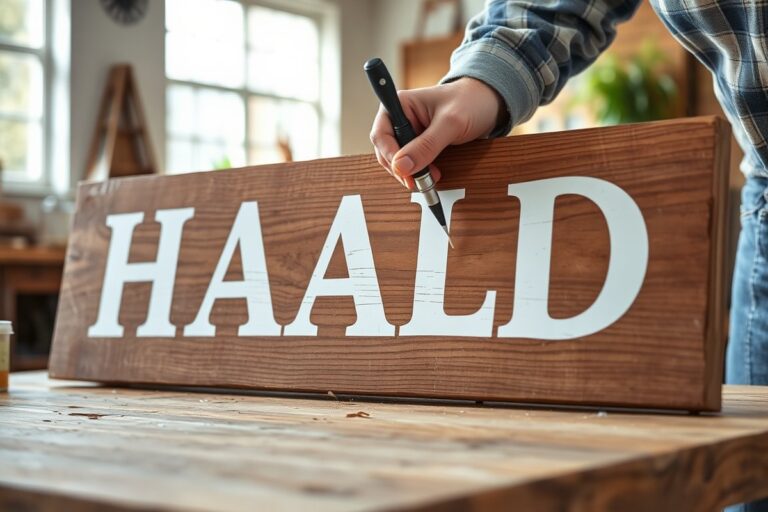
How to Make a Vintage Sign with DIY Tips and Step-by-Step Guide
Knowing how to make a vintage sign means combining the right materials, colors, and distressing techniques to mimic aged wood and paint. Start by choosing wood with natural character, then paint with colors that replicate years of wear. Distressing the surface and sealing it properly will give your sign an authentic, weathered look.
Key Takeaways
- Choose wood like 1x12x6 boards or shiplap from a local sawmill for authentic texture and affordability.
- Use black primer paint as a base coat to mimic old sign backgrounds before adding lettering.
- Lay out and measure stencils carefully, allowing extra space for cutting your board to size.
- Apply paint in thin layers and let each dry for 30-60 minutes to build vintage depth without cracking.
- Distress paint by sanding or cracking to imitate the breakdown of paint over decades.
- Wait at least 24 hours after applying stains or finishes to ensure full drying and durability.
Essential Materials and Tools for Vintage Sign Making

Creating a vintage wooden sign requires a few basic materials and tools, many of which you might already have at home. The essentials include wood boards, paints, and stencils, with options to customize based on availability and desired style. Using real old wood like fencing or pallet wood adds authenticity and texture, making the sign look genuinely aged and weathered. However, fresh wood like inexpensive shiplap can also work well, especially when treated with paint and distressing techniques to simulate an aged appearance.
Basic supplies for vintage sign making include wood cut to your preferred size, common dimensions range widely, for example, an 8-foot by 3-foot board, but smaller sizes like 12 by 24 inches suit indoor décor signs. Choose wood pieces free from large cracks or knots unless those details are part of the rustic look you want. If using scrap or old wood, clean it thoroughly before starting.
- Wood boards (old pallet, fencing wood, or new shiplap)
- Acrylic craft paint in base and accent colors
- Lettering stencils or printable templates
- Sandpaper (120 to 220 grit) for smoothing and distressing
- Paintbrushes and foam brushes of various sizes
- Sharpie marker or fine paintbrush for details
- Clear sealant such as polyurethane or wax
Tools beyond paint and brushes include a saw for cutting wood to size, sandpaper or an electric sander to smooth surfaces and edges, and clamps to hold boards firmly while working on them. You can substitute hand sanding for electrical tools if you lack power tools. Costs can remain low, about $20 total for paint, stencils, and basic boards if you purchase supplies selectively. Using scrap wood or shiplap reduces expenses significantly compared to buying specialty vintage sign wood.
For assembly, secure wooden planks side by side before painting to form a unified sign surface. To prepare the wood surface for painting, sand it lightly to remove splinters and open pores for better paint adhesion. After painting and adding your design, you’ll need sealant to protect your work and improve durability, especially if the sign will be displayed outdoors.
Consider adding unique touches like crackle paint or weathering stamps to mimic real aged wood and faded paint. These tools create the characteristic wear of a vintage sign and can be applied after the base paint has dried. Using a Sharpie for final lettering touch-ups can help refine imperfect stencil edges or add signature details.
Choosing and Preparing Wood for an Authentic Vintage Look

Choosing the right wood and preparing it properly are key to achieving an authentic vintage sign. The wood type affects the overall look and durability, while sanding and distressing bring out that worn, aged character. Pallets and reclaimed wood can work well but require careful prep to avoid issues.
Best Wood Types for Vintage Signs
Softwoods like pine, cedar, and fir are popular choices for vintage signs because they have visible grain and take paint well. Pine is affordable and widely available, typically costing around $5 to $10 for a 1”x6”x4’ board. Hardwoods like oak and maple offer durability but can be harder to distress and more expensive.
Boards with some natural knots, texture, and slight warping add character and mimic old signs. Plan for your sign’s size by choosing wood at least 3/4” thick and wide enough for your design layout, such as 12” to 24” wide. Remember that thicker wood feels more solid and authentic but costs more and weighs more to hang.
Techniques to Age and Distress New Wood
You can simulate age on new wood using sanding and distressing techniques. Start by sanding the wood smooth but leave slight unevenness and texture. Sand edges and corners more aggressively to replicate natural wear. Follow these steps to prep and distress new wood for a vintage feel:
- Sand the wood surface with 120-grit sandpaper to smooth rough spots while keeping some grain visible.
- Use 80-grit sandpaper on edges, corners, and flat spots to create worn areas.
- Apply your base paint coat, then after drying, sand some letters and edges lightly to reveal the wood beneath.
- Use a damp rag to gently rub the painted surface for subtle fading and to expose underlayers of color.
- Lightly tap or scratch the wood with a wire brush or chain for additional texture where desired.
- Apply a thin, lightly tinted wood stain to deepen the aged look in sanded areas.
Focus sanding on high-touch areas and raised grain for the most authentic aged effect, rather than sanding everything uniformly.
Using Reclaimed and Pallet Wood
Reclaimed wood, including pallet wood, can add genuine vintage charm with built-in weathering. Make sure the wood is dry, free of mold, and free of nails or staples before you start. Pallets often contain untreated pine or hardwood slats that vary in thickness and texture.
Because reclaimed wood can warp or crack, flatten any bowed boards by placing them under heavy weights or by clamping them during paint and drying. Sand off rough spots and splinters, but keep nail holes, dents, and natural marks as part of the vintage look.
Prices for reclaimed wood vary widely but often range from free (salvaged pallets) to $15 or more per board foot for specialty reclaimed lumber. Using reclaimed wood can reduce material costs but may add prep time.
Painting and Staining Techniques to Create Vintage Effects
To create authentic vintage effects on your wooden sign, use paints and stains crafted for aged looks, apply multiple layers including glazes for depth, and finish with crackle mediums that mimic natural wear. Each technique works together to build texture and color variation like those found on antique signs.
Choosing Vintage-Style Paint Colors and Stains
Opt for matte or satin acrylic paints since they dry quickly and blend well for vintage styles. Earthy tones like muted reds, olive greens, warm blues, and soft golds capture the aged appearance found on old public signs in places like bars and pools. Avoid shiny or gloss finishes, as they look too modern.
For stains, pick water-based wood stains in walnut or chestnut shades. They soak into the wood and add warmth without forming a surface film. Use stains sparingly to let the wood grain remain visible, strengthening the antique feel. Pair pale paints over darker stains to imitate naturally weathered paint layers.
Layering Paint and Using Glazes to Add Depth
Building layers is essential to achieving the depth that old signs have. Start by staining the wood as a base. Let it dry fully, then apply your background paint color with a brush or roller in thin coats. After the topcoat dries, use a translucent glaze tinted with a darker or contrasting color to add shadows and simulate dirt or soot buildup.
Apply glaze with a rag or brush, focusing on edges and spots where natural wear would occur. Wipe off excess glaze within 5 to 10 minutes to keep the effect subtle. A well-layered vintage sign should show slight color shifts and soft shadows that invite closer inspection.
- Stain the wood thoroughly and let it dry for 4 to 6 hours.
- Paint the entire surface with a base acrylic color in a thin, even coat.
- Let the first coat dry, then apply a second coat, allowing it to dry completely.
- Mix a glaze by adding 10, 20% acrylic paint to a clear glazing medium.
- Brush the glaze lightly over the sign, focusing on corners and raised textures.
- Wipe away excess glaze after 5, 10 minutes with a soft cloth.
- Repeat glazing in small spots if more depth is needed.
Adding Crackle and Weathering Effects
Crackle is a medium that creates fine cracks in the paint, replicating the pattern seen on vintage wood signs where paint dried unevenly or aged under stress. Use a commercial crackle medium between two paint layers. The top paint shrinks and cracks naturally as it dries.
Apply the crackle layer over a dry base coat. Then paint a contrasting topcoat immediately or within 30 minutes, brushing gently in one direction without overworking the paint. The cracking will appear in 1 to 3 hours. Avoid thick coats, which can produce large, unrealistic cracks or no crackling at all.
Finish by adding weathering using dark craft paint sponged or stamped lightly with distress stamps, simulating grime and wear. Use a dry brush technique with black or brown paint to add streaks or shadows near edges and corners for authenticity.
Designing and Transferring Lettering and Graphics
Start by planning your vintage sign’s layout carefully because a well-balanced design makes the lettering and graphics clear and attractive. Measure the wood surface and sketch your design to scale on graph paper or use basic design software. Include spacing for any decorative elements, and choose fonts that match the vintage style you want, such as serif or script fonts that resemble old signage.
Creating or buying stencils simplifies transferring your design. You can buy pre-made letter stencils in sizes like 7 inches from craft stores, which are affordable and quick for common fonts. If you want a custom design, use a vinyl cutting machine like Silhouette Cameo 3 or Cricut to cut a stencil from adhesive vinyl or stencil sheets. These machines cost between $150 and $300 new but can save time and produce crisp, precise designs. For a no-machine option, print your design on paper, then use carbon paper behind it to trace outlines directly onto the wood.
Transferring lettering or graphics has several simple methods. For stencil use, secure the stencil to the wood with painter’s tape or use a repositionable spray adhesive for clean edges. Apply paint with a small stencil brush or sponge, dabbing gently to avoid bleed. To hand-paint, use a pencil to outline letters on the wood and then fill in with a fine paintbrush, which allows for shadows or distressing effects. Vinyl stencils allow for easy paint application but hand-painting can give a unique, authentic look if you’re steady and patient.
- Measure and sketch your layout on paper before working on wood
- Buy standard letter stencils for quick, simple fonts
- Use Silhouette or Cricut machines to cut custom vinyl stencils
- Try carbon paper to trace designs by hand when no stencil is available
- Secure stencils firmly to prevent paint bleeding
- Choose fine brushes for detailed hand-painting and shadow effects
- Practice lettering on scrap wood to gain confidence
Vinyl cutting machines excel at producing accurate, repeatable stencils and complex graphics that would be tricky to draw freehand. They’re especially useful if you want to make multiple signs or have intricate designs with curves and shadows. However, they require some software skills and the initial investment might not suit casual projects. Hand painting with traced outlines remains effective for simple, one-off signs and offers a handmade vibe. Whichever method you pick, your goal is clear, even lettering that complements your vintage theme without smudges or uneven strokes.
Distressing and Weathering Your Sign for Authenticity
To make your vintage sign look truly worn and weathered, distressing should mimic natural aging patterns. Use sanding to soften the paint and expose wood grain, beat the surface to add dents and imperfections, and employ wet distressing for layered paint effects. Combining these methods helps achieve an authentic, timeworn appearance.
Dry Sanding and Edge Wear Techniques
Dry sanding removes paint in a controlled way, revealing bare wood and faded areas typical of old signs. Concentrate sanding on flat surfaces and edges where natural wear would happen, like corners and raised panels. Sand more heavily on edges to simulate frequent handling and exposure.
Light grit sandpaper between 120 and 180 works well to take off layers without damaging the wood underneath. Use a sanding block or palm sander for even pressure. Focus on places where the paint might have worn thin, but avoid sanding too much or the sign will look damaged rather than aged.
Using Tools to Create Dents and Marks
Adding physical marks with tools like hammers, screwdrivers, and chains simulates years of rough use. Strike the wood at random spots to create subtle dents and scratches. Use the flat side of a screwdriver to scrape or chip paint edges.
Start lightly and gradually increase impact to avoid overdoing it. These marks should look natural, so avoid making patterns or overly deep gouges. This technique brings dimension and history to your sign, capturing that weathered story.
- Choose a hammer, screwdriver, or small metal chain for distressing.
- Randomly tap or scratch the wood surface, focusing on corners and edges.
- Leave fewer marks in the center to mimic natural wear distribution.
- Inspect frequently, stepping back to judge the overall look.
- Add more impact marks sparingly to balance the effect.
Test your distressing tools on scrap wood first to avoid accidentally ruining your sign’s surface.
Wet Distressing for Layered Effects
Wet distressing involves using water to soften paint, allowing you to remove some layers while leaving others intact underneath. This creates a chipped, peeled look often seen on vintage signs exposed to weather. Use wet distressing when your sign has multiple paint layers or you want a patchy effect.
Apply water with a spray bottle or damp cloth on the areas you want to distress. Wait a few minutes for the paint to soak and soften. Then rub the surface gently with steel wool or a scrunched-up cloth to peel or rub off paint portions selectively. Dry immediately with a towel to prevent damage to the wood.
- Lightly spray water on painted areas where you want a distressed look.
- Wait 5 to 10 minutes for the paint to soften but not fully saturate.
- Gently rub with fine steel wool or a cotton cloth to remove paint selectively.
- Wipe dry with a clean towel to halt the softening process.
- Repeat on other spots to build a natural, uneven effect.
Wet distressing is helpful for layered paints but avoid soaking the wood, which can warp or stain the sign permanently.
Sealing and Finishing the Vintage Sign for Protection
Sealing your vintage sign helps protect it from damage and wear while keeping the aged charm intact. Choosing between wax, varnish, or polyurethane depends on where you plan to display your sign and the look you want to maintain. Wax finishes, especially dark wax, work well to deepen the vintage effect and add a subtle sheen without covering the texture of the wood or paint. They are best for indoor signs or covered outdoor areas because wax offers moisture resistance but isn’t as durable against direct weather or heavy handling.
For outdoor signs exposed to sun and rain, a clear polyurethane or spar varnish provides better protection. These finishes form a harder, waterproof layer that holds up to UV rays and moisture. Selecting a satin or matte polyurethane helps preserve the aged, muted appearance without the glossy shine that can look too new. A water-based polyurethane dries faster and has less odor, which works well if you want a quicker, cleaner finish.
Sealing isn’t always necessary for purely decorative indoor signs that won’t face spills or rubbing, but applying a protective finish improve longevity and makes cleaning easier. Without sealing, dust can settle in the cracks of distressing, and paint may rub off over time. Applying wax or sealer also boosts the color depth and highlights details of your lettering and texture.
To apply wax, start with a clean, dry sign. Use a soft cloth or foam brush to spread a thin layer of clear or tinted dark wax evenly across the surface. Work in small sections, rubbing the wax in circular motions to reach into grooves. Let it set for 5 to 10 minutes, then buff with a clean cloth to remove excess and achieve a soft luster. Dark wax especially deepens cracks and brush strokes, improving the worn look. You can apply several thin coats spaced a few hours apart for stronger protection.
When using varnishes or polyurethane, shake or stir well to mix. Apply thin, even coats with a high-quality synthetic brush, brushing in the direction of the wood grain. Avoid thick coats to prevent drips or uneven drying. Let each coat dry fully, usually 2 to 4 hours for water-based and up to 24 hours for oil-based products, then lightly sand with fine-grit sandpaper (220 grit) between coats to maintain smoothness and adhesion. Two to three coats offer solid protection without building a thick film that hides the vintage texture.
Expect sealing supplies for a typical 12 x 24-inch sign to cost around $10 to $25 depending on wax type or varnish brand, covering multiple projects. Apply finishes in a well-ventilated area with stable temperatures between 60°F and 80°F for best drying results. Avoid applying too much wax or thick varnish layers, which can leave sticky or plastic-like textures and dull paint details.
Planning Your Vintage Sign Project by Size and Budget
Choosing the right size for your vintage sign depends on the space where you plan to hang it and the budget for materials. Measure the area to get maximum dimensions; signs that are too large can overwhelm a space, while too small signs might not stand out. A good starting point is to select a size that balances visibility and your budget. For example, a sign around 12 inches by 24 inches suits many indoor spaces and keeps material costs moderate.
Budgeting involves considering wood costs, paint amounts, and tools if you don’t already own them. You might find it useful to look for leftover wood in your garage or buy affordable pine or plywood. Paint consumption depends on the sign size and number of coats; for a 12×24-inch sign, a small 8-ounce bottle of chalk paint and a matching size of craft paint should be enough for stenciling. Besides supplies, factor in the time needed for design, painting, drying, and distressing.
| Sign Size | Approximate Wood Needed | Paint Amount | Expected Time | Estimated Cost (Materials Only) |
|---|---|---|---|---|
| 12″ x 24″ | 1 board, 12″x24″ | 8 oz chalk paint, 8 oz craft paint | 4-6 hours (design to finish) | $10-$20 (wood + paint) |
| 18″ x 36″ | 1 board, 18″x36″ | 12 oz chalk paint, 12 oz craft paint | 6-8 hours | $20-$35 |
| 24″ x 48″ | 1 board, 24″x48″ (may cut from a 6-ft piece) | 16 oz chalk paint, 16 oz craft paint | 8-12 hours | $30-$50 |
The timeline reflects sketching your design to cutting the wood, painting background and lettering with two coats, and distressing. Let paints dry fully between coats for the best results, usually 1-2 hours depending on the room temperature (ideal 65-75°F). Complex designs with multiple colors or stencils can extend the time, so plan for extra hours on busy weekends or evenings.
Tradeoffs appear in balancing size with cost and effort. Larger signs require more paint and wood, which raises the price and extends work time. Smaller signs allow quicker finishes but limit detailed layouts or long wording. Material selection also influences the cost, using found wood can cut expenses but may need extra prep work. Clear budgeting and time estimates help you avoid starting a project that might become overwhelming or too costly.
Common Mistakes and How to Fix Them When Making Vintage Signs
Smudging paint or lettering can ruin the crisp look of a vintage sign and cause delays. This often happens when paint is still wet or when using too much paint on a stencil or brush. To fix smudges, wait until the paint fully dries, this can take between 30 minutes and several hours depending on the paint type, then lightly sand the mistake with 220-grit sandpaper and repaint. Avoid rushing this step to prevent digging into the wood.
Applying paint in the wrong order or layering too thickly can cause cracking or peeling later. Paint your base coat thinly and let it dry completely, usually 1 to 2 hours, before applying any lettering or graphics. When you notice bubbling or peeling, gently sand the area and repaint with thinner coats, allowing full drying time between layers. Avoid heavy brush pressure, which can cause uneven textures.
Over-distressing a sign often leads to wood damage or an overly worn look that loses the vintage charm. In case your sanding or distressing goes too far, patch small holes or thin areas with wood filler carefully matched to the base stain. After it dries (typically 20 to 30 minutes), sand smooth and touch up with paint or stain. For large distressed spots, try layering a dark wax over the sign to tone down harsh highlights without redoing the base layers.
- Fix smudges by letting paint dry, sanding gently, then repainting thin layers.
- Allow at least 1 to 2 hours drying time between paint coats to prevent peeling.
- Simplify distressing: sand lightly and check progress often to avoid damage.
- Use wood filler for small over-distressed spots; dry and sand smooth before repainting.
- Apply dark wax to soften overly harsh distressed effects without removing paint.
Keep patience in every step, rushing paint drying or distressing rarely leads to good results.
When sanding paint mistakes, choose fine-grit sandpaper like 220 to carefully remove errors without cutting into the wood. Avoid aggressive sanding tools, which leave scratches that show through the finish. For signs meant for outdoor display, sealing over repairs with a clear polyurethane or exterior varnish will protect your corrections and keep the sign looking good longer. Taking extra time to correct these common issues pays off with a polished vintage look that complements your space.
Step-by-Step Action Plan for Making Your Vintage Sign
Follow these steps to create your vintage wooden sign with an authentic look. Each phase guides you through the key actions and how to confirm success before moving on.
- Day 1: Choose your wood and prepare it by sanding to smooth rough areas but keep natural grain visible. Success means no splinters and an even surface for painting.
- Day 2: Apply your base paint or stain using thin coats. Check that the finish is uniform and dries without drips or blotches.
- Day 3: Plan and transfer your lettering or graphics using tracing paper or stencils. Confirm the design aligns properly and looks clear on the wood.
- Day 4: Paint your letters or graphics. Let the paint dry completely and inspect for crisp edges and no bleeding.
- Day 5: Distress your sign by sanding edges and key areas lightly. You’ll know it worked when the sign shows subtle wear without overdoing it.
- Day 6: Seal your sign with a clear matte finish to protect the paint and wood. Check that the finish is even and dries without sticky spots.
- After 1 week: Display your sign in your chosen spot. Reassess for any touch-ups needed after exposure to light or air.
Frequently Asked Questions
What Type of Wood Is Best for Outdoor Vintage Signs?
Cedar and redwood resist weathering well outdoors, keeping your vintage sign durable and attractive longer. These woods handle moisture better, reducing the chance of warping or rot in outdoor environments.
How Can I Create a Crackle Effect on Painted Signs?
Use a crackle medium or stamp, such as the Iron Orchid Craquelure Stamp with black craft paint, to simulate aged paint cracks. This adds an authentic vintage texture quickly and dries fast for efficient crafting.
Can I Use Pallet Wood for My Vintage Sign?
Yes, upcycling old pallets adds character and authenticity, plus it’s cost-effective. Clean and prepare the wood by removing nails and sanding before painting.
What’s a Good Way to Transfer Lettering Without Professional Tools?
Print your design on paper, tape it to the wood, and trace over it lightly, making a faint imprint to paint over. This manual method helps if you don’t have a stencil cutter.
How Do I Seal Vintage Signs to Last Outside?
Use a clear polyurethane or exterior-grade sealant to protect the paint and wood from moisture and UV damage. Apply several coats, sanding lightly between each, for strong lasting protection.
Are Larger Vintage Signs Harder to Make?
Larger signs require sturdier wood and careful handling but follow the same steps as small signs. You’ll need more materials and space but the process is similar overall.
The Bottom Line
Creating a vintage sign at home takes patience and attention to detail, but results can be rewarding and personalized. Start by selecting the right wood and working step by step to build layers of character. Your next move should be gathering your materials and sketching your design to bring your vintage vision to life.