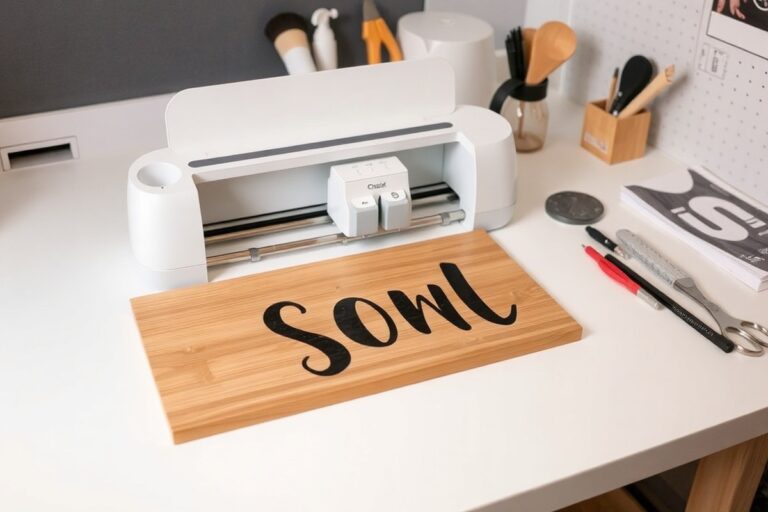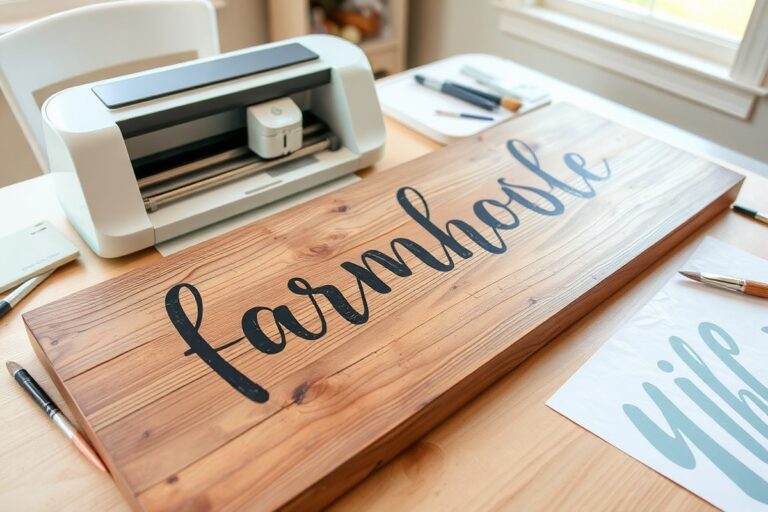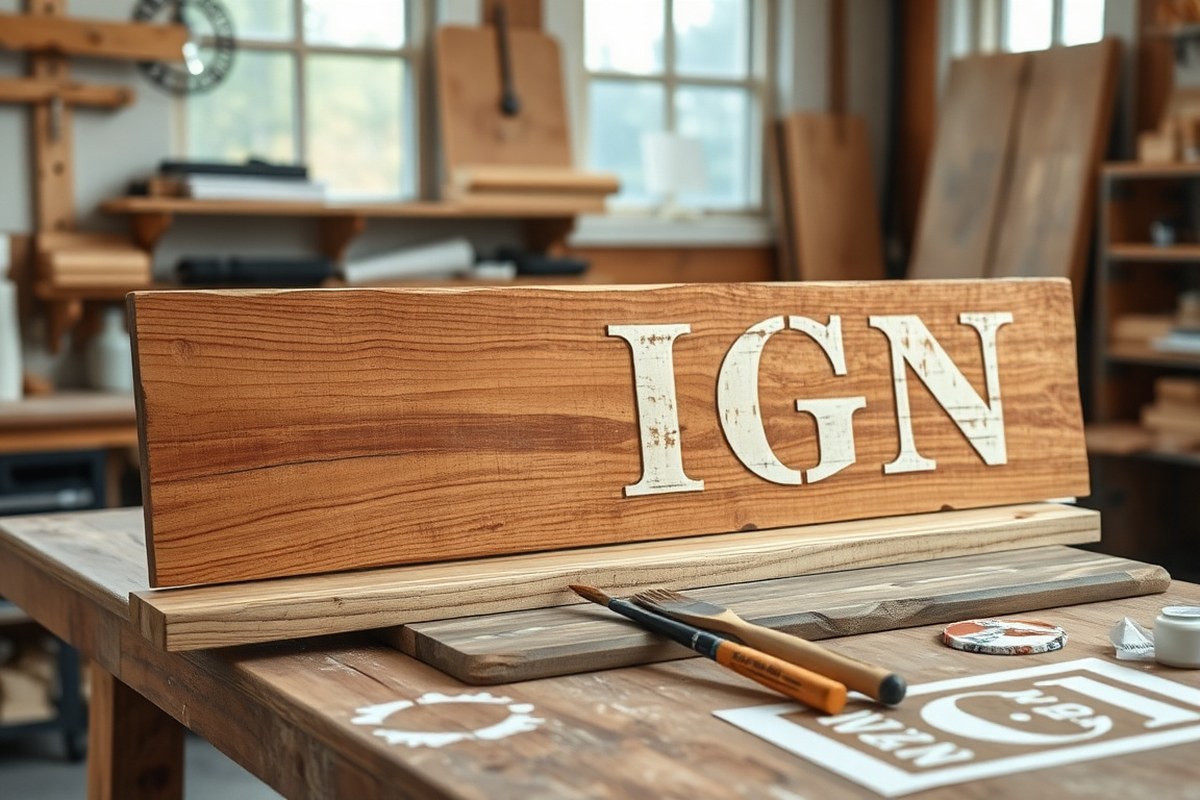
How to Make a Rustic Sign: A Complete Guide with Tips and Step-by-Step
Knowing how to make a rustic sign starts with choosing simple materials like a 1×10 wood board and basic supplies for lettering and distressing. Using affordable wood, such as sold in 4-foot lengths, keeps your project low cost and manageable. Begin by selecting a board size that fits your message, then prepare it by cleaning and lightly sanding to create the perfect surface for painting or staining.
Key Takeaways
- Pick a wood board no thicker than 1 inch to keep your rustic sign lightweight and easy to hang.
- Measure each wood piece carefully since advertised 4-foot lengths can vary slightly in size.
- Start with a beginner-friendly sign size around 10×12 inches to practice lettering and finishing techniques.
- Use stain by applying it, letting it sit 5-10 minutes, then wiping off excess for an even weathered look.
- Allow glued pieces to dry about 24 hours before moving or painting for better adhesion.
- Recycle old frames from thrift stores to add rustic charm without extra cost.
What Is a Rustic Sign and How to Make One

A rustic sign is a type of decorative wooden sign that features a worn, weathered, or natural look. It often emphasizes simplicity and organic charm, using materials like reclaimed wood, barn wood, or inexpensive pine boards to create an authentic country or farmhouse feel. The goal is to make the sign look handmade, aged by time, or naturally imperfect, which adds character and warmth to home decor or personalized gifts. Typical styles include hand-lettered or stenciled text with minimalistic designs, often with distressed paint or stain finishes that reveal the wood’s original texture.
To make a rustic sign, you start with selecting wood that has some texture or natural variation. This wood might be rough-hewn, slightly warped, or have visible grain and knots, which contribute to the rustic appeal. After cutting your wood to the desired size, you prepare the surface by lightly sanding to remove splinters while leaving some roughness. Next, transfer your text or design using stencils, freehand painting, or vinyl decals that you apply and then paint over. Once your design is in place, you create weathered effects by distressing the paint with sanding, dry brushing, or layered staining. Finally, sealing the sign with a matte or satin finish protects it but keeps that dull, natural look rather than shiny.
Basic steps include choosing the wood, preparing and cutting pieces, applying the design, distressing or aging the paint or stain, and sealing your work. For example, if you want to make a 12-by-24-inch sign, gather a piece of pine board for about $10 to $15, sand it lightly, paint your wording in black or white with a stencil, then sand edges and the letters to create a worn effect. Allow at least 30 minutes for painting and drying between layers, and seal your sign with a clear matte polyurethane to keep it durable. Expect the entire process to take a couple of hours, depending on drying times.
Rustic signs serve many uses, including home decoration, commemorating special places, or making meaningful gifts. They match well with farmhouse, coastal, or vintage-style interiors. Achieving the right rustic look means balancing weathered details without damaging the wood’s structural integrity. Watch for sanding too aggressively, which can create uneven surfaces, or applying sealer too thickly, resulting in an unwanted shine. Different wood types and finishes can change the final appearance, so experimenting with scraps first helps you find the best combination that fits your style and space.
Choosing the Best Wood and Supplies for Rustic Signs
Choosing the right wood and supplies is key to making a rustic sign that looks great and lasts. Your wood choice affects the sign’s texture, durability, and overall style, while selecting proper tools ensures a smoother crafting process. Both reclaimed and new wood can work well, depending on your budget and desired finish.
Popular Wood Choices for Rustic Signs
Wood types with natural knots and grain usually give the best rustic look because they add texture and character. Pine, cedar, and fir are common softwoods that are affordable and easy to work with. Hardwoods like oak or walnut offer greater durability but cost more and weigh more. Reclaimed wood is highly prized for its weathered patina and unique imperfections that no new wood can replicate.
| Wood Type | Durability | Cost Estimate per Board Foot | Rustic Look |
|---|---|---|---|
| Pine | Moderate (susceptible to dents) | $2 – $4 | Good natural knots and grain |
| Cedar | High (resists rot) | $3 – $6 | Rich color with natural oils |
| Fir | Moderate | $2 – $5 | Light color with straight grain |
| Oak | Very High | $5 – $10 | Strong grain, heavier wood |
| Reclaimed Wood | Varies (depends on source) | $4 – $12 | Unique weathered patina and character |
Reclaimed wood often costs more but brings authentic wear and history. Buy from reliable suppliers to avoid hidden damage or pests. New wood is easier to source and consistent in size but requires effort to create a weathered effect.
Essential Tools and Materials Checklist
Having the right tools on hand improves safety and quality. Basic woodworking hand tools paired with some power tools can speed up your work, but you can also create rustic signs with minimal equipment if you prefer handcrafting.
- Measuring tape and square for precise dimensions
- Circular saw or miter saw for cutting boards
- Orbital sander or sandpaper (80-220 grit) for smoothing edges
- Paintbrushes and foam brushes for painting and staining
- Pencil or stencil transfer paper for layouts
- Wood glue and clamps for assembly
- Protective sealant (polyurethane or outdoor varnish)
Optional but helpful: nail gun or hammer with finishing nails, wood filler for cracks, and gloves to protect your hands. Make sure to work in a well-ventilated area and wear a dust mask when sanding.
Always wear eye protection and a dust mask when cutting or sanding wood to prevent injury and irritation.
Tips on Selecting Wood Thickness and Size
Wood thickness typically ranges from 3/4 inch to 1 1/2 inches for rustic signs. Thinner wood (around 3/4 inch) is easier to work with and lighter for hanging but less durable over time. Thicker boards (1 inch or more) offer a substantial feel and resist warping better, especially for outdoor signs.
Consider the size of your sign and where you plan to hang it. Common dimensions range from 12×24 inches for smaller decor to 24×48 inches or larger for a statement piece. Keep in mind reclaimed wood sizes may vary, so measure each board before cutting if you want an exact fit.
Select boards with visible knots, cracks, or grain patterns that complement your design. These imperfections improve the rustic charm but avoid boards with large splits or insect damage that compromise stability.
Preparing and Cutting Wood for Your Rustic Sign
Preparing and cutting the wood correctly ensures your rustic sign fits your space and looks professional. Accurate measuring and marking, safe cutting methods, and proper sanding all contribute to a smooth surface ready for decoration.
Measuring and Marking Your Wood Precisely
Start by deciding the dimensions for your sign based on where you plan to hang it or the design you want. Use a tape measure to get exact length and width, then mark the board clearly with a pencil to guide your cuts.
Make two marks on each edge of the wood, one at the top and another at the bottom, so you can draw straight lines across the board using a carpenter’s square or straight edge. This method prevents crooked cuts and keeps your sign looking sharp. Double-check your measurements before cutting to avoid mistakes that waste material and time.
Safe Wood Cutting Techniques
Using the right tools and safety gear is essential to cut wood cleanly and avoid injuries. Whether you use a handsaw for small boards or a power saw for larger pieces, maintaining control over the tool will result in better cuts. Follow these steps to measure, mark, and cut wood safely:
- Wear safety glasses and hearing protection to protect eyes from sawdust and ears from loud noise.
- Secure your wood firmly with clamps or a non-slip surface so it won’t move while cutting.
- Align your saw blade with the pencil guide line before starting the cut to ensure accuracy.
- Start cutting slowly to create a shallow groove, then continue steadily along the line.
- Use smooth, even strokes with a handsaw or maintain steady pressure with a power saw for clean edges.
- Keep your fingers safely away from the blade path at all times.
- Cut the wood lath frame pieces at 45-degree angles if your design includes angled edges for framing.
Taking your time during cutting pays off in the final design. Avoid rushing, which can cause uneven cuts or accidents.
Sanding for a Smooth Rustic Finish
Sanding removes rough spots and splinters, creating a smooth but still rustic surface that’s easier to paint or stain. Start with a coarse grit sandpaper, such as 80 grit, to remove any rough patches or saw marks.
After the initial sanding, use finer grits like 120 or 150 to smooth the surface without eliminating the natural wood texture that gives a rustic feel. Sand along the grain, not against it, to prevent scratches. Finish by wiping off dust with a damp cloth before painting or staining. Proper sanding improves paint adhesion and durability, helping your rustic sign look great for years.
Transferring Text and Graphics to Your Sign
Adding letters and images to your rustic sign can be done using stencils, freehand painting, or image transfer techniques. Choosing the right method depends on your skill level, the detail you want, and the tools you have available. Each approach offers a different balance of precision, time, and creative freedom.
Using Stencils for Crisp Lettering
Stencils help you achieve clean, consistent letters and shapes, especially if you’re new to painting. You can buy pre-made stencils in various fonts or designs, usually for $5 to $15 each at craft stores or online. Another option is to create your own stencil by printing your design on cardstock and carefully cutting it out with a craft knife. These custom stencils let you use any font or graphic you want.
Working with stencils is straightforward: position your stencil on the wood, tape it securely, then use a stencil brush or sponge to dab paint through the cutouts. Avoid brushing paint on heavily, as it can bleed under the edges. Also, make sure the surface is dry and lightly sanded so the stencil sticks better. After painting, let the paint dry 20 to 30 minutes before carefully lifting the stencil.
Freehand Painting Techniques
Freehand painting gives a more personal touch but requires some steady hands and patience. To freehand your letters or images, begin by lightly sketching the design with a pencil on the sanded wood surface. Use a ruler or letter guides drawn faintly if you want even spacing. Thin brushes with a fine tip work well for lettering, while flat brushes can fill larger areas. Here are some tips to keep your freehand painting neat:
- Use light pencil marks so they erase easily or get covered by paint.
- Work slowly, painting thin layers to avoid drips and blotches.
- Keep a damp cloth nearby to wipe mistakes before the paint dries.
- Practice your brush strokes on scrap wood or paper first.
- Choose paint colors that contrast well with your wood base for readability.
Expect to spend around 30 minutes to an hour on lettering, depending on your level of detail. Paint spills or smudges can be fixed by lightly sanding the mistake and repainting after it dries.
Image Transfer Methods for Custom Graphics
Transferring detailed images or complex lettering can be done using several common methods. The graphite transfer technique involves printing your design in reverse, placing graphite paper between the print and your wood, then tracing over it with a pencil. This transfers a faint outline onto the wood to paint over. This method costs under $10 for a pack of graphite paper and is very popular for precise designs.
Another option is to use gel medium transfer. You print your design on regular paper, apply gel medium to the wood, and press the paper down. After drying about 24 hours, you gently rub away the paper with water, leaving the image on the wood. Gel medium costs about $5 to $15 and is great for photos or intricate patterns but requires patience and care.
Temporary tattoo paper is a simpler way to transfer small graphics. Print your design on the paper, then apply and water-activate the tattoo onto the wood. This is quick but less durable on rough wood surfaces.
| Method | Pros | Cons |
|---|---|---|
| Stencils | Crisp edges, reusable, easy for beginners | Limited by stencil size and design, bleeding paint risk |
| Freehand Painting | Highly customizable, personal style, no special tools | Requires steady hand, more time, risk of mistakes |
| Graphite Transfer | Accurate outlines, affordable, works on rough wood | Extra step with tracing, faint lines sometimes hard to see |
| Gel Medium Transfer | Transfers photos, detailed images, durable finish | Long drying time, delicate process, supplies needed |
| Temporary Tattoo Paper | Quick, simple, good for small designs | Not ideal on rough wood, less permanent |
Creating Distressed and Weathered Effects on Wood Signs
To create naturally aged, rustic signs, start by distressing your wood with tools like coarse sandpaper, wire brushes, or even a hammer and chain. Lightly tapping or denting the wood adds texture, mimicking years of wear. Use 80 to 120-grit sandpaper to focus on edges and high-contact areas, removing finish or softening corners. This step helps avoid splinters while producing an authentic worn look.
Combining stains and paints brings out a layered, weathered effect that looks like it’s been outdoors for decades. Begin with a base coat of wood stain in a medium to dark tone, such as walnut or chestnut, applied with a rag and wiped off after 5 to 10 minutes to prevent over-darkening. Once dry, lightly paint your chosen color, usually white, gray, or muted tones, over the stain, then wipe or sand the paint away partially after 15 to 30 minutes before it fully sets. This achieves a thin, uneven paint layer that exposes the stained wood beneath.
A step-by-step approach helps control this process: first, sand or texture the bare wood; next, apply stain and let it cure for 12 to 24 hours; then, apply a watered-down paint or chalk paint layer; follow with sanding or scraping the paint to reveal the wood grain and stain underneath. Adding another dry brush layer of a contrasting color sets a realistic weathered patina. This combination of sanding, staining, and selective painting captures years of natural aging.
Using hammer marks and random dents adds character but stay moderate, excessive damage weakens the wood and may cause splinters. For softer distressing, steel wool and wire brushes help roughen smooth surfaces by simulating natural erosion from weather. Experiment on scrap wood to find your preferred intensity. Avoid harsh chemicals or power tools that can remove too much material or cause rough splinters.
Test your sanding and paint removal techniques on a small section to prevent over-distressing and preserve the wood’s strength.
Weathered signs often show darker stains in cracks and dents, so apply a darker glaze or antique wax in those crevices after paint removal for depth. Let each layer dry fully before moving on to avoid sticky or blotchy finishes. This layering takes 2 to 3 days total but significantly improve authenticity.
Cost-wise, basic tools, sandpaper packs, price per sheet around $1 to $2, a small bottle of wood stain $5 to $10, and sample paint or glaze $5, keep this project affordable and repeatable. Distressing your wood signs with these simple steps will give you that sought-after rustic charm, perfect for cozy home accents or thoughtful handmade gifts.
Painting, Staining, and Sealing Your Rustic Sign
Choosing the right paint or stain is key to achieving the rustic look while protecting the wood. Acrylic paints and gel stains work well because they provide good coverage, dry quickly, and resist cracking. For staining, water-based gel stains offer an easier and more even application, improving the wood grain without soaking in too deeply. Avoid thick stains that can obscure detail or cause blotchiness on softer woods. Your finishing technique affects not only the appearance but also how well your sign holds up indoors or outdoors.
Applying paints or stains evenly and safely requires proper surface preparation and good ventilation. Work in a well-ventilated area, preferably outdoors or by an open window. Use a natural-bristle brush for paints and a foam brush or rag for stains to control coverage and reach tight corners. Thin your paint slightly with water or a recommended medium to avoid heavy buildup, which can peel over time. Let each coat dry completely, usually 1 to 2 hours, before adding another layer or sealing.
Sealing your rustic sign locks in color and shields the wood from moisture, dirt, and UV damage. For indoor signs, a clear acrylic spray sealer or water-based polyurethane works well and won’t yellow with age. Outdoor signs need more durable protection, typically a spar urethane or marine-grade varnish designed for UV and weather exposure. Apply sealers only after paint or stain has fully dried to prevent cloudiness and use multiple thin coats to build a strong barrier.
- Clean and Sand: Start with a smooth, dust-free surface. Lightly sand your wood with 220-grit sandpaper to remove rough spots and open the wood grain for better paint or stain absorption.
- Apply Paint or Stain: Use a foam brush or rag to apply thin, even coats of stain or acrylic paint. Wipe off excess stain after 5 minutes for a weathered look or let paint dry fully between coats to build opacity.
- Distress (Optional): For extra rustic charm, gently sand painted edges or corners after drying to reveal wood beneath. This simulates natural wear.
- Allow to Dry: Let your finish cure for 24 hours in a dry environment to ensure all moisture evaporates before sealing.
- Seal for Protection: Apply your chosen sealant using a clean brush or spray can in thin, even layers. For outdoor use, prioritize spar urethane or marine varnish labeled for exterior settings.
- Recoat as Needed: Plan on applying 2 to 3 coats of sealer for optimal protection, with a light sanding between coats for better adhesion.
- Cure before Use: Allow your sign to cure several days, avoiding placement in humid or wet areas until fully hardened to prevent cloudiness or peeling.
Expect to spend $10 to $30 on paints, stains, and sealers depending on the size of your sign and product quality. Look for sales at craft stores or consider sample sizes for small projects. Proper sealing extends the life of your rustic sign, keeping your personalized creation vibrant for years, whether hung in a cozy living room or on a porch exposed to the weather.
Assembling, Fastening, and Hanging Your Rustic Sign
Start assembling your rustic sign by arranging the wooden boards side by side on a flat surface. Use two thin wooden supports placed horizontally across the back, approximately 3 inches from the top and bottom edges, to hold the wooden pieces together and provide sturdiness.
Apply wood glue along the edges where the boards meet to bond them briefly. For larger signs, secure the boards together temporarily using painter’s tape to prevent shifting while the glue dries, which usually takes about 30 minutes to an hour depending on the adhesive.
Once the glue has set, reinforce the assembly by nailing the horizontal supports through the back into each board. Use two nails per board per support for a strong grip; for example, a sign with seven vertical boards would require 28 nails total (14 nails per support). Hammer the nails in carefully to avoid splitting the wood.
Choosing the right hanging hardware depends on the size and weight of your sign. For smaller signs under 5 pounds, sawtooth hangers are an easy and inexpensive option, typically costing under $1 each. For larger or heavier signs, D-ring hangers paired with picture wire offer better balance and support. These hardware pieces are widely available at hardware stores for around $2 to $4 per set.
To install hanging hardware properly, position the hangers on the back of the sign about one-third of the way down from the top edge on either side. This placement ensures even weight distribution and prevents the sign from tilting when hung. Attach the hangers by driving small screws through the pre-drilled holes in the hardware into the wooden supports for maximum security.
- Lay out boards and place two horizontal wooden supports on back.
- Glue edges between boards and secure with painter’s tape until dry.
- Nail supports through the back with two nails per board per support.
- Select sawtooth hangers for small signs or D-ring hangers with wire for larger signs.
- Attach hanging hardware one-third from top edge on back supports using screws.
For signs intended to hang outdoors or in humid areas, consider adding a weather-resistant sealer before attaching hardware to protect both wood and fasteners from moisture damage. Avoid placing screws only into thin boards without support underneath, as this may pull out over time. Balanced installation and secure fastening preserve your sign’s rustic charm and function.
Common Mistakes, Troubleshooting, and Maintenance Tips
One common mistake beginners make when painting rustic signs is applying too much paint at once, which leads to uneven coverage and drips. To fix this, gently sand down any thick paint spots with fine-grit sandpaper once dry, then apply a light second coat with a dry brush technique to even out the surface. Another typical error is attaching boards with inadequate fasteners, causing loose or warped panels. Securing boards with braid nails or screws, especially reinforcing the frame to the interior wood lath boards, will keep your sign sturdy over time.
Signs made with new wood can sometimes absorb paint unevenly, leading to blotchy areas. Applying a thin layer of primer or wood conditioner before painting helps the paint adhere evenly and reduces paint soaking in too much on softer areas. When your design involves freehand painting, fix mistakes by letting the paint dry completely, gently sanding the area, and repainting with care. Avoid rushing this process as wet paint corrections often smear and look messy.
To keep your rustic signs looking great long-term, regular maintenance is essential. Start by inspecting your sign at least twice a year for signs of wear like cracks, warping, peeling paint, or loose boards. Address minor issues early, fill cracks with wood filler and touch up peeling paint with matching stain or paint. Applying a new coat of clear polyurethane or exterior sealer every one to two years is especially important for signs displayed outdoors, as it protects wood from moisture, UV rays, and temperature changes. Storing your sign indoors during harsh winters helps it last longer and requires less upkeep.
Cleaning your rustic sign gently also helps preserve its aged charm. Use a soft brush or cloth to dust off dirt and avoid harsh chemicals that can strip paint or stain. For signs with heavy grime, mild soap and water applied carefully works well; just be sure to dry it thoroughly afterward.
Always reinforce boards with braid nails or screws during assembly to prevent loosening over time and prolong your sign’s durability.
Step-by-Step Action Plan for Making Your Rustic Sign
Follow these clear steps to create your rustic wooden sign efficiently. Each phase builds on the last to help you keep track and achieve the desired look.
- Day 1: Select your wood and gather supplies like sandpaper, paint, brushes, stencils, and sealing materials. Confirm your wood is free of major cracks and suitable for distressing.
- Day 2: Cut and prepare the wood to your sign’s size and shape. Sand the edges and surface smoothly but keep some roughness to retain the rustic feel.
- Day 3: Transfer your text or design onto the wood using stencils or transfer paper. Make sure the design lines are clear and legible before painting.
- Day 4: Apply distressing techniques like sanding over painted areas or using a wire brush. Check that the wood has an aged, weathered look without weakening the structure.
- Day 5: Paint or stain your sign selectively to highlight the design. Allow all layers to dry thoroughly to avoid smudging.
- Day 6: Seal the sign with a protective finish appropriate for indoor or outdoor use. Confirm the finish is even and no spots remain uncovered.
- Day 7: Attach any hardware needed for hanging, such as hooks or a frame. Test the hanging setup on a wall to ensure stability.
Frequently Asked Questions
What Is the Easiest Wood to Start with for a Beginner Rustic Sign?
Pine is the easiest wood for beginners because it’s soft and affordable. It sands and paints well, letting you create a rustic look without heavy tools or specialized skills.
Can I Use Recycled Materials for Making a Rustic Sign?
Yes, recycled wood like old pallets or fences adds authentic charm and sustainability. Just ensure the wood is clean and dry to avoid warping or damage.
How Do I Make My Rustic Sign Suitable for Outdoor Use?
Use outdoor wood like cedar or treated pine, then seal it with exterior polyurethane. This protects your sign from moisture, sun damage, and prolongs its life.
Can I Incorporate Other Materials Besides Wood in a Rustic Sign?
Yes, adding rope, metal accents, or old window panes creates interesting rustic textures. These materials improve the sign’s visual appeal and add character.
How Long Does It Usually Take to Finish a Rustic Sign Project?
Most DIY rustic signs take between 2 to 5 hours depending on complexity. Time varies with design details, drying times for paint or stain, and finishing touches.
What Tools Do I Absolutely Need for Making a Rustic Sign at Home?
Basic tools include a saw, sandpaper, paintbrushes, and a ruler or measuring tape. These cover cutting, smoothing, painting, and sizing your wood.
Wrapping Up
Making your own rustic sign lets you add a personal, charming touch to your home or gift giving. Trying one project helps you learn how to match design with technique. Pick a simple phrase or graphic and start crafting today to see your space change with rustic character.