How to Make a Metal Sign at Home: Complete Guide with Best Tools & Tips
Learning how to make a metal sign at home means choosing the right materials, tools, and design to create a durable and attractive piece. Start by selecting metal sheets that fit your space and purpose, such as 12×18 inches for home use. Planning your design with properly scaled text and graphics ensures your sign looks professional and communicates clearly.
Key Takeaways
- Select aluminum or steel sheets based on size and intended location to ensure durability and ease of use.
- Scale text to around 2, 3 inches tall on a 12×18-inch sign for proper readability.
- Use pre-coated metal blanks if sublimation printing is your chosen method for clean, weatherproof results.
- Set your design canvas size to match your metal blank dimensions at 300 DPI for sharp images.
- Consider etching with an acid solution carefully, timing up to 30 minutes for the desired depth.
- Apply primer and allow 1, 2 hours drying time between coats for an even, lasting finish.
What Materials and Tools You Need for a Metal Sign

Choosing the right metal is key for making a durable and visually appealing sign. Aluminum is often the best option for DIY projects because it is lightweight, rust-resistant, and easy to cut and shape. It usually costs about $10 to $20 for a 12″x12″ sheet at 0.040″ thickness. Steel is stronger and more durable but heavier and prone to rust unless properly treated. Steel sheets are available in cold-rolled or galvanized forms, generally priced between $20 and $40 for a similar size and thickness. Copper offers a distinctive appearance with a natural patina over time but costs more and requires special tools for cutting and finishing. Your choice depends on sign size, location, and desired finish.
For thickness, metal between 0.040″ (1mm) and 0.063″ (1.6mm) works well for signs up to 18″x24″. Thinner sheets under 0.040″ risk bending easily, especially for larger sizes, while thicker metal over 0.063″ increases weight and difficulty cutting by hand tools. For signs larger than 24″x24″, opting for 0.080″ (2mm) or thicker can improve rigidity but may require power tools.
- Metal sheets: aluminum, steel, or copper; 0.040″ to 0.080″ thick depending on sign size
- Cutting tools: tin snips for aluminum, metal shears or jigsaw with metal blade for thicker steel or copper
- Drill with metal bits for mounting holes
- Files and sandpaper to smooth edges
- Protective gear: gloves, safety glasses, ear protection
- Marking tools: grease pencil or permanent marker
- Optional: rotary tool (Dremel) for engraving or shaping details
Must-have tools include safe cutting instruments suitable for your metal type and thickness and sturdy gloves to protect hands from sharp edges. Eye protection is essential; metal shards can cause serious injury even when cutting thin sheets. Ear protection matters if using power tools. For beginners, starting with aluminum and tin snips is easier because it cuts smoothly and reduces tool wear. Files and sandpaper ensure smooth, safe edges which also improves paint or finish adhesion.
For cost, basic tin snips start around $15, $25, metal files $5, $15 each, and a good pair of protective goggles around $10. Drills may already be available at home, but a corded or cordless drill set with metal bits around $30 is typical for a small metal sign project. Sandpaper and marking tools are inexpensive but important for accuracy and finish quality.
How to Plan and Design Your Custom Metal Sign

Planning your metal sign starts with matching your design size and layout to the metal sheet you’ll be using. Choosing to draw by hand or work digitally, make sure your graphics and text fit well to avoid costly mistakes and wasted materials. Preparing your design carefully simplifies transferring it onto the metal and brings your vision to life accurately.
Choosing the Right Design Size for Your Metal Sheet
Your design should fit the metal sheet comfortably with enough margin to avoid cutting errors. For example, on a 12 by 18 inch metal sheet, letters between 2 and 3 inches tall typically offer good visibility and balance. For smaller signs, reduce the letter size proportionally, while large signs like 24 by 36 inches allow for bigger text and more detailed graphics.
Scale your design precisely before transferring by measuring the metal sheet and using these measurements as your canvas. Multiple design elements should be spaced to avoid overcrowding; 1 to 2 inches between graphics and text is often sufficient for clarity. Planning your layout on paper or screen at actual size helps you spot alignment issues before you begin.
Using Design Software vs Hand-Drawn Sketches
Digital design software offers precise control over scaling, layout, and color, which can save time and reduce errors. Popular options range from free programs like Inkscape and GIMP to paid apps such as Adobe Illustrator and CorelDRAW. Inkscape is widely used for vector graphics, ideal for clean lines, while GIMP handles photo editing. Illustrator and CorelDRAW provide professional features like advanced layering and export formats compatible with cutting machines but cost between $20 to $53 per month.
| Software | Type | Cost | Best For |
|---|---|---|---|
| Inkscape | Vector | Free | Precise shapes and text |
| GIMP | Raster | Free | Photo edits and touch-ups |
| Adobe Illustrator | Vector | $20.99/month | Professional vector design |
| CorelDRAW | Vector | $249/year or $34.95/month | Advanced layout and cutting file export |
Hand-drawing is a valid choice if you prefer a more personal touch or want to sketch ideas quickly. Draw on graph paper scaled to your metal sheet size for easier resizing later. Use pencils with erasers and fine-tipped markers to finalize lines before transferring. However, hand drawings are harder to resize accurately and might require scanning and digital editing for the best results.
Preparing Designs for Transfer to Metal
Finalizing your design for transfer requires ensuring it’s scaled correctly and cleanly visible. When working digitally, export your image at actual size in a high-resolution format like PNG or PDF. Use software tools to mirror the image if you are planning sublimation or heat transfer, as the design will flip upon application.
- Measure your metal sheet carefully and note the exact width and height in inches.
- Create or adjust your design to match these dimensions at actual size in your preferred software, setting the document canvas accordingly.
- Check spacing of all elements, making sure text is legible and not too close to edges (leave at least 0.5-inch margin).
- Export your final design in a compatible format for printing or cutting, such as PDF, SVG, or high-quality PNG.
- When transferring by hand, print your design on regular paper or use graphite paper to trace onto the metal.
- For hand drawings, finalize lines with a marker or pen and use a lightbox or window to trace onto transfer paper or directly onto the metal.
Double-check the scale of your design before printing or cutting; a small error in size can lead to unusable signs and wasted metal.
Transferring Your Design Onto Metal Safely and Accurately
Transferring your design onto metal can be done accurately and safely by using carbon paper, stencils, or a vinyl cutter. Each method suits different design complexities and skill levels. Understanding how each works helps you pick the right approach for your metal sign project.
Method 1: Carbon Paper Transfer
Carbon paper transfer is a simple and affordable way to trace designs onto metal surfaces. It works best for straightforward designs and lettering. This method requires minimal tools and keeps the design aligned before painting or etching.
Use standard graphite or transfer carbon paper sized slightly larger than your design. Place the carbon paper between your printed design and the clean metal surface, with the carbon side facing the metal. Then trace over the lines firmly with a pencil or stylus to transfer the image.
- Clean the metal surface with rubbing alcohol to remove dirt and oils.
- Place carbon paper on the metal, carbon side down.
- Lay your printed design on top, aligned where you want it on the metal.
- Secure both sheets with masking tape to avoid shifting.
- Trace over the design outlines using a ballpoint pen or stylus.
- Carefully lift the paper to reveal a faint but clear carbon outline.
- Touch up any incomplete lines with a fine-tip permanent marker if needed.
Carbon transfer is quick and low-cost but offers limited precision on complex designs or curved surfaces. The transferred lines might smudge during handling, so trace lightly and work promptly.
Method 2: Using Stencils for Letters and Logos
Stencils provide more control for sharper edges and repeatable shapes, especially useful for lettering and logos. You can create stencils by hand or with cutting machines. Applying stencils correctly ensures clean paint lines or etching paths.
Begin by printing your design at actual size. For hand-cut stencils, use heavyweight stencil paper or plastic sheets. Trace your design and carefully cut out the positive areas with a craft knife. Larger or intricate stencils benefit from precision cutting machines like Cricut.
To apply the stencil, clean the metal surface, then fix the stencil in place using painter’s tape or stencil adhesive spray. Use a stencil brush or sponge to apply paint in thin, tapping layers to prevent bleeding. Remove the stencil while the paint is still damp for crisp edges.
- Create or print your design to size on stencil material.
- Cut out the design openings with a sharp craft knife or vinyl cutter.
- Clean the metal sign surface to improve stencil adhesion.
- Secure the stencil onto the metal surface with tape or spray adhesive.
- Use a stiff brush or sponge to dab paint lightly over stencil openings.
- Carefully lift the stencil off before the paint fully dries to avoid smudging.
- Allow the paint to cure according to product instructions.
Stencils allow more precise design reproduction than carbon paper but require patience and steady hands. Reusable stencils offer cost savings if making multiple signs with the same design.
Method 3: Vinyl Cutter for Complex Designs
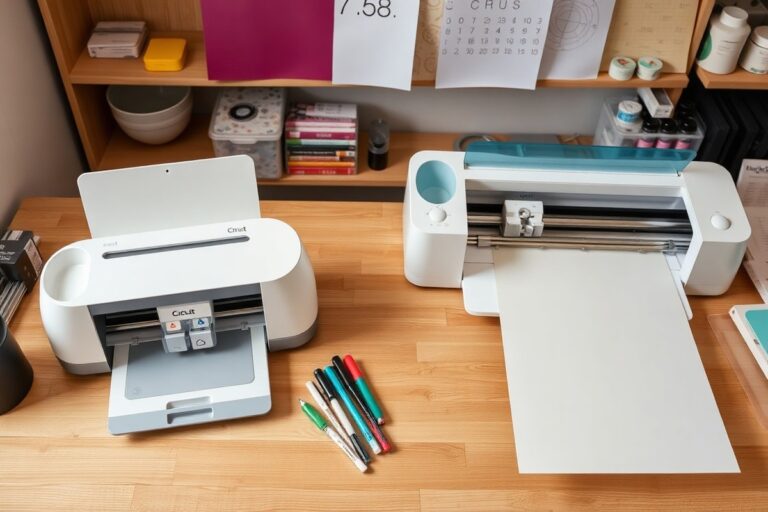
Vinyl cutting is ideal for detailed or intricate designs. Machines like Cricut can precisely cut vinyl sheets into stencils or direct adhesive decals. This method delivers clean lines and professional results but works best on thinner metals or decorative signs.
First, upload your digitized design to the vinyl cutter software. Adjust the size, then let the machine cut the design onto adhesive vinyl. Weed out excess vinyl by removing everything except your design. Apply transfer tape over the vinyl stencil to keep its shape and position it on the metal.
- Prepare your design file compatible with your vinyl cutter software.
- Load adhesive vinyl into the cutter and start the cutting process.
- Remove the non-design vinyl areas carefully, leaving the stencil.
- Place transfer tape over the vinyl stencil and smooth out air bubbles.
- Peel the backing paper off, leaving the vinyl stencil attached to the tape.
- Apply the transfer tape with the stencil onto the clean metal surface.
- Press firmly to adhere the vinyl to the metal, then slowly remove transfer tape.
- Paint or etch over the vinyl stencil as desired.
This method provides high precision at a higher upfront cost for the vinyl cutter (around $200-$400 for entry-level models). It suits hobbyists making multiple or complex metal signs. Thicker metals need industrial cutting tools for actual metal shaping, but vinyl stencils work fine for surface decoration.
| Transfer Method | Precision | Difficulty | Tools Required |
|---|---|---|---|
| Carbon Paper | Low to Moderate | Easy | Carbon paper, pencil/stylus, printed design |
| Stencil | Moderate to High | Moderate | Stencil material, craft knife or cutting machine, tape/adhesive |
| Vinyl Cutter | High | Moderate to Advanced | Vinyl cutter, adhesive vinyl, transfer tape, software |
Cutting and Shaping Your Metal Sign at Home
Cutting and shaping metal signs safely depends on the type of metal and its thickness. Aluminum and steel are popular choices. Aluminum is lightweight and rust-resistant, suitable for 16 to 22 gauge thicknesses common in signs. Steel is heavier and may need coating to prevent rust but is durable for indoor use. Cutting tools must match the metal’s thickness for clean cuts.
For thin metals, hand tools like tin snips or aviation snips work well. These are inexpensive and don’t require power, ideal if you want to avoid noisy or expensive equipment. Thick metal sheets over 16 gauge need power tools such as an angle grinder with a metal cutting disc, a jigsaw fitted with a metal blade, or a plasma cutter for precise, quick work. Plasma cutters and CNC routers offer cleaner edges but cost more and require some experience.
Handling sharp edges is critical. Metal always leaves jagged, sharp cuts that can cause cuts or snags. Use a metal file or sanding block to smooth edges. Rubber gloves protect your hands during this step and while shaping. A deburring tool also helps remove rough spots efficiently. Proper edge finishing improves both safety and the professional look of your sign. Here is a step-by-step safety checklist and process to follow for cutting and shaping your metal sign:
- Wear safety gear: Put on safety glasses, heavy-duty gloves, and ear protection before starting. This protects eyes from flying debris, hands from sharp metal, and ears from loud tools.
- Mark your cut lines: Use a permanent marker or scribe to draw the design outlines clearly on the metal surface.
- Choose the right cutting tool: Use tin snips for metal thinner than 16 gauge. For thicker metal, select an angle grinder, jigsaw with a metal blade, or plasma cutter if available.
- Secure the metal: Clamp your metal sheet firmly to a stable work surface to prevent shifting while cutting.
- Cut along your lines slowly: Follow the markings carefully. For power tools, keep the blade moving steadily without forcing it, to avoid jagged edges or tool damage.
- File or sand edges: After cutting, smooth all cut edges using a metal file, deburring tool, or sandpaper (around 120-220 grit) to remove sharp points and rough areas.
- Shape the metal: Use a metal shaping tool or carefully bend the metal by hand with gloves on to add curves or dimension as desired.
- Clean the sign: Wipe away metal dust or filings from the surface with a dry cloth before proceeding with finishing steps.
Power tools can speed up the process but aren’t strictly necessary for small, thin metal signs. Good control, patience, and proper hand tools can achieve clean shapes safely. Tool rentals and secondhand purchases can reduce costs if you don’t own a plasma cutter or angle grinder. Expect to spend under $50 on hand tools and safety gear and more if investing in power equipment. Sharp edges missing proper finishing often cause injury or damage paint, so never skip smoothing them.
Preparing and Finishing the Metal Surface for Painting or Etching
Preparing your metal surface before painting or etching is key to getting a long-lasting and attractive finish. Start by cleaning the metal thoroughly to remove any dust, grease, or residues. Use a lint-free cloth with a degreaser or mild soap and water, then dry the surface completely. Next, sand the metal with 80 to 120 grit sandpaper to create a rough texture. This helps the primer and paint adhere better, reducing the chance of peeling or chipping.
Applying a metal primer is essential, especially if you’re working with steel, to prevent rust and improve paint adhesion. Choose a primer formulated for metal; oil-based primers tend to offer the best rust resistance and durability but may take 1 to 2 hours to dry between coats. Water-based primers dry faster, usually around 30 to 60 minutes, but might provide slightly less protection outdoors. After the primer dries, apply your paint in thin, even coats. Spray paint designed for metal is a popular choice because it lays down smoothly and dries quickly; expect 1 to 2 hours drying time between coats as per the product label. For brush-on paint, allow extra drying time to avoid brush marks and runs.
| Coating Type | Drying Time | Durability | Best Use |
|---|---|---|---|
| Oil-based Metal Primer | 1, 2 hours | High rust resistance | Steel signs exposed to weather |
| Water-based Metal Primer | 30, 60 minutes | Moderate rust resistance | Indoor or short-term outdoor use |
| Metal Spray Paint | 1, 2 hours between coats | Good if layered properly | Quick application and smooth finish |
| Brush-on Metal Paint | 2+ hours between coats | Good, depending on paint quality | Detailed areas or smaller signs |
For an aged or rustic look, you can add a rust patina safely by applying a diluted mixture of vinegar and salt to bare or lightly coated steel. Spray or brush this solution onto the surface and let it sit in a warm, humid area for several hours to a couple of days, depending on how much rust you want. Check frequently to avoid over-rusting, which can weaken the metal. After achieving the desired rust pattern, seal it promptly with a clear coat to prevent unwanted rust spread. Rust converters also offer an option by chemically stabilizing existing rust, turning it into a paintable surface and stopping progress.
Make sure to work in a well-ventilated area and wear gloves when handling primers, paints, or rust solutions to protect your skin and lungs.
Adding Lettering and Graphics to Your Metal Sign
You can add lettering and graphics to your metal sign using various methods like painting, stenciling, sublimation printing, or etching, each offering different levels of detail and durability. Painting and stenciling work well for bold or simple designs, sublimation gives vibrant, high-resolution images, and etching produces a permanent, textured effect perfect for fine lines. Choosing the right method depends on the design complexity, available tools, and how long you want your sign to last.
Hand-Painting and Stenciling Techniques
Painting letters by hand on metal requires steady hands and the right brushes or paint pens to achieve crisp lines. Stenciling helps maintain consistency and clean edges, especially for beginner crafters. Use outdoor or acrylic paints made for metal surfaces to ensure durability and prevent peeling.
To paint or stencil your letters cleanly, start by applying a primer designed for metal. Use painter’s tape or a stencil to block out unwanted areas, and dab paint lightly rather than brushing heavily, which can cause bleeding under the edges.
- Clean the metal surface with rubbing alcohol to remove oils and dirt.
- Apply a thin coat of metal primer and let it dry for at least 30 minutes.
- Position your stencil or tape the outline of your letters securely on the metal.
- Use a small brush or paint pen to dab paint within the stencil, avoiding excessive paint buildup.
- Let the paint dry for 20, 30 minutes, then carefully remove the stencil.
- Touch up any edges with a fine-tipped paint pen if needed.
- Allow the paint to cure for 24 hours before handling or sealing.
Paint pens are especially useful for small details or corrections; choose colors with UV resistance if the sign will be outdoors. Avoid overly thick paint layers, which risk cracking or peeling.
Using Sublimation Printing on Metal Signs
Sublimation printing uses heat to transfer dye onto a specially coated metal surface, producing vibrant, durable images with excellent detail. This method requires a sublimation printer, specially coated metal blanks with a white polyester finish, and a heat press. It’s ideal for sharp graphics, photos, or multi-color logos.
For successful sublimation, precise temperature and timing are critical. The recommended temperature for many metal signs coated for sublimation is around 356°F (180°C), held for about 90 seconds to 2 minutes.
- Design your artwork using sublimation-compatible software and print it on sublimation transfer paper.
- Place the metal sign on butcher paper, with the coated side facing up.
- Position the printed transfer paper on top of the metal, design side down.
- Secure the paper with heat-resistant tape around all edges to prevent shifting.
- Set the heat press temperature to 356°F (180°C) and the timer to 90, 120 seconds.
- Press the metal sign firmly and evenly under the heat press during the set time.
- Wear heat-resistant gloves and carefully remove the sublimation paper and tape as soon as the press is opened.
Because sublimation relies on a polyester coating, it can’t be used with bare metal or uncoated surfaces. The setup can cost several hundred dollars, but results are vivid and resistant to fading or peeling. Fine details and gradients come through clearly with this method.
Home Etching: Process and Precautions
Etching creates a permanent, engraved look by removing a thin layer of metal to reveal a texture or design. You can do it safely at home using chemical etching solutions or electro-etching kits designed for hobbyists. This method suits precise lines and subtle shading better than painting.
Working with etching chemicals demands careful safety measures including gloves, goggles, and good ventilation. Always follow product instructions closely to avoid skin contact, fumes, or accidental damage.
- Clean the metal surface thoroughly with soap and water, then dry completely.
- Apply a resist layer to protect areas you want to remain unetched, such as vinyl stencil film or specialized etching resist pens.
- Prepare your etching solution according to the kit’s instructions, commonly ferric chloride for steel or copper.
- Submerge the metal sign in the solution or apply it with a brush, following recommended exposure times (often 15, 30 minutes).
- Remove the metal from the solution and rinse thoroughly with water to stop the etching process.
- Remove the resist material using acetone or other safe solvents.
- Dry completely and inspect the etching depth; repeat if deeper etching is needed.
Etching provides a durable, tactile finish but can slightly roughen the metal surface. Fine details like thin lines hold up well, but very intricate shading is limited by the chemical process. Avoid prolonged exposure to etchants to prevent over-etching or corrosion.
Sealing and Protecting Your Metal Sign for Lasting Durability
Applying the right sealant is essential to protect your metal sign from outdoor elements like rain, sun, and temperature changes. Sealants prevent rust, maintain color vibrancy, and extend the life of your sign. For outdoor use, choose between clear lacquer, polyurethane, and epoxy coatings. Clear lacquer is easy to apply and dries quickly but offers moderate durability, typically protecting signs for 1 to 2 years. Polyurethane provides better weather resistance and can last 3 to 5 years, especially the oil-based versions, but it takes longer to dry and requires multiple thin coats. Epoxy sealants produce a tough protective layer with excellent chemical and moisture resistance, potentially extending protection beyond 5 years; however, epoxies have a thicker consistency that demands careful application and longer curing times.
| Sealant Type | Durability Outdoors | Ease of Application | Cost Range (per quart) |
|---|---|---|---|
| Clear Lacquer | 1-2 years | Easy: spray or brush | $15, $30 |
| Polyurethane (Oil-Based) | 3-5 years | Moderate: multiple coats, slower drying | $20, $40 |
| Epoxy | 5+ years | Moderate/difficult: thick, needs careful spreading | $25, $50 |
To apply sealant evenly, clean your metal sign first with mild soap and water, then dry completely. Work in a dust-free, shaded area to avoid contaminants and avoid direct sunlight that can cause bubbles or uneven drying. Use a clean, high-quality synthetic brush or a spray applicator depending on the product instructions. Apply thin, even coats, brushing or spraying in one direction to minimize streaks. Allow each coat to dry fully, typically 2 to 4 hours for lacquer or polyurethane, and up to 24 hours for epoxy, before adding the next. Two or three coats are standard for long-lasting protection, but check your product’s label for specific recommendations.
Besides protection, sealants can boost your sign’s visual appeal. Glossy finishes improve color vibrancy and give a polished look, while matte or satin finishes offer a more subtle, contemporary style. Choose a sealant sheen that complements your painted or printed design for the best aesthetic effect.
Maintenance extends your metal sign’s life. Clean it gently with water and a soft cloth every few months, avoiding harsh chemicals that can degrade the sealant. Inspect your sign annually for chips or cracks in the sealant; touch up affected areas promptly with a matching product to prevent rust and fading. Signs exposed to harsher climates or more direct sunlight may need recoating every 2 to 3 years to maintain maximum protection.
Mounting and Installing Your Completed Metal Sign
Before drilling mounting holes in your metal sign, carefully measure and mark where the holes will go. Place holes near corners or along edges, typically 1 to 2 inches from each edge to prevent metal bending or cracking. Use a ruler or measuring tape to ensure that holes line up evenly with your mounting surface, whether a wall, fence, or post.
Choose mounting hardware based on the sign’s location. For outdoor use, rust-resistant stainless steel screws or bolts work best to prevent corrosion. Indoors, standard screws or metal hooks are usually sufficient. If mounting on wood, pre-drill pilot holes about 1/16 inch smaller than your screws to avoid splitting. For masonry or concrete walls, use wall anchors or toggle bolts for secure hold.
The right hardware and correct hole placement help keep your sign stable and straight. You can install metal signs yourself with common tools like a cordless drill, level, screwdriver, and mounting hardware. Below is a simple checklist to follow for mounting your sign on different surfaces.
- Measure and mark hole positions: Use a ruler to mark holes evenly spaced near corners or edges, about 1 to 2 inches from each edge.
- Pre-drill holes in the metal: Attach a metal drill bit to your cordless drill and drill holes at the marked points. Use a bit size fitting your screws or bolts, usually between 1/8 and 3/16 inch.
- Select mounting hardware: Choose rust-resistant screws or bolts for outdoor use. Use anchors for masonry or toggle bolts for hollow walls.
- Prepare the mounting surface: For wood, drill pilot holes. For concrete or brick, insert wall anchors.
- Align the sign on the surface: Hold the sign up, ensuring holes line up with anchors or pilot holes. Use a level to check straightness.
- Fasten the sign securely: Insert screws or bolts through sign holes into anchors or pilot holes. Tighten firmly but avoid over-tightening to prevent bending metal.
- Inspect and adjust: Check sign stability. Replace any hardware showing rust or wear over time.
Use a drill bit rated for metal drilling to avoid dulling, and always wear safety glasses when drilling holes.
Step-by-Step Action Plan
Follow this plan to make your metal sign project manageable and ensure a quality result.
- Before you start: Gather your metal sheet, cutting tools, paint, brushes, and mounting hardware. Check that all tools are in working order and your design is finalized to avoid delays.
- Day 1: Transfer your design onto the clean metal surface using carbon paper or a marker. Confirm the design is clear and properly aligned on the metal.
- Day 2: Cut and shape the metal with your tools, wearing safety gear. Smooth edges with a file and inspect for any sharp spots.
- Day 3: Prepare the metal surface by sanding and cleaning it thoroughly. The surface should feel smooth and look free of oils or rust before painting.
- Day 4: Apply your paint or etching materials carefully, allowing adequate drying time between coats. Check that coverage is even and colors meet your expectations.
- Day 5: Seal your sign with a clear protective finish to shield the artwork from weather and wear. The finish should dry to a consistent, durable surface.
- Day 6: Attach your mounting hardware securely and install the sign in its chosen location. Verify the sign is stable and well-positioned.
Frequently Asked Questions
Can I Make a Metal Sign Without Specialized Tools?
Yes, basic tools like metal shears and a drill can suffice for simple signs. Choosing simple designs and softer metals makes the process easier for beginners.
What Is the Best Type of Metal for Outdoor Signs?
Aluminum is ideal for outdoor signs due to its rust resistance and lightweight nature. It holds up well against weather and is easy to paint or print on.
How Long Does It Take to Make a Metal Sign at Home?
Making a basic metal sign can take a few hours to a few days, depending on the complexity. Drying and curing times for paint or finishes extend the total time.
Can I Recycle Old Metal to Make a Sign?
Yes, repurposed metal works fine if it’s clean and flat enough for your design. Removing rust and smoothing edges before use helps achieve a better finish.
What Kind of Paint Should I Use on Metal Signs?
Use enamel or outdoor acrylic paints for durability and color retention. They resist weather and fading better when sealed properly after painting.
Is It Necessary to Seal the Paint on My Metal Sign?
Sealing protects paint from chipping, UV damage, and moisture, extending the sign’s life. Choose a clear outdoor sealant sprayed or brushed on once paint is dry.
The Bottom Line
Making a metal sign at home requires focus on preparation, technique, and protection to ensure it looks great and lasts. Start by setting aside time to carefully transfer your design onto the metal, which sets the foundation for a successful project. With the right tools and attention to each step, your custom metal sign will become a durable and attractive piece you can proudly display.