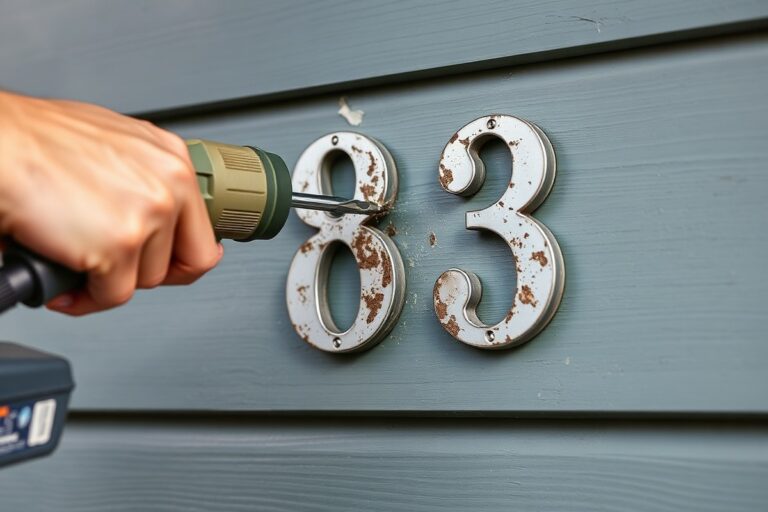
What Does a Sign Installer Do: A Complete Guide with Safety and Career Tips
What does a sign installer do? A sign installer installs various types of signs, including illuminated and non-illuminated displays, billboards, and vehicle graphics. They ensure signs are accurately positioned and securely mounted following safety standards for effective brand communication. Starting with hands-on training in safety and equipment handling builds the foundation for developing skill and precision on the job.
Key Takeaways
- Sign installers handle installation of illuminated, non-illuminated signs, billboards, and vehicle graphics.
- They ensure all signs comply with safety and building regulations during installation.
- Experience in related roles like construction or handyman work supports learning essential safety protocols.
- Physical strength to lift objects up to 50 pounds is often required on the job.
- Attention to detail is critical for precise placement and secure mounting of signs.
- Sign installers progressively take on leadership roles after five years of experience.
What Does a Sign Installer Do Day-to-Day?

Sign installers handle a range of tasks each day, centering on the installation, maintenance, and removal of signs for commercial and industrial clients. Their daily work begins with assessing the installation site and preparing it for the sign, which could be anything from illuminated storefront signs and vehicle graphics to billboards and road signs. This preparation includes measuring surfaces, checking mounting systems, and ensuring that all necessary materials and equipment are ready. Proper site assessment and preparation help prevent installation errors that can cause delays or unsafe conditions.
Installing signs varies by type and complexity. Small, non-illuminated signs can often be installed within a few hours, while larger illuminated signs or billboards may take one or more days, depending on size, mounting complexity, and weather conditions. Sign installers also repair signs when needed, ensuring signage remains clear and safe. Installing any sign requires knowing how to safely handle tools, interpret design plans, and comply with safety regulations.
Each job follows a systematic process to guarantee quality results and safety compliance. A typical installation involves careful planning and coordination, especially when working with a team or managing large-scale projects. Proper adherence to this process minimizes the risk of damage, improves client satisfaction, and ensures longevity of the sign.
- Review the design plans and client specifications. Confirm details such as size, location, mounting method, and materials to ensure the sign meets the customer’s requirements.
- Inspect and prepare the installation site. Measure the surface, check for obstacles or hazards, and clean or repair the mounting area as needed to create a stable base.
- Gather and organize tools and materials. Assemble hardware, power tools, ladders, lifts, and safety equipment required for the specific sign and site.
- Position and mark the mounting points. Use measuring tools and levels to accurately mark where the sign will be attached, ensuring it aligns with design specifications.
- Install mounting hardware securely. Drill holes, set anchors, or attach brackets to prepare for the sign’s weight and mounting type, keeping safety and durability in mind.
- Mount the sign according to manufacturer instructions. Attach the sign, check that it is level and secure, and connect electrical components if it’s an illuminated sign.
- Test the installation. Verify illumination works if applicable, ensure the sign is firmly attached, and inspect the site for leftover debris or hazards.
- Document the installation completion. Record measurements, serial numbers, or other details as required by the client or company policy, and communicate any issues or recommendations for maintenance.
The time to complete these steps can range from two hours to several days, influenced by sign size, mounting method, and site conditions. Good results mean the sign is secure, visually correct, and compliant with all required codes and safety standards. Common issues include misaligned placement or inadequate mounting preparations, which can lead to instability or premature damage.
Essential Skills and Qualifications for Sign Installers

Sign installers need a mix of technical, physical, and soft skills to do their jobs well. Physically, the job demands strength and stamina since you’ll often lift heavy signs and work at heights. Good hand-eye coordination and balance are essential, especially if you work on scaffolding or ladders. Technically, you must read blueprints and detailed installation plans accurately. Electrical knowledge is important when handling illuminated signs, requiring skills in low-voltage wiring and strict adherence to building codes for safety and function.
Soft skills round out your qualifications. Clear communication helps coordinate with clients and team members. Problem-solving is key when unexpected site conditions force you to adjust installation plans without damaging the sign’s appearance or structure. Attention to detail ensures compliance with regulations and customer specifications.
Most sign installer jobs require at least a high school diploma or equivalent. Vocational or technical training in related fields like construction, carpentry, or electrical work typically sets you apart. You can also earn certifications that demonstrate your expertise and commitment to best industry practices. These certifications improve job prospects and sometimes are required by employers, especially for jobs involving electrical work or complicated installations.
The physical demands mean you should prepare for long hours standing, climbing, and lifting materials that may weigh 50 pounds or more. Good fitness helps reduce fatigue and risk of injury. Using proper lifting techniques and safety gear is a must to protect yourself on the job.
- Read and interpret blueprints and technical drawings accurately
- Understand electrical wiring and building codes for illuminated signs
- Maintain physical fitness for lifting and working at heights
- Communicate clearly with clients, supervisors, and team members
- Adapt to unforeseen challenges with effective problem-solving
- Complete vocational training or apprenticeships where available
- Obtain certifications relevant to sign installation and safety
Always double-check power shutoffs and use approved safety harnesses when working at heights to avoid serious accidents.
Costs for vocational training vary but often range from a few hundred to a few thousand dollars, depending on the program and location. Certification exams may have fees around $100 to $300. Investing in these credentials typically pays off by increasing your hiring chances and potential earnings, which can range from about $30,000 to $55,000 annually. On-the-job learning is common, but formal preparation makes you stand out in a field where finding qualified installers is tough due to job complexity and physical demands.
Common Tools and Equipment Used in Sign Installation
Sign installers rely on a range of specific tools and equipment to complete installations accurately and safely. They use everything from hand tools to heavy machinery, and handle electrical components when installing illuminated signs. Understanding these tools helps ensure a smooth and secure installation process for all types of signage.
Hand and Power Tools Overview
Hand tools and power tools form the backbone of most sign installation jobs. Installers commonly work with drills, saws, and screwdrivers to assemble sign components and mount them on buildings, poles, or vehicles. High-quality power tools, such as rotary hammers and impact drivers, are essential for securing signs into concrete, wood, or metal surfaces. Proper handling and maintenance of these tools support efficiency and safety on the job. Commonly used hand and power tools include:
- Cordless drills for drilling holes and driving screws
- Impact drivers for heavy-duty fastening
- Hand saws and electric saws for cutting materials to size
- Measuring tapes and levels to ensure proper alignment
- Wrenches and pliers for assembly and adjustment
- Cutting torches and sandblasters for metalwork and surface preparation
Learning to use this toolkit effectively allows for precise positioning and secure fastening of signage components.
Heavy Machinery and Lifting Equipment
Large or heavy signs require machinery to lift and position them safely. Sign installers often operate cranes, bucket trucks, and hoists to handle oversized or improve installations. These machines allow installers to reach high places and maneuver heavy materials without risking injury. Maintaining a valid Commercial Driver’s License (CDL) is often necessary for driving the trucks that transport this equipment and the large signs themselves.
Using lifting equipment involves carefully planning the lift, securing the load with slings or chains, and communicating with team members throughout the process. Proper training is essential to prevent accidents and damage to the sign or surrounding property. For example, cranes can lift massive sign faces and structural steel components into place, while bucket trucks provide safe access to install signs on poles or building facades. Operators must always follow manufacturer guidelines and safety protocols.
Electrical and Wiring Tools
Many signs include lighting or digital elements that require electrical wiring and connection to power sources. Sign installers use specialized electrical tools such as wire strippers, voltage testers, multimeters, and conduit benders to set up these components. This work includes running wiring safely inside sign cabinets, connecting transformers, and testing circuits to ensure everything functions correctly.
Electrical installations demand attention to code compliance and safety standards. Installers wear personal protective equipment and use insulated tools to reduce the risk of electric shock. They typically follow this checklist for wiring illuminated signs:
- Turn off the power supply to the installation area
- Use a voltage tester to confirm no live current is present
- Strip wires to the appropriate length without damaging conductors
- Connect wires securely using wire nuts or connectors
- Route wiring through conduit or protective channels
- Test connections with a multimeter to verify continuity and correct voltage
- Restore power and perform a final functionality test of the sign lighting
Following these steps helps ensure electrical safety and reliable operation of illuminated signs.
How Sign Installers Ensure Safety on the Job
Safety on the job is a top priority for sign installers because they often work in high places and handle heavy equipment. They follow strict protocols, wear protective gear, and ensure legal rules are met to avoid accidents and complete installations correctly.
Personal Protective Equipment Requirements
Sign installers must wear specific safety gear before starting any job to reduce the risk of injury. Essential equipment includes hard hats to protect against falling objects, safety goggles to shield eyes from debris, and heavy-duty gloves for hand protection. When working at heights, harnesses and fall arrest systems are mandatory.
The right shoes with slip-resistant soles help maintain footing on ladders or scaffolds. Hearing protection may be necessary if power tools or heavy machinery operate nearby. Wearing visible vests or bright clothing also ensures installers are noticeable to coworkers and traffic.
Site Safety Protocols and Hazard Prevention
Before any installation begins, the area must be secured to prevent unauthorized access and reduce hazards. A common checklist includes confirming equipment stability, clear walkways, and safe pathways for electrical wiring. Installers should follow a decision rule: if there is any doubt about safety at height or electrical work, stop and assess before proceeding.
- Set up barricades or cones around the work zone
- Inspect ladders and lifting devices for defects
- Wear fall protection when working above 6 feet
- Verify power tool cords and connections are grounded
- Keep fire extinguishers nearby when welding or soldering
- Conduct a pre-installation safety briefing with the team
Making these checks and following protocols can prevent falls, electrical shocks, and injuries from dropped tools. After installation, performing a final inspection ensures the sign is firmly mounted and safe for public interaction.
Permit and Code Compliance Guidelines
Sign installers must review local zoning laws and building codes before setting up a sign. Obtaining the necessary permits often involves submitting detailed plans that show the sign’s size, location, and mounting method to the city or county. Installers interpret these permits alongside engineering specifications to ensure compliance. Failing to meet codes can result in fines or having to remove a sign, so installers verify setback distances from roads or buildings and follow electrical safety standards if the sign has lighting. It is common to follow a step-by-step process:
- Check local requirements for sign permits
- Submit drawings and applications for approval
- Confirm approved methods for installation and electrical connections
- Complete installation according to permits and safety rules
- Arrange final inspection by authorities if required
Adherence to these legal requirements protects installers and clients from liability and ensures signage serves its intended purpose without causing safety hazards or legal problems.
Typical Work Environment and Physical Demands
Sign installers usually work outdoors at construction sites, commercial buildings, and retail locations, where conditions can change rapidly. Weather often affects the job since installers need to carry out work in sun, rain, heat, or cold. Projects may require quick adjustments to accommodate site conditions and client schedules. Working outdoors means preparing for temperature swings and uneven terrain, sometimes reaching heights on ladders or scaffolds.
Physical demands for sign installers are significant. Handling large, heavy signs and installation equipment requires strength and dexterity, along with stamina for standing, climbing, or kneeling for extended periods. The job often involves lifting materials that can weigh from 50 to over 100 pounds, as well as using hand tools and power tools in tight spaces or awkward angles. Good coordination and balance are essential, especially when working at improve levels to install signs securely and safely.
Work hours typically follow a Monday-to-Friday schedule, but installers may face overtime or weekend shifts to meet project deadlines or client needs. These extended hours can add physical strain and require mental focus to maintain safety and quality. Night or early morning work might be necessary in some cases to minimize disruption in public or commercial areas, demanding flexibility and readiness to adapt to different schedules.
Experienced installers sometimes choose to work independently or as contractors, giving them flexibility but also requiring strong time management skills. Coordinating with construction teams and other contractors on site is key to completing projects efficiently and avoiding delays. Staying organized and communicating clearly can reduce downtime and ensure installation meets specifications without costly rework.
Always assess weather conditions before starting outdoor installations and prepare protective gear, since exposure to extreme elements can increase the risk of injury or delay work.
Challenges and Common Mistakes in Sign Installation
Sign installers face several challenges that can affect the quality and safety of their work. One big hurdle is mastering the use of diverse tools and materials. Knowing which anchors, fasteners, and supports fit different surfaces and sign types helps avoid costly damage and weak installations. Lack of this knowledge can lead to loose signs that pose safety hazards or waste time on rework.
Weather conditions also present a common challenge. Installing signs outdoors means dealing with wind, rain, or extreme heat, which can delay work or increase the risk of injury. Cold temperatures below 40°F can reduce adhesive effectiveness, while strong winds over 20 mph create dangerous working conditions on ladders or lifts. Planning installations during favorable weather windows and using proper protective gear reduces these risks.
- Measuring inaccurately, double-check measurements before drilling or mounting
- Using wrong anchors or fasteners for surface type
- Ignoring manufacturer specifications for sign weight limits
- Failing to secure permits or follow local regulations
- Overlooking the importance of level and plumb alignment
- Skipping site inspection leading to unanticipated obstacles
- Neglecting personal protective equipment such as helmets and gloves
Errors during installations often come from rushing or skipping key steps. Taking extra minutes to verify mounting points, confirm electrical connections if applicable, or use a level reduces mistakes. Using augmented reality (AR) tools can also help visualize exact sign placement, cutting down guesswork and minimizing repositioning. This technology gives installers a virtual preview, so they can adjust spacing and visibility before physically mounting the sign.
Another frequent mistake is poor communication with clients or team members. Checking installation requirements and any site restrictions ahead of time prevents surprises. Communicating delays due to weather or material shortages helps manage expectations and maintain professionalism.
Costly errors usually stem from not following best practices for safety, measurements, and materials. These mistakes can lead to sign damage, injury, or the need for costly repairs. Spending time on thorough planning, proper tool use, and clear communication leads to good results: secure signs, satisfied clients, and fewer callbacks.
Career Path and Advancement Opportunities for Sign Installers
Sign installers usually begin their careers in entry-level positions requiring some proven experience in related fields, then progress through more specialized roles before moving into leadership or freelance work. Gaining hands-on experience in installation, electrical, or construction work plays a key part in career advancement. Licensing and skill development open additional pathways to higher earnings and independence.
Entry-Level Roles and Skills Development
Most sign installers start with some background in construction, electrical work, or a similar trade. This experience can come from apprenticeships, vocational training, or on-the-job learning.
In the first 1 to 3 years, focus on mastering basic installation methods, tool handling, and safety compliance. Developing skills such as accurate measuring, mounting techniques, and familiarity with different sign materials sets a foundation for future advancement.
Entry-level installers often work under supervision while building their practical skills. Completing training programs or obtaining certifications related to electrical work or construction may be required depending on local regulations.
Mid-Level Specialized Positions
After gaining 3 to 5 years of field experience, sign installers typically move into more specialized positions. This can include handling complex electrical wiring for illuminated signs or managing installations involving structural engineering challenges.
At this stage, technicians might develop expertise in certain types of signage or installation methods, making them valuable for specific projects. Improving skills in troubleshooting, reading blueprints, and working with municipal permits often accompanies this level.
In some states, installers may qualify to take a contractor licensing exam after accumulating sufficient field experience, usually around 3 to 5 years. Holding a license enables installers to take on larger projects and increases earning potential.
Leadership and Freelance Opportunities
With 5 or more years of experience, sign installers can move into supervisory or management roles, overseeing installation teams and coordinating complex projects. Leading safety training, scheduling jobs, and communicating with clients are common responsibilities.
Experienced installers can also work freelance or start their own businesses. Operating independently requires knowledge of business management, securing contracts, and complying with local licensing requirements.
Freelance sign installers can set their own rates, which vary by geography and specialization. They manage their schedule but take on the financial risks of self-employment, including equipment costs and liability insurance.
| Career Stage | Experience Required | Typical Skills Gained | Opportunities |
|---|---|---|---|
| Entry-Level | 0, 3 years (construction or electrical background helpful) | Basic installation, tool use, safety compliance | On-the-job training, certifications |
| Mid-Level | 3, 5 years | Electrical wiring, blueprint reading, permit handling | Specialization, contractor license eligibility |
| Senior/Lead | 5+ years | Project management, team leadership | Supervisory roles, freelance, business ownership |
The timeline to progress through these stages depends on the installer’s focus on skill-building and meeting local licensing requirements. Moving from entry-level to a licensed contractor role often takes at least 3 to 5 years, with leadership positions generally following after 5 years in the field. Freelance work suits those who want more control but requires solid experience and business knowledge.
Different Methods and Types of Sign Installation
Sign installation methods vary widely depending on the type of sign and the conditions at the installation site. For example, installing a digital sign often involves precise electrical wiring and weatherproofing, whereas a neon sign requires careful handling of fragile glass tubes and specialized mounting brackets. Channel letter signs need secure attachment to walls or surfaces and alignment for illumination effects. Your knowledge of exterior building materials, such as brick, metal, or concrete, directly impacts the anchoring techniques you use.
Before installation, conducting a detailed site survey is essential. This includes taking precise measurements, photographs, and noting the environment’s characteristics like sunlight, wind exposure, or the accessibility of high locations. Interpreting design blueprints and installation instructions plays a major role here. These documents guide you on exact dimensions, mounting points, power sources, and safety clearances. Blueprints often show schematics and construction drawings that inform the best attachment method to prevent damage or premature failure.
Your role differs from related trades like electricians or general contractors because you focus on the specific needs of signage and its visibility, durability, and compliance with local codes. While some sign installers hold commercial driver’s licenses to operate crane trucks for high or large installations, electricians primarily handle internal wiring and power safety. Understanding these boundaries helps you coordinate with other professionals effectively. Below is a comparison table outlining key installation methods commonly used for various sign types and site conditions:
| Sign Type | Installation Method | Site Condition Considerations | Tools/Equipment |
|---|---|---|---|
| Digital Signs | Surface mounting with electrical wiring and weather sealing | Electrical hookup location, exposure to weather elements | Drills, wire strippers, weatherproof conduits |
| Neon Signs | Bracket mounting with fragile glass handling and gas tube connection | Height accessibility, fragile components, ventilation | Glass handling tools, mounting brackets, transformers |
| Channel Letter Signs | Secure fastening to exterior walls, electrical illumination setup | Wall material (brick, metal), alignment requirements, height | Anchors, level tools, wiring kits, lifts or cranes |
| Photoluminescent Signs | Adhesive or mechanical mounting to ensure light emission during outages | Visibility zones, emergency exit routes, ambient light levels | Adhesives, measuring tapes, mounting screws |
| Large Outdoor Signs | Cranes or lifts for installation at height, heavy-duty anchoring | Wind loads, height, traffic control for safety | Cranes, bolting tools, safety harnesses |
Use a checklist during installation to confirm every step follows the blueprint exactly:
- Verify measurements and mounting points with site survey data.
- Confirm compatibility of wall or surface materials with anchoring systems.
- Inspect electrical connections per code and instruction schematics.
- Ensure safety equipment is in place for work at heights.
- Cross-check final alignment and visibility from intended viewing angles.
Always double-check the blueprint scale and legend before starting; misreading these can result in incorrect sign placement or unsafe mounting.
Good results come from matching the installation method to the sign type and specific site challenges, plus close adherence to blueprints. Ignoring site conditions can lead to improper attachment, electrical hazards, or premature deterioration of signs. Effective communication with the design team and other trades ensures you meet both functional and aesthetic goals.
Your First 30 Days: A Quick-Start Plan
Getting started as a sign installer requires hands-on experience and focused learning. Follow these steps to build a strong foundation and ensure your success on the job.
- Before You Start: Research local regulations and licensing requirements for sign installation in your area to ensure you meet all legal standards; confirm you understand what certifications or permits you might need.
- Week 1: Shadow an experienced sign installer on various job sites to observe daily tasks and safety protocols; check that you can identify all essential tools and equipment used on the job.
- Week 2: Practice using basic tools such as drills, levels, and measuring tapes under supervision; track your accuracy by measuring and marking installation points correctly every time.
- Week 3: Learn to read and interpret blueprints or installation plans; test your understanding by explaining the steps and measurements to your trainer before execution.
- Week 4: Perform simple installation tasks like mounting wall signs or banners with supervision; confirm success by ensuring the sign is level, secure, and meets safety standards.
- After 1 Month: Review safety skills including ladder use and electrical safety; pass a safety checklist or quiz provided by your employer or trainer to demonstrate readiness.
- Ongoing: Seek feedback on your work quality and efficiency to improve; set goals for handling more complex installations or learning specialized equipment over time.
Frequently Asked Questions
What Prior Experience Helps Someone Become a Sign Installer?
Those with 1 to 2 years of experience often come from roles like Apprentice Sign Installer or Construction Worker, where they learn key installation basics and safety. This background helps build a strong foundation needed on the job.
Can Sign Installers Work Outdoors in All Weather Conditions?
Yes, sign installers often work outdoors and need to handle rain, wind, and heat safely. Wearing appropriate gear and checking weather forecasts helps ensure safety and quality work.
Is Certification Necessary to Advance in Sign Installation?
Certification is not always required but can improve job prospects and lead to higher roles. It shows commitment and specialized knowledge that employers value.
How Much Does a Sign Installer Typically Earn Annually?
A Sign Installer earns around $40,000 per year on average. Pay varies with experience, location, and complexity of the installation projects.
What Career Growth Opportunities Exist for Sign Installers?
Sign installers can advance to Lead Sign Installer or Installation Manager positions. Gaining experience and specialized skills opens doors to these higher roles.
Why Is Attention to Detail Important for Sign Installers?
Attention to detail ensures signs are installed accurately and meet client specifications. This precision affects both appearance and safety compliance.
Key Points to Remember
Sign installers play a key role in bringing visual messages to life by combining technical skills with attention to safety and detail. If you want to step confidently into this trade, start by gaining hands-on experience through entry-level opportunities or apprenticeships. Taking that first practical step will help you build the skills and confidence required for a solid career in sign installation.