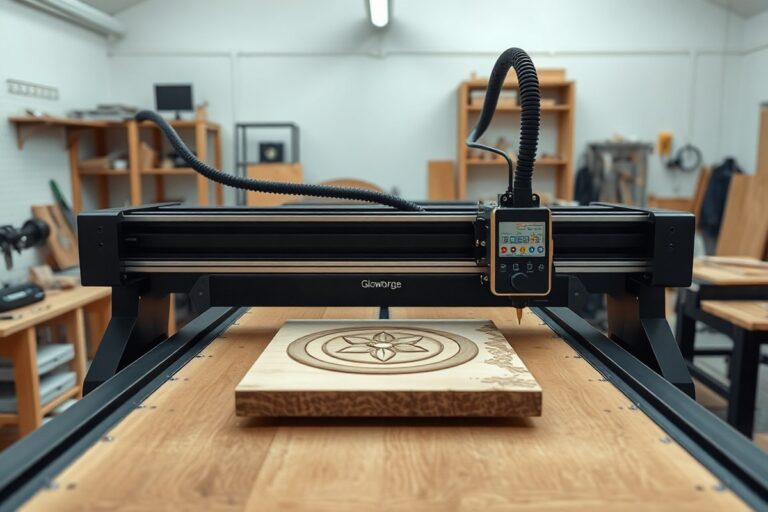
Is xTool Worth It? A Complete Guide to Models, Costs, and Benefits
Is xTool worth it depends on the type and scale of your projects. For most serious hobbyists and small businesses, xTool machines offer a solid balance of speed, precision, and versatility that justifies the investment. Starting with the M2 or S1 models provides value through efficient cutting and engraving, backed by user-friendly software and helpful trade-in discounts.
Key Takeaways
- The xTool M2 is ideal for beginners and Etsy sellers, with strong performance for its price point.
- Upgrading from any old laser or cutting machine can get you $50 to $800 off a new xTool.
- The 20W laser module on the S1 cuts roughly twice as fast as the 10W version.
- XTool machines range from about $160 up to over $7,500, covering hobby to professional needs.
- The M1 laser cuts up to 8mm wood thickness in one pass, suitable for thicker materials than the M2.
- XTool’s free design app, xTool Studio, works across all current models for easy project setup.
Is xTool Worth the Investment for Your Projects?

Choosing whether an xTool laser machine is worth the investment depends on balancing price, features, and your project needs. XTool lasers generally come at a premium compared to some open-frame diode competitors, but they also offer more reliability, ease of use, and a broad feature set. For example, the xTool M2, priced slightly under $150 more than more basic models, delivers a balance of affordable cost with advanced capabilities like enclosed safety and multi-material compatibility that lower-cost machines often lack. This additional investment tends to pay off if you value efficiency and consistent results.
Users who benefit most from xTool tend to be hobbyists, small business owners, and makers who expect to grow their skills and production without quickly outgrowing their equipment. The M2 suits anyone wanting a sturdy, ready-to-go machine with features that justify the price over entry-level options, even though it has a limited build height of about 1 inch. The community aspect also adds value; a dedicated space where users share projects and presets can speed learning and improve results. This ecosystem support is especially helpful for small businesses looking to add professional finishes but without the time to troubleshoot extensively.
Additional features can justify the extra cost depending on your projects. For instance, machines like the xTool D1 Pro offer adjustable laser height but require purchasing a riser kit separately to fully use the larger workpiece height. This trade-off illustrates that some features are modular, so your total investment might increase if you need maximum flexibility. Compare this to high-end CO2 machines like Glowforge Pro, which come bundled with many advanced features but at a considerably higher entry price and often subscription-based software. XTool’s local-run software frees you from subscriptions, offering long-term savings and offline operation. XTool machines offer versatile, enclosed systems at a moderate premium and don’t have ongoing fees.
When deciding if xTool is worth it for your specific use, compare the machine’s price and features directly with competitors and assess your typical projects. For example, if you mostly work on flat, thin materials like wood and acrylic and need safety enclosure, an xTool M2 or M1 Ultra is a strong choice. Choosing specialized color lasers or larger build volumes might be wiser if you prefer newer models or consider pricier CO2 units. Also, factor in accessory costs needed to maximize your machine’s potential. The good results show in consistent cuts and engravings without repeated trial-and-error, while frustration often comes from limited build space or insufficient support, which xTool minimizes through design and community resources.
How xTool Machines Differ: M1, M2, S1, and Beyond

XTool offers a range of laser cutters and engravers tailored to different crafting and business needs. Their models vary in laser power, cutting capabilities, and additional tools like blade cutters and color printing modules. Understanding these differences helps you pick a machine that fits your project demands, space, and budget.
XTool M1: Hybrid Cutter and Engraver Features
The xTool M1 Ultra is a versatile 4-in-1 desktop machine combining an ultra-fine diode laser with blade cutting, inkjet printing, and pen drawing. It comes standard with a 10W diode laser, with a 20W upgrade available for deeper cuts. Its laser spot size measures just 0.04 by 0.06 mm, enabling precise engraving on wood, acrylic, leather, and more.
This model’s cutter uses three blades, fine-point, rotary, and cutting blades, allowing it to cut materials that lasers alone struggle with, such as fabric and cardboard. The working area for laser, blade, and pen tasks is about 300 by 300 mm (roughly 12 by 12 inches), while inkjet printing covers a similar, slightly smaller space. One standout feature is the multi-color pen mode with eight ink colors, providing creative drawing options missing from other models.
The M1 uses pin-point positioning without a built-in camera system but offers add-on air assist for better cutting results. Its modular design means you can switch modes between laser, cutting, printing, and pen drawing, making it a great hybrid option if your projects require multiple crafting methods.
XTool M2: Color Craft Laser Capabilities
The xTool M2 focuses on color laser engraving and cutting with a hybrid laser module combining blue diode (10W or 20W) and a 3W infrared (IR) laser. This combination allows it to handle engraving, cutting, and color printing on various craft materials, including wood, leather, and acrylic. The M2 supports CMYK four-color printing, including dedicated black ink, for richer color fidelity than its predecessor, which used only three colors.
This machine uses a dual-camera system for real-time positioning, boosting precision and reducing setup time for detailed projects. Its work area matches that of the M1, but it employs laser tools instead of blades, concentrating solely on engraving and cutting. The M2 is fully enclosed and meets Class 1 safety standards, making it safe for use in homes where protection is essential.
While great for beginners interested in colorful craft projects, note that the M2 lacks blade and pen modes. It includes air assist for cleaner cuts but is less flexible than the M1 if cutting unconventional materials or needing blade precision.
XTool S1: Enclosed Diode Laser Advantages
The xTool S1 is a diode laser cutter and engraver with a fully enclosed design that merges eight 5.5W diodes into one 40W laser beam. It is the first desktop model to offer a 40W diode laser in an enclosed unit, delivering power similar to that of a CO2 laser while maintaining the compactness and safety features typical of diode lasers. This unit is particularly effective at cutting through thicker materials such as wood, acrylic, and leather, outperforming diode lasers with lower wattage.
The S1 supports longer material lengths via pass-through mode, allowing you to work on larger projects than the standard 300 by 300 mm size common with xTool’s desktop models. Its enclosed design keeps fumes and debris contained, improving safety and ventilation requirements in home studios or small workshops.
Unlike the M series, the S1 focuses purely on high-power laser cutting and engraving without color printing or blade tools. It’s ideal for users prioritizing cutting thicker materials with a compact footprint.
Higher-End Models: P2, P3 and F-Series Differences
XTool’s higher-end models include the P series CO2 lasers and F series fiber/infrared lasers, designed for professional and production-level work. The P2 features a powerful 55W CO2 laser cutting thick acrylic and various materials efficiently, with a larger working area and precise cutting speeds. The P3 offers even more power at 80W, supporting larger projects and higher throughput demands.
The F series targets metal engraving and marking, with fiber and MOPA fiber laser options. The F1 Ultra and F2 models handle metals like jewelry and tools, some equipped with ultraviolet lasers for delicate glass engraving. These machines cost significantly more but provide capabilities not possible with diode or CO2 lasers, including color marking on metals and glass. These models are not typical hobbyist tools; they require more ventilation, safety measures, and larger space but fill the gap for growing businesses needing industrial-level laser performance from desktop-style systems.
| Feature | XTool M2 | XTool M1 Ultra | XTool S1 | XTool P2 |
|---|---|---|---|---|
| Laser Type | 10W/20W Blue Diode + 3W IR Laser | 10W/20W Blue Diode | 40W Diode (8 × 5.5W combined) | 55W CO2 Laser |
| Cutting Modes | Laser only | Laser + Blade + Pen + Inkjet | Laser only | Laser only |
| Working Area (Laser) | Approx. 300 × 300 mm | Approx. 300 × 300 mm | Access to pass-through for longer materials | Larger professional size |
| Color Printing | CMYK 4-color | CMY 3-color + 8 pen colors | No color printing | No color printing |
| Positioning | Dual-camera real-time | Pin-point (no camera) | Not specified (enclosed system) | Professional-grade positioning |
| Price Range | Mid-range | Mid-range with multi-tools | Higher mid-range for power | High-end |
Make sure to verify the power option and module compatibility before purchase, as upgrades may require additional accessories or different machine versions.
Materials and Projects: What Can xTool Cut and Engrave?
XTool machines can cut and engrave over 300 materials, offering strong versatility for hobbyists and small businesses. They work well with wood, opaque acrylic, leather, and various fabrics, while metal engraving and cylindrical object projects are possible with additional features or accessories. Your choice depends on the material, project size, and desired finish.
Wood, Acrylic, and Leather Compatibility
XTool’s diode and CO₂ laser models handle wood cutting and engraving efficiently, with cutting thicknesses of up to 20mm for wood and 25mm for opaque acrylic. Basswood and other common wood types can be cut cleanly with sharp edges using the 80W CO₂ laser in machines like the xTool M1. For engraving, the laser delivers deep and crisp detail on wood surfaces, perfect for signage, custom gifts, or decor projects.
Opaque or dark-colored acrylic cuts well on xTool machines, but clear acrylic cannot be cut or engraved effectively due to its transparency, which affects laser absorption. Leather also engraves cleanly but typically won’t cut unless using specific machine settings and thinner materials, so it’s better suited for detailed engraving. The broad material compatibility of xTool’s lasers supports projects from paper and fabrics to rubber and bamboo, allowing you to experiment within these ranges.
Metal Marking and Engraving Options
Metal cutting is not feasible on xTool machines, but marking and engraving certain metals like stainless steel and aluminum are supported through IR or fiber laser modules, available on models like the F1 and F2 series. These modules use a 5W IR laser for color marking, allowing you to add logos, serial numbers, or artistic designs on metals with durable and precise results. This contrast marking is ideal for branding or custom product decoration but does not cut metal.
For metal projects, the xTool F2 offers a dual-laser setup, combining a diode laser for cutting and engraving non-metals, and an IR laser to mark metals in color. This balance lets you expand your project base without needing separate machines but requires understanding that real cutting still happens only on wood, fabric, or acrylic. Metal engraving is slower than cutting wood due to the nature of the laser type and material hardness.
Handling Cylindrical and Irregular Items
Working with cylindrical items like tumblers or irregular shapes is possible using the xTool M1 with the Riser Base accessory. The riser raises the work area and includes an adjustable honeycomb panel, stabilizing larger or oddly shaped objects for consistent engraving or cutting. This setup helps maintain focus and precision on curved surfaces, which is critical to avoid distortions or uneven burns.
Engraving cylindrical items often requires software calibration and rotating fixtures to ensure a smooth design wrap. Without proper positioning, the laser may lose focus or overlap engravings, resulting in visible distortions. The riser and clamps included with xTool’s setup provide the necessary support to align these objects correctly, with some projects taking extra time to perfect the rotation and laser path.
Color Printing on Various Surfaces with M2
The xTool M2 machine offers all-in-one capabilities, including full-color UV and direct-to-film printing, in addition to laser engraving and cutting. This allows printing vivid, durable images on wood, acrylic, fabric, canvas, and finished products without extra transfer processes. The M2’s UV printer head works well for bright, detailed designs on light and dark surfaces alike, expanding project possibilities beyond engraving.
This combination suits small business owners focused on personalized merchandise, such as custom apparel, signs, or accessories. Print speeds and setup vary by material; expect slightly longer preparation times when switching between printing and laser modes. While the M2 doesn’t engrave metals directly, it can print on coated or pre-treated metal surfaces, adding versatility to your workflow and product range.
Using xTool Software: Ease, Features, and Workflow
The xTool software stands out for its ease of use and friendly learning curve, especially for newcomers and small business owners. Most current xTool machines run on xTool Studio, a free design app tailored to work smoothly with the hardware. You can download and install it on Windows or Mac before your machine even arrives, which saves setup time. The installation process is straightforward and takes just a few minutes. Launching the software presents you with a clean, intuitive interface where you import or create designs and send them directly to your machine.
XTool Studio supports popular design formats such as SVG, DXF, PNG, JPG, and BMP, which covers most needs for laser cutting and engraving projects. This means you can create your artwork in many common programs or use ready-made designs without converting files. Once a design is imported, the software allows you to set parameters like power, speed, and mode for cutting, engraving, or scoring. Mode options, for example on the xTool M1, include “score,” which etches the outline with a single stroke, and “engrave,” which fills the entire shape, giving you flexible control over the final look.
The software greatly simplifies alignment and focusing, which typically challenge beginners. Many xTool machines feature auto-focus and camera-based alignment systems that integrate directly with the software. For example, the M2 uses dual cameras and ACS™ auto-settings that let you visually place your design on the material via a live preview. This removes guesswork and speeds up precise positioning. The software’s auto-focus feature automatically adjusts the laser head to the correct distance from the material, so you don’t have to measure manually before each job. These automated steps make it easy to start cutting or engraving immediately, even if you’ve never operated a laser machine before.
In the software workflow, after design placement and settings, you run a quick “frame” command to check the cutting area’s alignment on the actual material. This preview lets you make final adjustments without wasting material. Then, send the job to the machine and watch as it cuts or engraves according to your specifications. The total process, from design import to job completion, typically takes under 15 minutes for simple projects. For more complex designs or larger runs, the software’s organized workflow and memory help keep things efficient over multiple jobs.
Some users may explore third-party software like LightBurn for machines such as the xTool S1. LightBurn supports key functions but lacks full integration with native features like curved-surface engraving or material-area measurement, which means sticking with the official xTool Creative Space app is often better for complete access.
The software experience is also backed by xTool’s customer support and online resources, so help is available if you hit snags. From installation through design to production, the software helps manage the workflow cleanly and reliably. Automatic features like autofocus and camera alignment reduce errors, save setup time, and improve project outcomes, which is especially valuable for hobbyists and small businesses producing a range of materials and designs.
Safety Features and Home Use Considerations
XTool machines come with several safety features that make them suitable for home use, especially for hobbyist crafters and small business owners. These devices are fully enclosed and Class 1 laser safety certified, which means they prevent harmful laser light from escaping during normal operation. This level of enclosure eliminates the need for safety goggles or a specially sealed room, unlike open-frame laser engravers. Key safety mechanisms include a flame detector, emergency stop button, and lid interlocks that immediately pause the laser if the enclosure is opened during operation.
For example, the xTool D1 Pro has a built-in flame detector that senses unexpected fires and automatically stops the laser. These features help reduce the risk of fire, which can occur if flammable materials ignite from laser heat. The M2 model’s integrated air assist also helps by blowing away smoke and debris at the cutting point, reducing fumes and preventing flare-ups.
Because laser cutting produces fumes, you must ensure proper ventilation to keep your workspace safe. Running a small fume extractor or positioning your machine near an open window can significantly improve air quality. Some users opt for a basic activated carbon filter system, which costs around $100 to $200, to further reduce odors and particles. Monitor the area closely during cuts involving materials like acrylic or wood, which release more fumes and carry a higher fire risk.
Also, keep the workspace free of unnecessary combustibles and never leave the machine unattended while it’s running. Always use the emergency stop if you see signs of smoke or heat buildup. That reduces fire damage risk and prevents larger accidents. Maintaining clean optics and regularly inspecting parts like belts and fans can also prevent malfunctions that might cause unsafe conditions.
Operating around children requires extra caution. Place the machine out of reach or have a dedicated craft room where children do not enter during cutting sessions. The sound alerts and flashing lights on xTool machines provide useful warnings that keep you aware of the machine’s status. Educate family members about the dangers and keep a fire extinguisher handy, rated for electrical and chemical fires.
Always stay nearby during cuts and watch for smoke or unusual smells to stop the process immediately if needed.
Here is a safety checklist for home use: ensure the machine is on a stable, non-flammable surface; connect ventilation or a fume extractor; keep combustibles at least 3 feet away; enable all safety interlocks; test the emergency stop button before projects; wear a mask if ventilation is limited; keep children and pets away from the area; and monitor the cut continuously. Following this checklist helps you safely enjoy the precision and versatility of xTool lasers while minimizing risks to your household.
Speed and Precision: How Fast Can xTool Cut and Engrave?
XTool laser cutters deliver reliable speed and precision ideal for hobbyists and small businesses. There’s a noticeable performance gap between the 10W and 20W laser modules: tests show the 20W cuts roughly twice as fast as the 10W. For example, cutting a 5mm thick piece of basswood took just over a minute with the 20W, compared to almost two and a half minutes with the 10W. Opting for the 20W is a smart choice when you need quicker cuts or want to work with thicker materials.
Precision is another strength of xTool machines. The Spot size for the 20W S1 model laser is about 0.06 by 0.08 mm, allowing detailed engraving and clean cuts. The precision rating is down to 0.01 mm, which helps maintain intricate designs, especially on delicate or highly detailed projects. This precision level suits materials like wood, leather, acrylic, and more, resulting in sharp edges and detailed engraving that hobbyists and small manufacturers depend on for quality products.
The xTool M2 model brings laser cutting, engraving, and full-color printing into one machine but does have a build height limit with a maximum cutting height of about 12 inches. This restriction means taller materials or projects needing more vertical space might not fit comfortably. Projects involving thick or bulky items that require extra height clearance might face limits with the M2’s build height capacity.
| Specification | XTool S1 10W | XTool S1 20W |
|---|---|---|
| Cut Speed (5mm Basswood) | ~2.5 minutes | ~1 minute |
| Maximum Cut Thickness (Basswood) | Up to 5mm | Up to 10mm |
| Laser Spot Size | ~0.06×0.08 mm | ~0.06×0.08 mm |
| Maximum Speed | Up to 600 mm/s | Up to 600 mm/s |
| Precision | 0.01 mm | 0.01 mm |
The tradeoff between the two laser modules boils down to your project’s scale and complexity. The 10W laser is ideal for detailed engraving and cutting thinner materials. Regular cutting of thicker or denser materials benefits from the 20W laser’s increased power and speed, cutting down project time substantially. The increased price of the 20W module reflects this added capability but may pay off quickly in productivity.
To optimize cutting results, pay attention to material thickness and laser power settings. For instance, cutting thicker wood like cherry wood up to 10mm thickness benefits from the 20W laser. Lower wattage lasers may require slower speeds or multiple passes, increasing project time and potentially causing uneven cuts or burning. For engraving tasks, both power levels can handle detailed jobs, but larger areas will complete faster with higher power.
The M2’s build height limit to around 12 inches requires careful planning if your craft projects need vertical space above that. Items thicker than 12 inches risk not fitting or requiring alternate methods. Consider this when selecting your machine, balancing precision and speed needs against material size and project dimensions.
Costs Beyond Purchase: Replacement Parts and Accessories
Ongoing costs for xTool laser machines mainly come from replacement cartridges, accessories, and maintenance supplies, which impact the long-term value you get from your investment. Replacement cartridges for these machines, specifically the ink cartridges, are proprietary and priced around $99 or more each. These cartridges house 40ml of ink and have about a one-year shelf life, so you’ll need to factor in at least annual replacement if you use your machine regularly. Since the ink cartridges are non-refillable, buying new ones from xTool is unavoidable. This makes the ink cartridge cost a predictable part of your yearly budget for operating expenses.
In addition to cartridges, several accessories can improve your laser cutter’s performance and the quality of your work. An air filter is important for minimizing smoke and fumes generated during cutting and engraving, helping keep your workspace clean and preserving crisp edges on your cuts. Prices vary because some bundles include these extras; for example, the 20W and 40W Basic Bundles and the Rotary Bundle on Amazon often come with these helpful additions, with prices adjusting depending on current xTool deals.
When purchasing, check the official xTool website to verify current bundle contents and pricing, as these fluctuate frequently. Some bundles offer great value by including air filters, rotary attachments, or additional blades, which otherwise would add $50 to $300 more if bought separately. For example, the additional laser package for the base model costs about $299, but certain machines like the M2 include it standard, saving you that extra expense.
Keeping track of proprietary replacement parts is essential for budgeting. You can only buy replacement blades and cartridges directly from xTool, and third-party retailers won’t qualify for the 60-day purchase warranty that comes with orders through xtool.com. This policy means you should weigh convenience and warranty coverage against potentially higher bundle prices or seasonal deals. Paying more upfront for a bundle with warranty coverage might save you repair and replacement hassles later.
Maintenance routines include regularly cleaning the laser lens, checking alignment, and replacing cartridges and blades as needed. Poor maintenance leads to slower cuts, lower engraving quality, and potential machine damage. Good results usually show crisp, clean edges with no burn marks, which come with fresh cartridges and well-maintained parts. Noticing fading or incomplete cuts usually means it’s time to swap out the cartridge or blade.
For hobbyists and small business owners scaling up, monitoring these ongoing costs is important. A checklist to manage expenses should include ordering replacement cartridges about once a year, investing in recommended accessories like air filters early on, researching bundles that include needed extras, and factoring in occasional upkeep costs around $50 to $300 annually, depending on use. Planning ahead reduces downtime and keeps your xTool machine running smoothly for creating high-quality projects that grow your business revenue.
Setup and First Project: Getting Started with Your xTool Machine
Setting up your xTool machine and finishing your first project involves straightforward steps designed to minimize frustration and get you crafting quickly. Proper assembly, software setup, and understanding the basic workflow help avoid common beginner problems. Following a clear step-by-step process ensures your machine is ready for accurate cutting and engraving.
Initial Unboxing and Assembly
Start by gently unpacking your xTool machine from its box on a flat, stable surface large enough to hold the entire unit, including the bed that measures about 23.93 by 15.16 inches. Remove all packing materials while keeping essential components like the power cable, USB cable, and accessory kits nearby. Assembly is minimal since xTool machines come mostly pre-assembled, but confirm that the protective covers, laser modules, and work area are intact and clean.
Check that the machine is level and stable to prevent vibrations during operation. Connect the power supply, but don’t plug it into the wall outlet yet. Before powering on, familiarize yourself with physical safety features such as the emergency stop button and the enclosure doors if your model includes them, particularly the S1. These features reduce risks and ensure safer use right from the start.
Software Installation and Device Pairing
Install the xTool Creative Suite software on your computer by downloading the latest version from the official xTool website. This program is user-friendly and supports essential features like laser cutting, engraving, and the print-then-cut workflow present in models such as the M2. The software also pairs wirelessly or via USB, depending on your model and preference. For example, the xTool S1 offers offline capabilities, which means you can operate it even without a constant internet connection.
After installation, launch the software and follow the prompts to add your machine using the serial number found on the device or packaging. Make sure your computer and machine are connected to the same network if pairing wirelessly. Run the initial calibration wizard inside the software to align the laser head and focus properly. The autofocus feature on the S1 simplifies this step, adjusting lens height automatically, but you may need manual focus for other models like the M1.
Running Your First Cut or Engraving
Choose a simple starter project to familiarize yourself with the workflow, something that fits within the 19.6 by 12.5 inch work area, like a small wooden keychain or an acrylic coaster. Start by selecting the correct operation mode in Creative Space, especially if you have the M1 that supports both cutting and blade operations. Import your design file in a supported format such as SVG or PNG, adjust the size to fit your material, and set your parameters based on recommended values for your material’s thickness and type.
Once settings are configured, place your material securely on the bed and close the machine’s cover if applicable. Press “Run” in the software, and the machine will start the process. Keep the machine under observation in case of issues like shifting material or unexpected noises. A typical engraving might take several minutes; cuts can vary depending on material thickness and power settings, which are usually listed in the xTool user manual or online resources.
Troubleshooting Common Issues
Alignment problems often arise if the initial calibration was skipped or rushed. Run the autofocus or manual focus calibration again and check the lens for dust when cuts aren’t clean or engraving looks blurry. Another frequent issue involves incorrect material settings; using settings for acrylic on wood, for example, will yield poor results. Double-check you’ve chosen the right cutting or engraving parameters in the software.
Machine communication errors sometimes happen during wireless pairing, try reconnecting via USB or restarting both the computer and the xTool device. Make sure safety switches and door sensors are fully engaged when the laser does not start or stops mid-job. Many beginners forget to secure the material properly, causing movement during cutting or engraving, so use clamps or reposition the material firmly for better outcomes.
Always double-check that the machine’s cover is fully closed before starting a job to prevent immediate shutdowns due to safety interlocks.
Who Benefits Most from xTool: User Profiles and Use Cases
XTool machines are best suited for hobbyists and small business owners who create personalized items such as gifts, jewelry, signage, decor, and apparel. If you’re running an Etsy shop or a small handmade business, xTool devices offer features tailored to your needs, including precise cutting and engraving on a variety of materials. For example, the xTool M1’s ability to cut rubber makes it ideal for creating custom stamps to personalize your packaging or marketing materials, a valuable asset for crafters wanting to add a professional touch to their product presentation.
The xTool M2 appeals especially to makers who need versatility and efficiency. It combines several functions, offering an all-in-one solution that can handle intricate designs and a broad range of materials. This makes it a practical choice if your small business requires both laser cutting and engraving without investing in multiple devices. The M2’s performance supports projects ranging from wood and acrylic cutting to detailed metal engraving, helping you scale your production without sacrificing quality.
Regarding experience level, the simpler design and software integration of the xTool M1 make it accessible for beginners who are just starting their laser cutting journey. Its learning curve is manageable, allowing new users to produce quality work quickly with minimal setup. More advanced users or those aiming to expand production capabilities might prefer the M2 or future models like the anticipated P3, which use higher power lasers and additional features suitable for more complex jobs.
For small businesses focused on maintaining a clean and safe workspace, combining an xTool machine with accessories such as the Desktop Smoke Purifier, recommended for the xTool F1, helps reduce fumes and particles during operation. This addition is particularly important if you’re working in a home environment or a small studio where ventilation options may be limited.
Cost considerations vary by model and accessories but generally start in the mid-hundreds to a few thousand dollars. This range balances capability and price, making xTool machines affordable for hobbyists while offering enough functionality for small enterprises. The investment pays off by enabling you to produce professional-quality items consistently and speed up turnaround times for customer orders.
Choosing the right xTool machine depends on your project size, material types, and production volume. Hobbyists wanting to experiment with different materials might begin with the M1 or M2 for their versatile performance and user-friendly design. For small businesses seeking to boost productivity or offer more sophisticated product lines, models like the M2 or upcoming P3, with higher laser power and specialized modules, can handle heavier workloads and more demanding project requirements.
Comparing xTool to Other Brands: Features and Value
XTool laser machines compare favorably with popular brands like Glowforge and Cricut, especially in terms of offering a versatile all-in-one cutting and engraving system at a competitive price point. The xTool M2 model, for instance, replaces vinyl cutting and multi-color pen drawing features found in some other brands with a stronger IR laser and an improved camera and print system, which improve precision and printing alignment. This makes it appealing both to hobbyists who are upgrading beyond blade cutters and to professionals who need reliable laser etching alongside cutting capability.
Pricewise, xTool machines like the M1 and M2 tend to undercut Glowforge models by several hundred dollars while providing similar or better laser power and material compatibility. The M1, priced as a hybrid option, suits users without prior experience with laser or blade cutting machines and who want an affordable all-around tool. In contrast, Cricut excels at vinyl and paper craft but lacks the power and speed for handling thicker materials like wood or acrylic. This puts xTool in a niche that combines laser precision with the usability and community support familiar to crafters who may already own Cricuts or Silhouettes.
The unique advantage of xTool lies in its ecosystem approach: enclosed machines that prioritize user safety, a single free app to streamline design and cutting workflows, a wide range of tested materials, and an active user community sharing tips and projects. This approach contrasts with competitors that often focus on either the lowest price or a narrow feature set targeted at one craft type. With xTool, the investment buys not just hardware but software and support that reduce setup time and trial-and-error, speeding your path to good results.
Deciding which brand offers better value depends on your primary use case. For laser engraving and cutting thicker materials like wood or acrylic, xTool’s M2 delivers strong value with faster processing and higher precision compared to a Cricut blade cutter or an entry Glowforge. Beginners who want a safe, enclosed environment and a straightforward user experience will find xTool’s design more approachable than assembling parts from modular kits or buying multiple machines for each craft type.
To guide your choice, consider these criteria: if you want multi-color pen drawing and vinyl cutting, Cricut or Silhouette might be irreplaceable. If you want a dedicated laser platform for cutting and engraving with advanced features, the xTool M2 fits well. For a balanced start with some laser capability and blade cutting, the xTool M1 is a smart pick. Glowforge models offer similar laser power but traditionally at higher prices and with fewer software updates, making xTool the scrappier, cost-effective alternative for serious hobbyists or small business crafters.
Step-by-Step Action Plan to Start Using Your xTool Machine
Follow this plan to get your xTool machine up and running quickly and see results on your first project.
- Before you start: Set up a dedicated workspace with good ventilation and a stable surface. Ensure your power source matches the machine requirements. This prevents early operational issues.
- Day 1: Unbox and assemble your xTool machine, following the included instructions exactly. Test the basic movement and connection through the software to confirm the machine responds correctly.
- Day 2: Run the calibration process using the software’s guided steps. Accurate calibration is key for precision cuts and engravings.
- Day 3: Choose a simple project with a recommended material, such as basswood or acrylic. Complete the cut or engraving using default settings to verify the machine handles the material well.
- Week 1: Experiment with different materials and settings. Keep notes on speed and power levels that yield the best results for each material type you plan to use.
- Week 2: Order a few replacement parts or accessory options compatible with your machine model. Familiarity with these will help reduce downtime.
- Week 3: Join xTool user communities online to learn tips and troubleshoot issues. Engaging with other users expands your knowledge and project ideas.
- Month 1: Complete a custom project from start to finish, integrating your preferred design software with the xTool software for a streamlined workflow. Successful completion confirms you’re ready for more complex tasks.
Frequently Asked Questions
Is xTool Worth It for Beginners?
Yes, the xTool M2 is ideal for beginners and Etsy sellers, offering user-friendly features that justify its cost. It helps level up your projects with precision despite a limited vertical workspace.
Does xTool Offer Trade-In Discounts?
Yes, you can trade any old laser, 3D printer, or cutter for a discount ranging from $50 to $800 without sending your old machine back. This makes upgrading more affordable.
Is the xTool S1 Good for Small Businesses?
Yes, the xTool S1 is well-suited for serious hobbyists and small business owners looking for precision and speed. Its performance justifies the price.
Can xTool P3 Match Doubled Specs of P2?
The P3 roughly doubles key specs compared to the P2, making the extra $150 investment worthwhile for higher speed and power. This upgrade delivers noticeable performance gains.
How Fast Is the 20W Laser Module in xTool Machines?
The 20W laser cuts about twice as fast as the 10W, significantly reducing project time, for example, a 5mm basswood cut went from 2.5 minutes down to just over 1 minute.
What Are the Costs Beyond Buying an xTool Machine?
Replacement parts and accessories add to the total cost, but the machines run the free xTool Studio app, helping control software expenses. Budget for consumables to keep performance steady.
Wrapping Up
XTool machines offer a solid balance of speed, accuracy, and user-friendly features that can justify the investment, especially if you plan to work with a variety of materials regularly. Start by testing basic cuts on low-risk materials to build your confidence and skills. Exploring the software features and joining user groups also enrich your experience and productivity.