How to Make a Sign Post with Simple Steps for Durable Results
How to make a sign post starts with choosing sturdy materials like a 4×4 wood post or PVC pipes for durability. Secure installation involves digging a hole, positioning the post properly, and filling the hole with soil or cement. Proper placement ensures your sign stays visible and stable, preventing damage from weather or accidental knocks.
Key Takeaways
- Use a 4x4x8-foot wood post or a combination of PVC pipes and fittings for a strong sign post frame.
- Dig a hole at least 2 feet deep to secure the post firmly in the ground for long-lasting stability.
- Fill the hole tightly with soil or quick-setting cement and tamp it down to prevent leaning or wobbling.
- Choose a sign location with clear visibility, free of obstructions, to maximize its impact.
- Paint and seal wooden posts with weather-resistant finishes like silver hammered spray paint to protect from moisture and sun damage.
- Attach signs securely using T joints, elbows, or cotter pins depending on your post design for safe mounting.
Essential Materials and Tools for Building a Sign Post
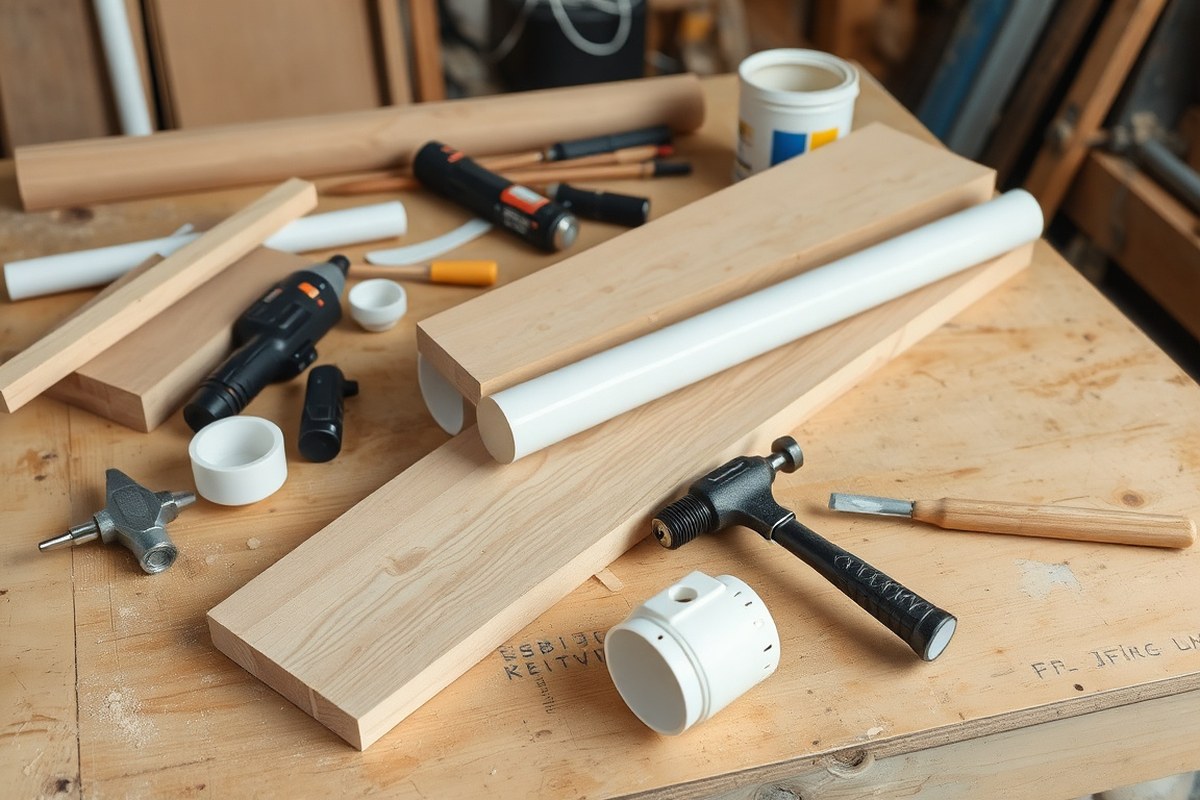
To build a durable sign post, you need the right materials and tools depending on whether you choose wood or PVC. Wood posts require weather-resistant lumber like cedar or pressure-treated 4″x4″ lumber, which withstands outdoor conditions and offers a classic look. For assembly, corrosion-resistant screws or nails, a drill or hammer, sealant or exterior paint for protection, and mounting brackets will be necessary.
PVC sign posts are lightweight and weatherproof, making them a low-maintenance alternative. Materials include several lengths of PVC pipe (such as a 4-foot main post and shorter 12-inch pieces), 90-degree elbows, T-joints, threaded caps, plugs, and a cotter pin to lock parts together. You’ll also need PVC primer and glue to create secure, waterproof joints, plus spray paint if you want to customize the finish.
Wood requires cutting precision and protective treatment. Cutting should be measured carefully to fit the sign dimensions, and the post must be sealed or painted for durability. PVC assembly mainly involves fitting and gluing pieces, which takes less skill but relies on correct adhesive application and drying time for strength. Both materials need tools to secure the sign itself, typically screws, nails, or brackets designed to fasten firmly without damaging the sign face.
- For wood: pressure-treated 4″x4″ wood post, corrosion-resistant screws, drill or hammer, exterior paint or sealant, mounting brackets
- For PVC: 4 ft PVC pipe, assorted pipe joints (elbows, T-joints), threaded caps/plugs, PVC primer and glue, cotter pin, spray paint for finish
- Common tools: measuring tape, saw (for wood or PVC), drill or hammer, level
- Protective gear: gloves, safety goggles for cutting and assembly
- Optional: concrete mix for setting posts securely in the ground
Choosing weather-resistant wood like cedar or treated lumber means your post will last longer outdoors but expect to spend about $20 to $40 for an 8-foot 4″x4″ post. PVC pipe costs vary but generally run $10 to $25 for a similar length with fittings. PVC install is simpler but can appear less traditional and may require more precision gluing. Wood can be heavier and demands more maintenance but offers strength and a natural appearance. Using concrete to anchor the post provides the best stability regardless of material, but simple soil tamping works for lighter signs in less exposed locations.
Choosing the Right Type of Sign Post for Your Project

Choosing the right type of sign post depends on durability needs, budget, and installation environment. Wooden and PVC posts are the most common choices, each with distinct advantages for different projects. Understanding their durability, cost, and maintenance helps you pick the best post for your sign.
Wooden Sign Posts: Features and Uses
Wooden sign posts are traditional and versatile, often made from cedar, pine, or treated lumber. They provide strong support and can be easily painted or customized to fit your design preferences. Wood’s natural look works well for residential signage and real estate signs, where aesthetics matter. Cost-wise, untreated cedar posts usually run about $20 to $40 for a standard 4×4 post, making them affordable for most DIY projects.
Wood posts require maintenance to prevent warping, splitting, or rotting caused by weather exposure. Applying a weather-resistant paint or sealant extends their lifespan, but you should inspect them regularly for signs of wear. They are best used when installed in soil that drains well and not in constantly wet conditions, as moisture accelerates decay. Wooden posts are also easier to modify on site if needed, such as cutting to length or adding decorative trims.
PVC Sign Posts: Pros and Cons
PVC posts are made from rigid plastic and offer excellent weather resistance and low maintenance. They do not rot, warp, or suffer from insect damage, which suits projects requiring longevity with minimal upkeep. A standard 4×4 PVC post costs from $30 to $60, generally higher than wood but offset by less need for upkeep over time.
While PVC posts are durable, their rigidity can be a drawback in high-wind areas where some flexibility could prevent cracking. They also offer less natural visual appeal and can be less customizable compared to wood, painting PVC requires special primers and paints designed for plastic. Use PVC posts when you want a clean, modern look and expect the post to withstand moisture and temperature changes without frequent maintenance.
Hybrid and Alternative Materials
Other options include metal posts, like aluminum or steel, which are very durable but prone to rust unless properly coated, and composite posts that combine plastic with wood fibers. Metal posts are often used for commercial signage but can be overkill for small DIY projects, given higher costs and installation complexity. Composite posts balance durability and appearance but can cost $50 or more per unit and may still need painting to improve visibility.
Choosing hybrid or alternative materials depends on your climate, budget, and the sign’s importance. For example, metal posts are great in areas with heavy winds and rain, while composites suit moderate climates. Maintenance varies, but all posts benefit from adding weather-resistant paints or coatings to extend their usable life.
Below is a comparison of wooden and PVC sign posts based on key project factors. This table helps to choose the most suitable post type by weighing cost, durability, maintenance, and appearance.
| Factor | Wooden Posts | PVC Posts |
|---|---|---|
| Material Cost (4×4 post) | $20, $40 | $30, $60 |
| Durability | Moderate; susceptible to rot and splitting | High; resists moisture and insects |
| Maintenance | Periodic sealing or painting | Minimal; occasional cleaning |
| Appearance | Natural wood grain; highly customizable | Clean, smooth surface; paint required for colors |
| Installation | Easier to cut and adjust on-site | Requires special tools for modifications |
| Best Use | Residential, aesthetic-focused signs | Moist environments, low-maintenance needs |
Selecting your sign post also involves considering local weather conditions and how much time you can spend on maintenance. Wood may need more attention in wet or extreme climates, while PVC can generally withstand these conditions longer with less care.
Tip: Regularly inspect wooden sign posts for cracking or warping and repaint every 2, 3 years to maintain strength and appearance.
How to Select and Prepare a Suitable Location for Installation
Choose a location for your sign post where it is clearly visible from the main street or primary viewing angle. High readability means the sign should face oncoming traffic or pedestrian flow directly. Avoid spots where trees, parked cars, or other signs partially block the view. Position the sign at eye level or slightly above for motorists, typically 5 to 7 feet from the ground, to improve legibility without obstructing sight lines.
Check local zoning laws and neighborhood rules before installation, as many areas regulate sign placement. Property easements, portions of land reserved for utilities or public use, often restrict where posts can be placed. Contact your city or county building department to inquire about setback distances from roads or sidewalks, usually around 10 to 15 feet, and any permits required. Avoid placing your post where underground utility lines run to prevent damage and ensure safety. Call 811 for utility locates before digging, a free service in the US.
A good decision rule is to pick a site with clear visibility for at least 50 feet in both directions of the street. This distance allows drivers or passersby enough time to read and react to the sign. Also, consider lighting conditions; select a spot that gets enough natural light during peak hours or plan for supplemental lighting if the sign must be visible at night. Reflective materials on signs can improve visibility in lower light situations without extra cost.
Think about the environment surrounding your sign post to avoid issues like soil erosion or flooding that could destabilize it. Choose firm, dry ground to help keep the post upright over time. In areas with heavy foot traffic, placing the post off to the side reduces the risk of accidental damage. On sloped sites, ensure the post is set perpendicular to level ground by measuring with a carpenter’s level to maintain balance and appearance.
Costs for permits and location preparation vary, but anticipate spending $20 to $100 on permits depending on your municipality. Utility marking is typically free but mandatory before digging. Preparing the site can involve minor landscaping to clear brush, which might cost $0 if you do it yourself or more if hiring help. The effort you invest in choosing and preparing the right location pays off in better sign effectiveness and fewer legal or maintenance problems down the road.
Step-by-Step Installation Process for a Secure Sign Post
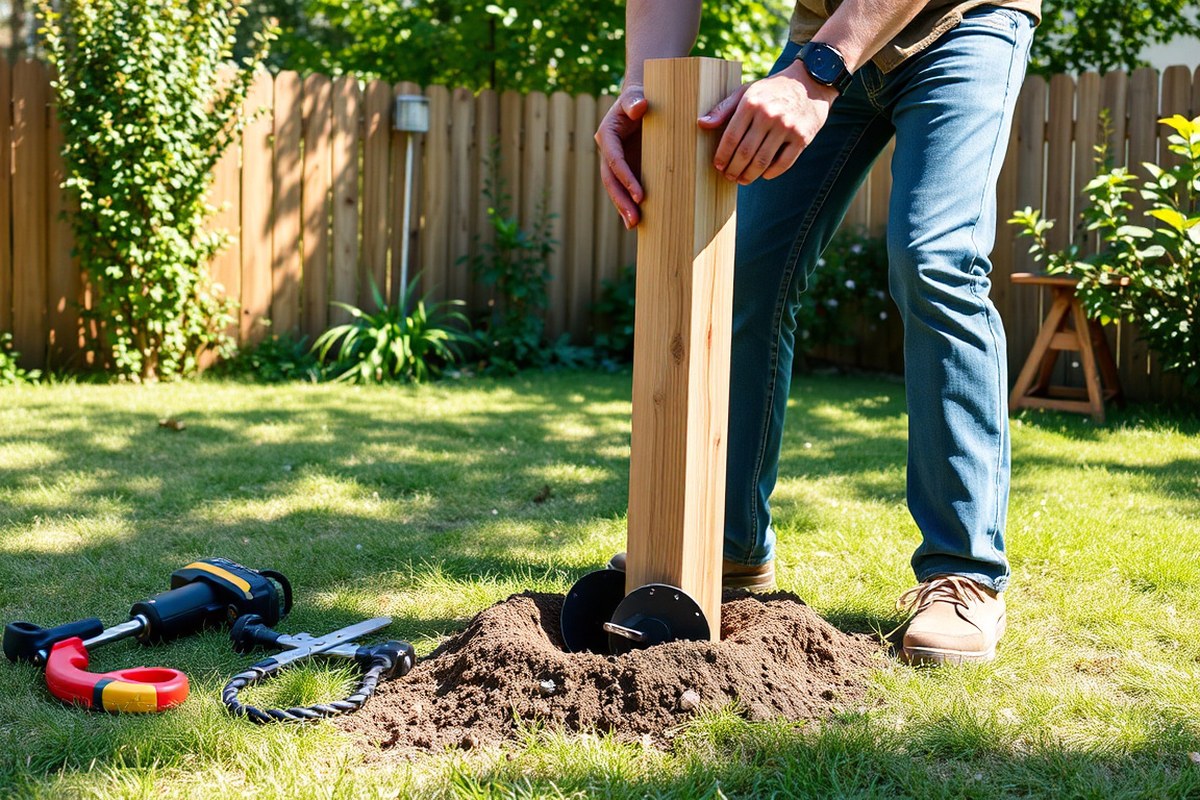
Installing a sign post securely requires digging an appropriately sized hole, positioning the post accurately, and choosing the right backfill to stabilize it. Following a clear sequence ensures the post stays straight and stands firm over time.
Digging and Preparing the Post Hole
The hole you dig must be deep and wide enough to support the post against wind and weight. A good rule is to dig the hole about one-third the length of the post into the ground, typically 2 to 3 feet deep for standard sign posts, with a diameter 3 times the width of the post. This depth prevents wobbling and sinking over time. The soil should be loosened around the hole edges to help with drainage but avoid digging too large to maintain earth stability.
Before inserting the post, clear out any loose dirt or debris at the bottom of the hole. You want a firm base to set the post on, which can be just natural soil or a small layer of gravel for drainage, depending on your soil type.
Setting the Post and Ensuring Level
Positioning the post precisely vertical is critical. Start by placing the post in the hole, then check the angle with a carpenter’s level or a digital angle finder. Adjust the post until it stands perfectly straight both front-to-back and side-to-side. This step should be repeated after partial backfilling and once more after the backfill has settled to ensure the post does not shift.
- Place the post in the center of the hole.
- Use a level to check vertical alignment in multiple directions.
- Have an assistant hold the post steady or use temporary braces.
- Adjust the post angle until it is plumb.
- Recheck alignment frequently as you proceed to backfill.
Backfilling Options: Soil vs Concrete
Backfill choice depends on the permanence and exposure level of your sign post. Soil backfill is sufficient for light-duty posts in stable ground, but concrete offers stronger support, especially for heavier posts or in areas prone to wind or disturbance.
Concrete mix for sign posts typically consists of water and cement powder combined to a thick consistency. Pour the mixture carefully around the post, filling at least 6 inches above ground level and tapering downwards. Avoid pouring concrete on frozen or extremely wet ground to maintain curing performance. Concrete sets within 24 to 48 hours to provide firm support. When choosing between soil or concrete:
- Use soil backfill if you want an easier, less expensive installation and the post is lightweight with minimal exposure.
- Use concrete for heavier or taller posts, in loose or sandy soil, or if you need a durable, long-lasting installation.
Designing and Customizing Signs for Maximum Visibility
Designing a sign for maximum visibility starts with focusing on size, font, and color. For yard signs, a common size is 24 by 36 inches. This size balances legibility from a distance with ease of installation on a sign post. When choosing a font, pick one that’s easy to read in bold lettering, such as Agency FB. Set the font size around 20 pixels and use a light color like near-white (R=245, G=245, B=245) for strong contrast against a darker background. Higher contrast colors improve readability even from 50 feet or more.
Customizing your sign means considering the background and graphics carefully. Avoid cluttering the sign with too much text or images. Use a simple, clean design with your key message centered and in large, clear text. A dark navy or black background helps the light-colored font stand out. Including a logo or other graphic element works best when it’s minimal and placed so it doesn’t compete with your message. This makes your sign more noticeable to people driving or walking by quickly.
For outdoor durability, use exterior-grade acrylic or enamel paints as these resist fading and weather damage better than standard paints. Apply primer first and follow with two coats of paint to ensure solid coverage. Seal the finished sign with a clear UV-resistant topcoat or varnish to protect colors from sun damage and moisture. Signs painted this way can last 3 to 5 years outside before needing touch-ups or repainting.
Design your sign based on where it will be installed. For locations with heavy shadows, increase brightness and use reflective paint for better visibility at dusk or dawn. Facing sunlight, signs with matte finishes reduce glare that can make text hard to see. In areas with wind exposure, choose thicker materials and avoid overly detailed elements that might peel or chip easily.
An example of an effective real estate sign might use a 24×36 inch board painted deep blue. The agency’s bold Agency FB font in near-white is centered providing the main message, such as “For Sale,” across the top third of the sign in 3-inch tall letters. Below that, the agent’s name and phone number are placed in slightly smaller but still readable font size. A small, simple logo goes in the lower right corner, ensuring the main message grabs attention first. This layout, combined with high-quality paint and a UV sealant, creates a visible, long-lasting sign.
Use a clear UV-resistant topcoat on your sign paint to prevent fading and maintain visibility over several seasons outdoors.
Effective Methods to Attach Signs to the Post
To attach aluminum signs to a colonial sign post securely, use hardware designed specifically for outdoor metal signs to avoid damage or instability. The goal is to fix the sign firmly without bending, scratching, or allowing it to loosen over time. Common hardware includes screws, bolts, U-bolts, and brackets, each serving different mounting needs depending on your post and sign size.
Start by choosing the right fasteners. For aluminum signs, stainless steel screws or bolts with nylon washers offer corrosion resistance and grip without harming the metal. Avoid common steel nails or staples, which can rust and damage the sign. Also, nylon or rubber washers prevent the fastener from scratching the surface and allow for slight expansion due to temperature changes.
The choice of hardware depends on how thick your sign is and the style of the colonial post. If the post has flat mounting surfaces, angle brackets with screws provide stable contact points and keep the sign flush. For round posts without flat panels, U-bolts wrap around the post and clamp the sign securely. U-bolts must be sized to fit the post’s circumference snugly without deforming the sign material. Here’s a checklist to decide on hardware and attachment method:
- Measure the thickness and weight of your aluminum sign.
- Check the post’s shape, flat or round mounting face.
- For flat surfaces, select stainless steel screws with nylon washers or angle brackets.
- For round posts, pick the correct-sized U-bolts with rubber washers.
- Use a drill with a metal bit to pre-drill holes, preventing aluminum from cracking.
- Make sure the sign’s holes align precisely with the hardware points to avoid strain.
- Do not overtighten screws or bolts, tighten until secure, then stop to avoid warping.
Drilling pilot holes about 1/16 inch smaller than your screws’ diameter keeps the aluminum intact and prevents cracking. Place the sign on a flat surface and use clamps to hold it steady before drilling. Space screws evenly around the edges, typically every 12 to 18 inches, which keeps the sign stable across different weather conditions.
Expect to spend between $10 and $25 on hardware depending on quality and quantity. Stainless steel sets are widely available at hardware stores or online. Installing the sign properly this way ensures it withstands wind, rain, and sun without loosening or sagging while preserving the sign’s clean, professional look that complements your colonial post.
Common Mistakes and How to Avoid Them When Making a Sign Post
One of the biggest mistakes when making a sign post is poor leveling. Make sure the post is perfectly vertical to avoid leaning over time, which can cut down visibility and put stress on the structure. Use a carpenter’s level during installation to check all sides of the post. Set the post in concrete and keep the level against the post until the concrete sets, usually about 24 to 48 hours depending on the mix and weather. Uneven soil or improper hole depth may cause the post to shift, so make sure the hole is deep enough, typically one-third the length of the post, and the soil is well compacted around the base once set.
Using inadequate materials is another common problem. Posts made from untreated wood or thin metal can warp, rot, or rust, especially in outdoor conditions. Choose pressure-treated wood or weather-resistant metal designed for outdoor use; these materials last longer and support signs better. Adding a protective sealant to wood posts can add years to their lifespan. Avoid using softwood that costs less but may crack or degrade within a few seasons.
Incorrect installation methods lead to instability or reduced sign visibility. Make sure the post is installed in a location free from obstructions like trees or parked vehicles to keep the sign visible from the intended viewing distance. Fasteners and brackets must be secure and compatible with the post material to prevent signs from wobbling or falling off. Using galvanized screws or bolts reduces the chance of rust and loosening over time compared to cheaper hardware.
Troubleshooting stability often means checking the base first. When the post wobbles, check whether the concrete footing is cracked or the soil has become loose. Tightening bolts or adding fresh concrete mix around the base can restore firmness. For signs that are difficult to see, evaluate height and angle; a sign installed too low to the ground might be blocked by vegetation or parked cars, while a sign tilted away from the road can reduce legibility. Adjusting the post height to between 5 and 7 feet and tilting the sign slightly toward oncoming traffic improves visibility for drivers and pedestrians.
Another issue is fading or damage to the sign face from sun and weather exposure. Use UV-resistant paints or laminates to protect the sign graphic. Regularly inspect the sign for cracks or peeling and replace or touch up as needed to maintain clear messaging. Refreshing protective coatings every two to three years keeps the sign vibrant and readable.
Cost factors include buying quality wood or metal posts, durable fasteners, and concrete for footings, which can range from $20 to $60 per post depending on size and material. The investment in better materials and installation techniques helps avoid repair or replacement costs sooner. Good results look like a straight, solid post with a clearly visible sign, firmly attached and facing the right direction.
Maintaining and Repairing Your Sign Post for Longevity
Maintaining and repairing your sign post ensures it stays sturdy and looks professional over time. Regular checks and timely touch-ups prevent small problems from becoming major repairs. Knowing when to replace parts or the entire post helps you avoid unsafe or ineffective signage.
Routine Inspections and Cleaning
Carry out a thorough inspection of your sign post every three to six months. Look for signs of rust, rot, cracks, or loose attachments. Check the base for stability and ensure the sign remains legible and clean. Consistent inspections catch early damage, preventing costly repairs and maintaining your sign’s visibility.
Cleaning your sign post depends on the material. For wooden posts, use a soft brush or cloth with mild soap and water to remove dirt and debris. Avoid harsh chemicals that can damage wood or fade paint. Metal posts can be cleaned with a cloth and a bit of vinegar or mild detergent.
- Inspect for rust, cracks, or rot
- Check bolts, screws, and sign attachments for tightness
- Ensure post is upright and firmly anchored
- Clean dirt, bird droppings, and debris off sign and post
- Use gentle cleaning solutions suitable for the post material
- Schedule inspections seasonally or after severe weather
These small actions preserve both the sign’s appearance and its structural integrity, helping your signage serve its purpose longer.
Repainting and Weatherproofing Tips
Repaint your sign post every two to three years to keep it looking fresh and protected. Before repainting, lightly sand the surface to remove loose paint and smooth rough spots. Use a primer suitable for the material, wood primer for wooden posts and rust-inhibiting metal primer for metal posts.
Choose high-quality outdoor paint designed to withstand sun, rain, and temperature changes. Weatherproofing treatments add an extra layer of protection. For wood, apply a clear sealant or water-repellent finish after painting. For metal, consider a rust-resistant coating if the paint is thin or chipped.
Using paint and sealant designed for outdoor use can significantly extend your sign post’s life, especially in harsh climates.
Some weatherproofing steps include:
- Sanding and washing the surface before painting
- Applying primer for better paint adhesion
- Using outdoor-grade paint with UV protection
- Sealing wood with a water-resistant finish
- Applying rust-resistant coatings on metal posts
- Reapplying sealants every 1-2 years depending on local weather
Simple Repairs and When to Replace
Basic repairs like tightening screws, replacing rusted bolts, or patching small cracks keep your sign post functional. Use weather-resistant hardware to avoid frequent replacements. Wood filler or epoxy can fix minor splits in wooden posts, while rust converters treat small rust spots on metal.
Replace parts if damage is extensive enough to threaten stability or appearance. For wooden posts, deep rot or a crack larger than 6 inches usually means replacement. Metal posts showing corrosion that has thinned the metal structure also need full replacement for safety.
Signs attached to damaged posts may need new mounting hardware or repositioning for proper display. Track your repair history to spot recurring problems early. Replacing an entire sign post typically costs between $50 and $150 depending on materials, which can be more economical than continuous patchwork.
Step-by-Step Action Plan
Follow these steps to build and install your sign post efficiently while ensuring durability and visibility.
- Before you start: Gather all necessary materials and tools listed for your specific sign post type. Confirm everything is on hand to avoid delays.
- Day 1: Choose and mark the installation site. Check the ground for stability and permit requirements if needed.
- Day 2: Cut and prepare the post and sign according to your design. Verify measurements and finishes match your visibility goals.
- Day 3: Dig the hole for the post, ensuring it’s deep and wide enough for stability. Use a level to ensure the hole is vertical.
- Day 4: Set the post in place using concrete or compacted soil. Confirm the post is plumb before concrete sets or soil compacts.
- Day 5: Attach your custom sign securely using bolts, screws, or brackets. Double-check attachment points for tightness and alignment.
- Week 2: Inspect the installed sign post for any movement or instability. Adjust or reinforce as needed.
- Monthly: Perform maintenance checks for rust, rot, or loose hardware to keep the sign post in good condition.
Frequently Asked Questions
Can I Build a Sign Post Without Concrete?
Yes, you can fill the hole with tightly packed soil, but concrete offers better stability and durability, especially in windy conditions.
How Deep Should I Dig the Hole for a Sign Post?
Typically, a hole 2 to 3 feet deep provides good stability for a 4×4 post, depending on soil type and post height.
What Type of Paint Works Best for Outdoor Sign Posts?
Use high-quality, weather-resistant paint to protect the post from moisture and improve visibility over time.
Can I Reuse Old Wood for Making a Sign Post?
You can reuse old wood if it’s in good condition and structurally sound, but treated lumber lasts longer outdoors.
How Do I Prevent a Sign Post from Leaning?
Ensure the hole is deep enough and pack soil or concrete firmly around the post, checking for plumb during installation.
Is It Necessary to Get Permits Before Installing a Sign Post?
Local regulations vary, so check with your city or county to see if a permit is required for sign installation.
Key Points to Remember
Building and installing your sign post right the first time pays off in durability and visibility. Start by selecting your materials and site carefully, then follow through with precise installation steps. Begin with preparing your sign and post today to move quickly toward a successful setup.