How to Laser Cut Acrylic: Simple Steps for Clean, Precise Results
Achieving clean and precise acrylic laser cuts begins with selecting the appropriate laser cutter settings and the right acrylic material. A CO2 laser set to approximately 85 to 100% power and a speed of 10 to 15 mm per second works well for cutting 1/8-inch acrylic with smooth results. Always run tests on scrap acrylic before cutting your final piece to prevent material waste.
Key Takeaways
- Use a CO2 laser for the best acrylic cutting results due to its ability to vaporize instead of melt the material.
- Start with 85, 100% power and 10, 15 mm/s speed on a 40, 60 W laser for 1/8-inch thick acrylic sheets.
- Cast acrylic cuts cleaner and has a better edge finish than extruded acrylic for high-end projects.
- Attach acrylic pieces before or after cutting using double-sided 3M tape or acrylic adhesive for secure assembly.
- Keep the acrylic sheet flat and clean to prevent distortions and ensure precise laser movement.
- Each cut typically takes 2, 3 minutes or less, depending on acrylic thickness and design complexity.
How to Laser Cut Acrylic Cleanly and Precisely
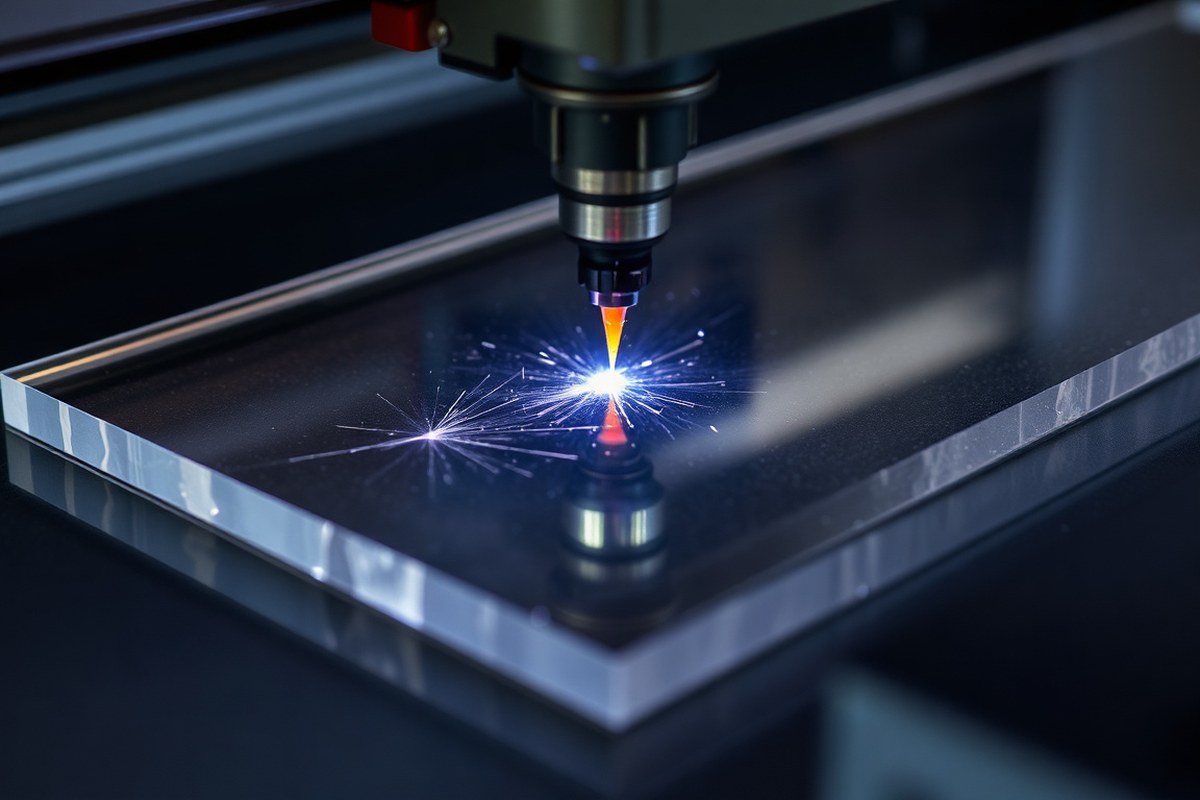
Achieving smooth, clean cuts on acrylic with a laser cutter involves precise control over power, speed, and the use of cast acrylic. Cast acrylic produces crisp, flame-polished edges that require no additional finishing, unlike extruded acrylic, which often melts and leaves gummy, raised edges. Selecting the right laser power and adjusting the speed according to the thickness of the acrylic are essential to avoid burrs, smoke marks, and cloudy edges.
Start with the power of your laser cutter as the baseline. Machines with 40-60 watts work well for acrylic up to 1/4″ (6mm) thick. For 1/2″ (12mm) thickness, 80-100 watts yield cleaner cuts. If cutting up to 1″ (25mm), a 130-150 watt laser is needed to cut efficiently in one pass. Slower cutting speeds and air assist help prevent melted edges and keep cuts clear.
- Choose cast acrylic sheets. This type melts cleanly under laser light, giving polished edges without post-processing. Avoid extruded acrylic for cutting if smooth edges matter.
- Set your laser power based on acrylic thickness. Use 40-60W for up to 1/4″ thick, 80-100W for 1/2″ thick, and 130-150W for 1″ thick sheets to ensure enough energy for a clean cut.
- Adjust the cutting speed to balance heat input. Thicker acrylic needs slower speed to allow full cutting without charring. For example, at 1/8″ thickness, try a faster speed around 10-20 mm/s; for 1/2″ thickness, reduce it to around 3-5 mm/s.
- Enable air assist throughout the cut. A steady stream of air blows away smoke and debris, prevents flame flare-ups, and helps achieve crisp edges.
- Make a test cut on a scrap piece. Monitor the edge quality and adjust speed or power slightly if edges appear rough or gummy. A well-cut edge is transparent and glossy without cloudiness.
- Use a single pass cutting method for thin sheets. Multiple passes may cause heat buildup and edge imperfections, so single pass is ideal for up to 1/4″ thickness.
- Keep the acrylic’s protective film on during cutting. This prevents smoke stains on the surface and reduces the risk of surface damage or marks.
- Clean the edges after cutting if needed. For minor debris or slight roughness, gently wipe with isopropyl alcohol or use a fine abrasive pad. Avoid sanding which removes polished finish.
Clean and precise laser cuts come from balancing power, speed, and air flow while working with the right type of acrylic. Correct settings reduce the need for post-processing and produce polished edges right off the machine, saving time and effort on your projects.
Which Acrylic Types Work Best for Laser Cutting?

Cast acrylic and extruded acrylic differ mainly in manufacturing methods, resulting in distinct qualities for laser cutting. Cast acrylic is preferred because it produces cleaner, clearer cuts with smooth, flame-polished edges. Extruded acrylic often creates gummy or melted edges due to internal stresses from its production process.
Cast Acrylic Overview
Cast acrylic is made by pouring liquid acrylic into molds, allowing it to cure into solid sheets. This process results in a dense, uniform material with high optical clarity and excellent surface quality. When laser cut, cast acrylic responds well to the heat, melting and vaporizing cleanly to produce crisp, flame-polished edges without requiring additional finishing.
Since cast acrylic has no internal stresses, the laser produces minimal residue or distortion. This makes it ideal for projects needing high-end aesthetics, such as display cases, signage, and decorative items. Although cast acrylic costs more upfront, it delivers superior results that can save time and effort in post-processing.
Extruded Acrylic Overview
Extruded acrylic is manufactured by pushing molten acrylic through a die to form sheets. This process tends to introduce internal stresses into the material, which affect laser cutting results. When the laser hits extruded acrylic, these stresses cause the edges to melt unevenly, creating a gummy residue and rougher finish compared to cast acrylic.
While extruded acrylic is often cheaper, it doesn’t cut as cleanly, making it unsuitable for projects where precise, smooth edges are critical. The edges may require additional sanding or polishing, increasing labor and reducing production efficiency. Extruded acrylic is better suited for applications where appearance is less important or for budget-conscious projects.
Which Type to Choose for Your Project
Selecting cast or extruded acrylic depends on your budget, finish quality, and application. For professional quality cuts with excellent clarity and polished edges, cast acrylic is the best choice. For hobbyist or lower-cost projects where edge finish matters less, extruded acrylic can work but expect a rougher cut and extra finishing.
Using a CO2 laser with the correct power, focus, and speed settings on cast acrylic ensures clean cuts that need no further polishing. For thicker sheets, cast acrylic also performs better, while extruded acrylic tends to produce angled or incomplete cuts unless the laser is powerful enough and settings are optimized. The table below compares key features and performance characteristics between cast and extruded acrylic for laser cutting.
| Characteristic | Cast Acrylic | Extruded Acrylic |
|---|---|---|
| Manufacturing Process | Pouring liquid into molds | Molten acrylic pushed through a die |
| Internal Stresses | Low to none | High |
| Surface Quality | High clarity, uniform density | Lower clarity, possible streaks |
| Laser Cut Edge Finish | Smooth, flame-polished, clear | Gummy, rough, melted residue |
| Suitability for Engraving | Excellent | Acceptable, but lower quality |
| Cost | Higher | Lower |
| Recommended Applications | High-end signage, display, decor | Budget projects, prototypes |
Always cut acrylic in a well-ventilated space or with proper fume extraction to avoid inhaling harmful acrylic fumes during laser cutting.
Choosing cast acrylic paired with a properly powered CO2 laser produces efficient, high-quality cuts expected in professional products. Extruded acrylic can be cheaper but often requires extra finishing work and may disappoint where edge clarity and smoothness matter most.
How Laser Cutter Settings Affect Acrylic Cut Quality
Laser cutter settings like power, speed, the number of passes, focus, and air assist directly shape how clean and precise your acrylic cuts look. Higher power with slower speed helps cut through thicker material but risks melting and smoke marks. Air assist and proper focus keep edges smooth and clear by minimizing heat buildup and debris. Adjust these factors carefully to avoid common issues such as cloudy or melted edges.
Recommended Power and Speed by Thickness
Power and speed need matching to your acrylic thickness for the best cut quality. More power at a slower speed lets the laser penetrate thicker acrylic without multiple passes, but going too slow can cause melting. Lighter power with quicker travel works better for thin sheets to reduce heat buildup.
| Thickness | Laser Power (CO2) | Speed (mm/s) | Passes |
|---|---|---|---|
| 3 mm | 85, 100% | 10, 15 | 1 |
| 5 mm | 100% | 6, 10 | 1, 2 |
| 8, 10 mm | 100% | 4, 6 | 2, 3 |
| Up to 1/4″ (6mm) | 40W – 60W | Varies | 1 |
| Up to 1/2″ (12mm) | 80W – 100W | Varies | 1-2 |
| Up to 1″ (25mm) | 130W – 150W+ | Varies | 2-3 |
Laser power is normally expressed as a percentage of maximum output or in watts for CO2 lasers. Thinner acrylic around 3 mm cuts well near 85, 100% power at speeds over 10 mm/s for one pass, while 8, 10 mm sheets need full power, slower speeds under 6 mm/s, and multiple passes. Matching power to the laser wattage and acrylic thickness ensures clean cuts without excess melting or cloudy edges.
The Importance of Air Assist
Air assist blows a constant stream of air or inert gas at the laser’s cutting point. This clears away smoke and molten acrylic, which reduces residue and prevents cloudiness on edges. It also cools the material, minimizing heat damage like melting and bubbles.
Using air assist improves both cut quality and laser optics longevity. Without it, smoke accumulates on the surface and the lens, interfering with laser focus and leaving smoky brown or black marks. For best results, connect your air assist nozzle near the laser head and use moderate pressure airflow during cutting. This setup is standard on most acrylic cutting processes.
How Focus Adjustments Improve Precision
Laser focus, primarily adjusted on the Z-axis, controls the point where the laser beam is smallest and most intense. Setting the focus accurately at the surface of the acrylic sheet gives a clean, sharp cut.
Too high or low focus spreads the beam and reduces cutting quality, causing rough edges and increased melting. Focus should be tuned to the acrylic thickness, you want the beam waist just inside or slightly on the top surface. Slight adjustments can improve edge smoothness and reduce scorch marks. While some users run multiple passes with adjusted focus points for thick acrylic to maintain sharp edges, a single accurately focused cut at the material surface often achieves the best flame-polished effect on cast acrylic edges.
Preparing Acrylic Sheets for Laser Cutting
Cleaning acrylic sheets before laser cutting is essential to achieve clear, precise cuts. Surface dust, oils, or fingerprints can interfere with the laser’s focus and cause blemishes or uneven edges. Use a microfiber cloth slightly dampened with water or isopropyl alcohol to wipe the surface gently. Avoid any abrasive cleaners or rough cloths, as they can scratch the acrylic. Let the sheet dry completely before proceeding.
Masking helps protect the acrylic from smoke residue and heat discoloration during cutting. Most acrylic sheets come with a protective plastic film that should stay on until just before cutting. For extra protection, apply low-tack painter’s tape or specialized laser cutting masking tape. These tapes minimize residue and are easy to remove. Avoid regular adhesive tapes, as they can leave sticky deposits that are hard to clean and may damage the acrylic surface.
Securing the acrylic sheet firmly on your laser bed prevents shifting during cutting, which causes misaligned or blurred cuts. Use clamps if your machine supports them or apply secure, non-residue double-sided tape along the edges. Position the sheet flat and straight to ensure the laser beam maintains proper focus along the entire cut path. For larger sheets, place at least two clamps spaced evenly along opposite edges. Avoid excessive pressure that might crack thinner sheets.
- Wipe acrylic with a microfiber cloth and isopropyl alcohol, then let dry.
- Keep or apply a protective masking film or low-tack painter’s tape.
- Remove masking only from the cut area after finishing to reduce residue.
- Use clamps or non-residue double-sided tape to hold sheets firmly.
- Check for flatness and avoid warping before starting the job.
- For mirror acrylic, remove masking from the mirrored side before cutting the back.
- Test cut a small piece first to confirm the setup.
Preparing your acrylic sheets with these steps reduces cleanup time and improves the overall quality of the finished product. Clean surfaces allow the laser to cut without interruption, while proper masking lessens the risk of heat damage or smoke stains. Secure mounting keeps the job precise and prevents costly mistakes. The time investment in preparing the materials can save frustration and yield smoother, more polished results.
How Long Does Laser Cutting Acrylic Take?
Laser cutting acrylic usually takes between a few seconds to several minutes per cut, depending on the thickness and complexity of your design. Cutting 1/8-inch (about 3 mm) acrylic typically takes less than a minute for a simple shape, while thicker acrylic, up to 1/2 inch (12 mm), can take several minutes per pass. Most hobby-level CO2 lasers cut 1/8 inch acrylic at speeds around 10 to 20 inches per minute, but thicker sheets require slower speeds and often multiple passes to get a clean cut without melting or charring.
The speed and power settings directly affect how long the job takes. Higher power cuts faster but risks rougher edges or melting if set too high. Lower power means slower cuts but cleaner edges. Adjust these settings based on your acrylic’s thickness, type, and your laser’s wattage. For example, a 40-watt laser might cut 1/8-inch acrylic quickly at 15 inches per minute with 90% power, but thicker acrylic could need reducing speed to 5 inches per minute and boosting power close to 100%, taking up to several minutes per cut line. Experimenting with these parameters helps balance cutting time and quality for your specific project.
Design complexity also influences cutting time. Simple straight lines or geometric shapes require less time because the laser moves primarily in smooth, continuous paths. Intricate patterns with many curves, tiny details, or multiple cut outlines slow down the process because the laser head must change direction more frequently and pause at sharp points. For detailed designs, you might expect cutting time to increase by 30% to 50% compared to a simple cut of the same size. Planning your design layout and minimizing unnecessary small details can keep cutting times reasonable.
Material type and quality also play roles. Transparent or colored cast acrylic may absorb laser energy differently than extruded acrylic, slightly changing how quickly the laser cuts through. Keeping your material clean and free of debris ensures the beam stays focused and efficient, reducing cutting time. Finally, ambient conditions such as room temperature and airflow affect heat buildup around the cut area, which can lengthen or shorten the required duration.
Test cut a small section before running the full job to verify your settings balance speed and cut quality, especially when changing thickness or design complexity.
Common Acrylic Laser Cutting Mistakes and How to Fix Them
Brittle or gummy acrylic edges usually come from using too high power or too slow speed on your laser cutter. The excess heat melts the acrylic instead of vaporizing it cleanly. Lowering power settings or increasing speed helps reduce melted, cloudy edges and leaves a smooth, shiny finish. Chips and cracks often occur when the laser cuts too deep on thin sheets or the material shifts during cutting. Avoid these issues by securely fastening the acrylic and ensuring the laser focus matches the sheet thickness.
Flare-ups or visible flames signal the laser beam is igniting airborne dust or acrylic fumes. This not only risks damaging your material but can also soot the edges. Proper ventilation and using an air assist system to blow away smoke and dust help prevent burning. Adjust your settings to avoid overlapping passes that increase excessive heat buildup.
Smoke marks and dull engravings are typically caused by residue settling on the acrylic or too low power for engraving depth. Clean your acrylic surface before cutting and set the laser power to a level suitable for clear detail without melting. The table below summarizes common acrylic cutting problems and solutions to help you troubleshoot effectively:
| Problem | Cause | Solution |
|---|---|---|
| Edges gummy or melted | Too high power, too slow speed | Lower power 5-10%; increase speed by 10-20% |
| Edges cracked or chipped | Material movement, laser focused off surface | Secure acrylic firmly; adjust focus to exact thickness |
| Burning or flames (flare-ups) | Laser ignites fumes or dust around cut | Use air assist, improve ventilation; avoid overlapping passes |
| Smoke marks or dull engraving | Residue buildup, insufficient power for engraving | Clean surface; increase engraving power slightly |
Adjusting laser settings and maintaining your workspace are key to preventing defects. Cutting acrylic thinly and holding it tight keeps cracks and chips at bay. Air assist systems typically cost $50 to $100 but offer better edges with less residue. Testing on scrap acrylic before final cuts helps find the right balance. Success appears as clear, polished edges with no discoloration, minimal heat distortion, and precise engraved details.
Safety Tips and Best Practices for Laser Cutting Acrylic
Laser cutting acrylic produces fumes that can be harmful if inhaled and intense light that can damage your eyes. The cutting process releases tiny particles and gases like methyl methacrylate, which may irritate your respiratory system. Proper ventilation is essential to prevent buildup of these fumes in your workspace.
Use a well-ventilated area or set up an exhaust system that pulls air directly from the laser cutter and vents it outside your building. Portable air scrubbers fitted with HEPA and activated carbon filters can help reduce airborne particles and odors if venting outside is not possible. Consistent airflow of at least 100 cubic feet per minute is recommended for small workshops.
Protective eyewear designed to block the specific wavelength of the laser is important. These goggles prevent retinal damage from the laser beam and stray reflections. Avoid generic safety glasses, as they might not provide adequate protection. Gloves can protect your hands from sharp acrylic scraps but remember not to wear loose gloves near moving machine parts.
Regularly maintain your laser cutter to ensure safe operation and prevent fires. Clear away acrylic dust and scraps after each use as buildup can ignite under heat. Inspect and clean the lens and mirrors monthly or following the manufacturer’s instructions to maintain accurate beam focus and reduce reflective hazards. Check ventilation ducts for blockages and replace filters according to their lifespan, often every three to six months.
- Wear laser-approved safety goggles at all times when the laser is active
- Ensure your workspace has an exhaust fan or ventilation to the outside
- Use air scrubbers if outside venting isn’t available
- Wear close-fitting gloves to handle acrylic pieces after cutting
- Clean debris and dust from the cutter and surrounding work area after each session
- Inspect and clean lenses monthly to avoid beam scattering
- Replace ventilation filters every 3, 6 months or per manufacturer guidelines
Cost for ventilation upgrades or air scrubbers varies widely. Basic exhaust fans can cost under $100, while commercial air scrubbers range from a few hundred to over a thousand dollars depending on capacity. Laser safety goggles typically cost between $20 and $60. Prioritize these investments to protect your health and extend your equipment lifespan.
How to Test and Adjust Settings for Successful Acrylic Cuts
Running a kerf test on scrap acrylic helps you find the best balance of power and speed settings for a clean, precise cut on your laser cutter. Successful test cuts show a smooth edge and complete penetration without excessive melting or charring. You need to adjust settings by increasing power if the cut doesn’t go through, or lowering power or upping speed if edges are rough or melted.
Step 1: Select Scrap Acrylic for Testing
Choose a piece of scrap acrylic that is the same thickness and type as your project material. This ensures test results reflect how the actual cut will behave. Avoid using heavily scratched or dirty scraps because surface condition affects cut quality.
Mark your scrap sheet with a label or tape, noting the sheet thickness and manufacturer if known. Clean the surface of dust or oils lightly with a soft cloth so the laser interacts consistently.
Step 2: Run Initial Test Cut with Default Settings
Power up your CO₂ laser cutter and confirm it’s calibrated for focus and alignment. For a 40, 60 W machine, start with about 85, 100% power and 10, 15 mm/s speed in a single pass. When your sheet is 3 mm thick, begin with settings close to these values.
Your first test is a straight line or square kerf cut about 20 to 30 mm long. This allows you to measure kerf width and assess cut quality. Include a small hole or tab section to test how well the cut separates at those settings.
- Turn on the laser cutter and wait for full warm-up.
- Place scrap acrylic flat on the cutting bed, secure it to prevent movement.
- Set laser focus to the acrylic surface thickness.
- Input your starting power (85, 100%) and speed (10, 15 mm/s) for one pass.
- Load the test cut design, such as a 20 mm line or square kerf.
- Run the laser and wait for the cut to complete.
- Remove the scrap from the bed and inspect the cut edge.
Keep the scrap in place during cutting to avoid misalignment or repeated passes that can affect results.
Step 3: Evaluate Edge Finish and Cut Through
Check if the cut edge of your test is smooth and fully cuts through the acrylic. The edge should be mostly clear and polished, with minimal melted or bubbled spots. When a cut isn’t complete, you’ll notice a thin leftover connection or rough separation.
Look at the kerf width (cut width) to confirm it matches your design tolerances, laser kerf usually ranges from 0.1 to 0.3 mm depending on settings. Note any charring or frosting which might mean your power is too high or speed is too low.
Step 4: Adjust Settings and Repeat If Needed
Use your test results to tweak the power and speed. Raise power by 5, 10% if the cut is incomplete. When edges appear melted or have excessive residue, lower power by 5 to 10% or raise speed by 2 to 3 mm/s. Increase speed carefully to avoid leaving the material partially uncut.
Test small increments rather than large jumps to avoid overshooting your settings. Keep a record of each test with settings and observations to build your personal settings library for future projects.
- Review initial kerf test results in detail.
- Adjust power up or down by small increments (5, 10%).
- Modify speed in 2, 3 mm/s steps as needed.
- Run a new test cut on the same or fresh scrap piece.
- Compare each new result to previous cuts.
- Repeat adjustment and testing until the cut is clean and full through.
- Save successful settings with the acrylic scrap as a reference card.
Don’t increase power beyond your laser’s recommended maximum for acrylic; repeated passes with optimized settings usually yield better edges than maximum power single passes.
Step-by-Step Action Plan for Laser Cutting Acrylic
Follow these steps to get started with clean, precise acrylic laser cutting. Test and adjust settings early to ensure the best results.
- Before you start: Choose clear cast acrylic sheets for smooth cuts. Check the sheet thickness matches your laser cutter capabilities.
- Day 1: Clean the acrylic surface with a mild detergent and dry it completely to prevent contamination during cutting.
- Day 2: Position the acrylic on the laser bed. Use masking tape or a protective film to reduce edge chipping on cut lines.
- Day 3: Run a small test cut on a scrap piece using recommended settings: typically low speed and moderate power. Inspect the edge for smoothness and minimal melting.
- Day 4: Adjust laser speed and power in small increments if the test cut edges show excessive melting or burrs. Repeat test cuts until satisfied.
- Day 5: Make your final design cut. Remove the protective film immediately after cutting to avoid residue bonding to the acrylic.
- Day 6: Clean edges gently with a plastic scraper or fine abrasive pad if minor residues remain. Avoid solvents that can damage acrylic.
- After 1 week: Review your finished cuts for consistency. Document effective laser settings for future projects.
Frequently Asked Questions
Can I Laser Cut Acrylic Thicker Than 1/4 Inch?
Yes, you can cut thicker acrylic sheets with higher wattage lasers; 80-100W suits up to 1/2 inch, and over 130W is needed for 1 inch thickness for clean cuts.
Does a CO2 Laser Work for Acrylic Cutting?
Yes, CO2 lasers are ideal for cutting acrylic because they vaporize the material cleanly without mechanical stress.
Can I Use Laser-Cut Acrylic Pieces for Outdoor Signs?
Laser-cut acrylic is durable but UV light can cause fading; use UV-resistant acrylic or coatings for outdoor use.
How Do I Prevent Acrylic Edges from Yellowing After Laser Cutting?
Proper laser settings and ventilation reduce heat buildup, limiting yellowing on the cut edges.
Which Materials Are Unsafe for Laser Cutting?
PVC and vinyl release toxic gases and can damage laser cutters, so never cut them.
Does a Glowforge Laser Cutter Cut Acrylic Cleanly?
Yes, Glowforge can cut acrylic with the right settings, but thicker sheets require multiple passes or higher power.
Final Thoughts
Successful acrylic laser cutting depends on choosing the right material, preparing it properly, and fine-tuning your laser settings through testing. Start by cutting small test samples and adjusting based on their quality. This hands-on approach will help you create precise, clean cuts that meet your project needs. Next, set up your laser cutter with recommended settings and perform your first test cut today to build confidence and skill.