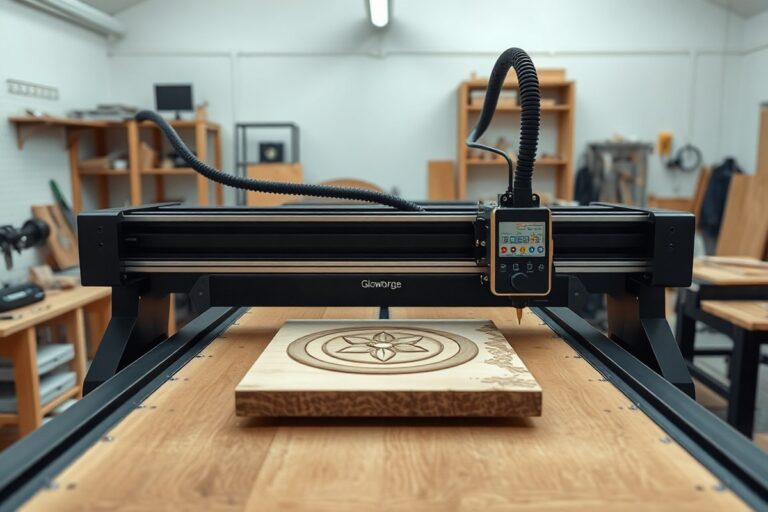
How to Engrave Brass Plaques: 8 Clear Steps for Precise, Durable Results
How to engrave brass plaques involves choosing the right method that suits your design and tools, like hand engraving or laser engraving. Using proper techniques and materials ensures precise, durable results without damaging the brass. Start with brass at least 1mm thick and understand your material’s composition to make engraving easier and more controllable.
Key Takeaways
- Use brass with 60-70% copper and 30-40% zinc for easier engraving and better results.
- Start with brass blanks thicker than 1mm to avoid dents and simplify handling.
- Angle the graver’s cutting edge between 30 to 45 degrees for effective hand engraving.
- Fiber lasers, like the Monport GI30, outperform CO2 lasers when engraving brass plaques.
- Laser engraving works best on bare brass or when combined with marking sprays for diode lasers.
- Full-colour laser marking is possible on brass if you use specialized equipment like certain fiber lasers.
1. Which Methods Can You Use to Engrave Brass Plaques?

Engraving brass plaques typically uses two main methods: hand engraving and laser engraving. Hand engraving involves using specialized tools like gravers or rotary tools to manually etch designs into the brass. Laser engraving uses focused laser beams to precisely mark or cut the surface, offering a faster and more automated option. Each method suits different projects depending on the scale, detail required, and your available tools or skills.
Hand engraving is ideal if you want a traditional, hands-on approach. It allows for artistic control and unique textures but requires practice to master. You only need hand tools or a rotary tool like a Dremel, so it’s possible to do at home without investing in expensive machines. The main drawbacks are the time and effort involved, plus the skill needed to create consistent, clean designs.
Laser engraving provides high accuracy and speed. Machines like fiber laser markers can handle detailed patterns and are especially good for larger quantities or professional-quality finishes. Laser engraving machines have higher upfront costs, typically starting around a few thousand dollars, but they produce consistent results and precise edges on brass plaques with less manual effort. Home users can find compact desktop laser engravers suitable for smaller projects.
| Feature | Hand Engraving | Laser Engraving |
|---|---|---|
| Tools Needed | Hand gravers, burins, rotary tool (e.g., Dremel) | Fiber laser marker, laser engraving machine |
| Cost | Under $100 for basic hand tools | $2,000 and up for entry-level laser machines |
| Detail & Precision | Variable; depends on skill, can be very fine | High precision and repeatability |
| Time for Project | Longer, especially for intricate designs | Much faster, suitable for multiple plaques |
| Skill Level | Requires significant practice | Moderate; learning to use software and machine setup |
| Suitability for Home Use | Good; portable and inexpensive tools | Possible with compact machines, but requires space and ventilation |
Choosing the right method depends on the project’s size, detail level, budget, and your comfort with tools. For small batches or one-off plaques with a custom touch, hand engraving gives a unique look and requires minimal investment. Larger runs or projects demanding sharp, consistent text and designs benefit from laser engraving’s speed and precision. Testing a small area on your brass plaque can help determine which method fits the material and desired finish best.
2. What Tools and Materials Are Needed for Brass Plaque Engraving?

Hand engraving brass requires a set of specific tools designed for precision and control. The essential hand engraving tools include gravers or burins, which are steel chisels with various shaped tips to carve fine lines into the brass surface. A bench vise or engraving block holds your plaque steady while you work, reducing movement that can cause errors. You also need a magnifying lens or jeweler’s loupe to see fine details and a polishing cloth to clean the surface before and after engraving. Using high-quality brass, typically with a copper content around 60-70% and zinc 30-40%, affects the ease of engraving since softer brass cuts more smoothly.
Laser engraving on brass requires different equipment. Fiber lasers, such as the OMTech Galvo 20W, are preferred because they can directly engrave brass with speed and precision. Diode and CO2 lasers alone usually cannot engrave bare brass effectively. However, they can work if you apply a special laser marking spray that helps the laser create decorative marks. When using a fiber laser, adjusting parameters like power, speed, and frequency based on the brass type and desired engraving depth ensures clear, crisp results.
Working safely with both hand and laser engraving tools involves wearing appropriate safety gear. Protective eyewear guards against metal shards during hand engraving and laser light during machine engraving. Gloves protect your hands from sharp tools and hot surfaces, while a respirator or mask helps prevent inhaling metal dust or fumes. Adequate ventilation is critical, especially when engraving with lasers, to avoid accumulating harmful gases.
- Hand engraving: gravers/burins, bench vise or engraving block, magnifying lens, polishing cloth
- Laser engraving: fiber laser machine like OMTech Galvo 20W, laser marking spray (if using CO2 or diode lasers)
- Brass material: quality brass with 60-70% copper, 30-40% zinc for best cutting and marking
- Safety gear: safety glasses, gloves, respirator mask, and good ventilation
Always test your laser settings on a scrap piece of brass before engraving your final plaque to prevent mistakes or damage.
Using the right tools and materials ensures your brass plaques have clean, lasting engravings. The choice of brass alloy will influence how smoothly your hand tools cut or how well the laser interacts with the metal’s surface. Keeping your workspace safe with proper gear protects you from common hazards like flying metal flakes and harmful fumes.
3. How to Prepare Brass Plaques Properly Before Engraving
Preparing brass plaques properly before engraving ensures your designs come out clear and durable. Cleaning the brass removes oils, dirt, and residues that affect engraving quality. Choosing the right thickness impacts both ease of engraving and plaque durability. Most brass used for plaques is 70% copper and 30% zinc, which engraves well. Avoid coatings or finishes on the surface before engraving unless you plan to add color markings afterward, as coatings can reduce engraving precision. Testing brass hardness can help you decide if the material fits your engraving method.
Follow these steps to prepare your brass plaque effectively. Each step helps achieve a clean, smooth surface perfect for engraving, while ensuring the thickness and hardness match your project needs.
- Clean the brass surface. Use warm water with mild dish soap to wash away oils and dirt. Rinse with clean water and dry with a lint-free cloth to prevent water spots. For tougher residue, apply isopropyl alcohol on a cloth and wipe the plaque thoroughly.
- Inspect the brass thickness. Measure the plaque thickness with a caliper. For most plaques, thickness between 1/16 inch (1.5 mm) and 1/8 inch (3 mm) works best. Thinner brass is easier to engrave but less durable, suitable for decorative indoor plaques. Thicker brass offers more robustness for outdoor use but may require stronger engraving tools or laser settings.
- Check the surface finish. Ensure the brass is free from lacquer, paint, or other coatings unless using color marking after engraving. Any coating should be gently removed with fine sandpaper (around 400 grit) or a chemical stripper recommended for brass. Avoid deep sanding that will alter the surface texture.
- Test hardness if possible. Lightly try an engraving tool or a sharp tip at a low pressure on a small corner unseen area. If the brass resists without scratching and the engraving tool skids, it may be too hard for hand engraving and may need pre-treatment or laser engraving instead.
- Smooth the surface gently if needed. Use fine grit sandpaper (600 to 800 grit) to even out any scratches or roughness that can interfere with the engraver’s precision. Clean off dust carefully afterward.
- Remove dust and debris. Wipe the entire plaque with a tack cloth or microfiber cloth to avoid any particles under your engraving tool or laser beam, which can cause imperfections.
- Secure the plaque for engraving. Clamp or fix the brass piece on a steady surface to prevent movement during engraving. Movement leads to blurry or uneven lines.
These preparation steps cost little beyond your time and basic supplies like soap, alcohol, sandpaper, and a caliper. Attention to surface cleanliness, thickness, and hardness increases engraving quality and longevity. A well-prepared plaque will show sharp, deep lines and reduce the risk of tool damage or engraving errors.
4. How to Transfer Your Design Onto Brass Plaques Accurately
Transferring your design onto brass plaques accurately ensures clean, professional results whether you’re engraving by hand or using a laser machine. Hand engraving relies on precise manual tracing or stenciling to guide your tools, while laser engraving requires importing digital vector files into compatible software. Both methods benefit from careful alignment and securing the brass to prevent shifts during engraving.
Tracing Paper Method for Hand Engraving
Tracing paper is a straightforward and cost-effective way to transfer your design for hand engraving on brass. It allows you to copy a design onto the brass surface exactly where you want to engrave. This method works well for simple line drawings or lettering and requires minimal tools.
For best results, use carbon transfer paper between your brass plaque and the tracing paper to create a clear guide. This helps you avoid freehand guessing and keeps your design aligned during engraving.
- Secure your brass plaque onto a stable surface with tape or clamps to prevent shifting.
- Lay a sheet of carbon transfer paper onto the brass plaque with the ink facing downward.
- Position your tracing paper with the design over the carbon paper and tape it in place.
- Use a ballpoint pen or stylus to trace over your design clearly and firmly without tearing the paper.
- Remove the papers carefully to avoid smudging.
- Check the transferred design on the brass surface; retrace any faint lines with a fine-tip permanent marker to maintain visibility during engraving.
This process costs a few dollars for transfer paper and tracing paper, making it an affordable option. Be sure to align the taped papers squarely to your plaque’s edges to keep your design straight. Otherwise, the engraving may appear crooked.
Digital Design Preparation for Laser Engraving
For laser engraving, your design must be in a digital format compatible with the engraving machine’s software, such as vector files created in programs like Adobe Illustrator or CorelDRAW. The Monport GI30 Fiber Laser Marker, for example, uses bundled software that imports these files and positions them on the brass plaque.
Preparing your design digitally lets you precisely size, rotate, and align it before engraving starts. This eliminates the potential for misplacement that can occur with manual methods. Most software allows you to preview the exact placement on a digital layout matching your brass plate dimensions. Import your file into the laser engraving software and use these steps to ensure proper transfer:
- Open your vector design in the software.
- Set the plaque’s exact dimensions within the program to match your brass piece.
- Adjust the design size, orientation, and position as needed on the digital plaque template.
- Lock the brass plaque in the laser machine and focus the laser accurately on its surface.
- Use the software preview to confirm the design placement aligns with the physical brass on the worktable.
- Proceed with the engraving once alignment and focus are perfect.
Using digital files cuts down transfer error and speeds up the engraving process, especially for intricate or repetitive designs. The main costs include compatible design software and your laser engraving machine.
Using Transfer Tape and Stencils
Transfer tape and stencils provide another practical way to transfer designs onto brass for hand engraving tasks. Stencils are reusable and create consistent markings by protecting areas of the brass you don’t want to engrave.
Transfer tape, often clear and adhesive, holds a design and moves it onto the brass surface without shifting. This method works well for complex or multi-part designs and reduces hand-tracing errors. Follow these steps to apply transfer tape or a stencil:
- Print your design on thin paper or directly create a stencil on a material like vinyl.
- Cut out the design areas carefully to form a stencil or prepare the transfer tape with the design mounted.
- Clean and dry the brass surface thoroughly to ensure good adhesion.
- Position the stencil or transfer tape carefully; use tape or weights to hold it in place if needed.
- Press firmly to transfer the design onto the brass; for stencils, use a fine-tip marker or engraving pen to outline through the cutouts.
- Remove the stencil or transfer tape slowly and check the design placement.
- Make any necessary touch-ups with a permanent marker before engraving.
Transfer tape and stencils cost around $5 to $20 depending on the quality and type, providing a mid-range option between freehand tracing and laser transfer. Both methods improve accuracy and help keep your design aligned and sharp on brass plaques.
5. What Are the Step-by-Step Processes for Hand Engraving Brass?
Hand engraving brass plaques demands precision, patience, and steady control of your tools. Mastering the grip, angle, pressure, and sharpening routine ensures clean lines and detailed work. Follow the outlined steps carefully to shape your design accurately and finish your plaque beautifully.
Holding and Angling the Graver Correctly
Hold the graver firmly between your thumb and forefinger, resting your middle finger against the shaft for additional support. It’s essential to keep a steady grip without excessive tension to avoid fatigue or unsteady lines. Angle the graver between 30 and 45 degrees to the brass surface, which helps guide the cutting edge smoothly through the metal.
Resting your wrist lightly on the work surface stabilizes your hand and prevents wobbling. Always push the graver away from your body rather than pulling it, which can cause rough or jagged cuts. Keeping this consistent angle and control provides cleaner lines and better detail in your engraving.
Cutting Consistent Lines and Depths
Manual control of depth comes from steady pressure and slow, deliberate movement along your transferred guide lines. Applying too much pressure or moving too fast can cause the graver to slip or scratch the brass. It’s normal to make multiple shallow passes rather than trying to cut deeply in one go.
Expect to sharpen your gravers regularly, approximately every 30 to 60 minutes of engraving, or sooner if the cutting edge feels dull or slips unpredictably. A sharp graver cuts smoothly, while a dull one creates uneven lines and increases strain on your hand. Use a sharpening stone or honing guide designed for steel gravers to maintain a sharp edge.
- Secure the brass plaque firmly to prevent movement.
- Position your body and hand for comfortable, controlled movement.
- Hold the graver at a 30 to 45 degree angle to the plaque surface.
- Push the graver slowly and steadily along your design lines.
- Make multiple shallow cuts to control depth and detail.
- Stop periodically to check your work and sharpen the graver as needed.
- Clean metal shavings from the surface regularly to maintain visibility.
- Reassess your grip and pressure if the lines become uneven or jagged.
Rest your wrist on the work surface and clamp your plaque securely to avoid wobbly, uneven lines.
Finishing and Sealing the Engraved Plaque
After completing the engraving, clean the plaque with a soft brush or cloth to remove all metal dust and debris. Polishing the brass with a fine abrasive compound or brass polish improve the contrast between the engraved lines and the metal surface, making your design more distinct.
To prevent tarnishing, which brass is prone to after handling and exposure to air, apply a clear lacquer or wax finish. This sealing step protects the surface and maintains the plaque’s appearance over time. Allow each coat to dry fully according to the product instructions before handling or displaying your engraved brass plaque.
6. How to Set Up and Use Laser Engraving for Brass Plaques
Laser engraving brass plaques requires setting up the right type of laser, carefully positioning the plaque, loading your design into the software, and adjusting key settings such as speed, power, and passes. These factors control the depth, clarity, and speed of the engraving. Typical projects take from a few minutes up to an hour depending on plaque size and design complexity.
Choosing the Correct Laser Type and Power
Fiber lasers and some CO2 lasers are commonly used for engraving brass. Fiber lasers operate at a wavelength that metals like brass absorb well, resulting in clean, precise marks without damaging the surrounding area. CO2 lasers can work with brass but usually need a marking spray or coating to improve contrast.
Laser power settings depend on the laser type and plaque thickness but generally range between 20 to 50 watts for small-scale brass engraving. Higher power improves depth but increases the risk of heat damage or discoloration. Testing on scrap brass before the main job is essential to find optimal parameters.
Machine Setup and Plaque Positioning
Position the brass plaque flat on the engraving bed to ensure even focus and sharp results. Make sure the plaque is clean and free of oils or dust for consistent engraving quality. Use clamps or a jig to hold the plaque in place, preventing movement during engraving.
Adjust the laser focus according to the machine’s manual, typically by lowering the head to about 1 to 3 mm from the plaque surface. Proper focus is critical for detailed lines and consistent depths.
- Clean the brass plaque thoroughly with isopropyl alcohol and let it dry.
- Secure the plaque flat on the engraving bed using clamps or a jig.
- Set the laser focus distance to approximately 1 to 3 mm above the brass surface.
- Check the plaque orientation and size relative to the engraving area.
- Confirm there is no debris or dust on the machine’s lens and plaque.
Laser Software and Design Import
Upload your design file (commonly in formats like SVG, DXF, or PNG) into the laser software linked to your machine. Double-check the design size, placement, and orientation within the software workspace so it matches your brass plaque dimensions exactly.
Use the software’s preview function to confirm how the design will be engraved on the brass. Adjust positioning or scale if necessary to avoid clipping or off-center engraving.
- Open the laser engraving software connected to your machine.
- Import the prepared design file into the software.
- Scale and position the design to fit the brass plaque dimensions.
- Use the software’s alignment tools to center or offset the design.
- Preview the engraving layout on screen to ensure proper placement.
- Save the project settings for repeat jobs or future reference.
Fine-Tuning Speed, Power, and Passes
Set your engraving speed between 100 and 500 millimeters per second depending on depth needs and laser wattage. Slower speeds allow deeper or darker marks but increase engraving time. Typical engraving times range from 5 to 30 minutes for standard brass plaques sized 3 x 5 inches.
Adjust power from 20% up to 80% to find a balance between clear engraving and preventing brass discoloration or warping. Running multiple light passes instead of one deep pass can improve finish quality and avoid surface damage.
After initial test runs, fine-tune these parameters:
- Increase speed if the engraving looks too deep or risks burning.
- Decrease power if the mark is faint or uneven.
- Use 2 to 4 passes for detailed or deep engraving projects.
- Set an initial laser power around 40% and speed near 300 mm/s.
- Run a small test engraving on scrap brass.
- Evaluate engraving depth, clarity, and surface quality.
- Adjust power up or down in 5% increments based on test results.
- Change engraving speed incrementally by 50 mm/s as needed.
- Decide on the number of passes (typically 1 to 4) for desired depth.
- Run a full-scale engraving once satisfied with test output.
7. Which Safety Precautions Are Essential When Engraving Brass?
Engraving brass plaques involves exposure to metal dust and fumes, making safety gear and proper ventilation essential. When hand engraving, wearing safety glasses protects your eyes from brass shavings. Using gloves can prevent cuts and skin irritation, but avoid loose gloves that might catch in rotary tools. If you’re laser engraving, the machine emits fumes and tiny metal particles requiring both eye protection rated for laser safety and a well-ventilated workspace or an air filtration system designed for laser use.
Avoid inhaling metal dust and fumes by setting up your workspace near a strong exhaust fan or an air purifier with a HEPA filter. These remove contaminants that can cause respiratory issues after repeated exposure. Fire safety is another priority, especially with laser machines that can reach temperatures over 2,000°F (1,093°C). Keep a Class C fire extinguisher nearby, as it’s designed for electrical fires which can occur if the equipment overheats or sparks.
Safe handling of tools and machinery means keeping tools well maintained, keeping fingers clear of cutting or engraving tips, and never leaving laser machines running unattended. Before starting work, inspect all cords and connections for damage. Secure brass plaques firmly to prevent slipping, and shut off power immediately after use to avoid accidents. Avoid wearing loose clothing or jewelry, which can get caught in rotating tools.
- Wear laser safety goggles or safety glasses rated for impact resistance
- Use gloves when hand engraving but ensure they fit securely
- Maintain good ventilation with exhaust fans or HEPA air filters
- Keep a nearby Class C fire extinguisher for electrical fires
- Secure brass plaques firmly to avoid slips or movement
- Inspect tools and cords for damage before each use
- Avoid loose clothing, jewelry, or long hair near machinery
Developing a habit of following this checklist reduces the chance of injury and equipment damage. Investing $20 to $50 in personal protective equipment and proper ventilation pays off by preventing health issues and costly downtime. Hand engraving in a well-lit space with protective wear minimizes risks, while laser engraving demands more controls due to the intensity of heat and fumes. Prioritize safety to keep your brass engraving projects both enjoyable and hazard-free.
8. What Common Mistakes to Avoid and Fix When Engraving Brass?
Uneven or wobbly engraving lines often result from inconsistent hand pressure or a dull engraving tool. When your hand shifts or you press too hard or too lightly, the lines won’t be steady. To fix this, practice consistent pressure on scrap brass before working on your plaque. Using a fine tip engraving tool or a sharp bur for machine engraving helps maintain clean lines. Notice lines wavering, then pause and steady your hand by bracing your wrist or elbow on a solid surface.
Shallow or inconsistent engraving depth is usually caused by slow tool speed, insufficient pressure, or a worn-out bit. Brass plaques around 0.040 inches thick require firm, steady engraving to avoid shallow marks that won’t show up well. For hand engraving, use a sharp, well-maintained tool and apply steady pressure along your design. Machine engraving settings should deliver enough power to penetrate the brass but not so much that it damages the surface or backing. When depth varies, check your tool’s sharpness and the machine’s speed or power settings.
Fixing mistakes mid-project depends on the damage level. For minor slips, gently buff the area with fine-grit sandpaper (around 400-600 grit) to smooth out uneven lines, then re-engrave carefully. Avoid sanding aggressive areas that reveal too much brass or burnish your surface. For deeper errors, consider applying a brass filler or epoxy designed for metal repair, then reengrave on the fixed surface after curing. This method adds extra time and material cost but retains the plaque’s usefulness. Mistakes that are too large might mean you need a new plaque.
Recognizing tool wear early prevents poor results. Signs include reduced cutting quality, increased effort needed to engrave, and irregular line edges. For hand tools, sharpen tips with a fine diamond file or stone every few hours of engraving, depending on hardness and use frequency. Laser engraving machines require lens cleaning monthly and checking the focus and power calibration before each session. Routine preventive maintenance for electric engraving tools includes lubricating moving parts and checking for loose components once a week or every 20 hours of use.
Use this troubleshooting approach: first, identify if lines are uneven or shallow. Uneven results call for checking your hand stability or any machine vibration. Shallow engraving suggests looking into tool sharpness and the pressure used. Next, inspect the workpiece preparation and whether brass surface oils or dirt interfere. Finally, decide if you need to sharpen tools, adjust settings, or correct mistakes by filling or sanding. This step-by-step method keeps errors from worsening and helps you maintain professional-looking plaques.
Always test your engraving settings and tool sharpness on a brass scrap piece before working on your final plaque to avoid damaging your project.
Step-by-Step Action Plan for Engraving Your Brass Plaque
Follow these steps to create a clean, professional brass plaque engraving using the method and tools best suited for your project.
- Before You Start: Choose between hand engraving or laser engraving based on your budget, skills, and design complexity. Confirm your method suits the plaque’s size and finish.
- Day 1: Prepare the brass plaque by cleaning and polishing the surface thoroughly. The plaque should be free of dirt and oils to ensure clear engraving.
- Day 2: Transfer your design onto the plaque using stencils, tracing paper, or software for laser engraving. Check the layout matches your specifications precisely before proceeding.
- Day 3: Set up your engraving tools safely. For hand engraving, sharpen your tools and secure the plaque with a clamp. For laser engraving, adjust the machine settings specific to brass and perform a test run on scrap metal.
- Day 4-5: Begin engraving slowly and steadily. Monitor the depth and detail of your work often. For hand engraving, take breaks to avoid hand fatigue; for laser engraving, keep the workspace ventilated and watch for overheating.
- After Engraving: Clean the plaque to remove any debris. Apply a protective coating if needed to prevent tarnishing and highlight the engraving.
- Day 6: Inspect the finished plaque under good light to confirm all details meet your expectations. Fix minor errors with fine tools or a light secondary laser pass, if necessary.
Frequently Asked Questions
What Is the Best Type of Brass for Engraving Plaques?
The most common and easiest brass to engrave contains about 70% copper and 30% zinc. Higher copper content, like 80%, makes the brass harder and more difficult to work with. Testing a small area before engraving helps avoid problems.
Can You Engrave Brass Plaques at Home Without Professional Tools?
Yes, simple hand engraving or rotary tools can work for small home projects. Precision and patience are key, as professional laser engravers offer cleaner, faster results but cost more.
How Do I Maintain My Engraving Tools When Working with Brass?
Regular cleaning and sharpening of blades, burrs, or tips extends tool life. Brass leaves metal residue that can dull tools faster. Wiping tools during and after use prevents buildup.
Can I Add Color to Engraved Brass Plaques?
Laser engraving systems like the Monport GI30 can add vibrant color to metal plaques. This process improve design visibility while maintaining durability, offering a decorative touch beyond simple etching.
What Is the Most Common Mistake When Engraving Brass Plaques?
The most common mistake is skipping test engravings on your material, leading to shallow or uneven results. Always test your settings on a scrap piece to adjust pressure, speed, and depth.
How Long Does It Typically Take to Engrave a Brass Plaque?
Time varies by method; hand engraving can take hours, while fiber laser engraving usually completes a plaque in minutes. Detailed designs and plaque size also impact total engraving time.
The Bottom Line
Engraving brass plaques successfully depends on selecting the right method and preparing your materials carefully. Proper setup and patient execution ensure your engraving looks professional and lasts well. Take your time with the initial steps and focus on detail during engraving to create a plaque that truly stands out. Start by cleaning a brass plaque today and setting up your workspace for your chosen engraving method.