Wall Sign Ideas: 12 Creative Styles and DIY Tips for Every Room
Wall sign ideas can transform bland walls into personalized, stylish focal points without a big budget. Choosing the right style, material, and message lets you create decor that reflects your taste and fits each room. Start by considering your space’s theme and what mood you want the sign to set, it makes picking the perfect design easier and more effective.
Key Takeaways
- Rustic farmhouse-style signs can be made cheaply using everyday items like $5 IKEA cutting boards or 2×4 wood planks.
- Large typography signs printed on $2 engineering prints add bold style with minimal cost and effort.
- Wood, metal, and chalkboard materials each offer unique textures and vibes, choose based on your room’s decor and durability needs.
- Adding 3D elements like faux deer heads or raised lettering gives depth and interest to chalkboard and wood signs.
- Simple tools like sandpaper, paint, stencils, and screws cover most DIY wall sign projects effectively.
- Popular sign messages use classic quotes, kitchen words, or personalized monograms to fit specific rooms and moods.
What Are Wall Signs and Why Add Them to Your Walls?
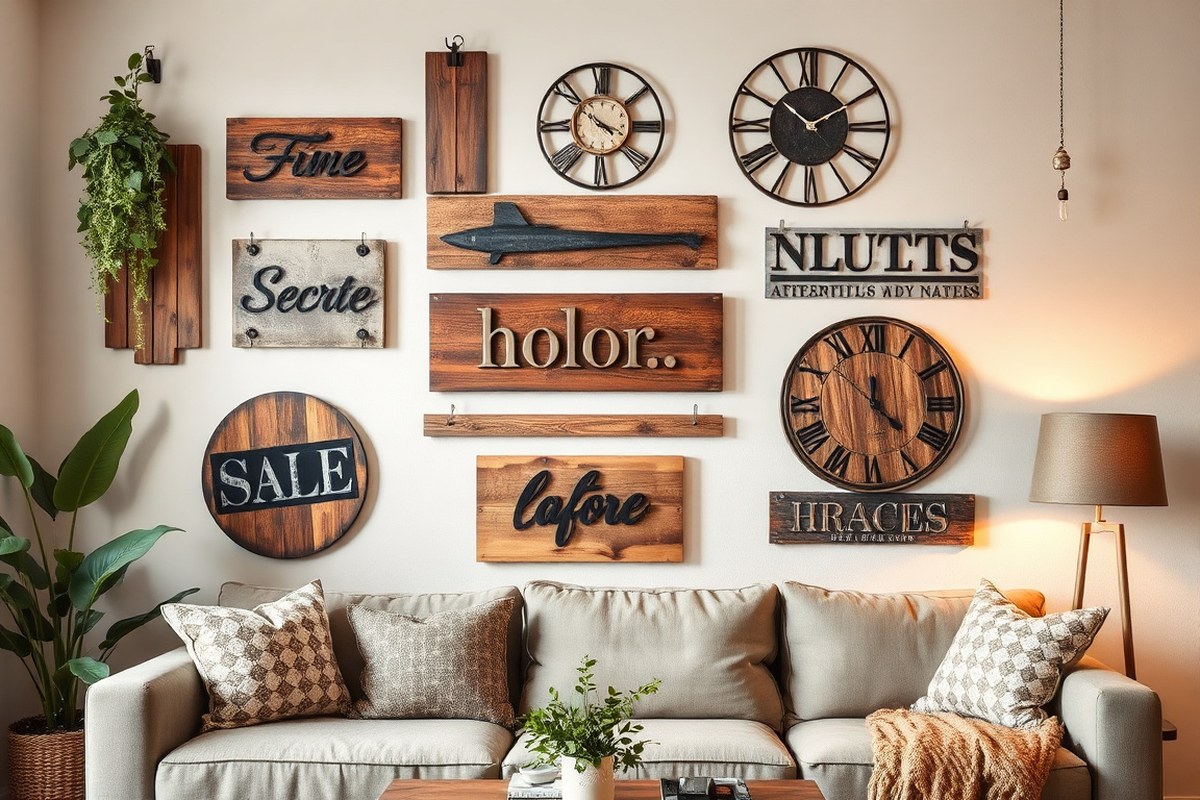
A wall sign is a decorative piece designed to hang on walls, often featuring words, phrases, artwork, or symbols. These signs come in many materials, including wood, metal, and chalkboard, and range from rustic farmhouse styles to sleek modern designs. They serve as both art and a form of personal expression, allowing you to add warmth, charm, and character to any room in your home.
Using wall signs for decoration adds a personal touch by allowing you to showcase messages or imagery that resonates with your style or values. For instance, a wooden sign with an inspiring quote can motivate you daily, while a chalkboard sign provides a functional and customizable element to jot down reminders or greetings. The costs vary widely based on materials and complexity, with simple DIY wooden signs costing as little as $5 for supplies, whereas antique or custom signs may run hundreds of dollars. Creating or selecting the right wall sign involves considering the room’s purpose, existing decor, and the message you want to convey.
Wall signs influence a room’s atmosphere by setting a tone, focusing attention, or sparking conversation. A rustic wooden sign near the dining area can introduce a cozy, farmhouse vibe that makes the space feel inviting and lived-in. Placing a chalkboard accent wall, improve with 3-D elements like a faux deer head or a bold EAT sign, brings texture and whimsy that enliven the space. These touches do more than fill empty walls; they transform rooms into personal galleries where memories and sentiments live visibly.
In practice, adding a wall sign starts with selecting a design that complements your room’s color palette, furniture style, and lighting. Mount the sign securely using wall anchors appropriate for your wall type, paying attention to the sign’s weight and size. Position signs at eye level for the best visual impact, generally 57 to 60 inches from the floor to the center of the piece. Results look best when the sign balances other decor elements without overwhelming the space. Signs that are too large or cluttered can make a room feel cramped, while thoughtfully placed signs improve flow and draw the eye to focal points.
By choosing or crafting wall signs that suit your home’s style and your personal story, you create walls that speak to you and your guests. The right wall sign isn’t just decoration; it’s a way to make your living space feel unique and welcoming without significant expense or effort.
Popular Wall Sign Types for Different Rooms and Spaces
Wall signs add personality and function to rooms tailored to their use. Kitchens often benefit from practical and decorative signs like chalkboards or humorous food quotes. Bathrooms suit moisture-resistant signs with calming messages or quirky humor, while kids’ areas welcome playful, colorful, or interactive signs. Entryways and home offices call for welcoming or motivating typography that fits the space’s purpose.
Wall Sign Choices for Kitchens
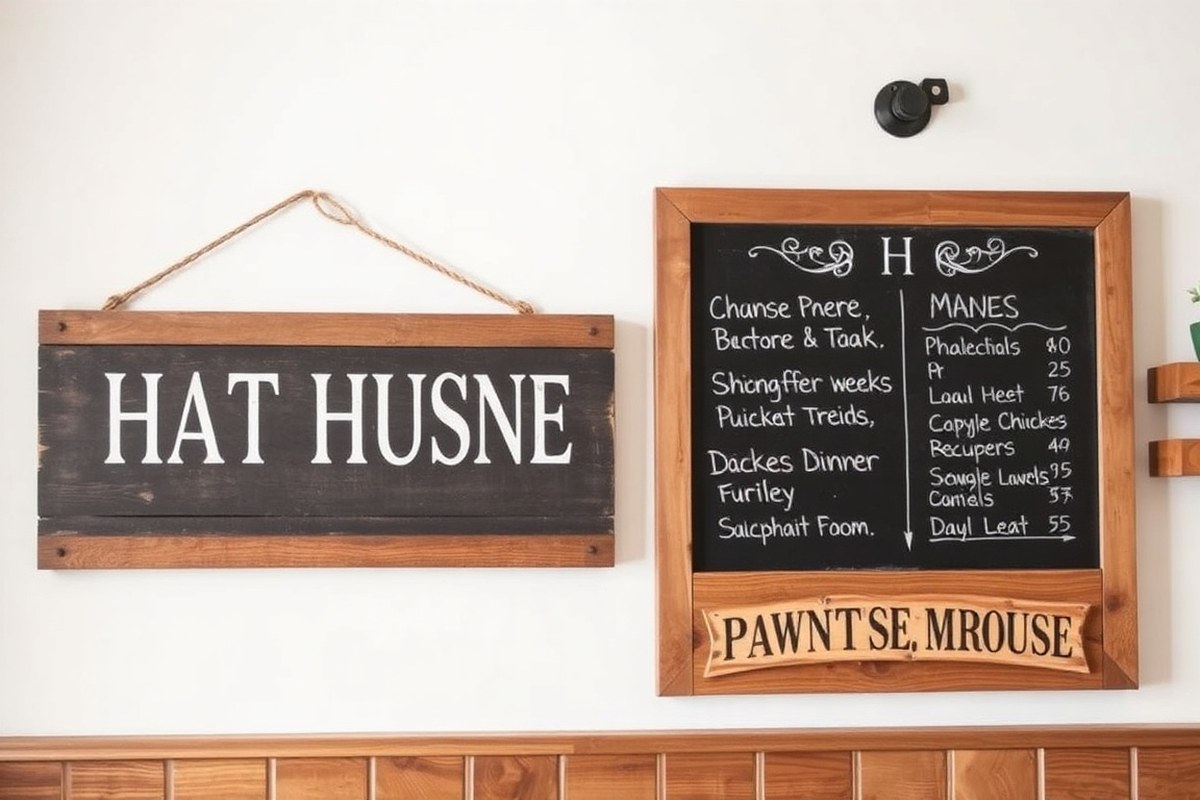
Kitchen wall signs should balance style with usability. Chalkboard signs are popular because you can update grocery lists, menus, or reminders easily. Choose a medium to large size that fills a prominent empty wall, around 24 to 36 inches wide, to attract attention without overcrowding the space. Wooden or metal signs with food-related sayings add rustic or modern charm while withstanding kitchen conditions.
Installing chalkboard signs is simple: mount using screws or strong adhesive hooks rated for 5 to 10 pounds. Position away from direct heat but within easy reach. Expect to spend $15 to $50 for ready-made signs or $10 to $30 for DIY with scrap wood and chalkboard paint.
Bathroom and Kids’ Room Friendly Signs
Bathrooms need signs that tolerate humidity and occasional splashes. Painted wooden signs sealed with a clear waterproof finish are ideal. Choose light colors or farmhouse styles with phrases like “Relax” or “Wash Your Hands” to blend with bathroom decor. Ombre painted wood signs also bring an elegant look without damage risk.
Kids’ rooms are an opportunity for creativity. Plush “trophy” style signs bring a soft decorative element, while colorful wooden or canvas signs add vibrancy. Interactive options like chalkboards or letter boards encourage participation and learning. Bright, safe materials and smooth edges are essential to avoid hazards.
Entryway and Home Office Wall Sign Ideas
Entryways benefit from large, statement pieces that welcome guests or share family mottos. Signs 36 to 48 inches wide with routed letters or layered graphics create the right impact. Wood with rustic stains or metal with sleek finishes suits various home styles. Signs here should be securely mounted using screws for lasting stability.
Home offices are perfect for motivational quotes or organizational boards. Chalkboards or letter boards help keep track of tasks and deadlines. A sign size of about 18 by 24 inches balances visibility without overwhelming a desk area. Mount at eye level and ensure lighting highlights the sign’s message.
Practical Wall Sign Installation Tips
Placement matters. Choose wall space that complements room traffic patterns and furniture layout. Signs should be at eye level, usually 57 to 60 inches from the floor, to maximize readability and visual appeal. Mounting depends on the sign’s weight and material:
- Lightweight wooden or foam signs: use adhesive strips rated for at least 5 pounds
- Heavier wood or metal signs: use wall anchors and screws for secure installation
- Chalkboards and interactive signs: position within easy reach for updates
- Bathroom signs: use waterproof sealants and avoid high splash zones
- Kids’ rooms: secure mounting to prevent falling hazards, use rounded edges
- Entryways: ensure strong mounting to handle possible bumps from coats or bags
When choosing size and material, consider the room’s lighting and wall color to ensure signs stand out without clashing.
Tip: Avoid using unsealed wood signs in humid spaces like bathrooms to prevent warping or mold growth.
How to Choose Styles and Themes That Match Your Decor
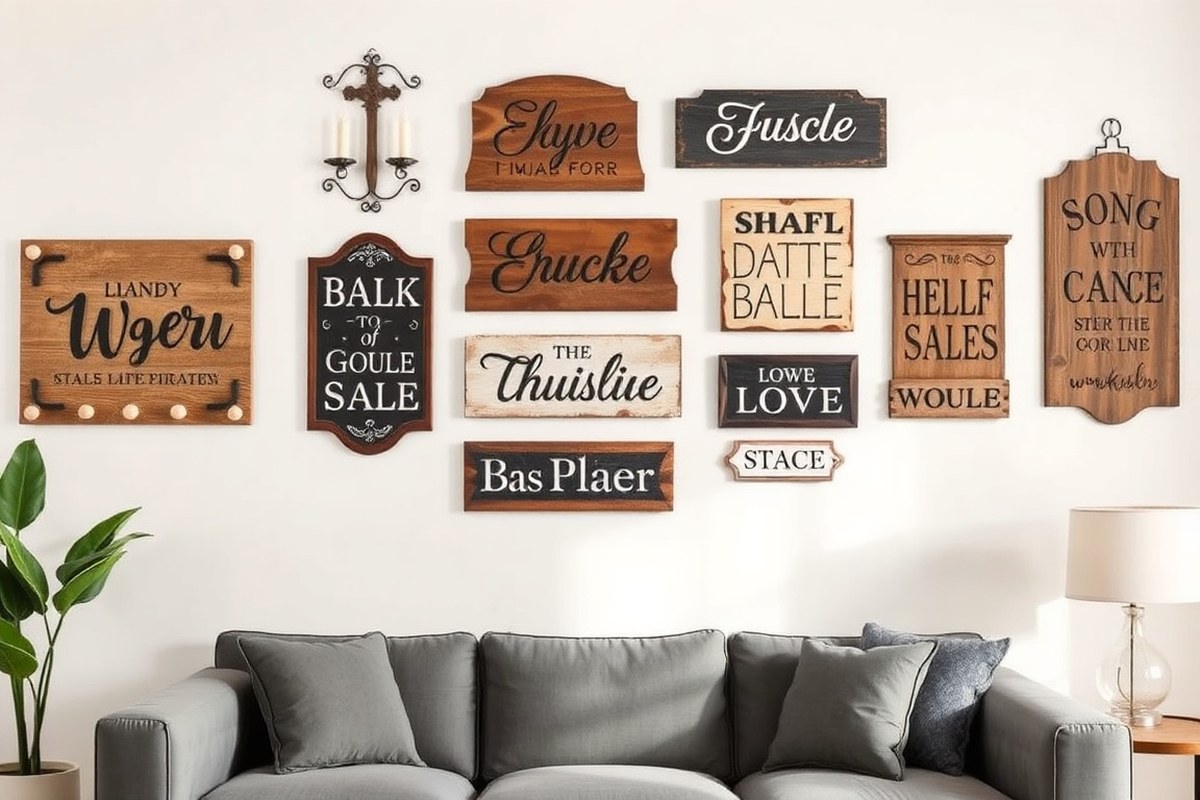
Choosing a wall sign that fits your decor begins with understanding the style and theme of your space. For farmhouse homes, picks with natural wood textures and cool gray or warm neutral tones work well. Signs inspired by barn wood or antiques bring that farmhouse charm while remaining versatile enough to blend with modern farmhouse details. Consider wooden signs featuring rustic or vintage imagery like farm animals or old-fashioned lettering to capture the right vibe. The subdued colors and distressed finishes typical of farmhouse designs help signs integrate smooth without overwhelming the room.
Modern home decor often favors simplicity and contrast. Signs in classic black and white or with bold, clean fonts complement sleek furniture and minimalistic spaces. In modern settings, go for wall signs with smooth surfaces, simple shapes, and straightforward messaging. Choosing fonts like sans-serif or clean script styles improve the contemporary feel. Bright or cheerful colors can add warmth here but keep the palette controlled to avoid clashing with other modern elements.
Matching color schemes plays a key role in how well the wall sign fits your space. Signs that use natural wood tones mixed with soft colors can brighten and invite without dominating the wall. For example, a farmhouse sign blending wood grain and muted greens or blues adds a welcoming touch without disrupting the theme. On the other hand, sharp black and white signs add contrast in modern rooms and can highlight the sign as a design statement. Use color combinations that echo your existing decor accents, whether that’s wall paint, furniture fabrics, or decorative accessories.
Mixing styles within your wall signs is possible when done thoughtfully. Combining a hint of vintage flair with modern elements can create a balanced look that feels intentional rather than mismatched. For example, a shabby chic farmhouse sign featuring a rustic motif alongside sleek typography offers personality and depth. When blending styles, keep colors complementary and avoid overcrowding the space with too many contrasting themes. A cohesive color story helps unify diverse styles. Consider placing mixed-style signs where their details and themes can play off each other, for instance, a vintage wooden sign near a modern metal clock.
When picking a style and theme, think about size and placement too. Large, super-sized wooden signs serve as focal points in farmhouse settings, while smaller, sleek designs might suit modern rooms better. The cost varies by material and size, wooden farmhouse signs typically range from $20 to $60 depending on craftsmanship and detail. A polished modern sign made from metal or acrylic may cost slightly more but often has a cleaner look. Check your wall space, lighting, and existing furnishings before deciding to ensure the sign improve your decor rather than overpowering it.
Comparing Common Wall Sign Materials: Wood, Metal, Chalkboard and More
Choosing the right material for your wall sign depends on where you plan to place it, the look you want, and how durable it needs to be. Wood signs offer a warm, rustic look that’s perfect for indoor spaces like kitchens and entryways. They are easy to customize, often made from reclaimed or pallet wood, and usually cost between $10 and $50 depending on size and finish. Wood is forgiving for DIY work since you can paint or stencil without needing special cutters, and attaching items like faux florals adds dimension. However, wood can warp or fade if exposed to moisture or direct sunlight for long periods, so it’s best kept indoors or in covered outdoor areas.
Metal signs provide a sleek, modern style and are very durable, making them suitable for outdoor use. Common metals like aluminum resist rust and handle changing temperatures well. Metal signs often come custom cut, which ensures clean edges but may cost more, generally $20 to $100 or higher. Because they don’t absorb paint the way wood does, vinyl graphics or powder coating are popular finishes. Metal signs work well for permanent outdoor installations, but they are heavier and require sturdy hanging hardware. Avoid placing metal signs where they will scratch or dent easily.
Chalkboard signs offer artistic flexibility and organization benefits. Large chalkboards or walls painted with chalkboard paint allow frequent message updates, which suits kitchens or offices. Chalkboards are affordable, typically $15 to $40 for a framed board suitable for walls, and you can use chalk or liquid chalk markers to write on them. They aren’t very durable outdoors since rain or humidity erases the writing and can damage the surface. Use them indoors or in protected porch areas. Acrylic signs, on the other hand, have a smooth, glossy finish and are weather-resistant. They’re often paired with wood for contrast and stay clean with simple wiping. Acrylic costs more than wood or chalkboards, typically starting near $30, but they last well outdoors and indoors. Here is a comparison table of common wall sign materials covering appearance, cost, durability, and use cases based on these factors:
| Material | Appearance | Cost Range | Durability | Best Use |
|---|---|---|---|---|
| Wood | Rustic, warm, customizable with paint/stencils | $10, $50 | Indoor use; prone to warping/fading outdoors | Entryways, kitchens, covered porches |
| Metal | Sleek, modern, clean-cut edges | $20, $100+ | Highly durable, rust-resistant when aluminum | Outdoor signs, long-term displays |
| Chalkboard | Matte black, writable surface | $15, $40 | Indoor only; moisture erases writing | Organizational messages, kitchens, offices |
| Acrylic | Glossy, smooth, modern | Starting around $30 | Weather-resistant, easy to clean | Indoor and outdoor use, paired with wood |
To create a wooden sign, select a smooth board such as a pallet piece or 2×4 cut to size. Paint it with primers or chalk paint to avoid warping. For metal, consider getting a custom-cut aluminum panel with vinyl graphics applied professionally or use powder coating to resist weather. Chalkboards can be purchased framed or painted on walls for added flexibility. Acrylic panels require simple cleaning with a damp cloth and safe mounting hardware for walls or posts. Always attach signs securely to walls, masonry, or posts with screws and anchors suitable for the material and weight of your sign. Proper selection and care based on these guidelines will keep your wall sign looking great for its intended lifespan.
DIY Wall Sign Essentials: Tools, Supplies, and Basic Techniques
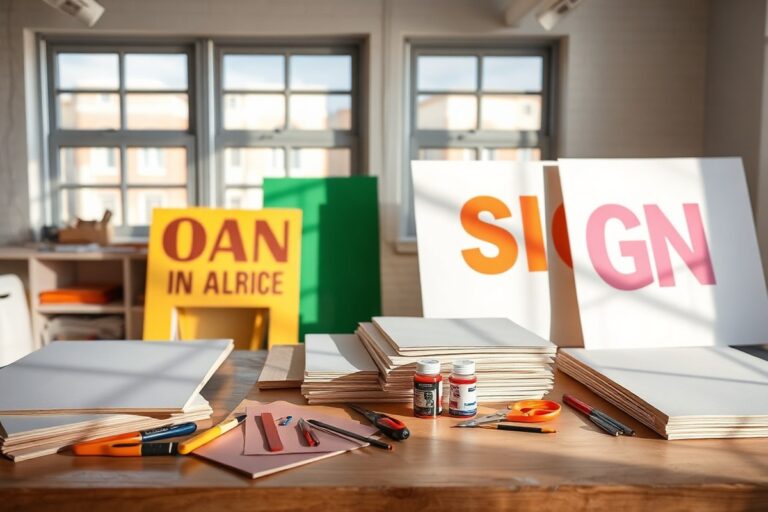
Creating your own wall sign starts with having the right tools and supplies. Basic items include wood or another sign base, paint, brushes, sandpaper, stencils or transfer paper, painter’s tape, and a pencil for sketching. You’ll also want a sealer like a clear acrylic spray to protect your finished work. These essentials cost between $10 to $30 upfront, depending on brands and quantities, and allow you to make signs that look polished and last well.
- Wood board or pre-made sign base (like shiplap or plywood)
- Acrylic paint in your chosen colors
- Various paintbrush sizes: small detail brushes and wider flat brushes
- Sandpaper (medium and fine grit) to smooth the surface
- Stencils or transfer paper for lettering
- Pencil and painter’s tape for layout and guidelines
- Clear acrylic spray or varnish for sealing
Preparing the surface correctly is key to a professional look. Start by sanding your wood sign with a medium-grit sandpaper to remove roughness or splinters, then finish with fine-grit for a smooth texture. Wipe off dust with a damp cloth before painting. Using raw or untreated wood requires applying a primer or a base coat of paint to help colors adhere evenly and avoid blotchy spots. Let each layer dry fully, usually 1 to 2 hours depending on humidity and paint type.
Lettering is usually easier for beginners when using stencils. They provide clean edges and consistent shapes without needing advanced freehand skills. You can find affordable stencil sets or create custom designs using a cutting machine like Cricut or Silhouette. Position the stencil with painter’s tape and gently dab paint with a sponge brush to avoid bleeding. For a personal touch and more practice, freehand painting with a steady hand and a fine brush works well. Sketch lightly in pencil first, then fill in with paint.
Always test your paint and stencil on a scrap piece before applying to the actual sign to avoid mistakes that are hard to fix later.
Simple painting techniques include layering, start with a base color covering the entire board, let it dry, then add lettering or detail. Dry brushing with a small amount of paint on your brush can add rustic texture. For chalkboard signs, apply a few coats of chalkboard paint, curing the surface by rubbing chalk over it and wiping clean to prep for writing and erasing messages. Using these basics, you can create custom wall signs that fit your style while avoiding common early pitfalls.
Step-by-Step DIY Wall Sign Project Blueprint
Creating a wooden wall sign involves a clear, step-by-step process that covers surface selection, design, painting, sealing, and hanging. Each stage takes time to ensure the sign looks good and lasts, with painting and curing often needing the longest period. Applying a proper sealer and mounting the sign securely improves durability and safety.
Selecting Your Sign Surface and Size
Choose a wooden board that fits the space and style you want. A common size for wall signs ranges from 12 by 18 inches to 24 by 36 inches, depending on where you plan to hang it. Thicker boards, about ¾ inch, provide durability and reduce warping, especially for larger signs.
Inspect the board for smoothness and flatness. Sand any rough spots with 120 to 220 grit sandpaper to create a surface that paint will adhere to evenly. Pick lightweight wood like pine or cedar for easier handling, but hardwood such as oak can last longer outdoors.
Designing Your Layout and Text
Develop a clear layout that balances text and any decorative elements. Decide on the phrase or message, font style, and size so they’ll be readable from the intended viewing distance. Sketch your design on paper or use a computer program to print a template at scale.
Place the template on the wooden board using painter’s tape. You can trace the design lightly with a pencil or use carbon paper to transfer the outline. This step ensures accuracy when painting your letters or shapes and minimizes mistakes.
Painting and Sealing Your Sign
Painting a wooden sign starts by applying a primer or base coat, especially if the wood is bare. Use acrylic or chalkboard paint for color and effect. One to two coats of paint, applied with a foam brush or small roller, are best for smooth coverage. Allow each coat to dry for at least 2 hours in a dust-free, well-ventilated area.
Once paint is dry, apply your design carefully with a fine brush. For detailed fonts or lines, thin paint slightly with water to avoid clumping. Let the paint cure for 24 to 48 hours before sealing. Use a clear, water-based polyurethane or acrylic sealer to protect the sign from moisture, UV rays, and wear. Apply two thin coats, allowing 4 hours of drying time between coats for best results.
Mounting and Hanging Safely
Select mounting hardware based on the sign’s weight and where you want to hang it. D-rings with wire work well for heavier signs, while sawtooth hangers suit smaller, lighter boards. Secure the hardware firmly into the back of the sign.
Mark the wall using a level to position the sign straight and ensure anchors or screws are suitable for the wall material, whether drywall, plaster, or masonry. Always use wall anchors rated for the sign’s weight to prevent falling or damage to the wall. Hanging a 12 by 18 inch wooden sign typically requires anchors supporting at least 10 pounds.
- Select a smooth, flat wooden board sized for your space (allow 30 minutes for sanding and preparation).
- Design your layout on paper or digitally, then transfer it to the board (about 1 hour).
- Apply primer or base coat, then let dry for 2 hours.
- Paint the background color with 1 to 2 coats, drying 2 hours between coats.
- Paint or stencil your design, then cure for 24 to 48 hours.
- Seal the sign with 2 coats of clear sealer, waiting 4 hours between coats.
- Attach hanging hardware securely on the back (30 minutes).
- Measure and install wall anchors, then hang the sign safely (30 minutes).
Creative Ideas to Add Dimension and 3D Elements to Wall Signs
Creating 3D effects on wall signs adds visual interest by introducing depth and texture to otherwise flat surfaces. One effective technique involves layering multiple cutouts of wood or acrylic, spaced apart using small wooden blocks or foam spacers. For example, cutting out letters separately and mounting them atop a wooden backing board improve them between ¼ and ½ inch above the base. This method gives a clean shadow effect that changes with lighting, making the sign stand out without overwhelming the room. When cutting materials, use a jigsaw or laser cutter for precision, and paint or stain each layer before assembly to reduce touch-up work.
Carving is another popular approach. Using a router or chisel to carve out letters or shapes directly into a wooden sign adds a tactile depth that brings character. A shallow relief of about ⅛ to ¼ inch maintains subtle dimension while keeping the wood sturdy. Adding a contrasting stain or color to the carved areas emphasizes the effect. This technique requires more skill and specialized tools but creates a timeless appearance ideal for rustic or vintage themes. Proper sealing after carving prevents damage from moisture over time.
Attaching natural elements such as small branches, dried flowers, or textured fabrics can improve 3D appeal. For instance, affixing reclaimed wood pieces or bark strips around the edge of the sign adds rustic charm and unique grain patterns that no two signs will share. Natural elements must be clean and dry before application, usually adhered with strong craft glue. To incorporate lighting, consider mounting LED strip lights behind raised layers or along the edges. Warm white LEDs create a soft glow that accentuates depth without glare and can cost between $10, $30 for a small kit, powered by USB or batteries. Conceal the wiring by routing channels behind the layers or inside the frame.
Adding these dimensional features does increase the complexity of the sign. Precise measurements and steady hands are important during layering and carving. Signs with multiple detached layers or embedded lighting need stronger mounting hardware like heavy-duty picture hooks or wall anchors rated for at least 15 lbs, especially if the sign exceeds 18 inches in width or weighs over 5 pounds. Lighter signs under 2 pounds with simple layers can use standard nails or adhesive strips, but check the wall surface type first. Detailed signs also require more time to build, typically doubling the hours compared to flat signs, expect 4 to 8 hours depending on skill level.
Successful 3D wall signs display clear, clean edges on layers and smooth transitions between carved sections and flat surfaces. Surfaces should be sanded to avoid splinters, and finishes applied evenly to prevent blotchy appearance. Problems often arise from uneven spacing causing shadows that look messy or from attaching heavy decorative elements that warp the backing board if not secured well. Using a sturdy backing like ¾-inch plywood helps maintain flatness and durability, especially in humid environments.
Choosing Sign Messages: Popular Quotes, Phrases, and Fonts
Choosing the right messages for your wall signs depends on the mood or tone you want to set. For welcoming signs, friendly and inviting phrases like “Home Sweet Home,” “Gather Here,” or “Welcome Friends” work well. Motivational signs often feature short, uplifting quotes such as “Believe in Yourself,” “Dream Big,” or “Stay Positive.” These phrases create a warm atmosphere or provide daily inspiration. When selecting your message, aim for clarity, brevity, and relevance to the space where the sign will hang.
Picking readable fonts is essential because wall signs are often viewed from a distance. Sans-serif fonts like Helvetica, Arial, or Futura provide clean and modern looks that’s easy on the eyes. For a more rustic or handcrafted feel, consider script fonts or serif fonts like Georgia, but keep decorative scripts limited to short words or headings, as these can be harder to read. Use a font size that stays legible at about 6 to 12 inches high for larger signs in living rooms or entryways. Contrast between text color and the background emphasizes readability, so light text on dark backgrounds or vice versa works best.
- Choose phrases that reflect your personality or style while fitting the space’s function.
- Use short, simple text for more impact and easier reading from across the room.
- Mix font styles cautiously, for example, a bold font for headlines paired with a simpler font for smaller text.
- For kitchen or bathroom signs, consider puns or light humor like “Squeeze the Day” or “Wash Your Worries Away.”
- Check font licensing when purchasing commercial fonts; some free fonts are only for personal use.
- Find inspiration in books, online quote collections, or by personalizing family mottos and favorite sayings.
- Test your font and phrase layout by printing a sample on normal paper before committing to materials.
Copyright is an important consideration if you want to use popular quotes or phrases. Many quotes are protected by copyright until 70 years after the author’s death, which means you can’t legally reproduce or sell items featuring those quotes without permission. Public domain quotes, often older than 1924 or by authors long deceased, are safe choices. Avoid trademarked phrases, especially brand slogans or catchphrases, as those can lead to legal issues. Personalized messages or original phrases avoid this risk entirely and add a unique touch.
Always verify whether a quote or phrase is copyrighted or trademarked before using it on a sign intended for sale or public display to avoid legal troubles.
You can find inspiration by looking at classic literature, proverbs, or even song lyrics from public domain works. Craft blogs and DIY tutorials often provide curated lists of quotes and tips on typography tailored for wall art. For example, DododsonDesigns.com offers a chalkboard sign tutorial with whimsical font ideas and layout tips to help balance style with legibility. Taking a little extra time to plan your message and font choice ensures your sign communicates clearly and complements your home decor.
How to Safely and Securely Hang Different Types of Wall Signs
Hanging wall signs requires the right hardware and careful planning to protect your walls and secure your decor. Using proper mounting methods depends on your wall type, drywall, brick, or wood, and whether you rent the space. Renters often need to rely on less invasive options like adhesive strips that can hold light signs without damaging surfaces.
Selecting Mounting Hardware for Your Wall Type
Choosing the correct mounting hardware ensures your wall sign stays put and your walls remain undamaged. For heavy wooden signs, use anchors and screws designed to support the weight, especially for drywall. Brick or concrete walls require masonry screws or anchors, which need a drill with a masonry bit. Wooden walls allow simpler attachments with nails or screws without anchors, providing strong support.
Renters should consider damage-free mounting options like removable adhesive strips or hooks rated for the sign’s weight. These products can hold lightweight signs but are not suitable for heavy wooden decor. Avoid using traditional nails or screws on rental walls without permission to prevent costly repairs.
Measuring and Marking for Accurate Placement
Accurate placement is key to a professional look and avoids unnecessary holes or damage. Use a measuring tape and level to mark the exact spot before drilling or attaching any hardware. Mark two points spaced to align with the hanging points on the sign for even support.
Check the height and orientation from different angles to ensure the sign fits the space visually and is easy to read. Use a pencil to lightly mark wall points, which can be erased or painted over if needed.
Installation Tips for Renters and Damage Prevention
Damage prevention starts with choosing the right hardware and following simple installation steps. Renters should test adhesive strips on a small hidden area first. For heavier signs on drywall, use appropriate wall anchors spaced correctly to handle the weight. Avoid hammering or forcing hardware, which could crack walls or pull paint.
Before you remove any adhesive strips or hooks, heat them gently with a hairdryer to soften the adhesive. Pull slowly and evenly to reduce the risk of paint peeling or wall damage. If you do use screws, fill holes with spackle before moving out.
- Select appropriate hardware based on wall type: drywall anchors, masonry screws, wood screws, or adhesive strips.
- Measure the wall space precisely where you want to hang the sign, considering height and alignment.
- Mark the spot(s) lightly with pencil at the hanging points on the sign.
- For drilled holes, use a drill bit matching the size of your anchors or screws.
- Install anchors in drywall or masonry as needed following package instructions.
- Secure screws or hooks ensuring they sit flush and stable on the wall.
- Hang the wooden sign and adjust for levelness with a spirit level.
- For apartments or rentals, use removable adhesive strips for signs weighing less than about 5 pounds; test and remove carefully after use.
Seasonal and Holiday Wall Sign Ideas to Refresh Your Decor
Seasonal and holiday wall signs can brighten up your space while giving your decor a fresh, timely twist. For Christmas, signs featuring simple wooden planks painted white with red typewriter font carry a classic appeal. These fit easily into existing holiday setups and bring a cozy, vintage touch. Fall signs might include warm hues with phrases like “Hello Autumn” or “Pumpkin Spice & Everything Nice” scripted on distress-painted wood or chalkboard surfaces for a rustic vibe. Summer calls for signs with bright, cheerful colors like yellow and orange; designs featuring lemonade or beach themes add a lively, sunny feel that captures the season’s energy.
Keeping signs easy to update year after year can save both time and money. One effective method is to use interchangeable panels or chalkboard surfaces. A chalkboard wall accent or framed chalkboard sign lets you refresh the message with chalk markers in just minutes. For wooden signs, consider attaching small Velcro strips or magnetic closures to swap out seasonal message plates or decorative elements quickly. Storing these easily replaceable parts avoids clutter and keeps your walls ready for seasonal updates without the need to create an entirely new sign.
Quick DIY seasonal signs often require minimal tools and materials. Cutting simple shapes from plywood or medium-density fiberboard (MDF) is a common starting point. Using stencils to paint seasonal text and adding a clear sealant allows the sign to last for years. Another quick idea is using printable vinyl or decals applied to a blank wooden or metal panel, which can be peeled off and replaced when the season changes.
- Transform a blank wooden frame into a holiday sign by printing seasonal graphics on card stock and swapping prints each season.
- Use a chalkboard paint layer on a smooth board for a versatile sign; write and erase seasonal messages weekly or monthly.
- Create stenciled phrases like “Winter Wonderland” or “Summer Vibes” on wood with acrylic paint and seal with polyurethane.
- Attach adhesive hooks to hold removable greenery, ornaments, or flowers that reflect the current holiday or season.
- Use ribbon or twine to hang small signs in groups for a quick seasonal wall collage that can be replaced in minutes.
Budget-wise, basic DIY signs typically cost around $10 to $25 in materials, including wood panels, paint, and supplies, depending on size and style. Chalkboard paint cans cover approximately 50 to 75 square feet and cost about $8 to $15, enough for several signs. More elaborate signs with 3D elements or professional vinyl decals may cost more but offer longer-lasting updates. The key is selecting materials and mounting options that allow easy removal and reattachment to avoid wall damage during swaps.
A common mistake is using permanent paints or adhesives that make updating signs difficult. Also, signs that are too heavy or large may require more secure mounting hardware, which can be cumbersome to remove seasonally. Balancing durability with flexibility is essential for successful seasonal wall signs that look fresh year after year.
Common Mistakes in DIY and Purchased Wall Signs (and How to Fix Them)
Signs that look unprofessional or cheap often suffer from poor mounting, unreadable fonts, or weather damage. A crooked sign or faded paint can quickly make even a well-crafted piece appear neglected or unfinished. Fixing these issues involves a mix of proper preparation, careful installation, and ongoing maintenance.
Uneven hanging is usually the result of not measuring or leveling before mounting. Use a tape measure and a carpenter’s level to mark where the screws or hooks go. Anchors rated for the wall type (drywall, plaster, brick) are necessary if the sign is heavy. For lighter signs, small nails or command hooks often work, but check the weight rating to avoid falls.
Faded or chipped paint mostly happens due to sunlight exposure or moisture, especially with exterior signs. Choose UV-resistant outdoor paint for signs placed near windows or outside. Repainting with a quality acrylic paint every year or two keeps the colors fresh. Applying a clear sealer or varnish protects most paint finishes from moisture and dirt.
Choosing the right size matters for readability and style. Signs that are too small get lost on large walls, while oversized signs can overwhelm a space and look unbalanced. A good rule is to make the sign about two-thirds the width of the space above a sofa or mantle. Common sizes range from 12×24 inches for small rooms to 24×48 inches or larger for big spaces. Measure your wall area and make paper templates before buying or cutting material.
- Always use a level and measure twice before mounting.
- Select fonts with clear, simple spacing for easy reading from a distance.
- Consider weather-resistant materials or sealants for outdoor or humid areas.
- Test your mounting hardware’s weight capacity.
- Scale the sign to fit the available wall space for visual balance.
- Touch up paint or finish annually to maintain vibrant colors.
- Clean signs gently with a soft cloth to prevent surface wear.
Mounting mistakes cause most sign failures; investing extra time to level and anchor properly pays off with a secure, professional look.
Fix fading by repainting sections with a brush or small roller in matching colors, or use outdoor-grade spray paint for a more even coat. For indoor signs, consider a matte finish to reduce glare and help letters stand out. If fonts look cramped or busy, redesign with larger letters and wider spacing, free online design tools can help visualize changes before cutting or painting.
Budget a few dollars for quality hardware and sealants to avoid costly repairs or replacements later. Spending about 30 to 60 minutes on prep and installation typically results in a sign that stays looking good for years. Signs that wear out quickly or hang unevenly tend to detract from your entire room’s decor, so addressing these mistakes early improves the overall impression.
When to Choose Professional Custom Wall Signs over DIY
Professional custom wall signs offer several advantages over DIY options, especially when you need durability, precise branding, or intricate designs. A key reason to opt for a professionally made sign is outdoor use. Materials and finishes designed for exterior conditions can withstand rain, sun, wind, and temperature fluctuations without fading or warping. Experts select UV-resistant paints and weatherproof coatings that last for years, something hard to achieve with typical DIY supplies. If your sign will face direct sunlight or extreme weather, hiring a professional ensures your investment stays vibrant and intact.
When branding or a polished look matters, professional sign makers deliver consistent quality. They can match exact colors in your brand’s palette, replicate fonts accurately, and use high-quality printing or engraving technology. This avoids the uneven lines or color mismatches that DIY projects sometimes have. A professional will also advise on the best size and placement to maximize visibility and impact. These details matter if you’re using a wall sign for your business space or a custom message that represents your style formally.
Complex designs involving multiple layers, precise cutouts, or mixed materials often require specialized tools like laser cutters or CNC machines. These tools are not common in home workshops. Professionals have access to these and the skills to create detailed effects, such as intricate scrollwork or precise 3D elements that can’t be easily replicated by hand. Trying to mimic these designs without experience can lead to waste of materials and frustration. Opting for a custom sign maker saves time and avoids mistakes, producing a finished product that looks professional and polished.
Costs for custom professional signs vary widely depending on size, material, complexity, and installation needs. Small, simple signs can start around $100 to $200. Larger or multi-material signs can easily exceed $500, with highly detailed or illuminated signs costing $1,000 or more. Installation may add to this cost, especially for outdoor or larger pieces that require secure mounting. By contrast, DIY projects might cost under $50 in materials but require significant time and skill.
You should hire a professional sign maker when your sign needs to endure harsh conditions, serve as a brand statement, or include complex elements that exceed DIY capabilities. For example, outdoor wall signs near a garden or entryway benefit from professional materials and finishes, ensuring a charming, long-lasting appearance. Likewise, business owners looking for precise branding or homeowners wanting elaborate, layered visual effects will see better outcomes from custom work. In these situations, professionals save you effort, reduce risk of damage, and provide expert advice on design, materials, and installation for a high-quality final result.
Step-by-Step Action Plan for Your Perfect Wall Sign
Follow this simple plan to create or choose wall signs that fit your space and style confidently.
- Day 1: Measure your wall space where the sign will go. Confirm the size fits well and won’t crowd or get lost on the wall.
- Day 2: Decide on the style or theme that complements your room’s decor. Pick quotes or images that match your personality or the room’s function.
- Day 3: Choose materials based on durability and look, wood for warmth, metal for modern, chalkboard for fun. Test samples if possible to see how they feel in your lighting.
- Day 4: Gather your tools and supplies if doing a DIY project. Make sure you have proper adhesives or hanging hardware for safe mounting.
- Day 5: Create or assemble your wall sign following a step-by-step guide. Check for clean finishes and sturdy construction as you go.
- Day 6: Hang the sign securely using the right method for its weight and material. Use a level to ensure it’s straight and test stability gently.
- After 1 week: Review the sign in your daily routine. Adjust placement or message if it doesn’t feel quite right or needs refreshing.
Frequently Asked Questions
What Are Some Eco-Friendly Materials for Wall Signs?
Bamboo and reclaimed wood are eco-friendly choices for wall signs. They reduce environmental impact while adding a natural, rustic touch to your decor. Using reclaimed materials also supports sustainability by repurposing old resources.
Can Wall Signs Be Used Outdoors Without Damage?
Yes, signs made from durable materials like aluminum or treated wood suit outdoor use. Weather-resistant coatings help protect against sun and rain, extending the sign’s lifespan while maintaining its appearance.
How Do I Incorporate Lighting into Wall Signs?
Adding LED strip lights or spotlights behind or around a wall sign improve visibility and appeal. Low-voltage LEDs are safe and energy-efficient, creating a warm glow that highlights the design.
Can I Use Wall Signs to Organize Home Spaces?
Wall signs work well as organizational labels, especially in kitchens, offices, or closets. Custom signs can clearly indicate zones or contents, improving functionality and decor simultaneously.
What Size Wall Sign Works Best for a Small Room?
Smaller signs, around 12 to 18 inches wide, fit compact spaces without overcrowding the wall. Choose designs that complement the room’s style and scale for a balanced look.
Are Magnetic Wall Signs a Good Option?
Magnetic signs offer easy repositioning and customization, ideal for renters or frequently updated messages. Ensure the wall surface supports magnets or install a metal backing for proper use.
The Bottom Line
Wall signs offer an easy way to express your style and personalize your living space. By selecting materials, messages, and designs thoughtfully, you create a focal point that adds character and warmth. Start with one wall sign that inspires you and watch how it transforms your room’s atmosphere.