How to Paint Laser Engraved Wood: A Complete Guide for Flawless Color Filling
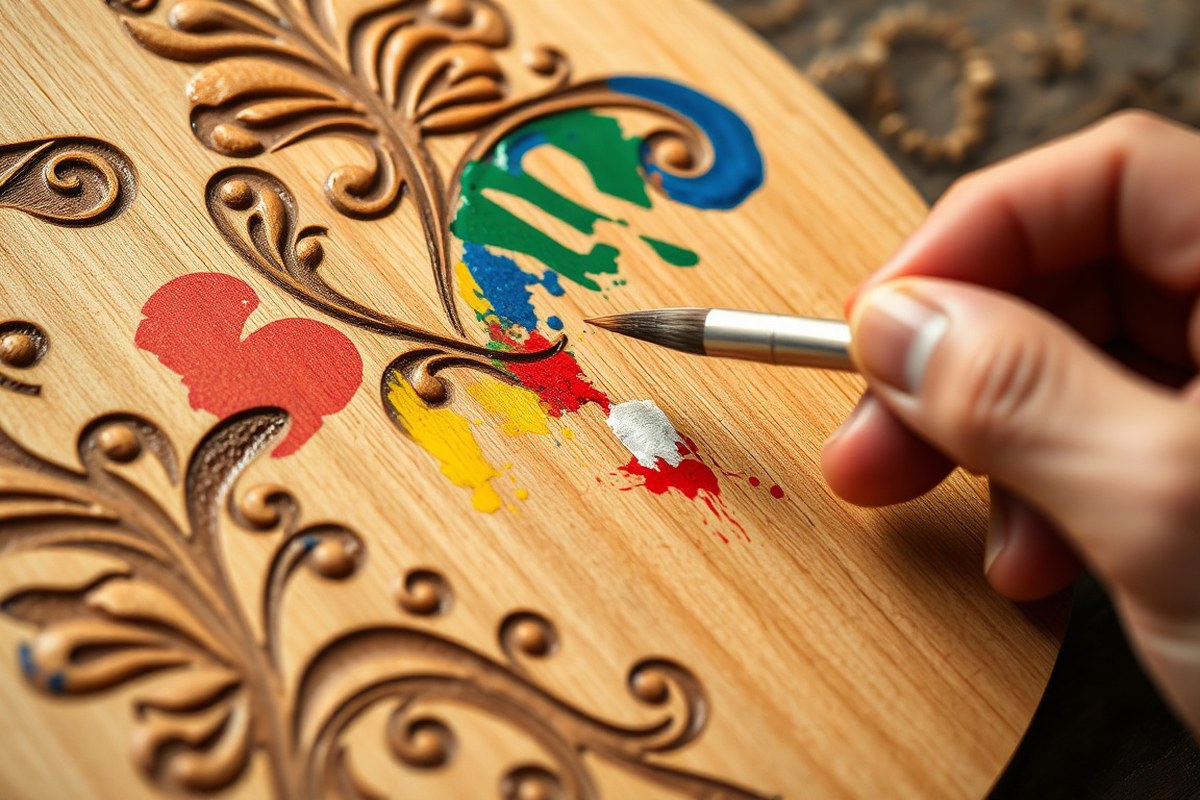
How to paint laser engraved wood requires careful preparation and the right paint selection to achieve sharp, vibrant fills inside carved details. Use acrylic paint for quick drying and easy cleanup, applying thin coats and allowing ample drying time between layers. Start by cleaning and drying the engraved wood completely for best adhesion and color vibrancy.
Key Takeaways
- Clean and let the wood dry for 24-48 hours before painting to ensure oil and dust don’t block paint adhesion.
- Use acrylic paint for filling engraved areas because it dries fast and spreads evenly.
- Apply thin coats of paint, waiting 30-45 minutes between each for smooth, flawless coverage.
- Remove excess paint from the wood surface quickly with a clean cloth after filling engravings.
- Mask surrounding areas with painter’s tape to prevent unwanted paint overflow and residue.
- Allow at least 5-10 minutes drying after filling engraved areas before cleaning or applying additional coats.
Can You Paint Laser Engraved Wood Successfully?

Painting laser engraved wood is definitely feasible and can produce striking, professional-looking results when done correctly. The key to successful painting lies in proper preparation and choosing the right materials. Laser engraving leaves grooves with soot and char that can prevent paint from adhering well, so cleaning these areas thoroughly before painting is essential. Use a small brush to apply acrylic paint inside the engraved lines, then wipe away any excess paint from the surface to keep the surrounding wood clean and maintain sharp design edges.
Paint adhesion depends largely on the type of paint and wood, as well as surface prep. Acrylic paint is the most recommended choice because it adheres strongly to wood, dries quickly, and withstands everyday wear without peeling or scratching easily. It also burns cleanly if you plan to engrave after painting, avoiding build-up that can blur details. The paint should be thin enough to fill grooves without creating a thick barrier that laser light cannot penetrate during engraving, typically a few light coats work best. Avoid thick or sluggish paints that remain wet or gummy too long.
Durability is another concern. Properly painted and sealed engraved wood can last for years with minimal fading or chipping. However, paint applied without removing soot or sealing the wood may peel within days. Sanding the engraved area gently before painting removes char and exposes fresh wood, giving paint a better grip. After painting, applying a clear top coat like spray lacquer or wipe-on polyurethane locks the paint in place and protects it from smudging or scratching. These finishes also trap laser soot inside grooves when you seal the wood before painting, preventing mess and improving longevity.
Using non-flammable, low-VOC acrylic paint is advisable, especially if the wood will undergo laser engraving after painting. This reduces the risk of fumes and harmful residue. For outdoor pieces, choose paints compatible with weather exposure and seal well to maintain the finish. Cost-wise, acrylic paints range from $5 to $15 per small bottle, which is enough for many engraving projects. Brushes or applicators add a few dollars but are reusable.
Good results show crisp, vivid colors perfectly nestled in the engraving with none spreading onto the wood surface. The paint should remain intact through handling and cleaning for a minimum of several weeks without flaking. Common problems include paint that peels quickly or leaves the surface stained, usually signs of poor cleaning or unsuitable paint choice. Sticking to these guidelines avoids those issues and turns laser engraved wood into eye-catching, durable pieces ready for display or sale.
How to Prepare Laser Engraved Wood for Painting
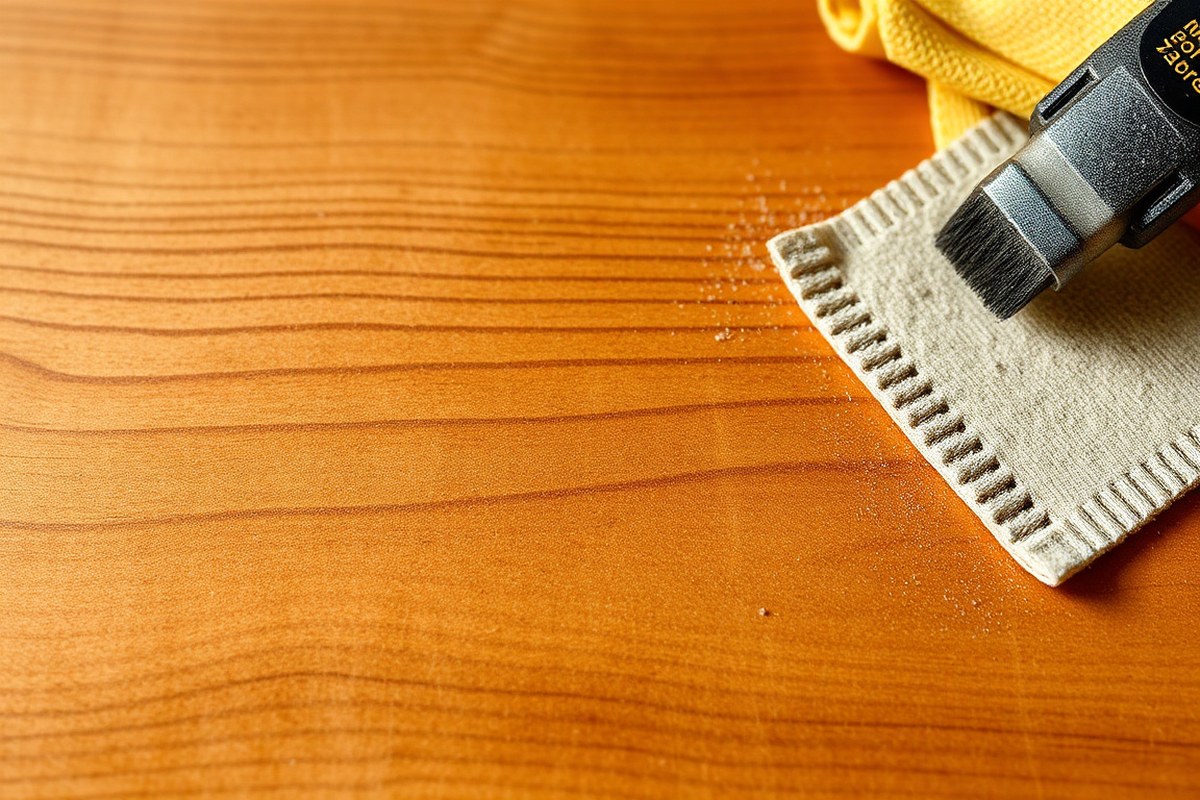
Preparing laser engraved wood for painting requires careful cleaning, light sanding, and sealing to ensure paint adheres well and looks smooth. Cleaning removes dust and fine wood particles in the grooves. Sanding creates a surface that paint can grip while sealing prevents excessive absorption or paint bleeding.
Cleaning Engraved Grooves Thoroughly
Laser engraving often leaves tiny wood dust and charred residue inside the grooves. This debris can prevent paint from sticking and cause uneven color. Use a gentle cleaning method to remove particles without damaging the wood.
Begin by brushing the engraved grooves with a soft, dry brush like a small paintbrush or toothbrush. For deeper cleaning, use compressed air or a vacuum with a brush attachment to pull out dust. Avoid wet cleaning methods before sanding as moisture can raise the wood grain, making sanding harder later.
Cleaning also includes checking for leftover scraps or splinters from cutting, which can interfere with painting. Removing debris ensures paint settles inside grooves, not on unwanted dirt or char.
Light Sanding for Better Paint Adhesion
Light sanding smooths the wood surface and roughens it just enough for paint to cling. Focus on both the flat areas and the edges of the grooves, but avoid aggressive sanding that removes engraved detail or burns.
Use fine-grit sandpaper between 220 and 320 grit for sanding laser engraved wood. Sand gently by hand or with a sanding block. A power sander is too rough and may damage grooves. After sanding, clear dust with a vacuum or tack cloth to avoid trapped particles under paint.
Sanding also removes tiny charred layers left by the laser, which could otherwise bleed dark soot into the paint. Proper sanding helps prevent paint from peeling later.
When and How to Seal Before Painting
Sealing the wood before painting reduces paint soaking into the wood fibers and keeps paint colors bright and crisp. Spray or wipe-on clear sealers like lacquer or polyurethane work well. Choose a sealer based on the final use of the piece, such as durable polyurethane for handled items or lacquer for silent drying.
Apply a thin, even base coat of clear lacquer, shellac, or polyurethane over clean and sanded wood. Allow it to dry fully, typically 1 to 2 hours, before painting. Lightly sanding the sealer with 320-grit sandpaper after it dries improves final adhesion.
Seal before painting to lock in the wood’s pores and prevent dark soot from bleeding out of engraved grooves during paint application. Avoid sealing after you paint because it can trap moisture or cause smearing.
- Brush engraved grooves with a dry soft brush to remove dust.
- Blow out grooves with compressed air or vacuum with a brush attachment.
- Inspect and pick out any leftover wood scraps or sanding dust.
- Sand the entire surface gently with 220-320 grit sandpaper by hand.
- Vacuum or use a tack cloth to remove all sanding dust.
- Apply a thin, even coat of clear lacquer or polyurethane sealant.
- Let the sealer dry completely (1 to 2 hours, depending on product).
- Lightly sand the sealer coat with 320-grit sandpaper if needed and remove dust.
Tip: Avoid skipping cleaning or sanding steps; leftover char dust or wood particles often cause paint to lift or appear uneven.
What Paint Types Work Best for Filling Engraved Wood?
For filling laser engraved wood, acrylic paint stands out as the best choice, especially if you want bright, opaque colours that really pop. Acrylic paint tends to create smoother, more consistent fills in the engraved grooves, unlike wood stains which soak unevenly into the wood fibres and often fail to fully cover the engraving depth. Transparency and colour vibrancy matter because these details define how striking your finished piece will look.
Wood stains are an option if you prefer a more natural, subtle effect that highlights the wood’s grain rather than masking it. These stains penetrate the porous surface, blending with the wood’s natural colour instead of completely covering it. However, stains may not fill the engraving deeply enough for pronounced contrast and can sometimes leave uneven coverage in tight spots.
Spray paint is generally not recommended for filling engraved grooves. It tends to mist over rather than deposit thickly and precisely, which makes it difficult to achieve full coverage inside the fine laser cuts. Spray paint works better for creating a sealed surface layer after filling or painting, using products like quick-drying spray enamel or lacquer, which protect and seal without creating unwanted pools inside the engraving.
| Paint Type | Best For | Advantages | Drawbacks |
|---|---|---|---|
| Acrylic Paint | Bright, opaque colour fills | Smooth, consistent fills; colours pop; easy to apply with small brushes | Can scratch off unsealed; requires sealing; more drying time |
| Wood Stain | Natural-look finishing | Penetrates wood; preserves grain visibility; quick drying | Uneven coverage in grooves; less vivid; not opaque |
| Spray Paint | Surface coating after filling | Quick drying; seals porous burnt edges; easy to apply over large areas | Poor groove fill; risk of pooling; less precise |
| Shoe Polish | Small repairs or dark fills | Easy to apply in grooves; adds colour quickly | Limited colours; less durable; can rub off |
Applying acrylic paint into laser-engraved grooves involves using a fine brush or small tool to press the paint directly into the cuts, ensuring the surrounding wood remains untouched since paint sticks mainly to the engraved areas. After filling, let the paint dry completely, which usually takes a few hours at room temperature (about 70°F or 21°C). Once dry, apply a spray clear coat such as Rust-Oleum enamel or lacquer to protect the fill and seal the surface without pooling inside the engravings.
When using stains, brush or wipe the stain over the wood and engravings, then promptly remove excess to avoid blotching. Stains dry faster, often within an hour, but don’t fill grooves as deeply, so they may need multiple applications to achieve desired contrast.
Step-by-Step Process to Paint Laser Engraved Wood
Painting laser engraved wood requires careful application of thin paint layers, focused attention on deep or wide engraved areas, and precise cleaning of excess paint to avoid smearing. Following a clear workflow ensures sharp, vibrant fills without damaging the wood. Patience between coats and gentle cleanup are key for best results.
Applying Paint in Thin, Even Coats
Use thin coats of paint to fill engraved areas gradually, letting each layer dry properly before applying the next. Thin coats reduce the risk of paint pooling or smudging, which can obscure fine details. Wait at least 30 to 45 minutes between coats to allow acrylic paint to dry but remain tacky for the next layer to bond well.
A small synthetic brush or foam brush works well to apply even coats without disturbing the wood grain or engraved edges. Avoid heavy or thick brush strokes. Instead, lightly cover the surface and engraved grooves with paint, focusing on consistent coverage. Overlapping multiple thin coats helps build vibrant color while avoiding surface damage.
Painting Deep or Wide Engraved Areas First
Engraved grooves that are deep or wide require special attention. Apply paint to one manageable section at a time rather than the entire piece. This method gives you better control on filling and cleaning before moving on.
- Dip a small brush into your paint, loading only a modest amount to avoid excess drips.
- Fill the engraved area gently, using brush strokes that follow the shape of the engraving to push paint into the grooves.
- Immediately use a clean cotton swab or soft cloth to wipe the surface around the engraving, removing any paint outside the lines.
- Let the paint dry 30 to 45 minutes before assessing if another thin coat is needed for opacity.
- Repeat filling and wiping for subsequent coats, building color gradually.
- Proceed section by section until the entire piece is painted.
This approach minimizes unintended paint smears and prevents thick paint buildup that takes longer to dry or peels.
Cleaning Excess Paint Without Damaging Wood
Removing excess paint quickly and carefully keeps the surface clean while preserving the sharpness of engraved details. Use a lint-free cloth or a cotton swab dampened with water or a mild acrylic thinner, only if compatible with your paint, to gently wipe away paint outside the engraved areas.
Wipe in gentle, single directions rather than scrubbing. The laser-charred edges can be fragile, so avoid aggressive rubbing that may lift paint from grooves or damage the wood surface. For wider areas, work in segments, cleaning each painted portion before moving on to avoid letting paint dry where you need to clean it up.
Allow paint to sit for no longer than 15 to 20 minutes before cleaning. Once the paint dries fully, it becomes harder to remove without scraping or risking damage. Consistent cleanup after each coat ensures crisp lines and a professional finish.
How to Avoid and Fix Common Paint Filling Problems
Paint bleeding or pooling in the grooves of laser engraved wood often happens when the paint is too thin or applied too heavily. Thin paint seeps beyond the engraved edges, making details blurry and uneven. Pooling indicates excess paint settling in low spots, causing a blotchy finish and slow drying. Uneven coverage can result from inconsistent brush strokes, inadequate drying time between coats, or a rough wood surface that soaks up paint unevenly. Paint peeling after drying usually comes from poor surface prep, incompatible paint types, or a failure to seal the finished piece properly.
To prevent and correct these problems, start by controlling paint thickness. Use acrylic paint that is viscous enough to stay within the grooves without dripping over the edges. Apply multiple thin coats with at least 30 to 45 minutes drying time between each. Patience helps solid layers develop without runs or pooling. For uneven coverage, lightly sand the wood between coats using fine-grit sandpaper (320 to 400 grit) to smooth raised grain and provide a better surface for paint adhesion. Peeling suggests the wood might not have been clean, dry, or sealed before painting, so check those conditions. Adding a clear primer or sanding sealer prior to paint can improve adhesion and reduce peel risk.
- Apply paint thinly with a fine detail brush or foam brush for control in grooves
- Allow 30-45 minutes drying time for the first coat, and longer as coats progress
- Sand between coats with 320+ grit sandpaper to even the surface and reduce grain raise
- Use a non-flammable acrylic paint suited for wood to avoid chemical reactions
- Seal the painted design with a clear finish after the last coat to protect from peeling
- Avoid rushing coats or applying thick layers that trap moisture and cause pooling
- Test paint on scrap wood before final application to judge drying and coverage
Checking the ambient temperature can help the paint dry uniformly; aim for 65 to 75°F (18 to 24°C) and moderate humidity. Excess humidity slows drying and encourages pooling or peeling. Notice paint bleeding? Gently use a damp cotton swab on the wet paint edge to remove excess and sharpen lines, but be careful not to smear. For paint that peels weeks after drying, re-evaluate your primer and sealer choices for better adhesion and consider store-bought wood primers designed for laser engraved surfaces.
Don’t apply heavy paint coats all at once; build up coverage gradually to maintain sharp, clean engraved details without bleeding.
How to Protect and Finish Painted Laser Engraved Wood
Sealing laser engraved wood after painting is the most effective way to protect both the paint and the wood surface. Applying a clear coat finish helps guard against scratches, sunlight exposure, and humidity changes that can cause paint to fade or chip. Skip sealing before painting unless you need a quick seal to stop wood tannins from bleeding into lighter paint colors. Generally, sealing after the paint dries ensures the finish locks in the colors and preserves the engraved details.
Choose your clear coat based on where the piece will be used. For indoor projects, polyurethane or acrylic finishes work well. They dry quickly, within a couple of hours per coat, and offer a solid barrier against dust and minor wear. Outdoor items need a tough exterior-grade finish with UV protection to withstand sun damage. Marine varnish or spar urethane are popular outdoor options because they resist moisture and fading better. Expect outdoor finishes to require more coats, typically 3, for full protection.
Apply the clear coat gently to avoid damaging the painted engravings. Use a soft-bristle brush or a high-quality synthetic foam brush to lay down thin, even coats. Hold the brush at a low angle and stroke in the direction of the wood grain. Avoid heavy brushes or quick strokes that can cause bubbles or pull paint from the engraved grooves. Spray finishes offer an alternative that reduces brush marks but require good ventilation and practice to apply evenly. Wait about 2 hours between coats and lightly sand with 320-grit sandpaper if the surface feels rough before the next coat.
Expect to spend about $10 to $20 for a quart-sized clear coat, enough for several small projects. Plan for 2 to 3 coats depending on use and exposure. Good results show a smooth, even shine that improve the wood grain and painted colors without obscuring engraving lines. Problems arise when the finish is too thick, causing cloudiness or runs, or when it’s applied too soon over wet paint, which can cause peeling. Proper drying time between painting and sealing is essential to avoid these issues.
For best results with laser engraved wood, focus on sealing after painting to keep your design sharp and colorful. The right finish and careful application extend your project’s life and keep your work looking professional whether displayed indoors or outdoors.
Advanced Tips for Multi-Color and Custom Effects
Creating multi-color fills, shading, and custom effects on laser engraved wood involves carefully layering colors and blending paint to achieve smooth transitions. You can mix paints safely to craft unique hues, then apply precise details with the right tools. Expert techniques focus on controlling paint application to avoid bleed and achieve clear, vibrant designs.
Layering Colors for Depth and Contrast
Layering colors adds dimension and contrast to your engraved wood, making designs more striking. Start by applying a base color inside the engraving, let it dry completely, then add secondary colors on top to create highlights or shadows. This approach prevents colors from blending unintentionally and improves color separation.
Use thin paint layers and allow each to dry fully, usually 20 to 30 minutes with acrylic paint at room temperature, to avoid smudging. For smoother transitions, slightly overlap the edges of colors and gently blend with a small, dry brush or sponge while the paint is still damp. Avoid thick paint, which can obscure fine engraved details.
Using Brushes vs Markers for Detail Work
Brushes offer excellent control for shading and gradient effects through blending techniques like dry brushing or feathering. Choose synthetic brushes with fine, soft bristles sized 0 to 2 for precise strokes. Small flat or round brushes help fill larger areas and smooth gradients.
Acrylic paint markers provide convenience for adding crisp lines and small details but tend to be less effective for smooth shading. They work best for layering color over a dried paint base or applying accent points. Be aware that marker paint may sit on the surface rather than absorb, which can be less durable and might require sealing.
Testing both tools on scrap wood lets you compare coverage and finish. For better longevity, avoid enamel-based markers on engraved wood as they can produce fumes during laser cutting and are harder to control for shading.
Color Mixing Basics and Safety Tips
Mixing acrylic paints lets you customize hues beyond store-bought colors. Use a palette or disposable plate and start with small amounts, about 1 teaspoon per color. Add colors gradually, testing on scrap wood to check the shade after drying since acrylic colors often dry darker.
To create shading gradients, mix the base color with white or a lighter tint to gradually lighten sections. For shadows, add a small amount of a darker color like burnt umber or black. Keep ratios consistent to replicate shades across multiple pieces. Follow safety practices when mixing and applying paint:
- Work in a well-ventilated area to avoid inhaling paint particles or fumes.
- Wear gloves to prevent skin irritation and avoid staining.
- Use paints and markers labeled for indoor use and compatible with wood surfaces.
- Check the Material Safety Data Sheet (MSDS) of paints for any hazards, especially before laser engraving painted surfaces.
- Clean brushes immediately after use to prevent buildup and maintain brush shape.
Samples of custom colors usually cost $4 to $5 for an 8-ounce container at hardware stores, making it affordable to experiment with mixes. Properly mixed and applied paints reveal uniform shades without patchiness or streaks, improving your wood engraving projects with rich, multi-dimensional color effects.
Workspace Setup and Safety When Painting Engraved Wood
Setting up an efficient and safe workspace for painting laser engraved wood starts with controlling dust, protecting surfaces, and ensuring good ventilation. Choose a well-lit area with a sturdy worktable covered by disposable kraft paper or a plastic sheet to catch paint drips and prevent permanent stains. Organize all your tools and materials close at hand to reduce movement while painting, which minimizes mess and allows for quicker corrections if needed.
Ventilation is essential because some paints release fumes that can irritate your eyes, nose, or lungs. Open windows, use a fan to blow air outward, or work near an exhaust system to keep fresh air flowing. Wear a properly fitted N95 respirator mask if you use solvent-based paints or spray paints to prevent inhaling harmful particles. Safety goggles protect your eyes from paint splashes and dust generated when sanding between coats. Use latex or nitrile gloves to protect your hands from chemicals and to maintain clean surfaces.
Masking tape plays a key role in controlling where paint goes, especially on detailed laser engraved wood. For best results, apply blue painter’s tape or vinyl transfer tape before engraving to shield non-engraved areas from smoke residue and burns caused by the laser. After engraving, check that the tape remains firmly in place before painting to avoid paint bleeding underneath.
- Apply blue painter’s tape or vinyl transfer tape neatly along the edges of engraved areas before any engraving.
- Choose medium tack tape to prevent adhesive residue but ensure it sticks well during painting and sanding.
- Press tape down firmly with a plastic card to seal edges and prevent paint wicking into the grain.
- Keep tape on during light sanding between paint layers to protect non-painted surfaces.
- Remove masking tape within 30 minutes to an hour after your final paint coat dries to avoid peeling paint.
Test masking tape on a scrap piece of your painted wood before starting your main project to avoid unwanted residue and peeling.
Each paint and wood combination reacts differently, so be prepared to reapply tape if it loosens during sanding or multiple paint layers. A tidy, organized workspace with safety gear and properly applied masking tape reduces cleanup time, improves precision, and protects both your wood piece and your health.
Step-by-Step Action Plan for Painting Laser Engraved Wood
Use this plan to achieve clean, vibrant paint fill on your laser engraved wood projects with lasting results.
- Before you start: Clean the wood surface thoroughly with a tack cloth to remove dust and oils. You’ll know it’s ready when no dust is visible and the surface feels smooth to the touch.
- Day 1: Lightly sand the engraved areas using fine-grit sandpaper to open the wood pores for better paint adhesion. The surface should feel slightly rough but not splintery.
- Day 2: Apply a thin primer layer designed for wood and allow it to dry fully. Check that the primer covers the engraved lines evenly without pooling.
- Day 3: Fill the engraved areas with your chosen paint type using a small brush or fine applicator. Confirm that the paint fills each groove completely without overflowing.
- Day 4: Let the paint dry fully, then gently wipe the surface to remove any excess paint resting on the wood outside the engraving.
- Day 5: Apply a clear protective finish, such as polyurethane or acrylic sealer, in thin even coats. Ensure each coat dries without streaks or cloudiness before applying the next.
- After 1 week: Inspect the project for any chips or fading and touch up as needed with the same paint and sealer types.
Frequently Asked Questions
Can I Paint Laser Engraved Wood Without Cleaning It First?
It’s best to clean the engraved wood to remove soot and dust before painting. This ensures better paint adhesion and a cleaner final look.
Is It Better to Paint Laser Engraved Wood Before or After Engraving?
Painting after engraving lets you fill the grooves precisely. Painting before engraving may block the laser if the paint is too thick.
Does Painting Laser Engraved Wood Affect the Wood’s Durability?
Painting can protect engraved wood if you seal it properly with a compatible topcoat. This adds a layer of durability against wear.
Can I Use Spray Paint to Fill Laser Engraved Wood?
Spray paint usually lacks control for filling grooves and can create uneven coverage. A small brush with acrylic paint works better for detailed filling.
How Do I Fix Paint Bleeding Outside the Engraved Areas?
Wipe excess paint gently from the surface before it dries to keep lines sharp. Using a thin paint formula also reduces bleeding.
Does Sealing Painted Laser Engraved Wood Change Its Appearance?
Sealing can slightly darken or gloss the paint. Test your finish on a scrap piece to make sure it matches your desired look.
Key Points to Remember
Painting laser engraved wood successfully depends on careful prep, using the right paint, and applying protective finishes to ensure durability. Start your next project by cleaning and priming the engraved areas thoroughly, that sets the stage for smooth, precise paint filling and lasting color. With these steps, you can add sharp, professional-quality accents to your woodworking pieces every time.